Platinum CCTV Surveillance Solutions
®
Mini Desk Clock DVR Hidden Camera Manual
©2010 Platinum CCTV Surveillance Solutions. All Rights Reserved
3
Video DVR Overview:
The DC-DVR1 model miniature desk clock hidden spy camera DVRs are designed to provide snapshots
or continuous video/audio recording onto a microSD card that can be inserted in the slot on the side
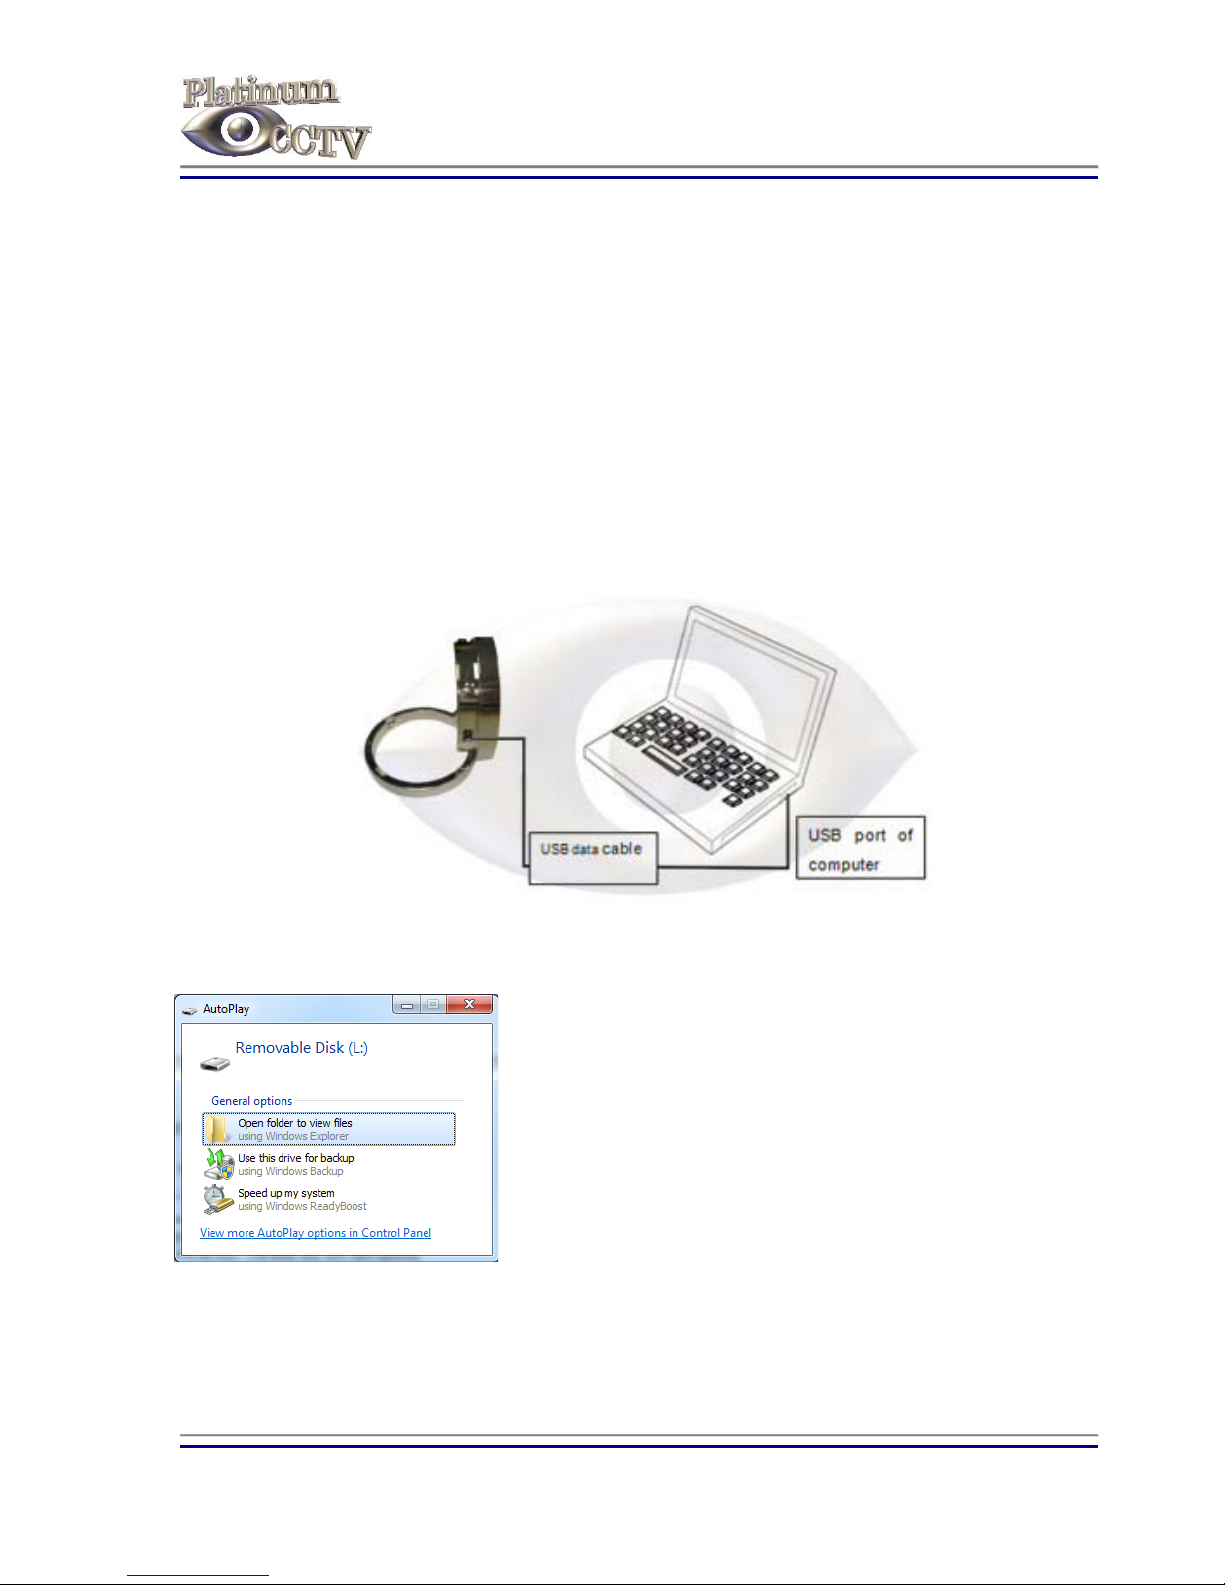
of the device. The video can be transferred to a PC using a standard mini USB cable (included) or by
removing the microSD card and inserting it into a card reader in a PC. These mini-desk clocks have a
high resolution 2 MegaPixel image sensor for great color video. The DC-DVR1 model records video in
640x480 resolution at 30fps. The built-in rechargeable battery can provide up to 120 minutes video
recording. Battery can be charged by plugging into a PC over mini-USB cable (included) or the
included power adapter.
DVR Operation Instructions:
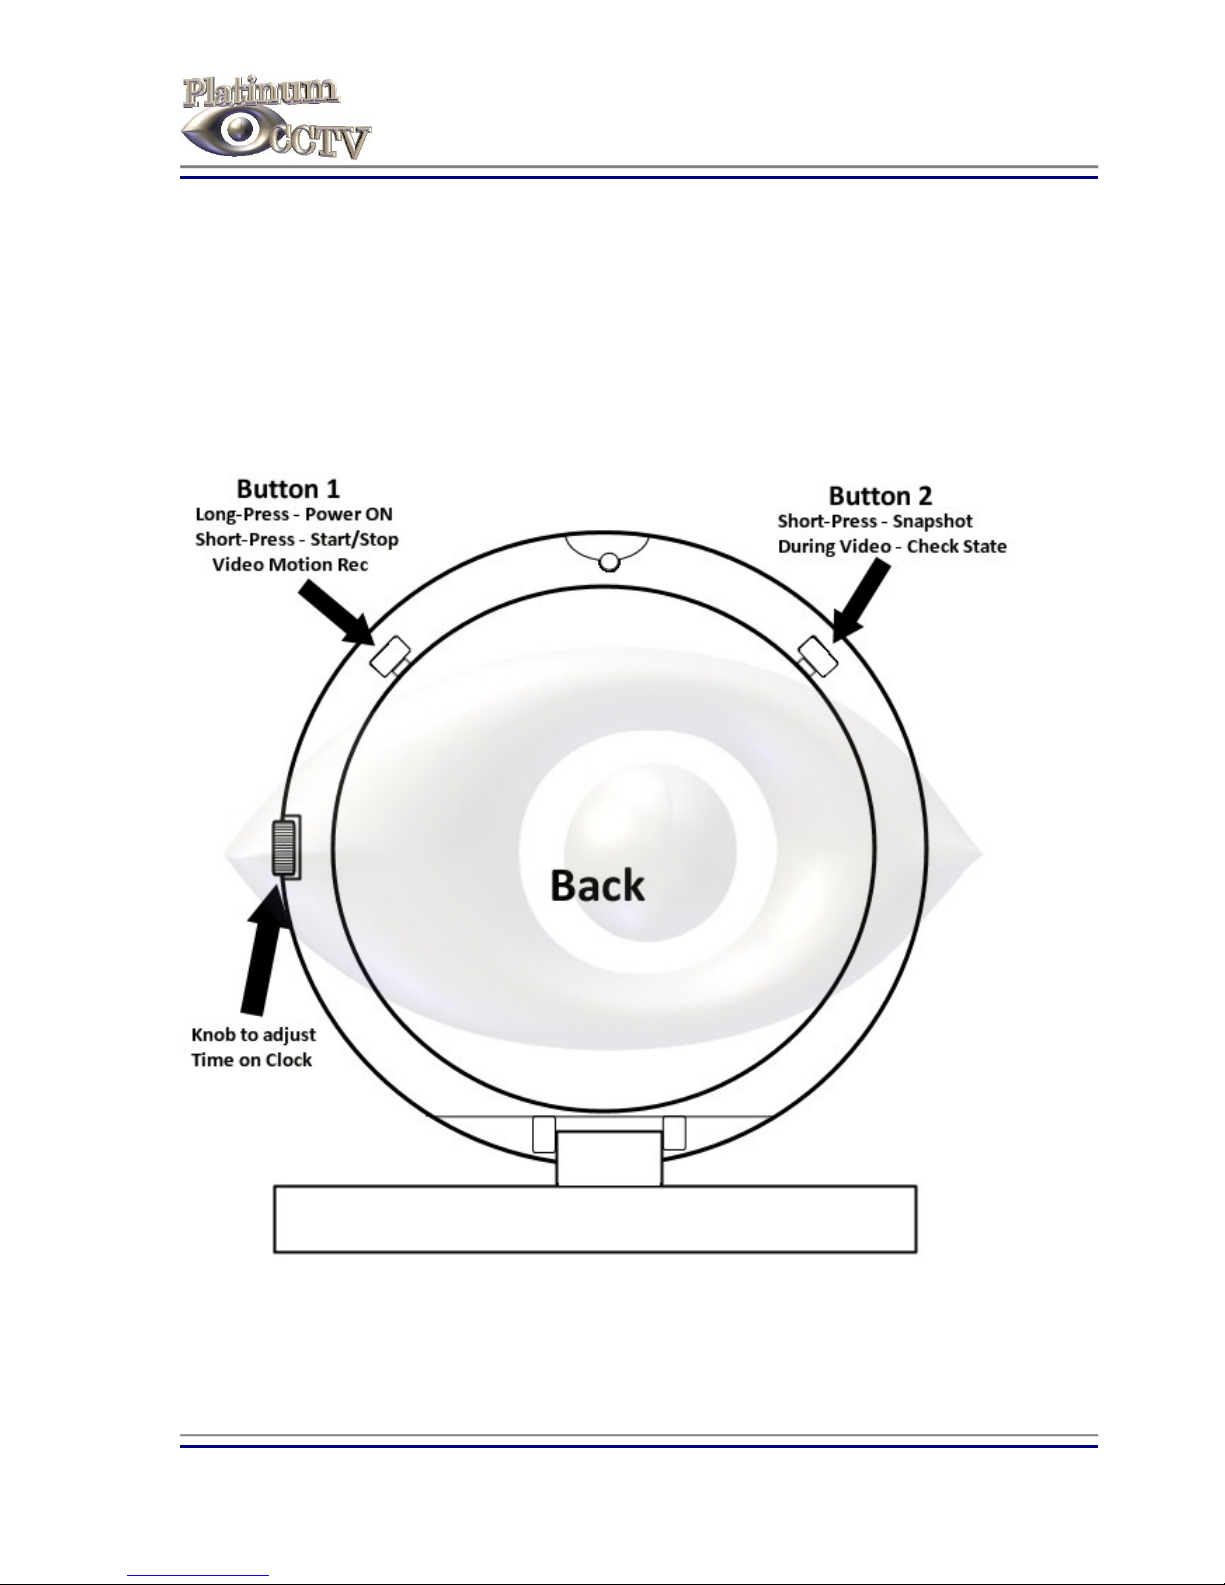
To access the DVR controls and microSD card slot, tilt the desk clock up from the base. The Diagram
will show the position of the buttons.
Power On and Enter Standby Mode:
To power on the DVR, Long-Press Button 1 (Right Button if Clock is facing you). The Red and Green
LEDs (located inside the dot for 6 o’clock position) will light. Once the Red LED turns off, leaving only
the Green LED on, the DVR is now in Standby Mode. Find instructions below on starting recording
once in Standby Mode
Continuous Video and Audio Recording:
After the clock is powered on and in Standby mode, Short-Press Button 1 (Right button if clock is
facing you). The Green LED will flash 6 times and will then go out. At this point in time, continuous
video/audio recording mode has begun. In order to keep the recording covert, the clock will leave the
LED off during the video recording. To stop the video recording and save the file to the SD card, short
press Button 1 again. The Green LED will light as it saves the file and will return the camera to standby
mode to await further instructions.
While the camera is in video recording mode, you can short-press Button 2 and the Green LED will
again flash 6 times to signify that it is still in video recording mode.
Files will be closed and a new file will begin every 30 minutes in the event that the continuous
recording continues for that duration. If the battery runs low, the camera will automatically close the
current file prior to powering down. Do NOT remove the SD card while recording is occurring
otherwise corruption of data may occur, leaving unreadable files.
Take a Snapshot:
Once the clock is powered on and in standby mode, short press Button 2 (Left button if clock is
facing you) on the back of the clock. This is the button on the left if the clock face is towards you. The
Green LED will flash once to store the photo on the SD card and then it will return to the previous
mode (Standy or Recording Modes).