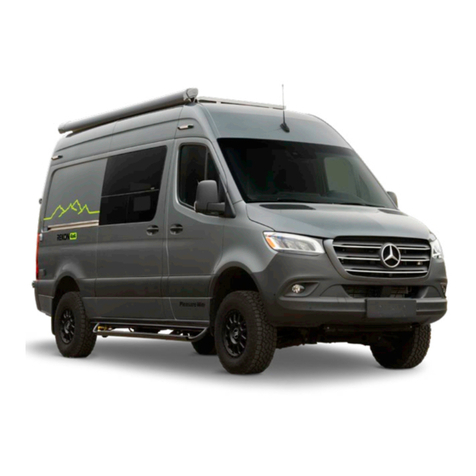
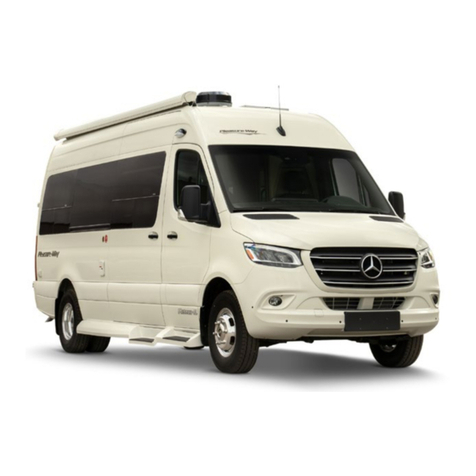
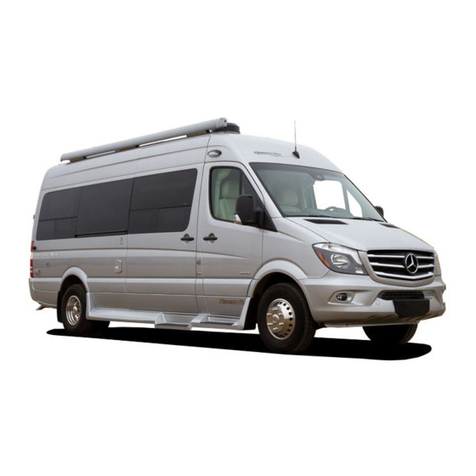
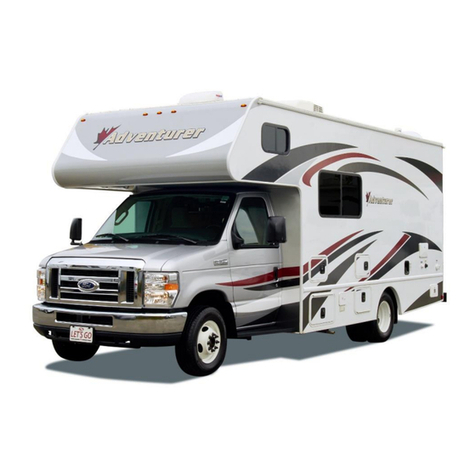
Pleasure-Way DODGE PLATEAU User manual

PLEASURE-WAY INDUSTRIES LTD.
DODGE
PLATEAU
OWNER’S MANUAL

2
PLEASURE-WAY INDUSTRIES LTD.
Pleasure-Way Industries Ltd. takes great pride in the quality and excellence that the Pleasure-Way
name represents. We appreciate having you as a customer and welcome you into the Pleasure-Way
family. This manual is provided to introduce you to many features of your new Excel. We
strongly advise you to take time to read this manual before you use your new motorhome. It will
help you to better understand the many operational features of this recreational vehicle.
We know that you will enjoy your new Pleasure-Way and we wish you many miles of pleasant and
carefree driving. Happy Travels!
For customer service information, please call us toll-free at 1-800-364-0189 between the hours
of 8 a.m. and 5 p.m. (Central Standard Time) Mondays through Fridays, excluding holidays.

3
TABLE Of CONTENTS
Warranties and Polices 5 - 6
Safety 6 - 7
Motor Home Exterior 8 - 10
Motor Home Size 8
Driver’s Side Storage Compartment 8
Driver’s Side Component Compartment 8
Driver’s Side LP Compartment 8
Driver’s Side Water Heater Vent 8
Driver’s Side Exterior Shower Compartment 8
Driver’s Side Sewer Hose Compartment 8
Driver’s Side Fresh Water Fill 9
Driver’s Side Rear Storage Compartment 9
Passenger’s Side Battery Tray Compartment 9
Passenger’s Side Furnace, Fresh Air and Exhaust Vent 9
Passenger’s Side Exterior 110-Volt Plug 9
Passenger’s Side Exterior Porch Light 9
Passenger’s Side Fridge Vents 9
Passenger’s Side Rear Storage Compartment 9
Rear Air Ride Suspension 9-10
Maintenance Schedule 10
Helpful Hints 10
Travel Preparation 10 - 11
Motor Home Systems 11 - 17
LP Gas System 11
Fresh Water System 12
Water Pump 12-13
Water Heater 13
Toilet 13
Shower 13
Waste System 13-14
Winterizing 14
Living Area Electrical System 14-15
12-Volt Manual Reset Breakers & Converter Output Fuses 15
Exterior Power 15
Monitor Panel 15
12-Volt Battery Disconnect Switch 16
Auxiliary Battery 16
Battery Care 16-17
Generator 17
Motor Home Interior 17 - 19
Interior Cockpit Map Light 17
Refrigerator 18

4
TV/VCP 18
Rear Entertainment Centre 18
Swivel Seats 18
TD King Size Bed Assembly 18-19
Single Bed Assembly 19
Electric Sofa Bed 19
TS Bed Layout 19
Wiring Schematic 20 - 21
Coach Specifications and Features 22

5
PLEASURE-WAY INDUSTRIES LTD. WARRANTIES & POLICIES
Pleasure-Way Warranty
Pleasure-Way Industries Ltd. warranties the specified new Motorhome free from defects in material and craftsmanship,
on the sections manufactured by Pleasure-Way Industries Ltd. under normal use and service. Pleasure-Way Industries
Ltd.’s obligation, under this warranty, shall be limited to 36 months/36,000 miles/60,000 kilometers (which ever comes
first) after the date of purchase by the original retail purchaser from an Authorized Pleasure-Way Dealer and shall be
limited to making good, at our factory, any part or parts thereof upon return to the factory.
The conditions of this warranty shall not and will not apply to the following:
1. if the Motorhome has been altered outside our factory in any way so as, in our sole opinion, to affect its
stability or reliability;
2. if the Motorhome, in our sole opinion, has been subject to misuse, negligence, or accident;
3. tires, refrigerator, stove, heater, chassis, power train, and any other component, which is under a separate
guarantee from the manufacturer, and service can be obtained from their facilities in North America;
4. unauthorized repairs, alterations or modifications;
5. routine maintenance;
6. failure of the coach and/or chassis resulting in incidental damages such as: loss of use of Motorhome;
inconvenience; cost of rental vehicle; and/or cost of accommodations, travel expenses & meals; and other
miscellaneous incidental expenses; and
7. damages resulting by: hail, tornadoes, lightning, floods, earthquakes, plow winds, fire, rain & environmental
conditions which include tree sap, tar, chemicals, oils, salts, and/or Acts of God.
The conditions of this warranty shall not and will not apply to degeneration due to wear and exposure after these
limitations:
1. for one year from the original retail purchase date or 12,000 miles/20,000 kilometers (which ever comes first),
by the original retail purchaser from an Authorized Pleasure-Way Dealer:
a) all seat, curtain, door panel and wall fabrics used in the coach;
b) exterior fibreglass surfaces;
c) window seals;
d) exterior power cable hatch, city water fill hatch, porch light, & exterior cable TV outlet;.
e) running board trim; and
f) carpet.
2. for 120-days from date of the original retail purchase by the original retail purchaser from an Authorized
Pleasure-Way Dealer:
a) black and gray water termination valves;
b) fresh water tank drain tap; and
c) exterior door catches, cam locks, thumb latches & hinges.
6
The warranty is expressly in lieu of all other warranties expressed or implied and all other obligations or liabilities for
alleged representation or negligence. Pleasure-Way Industries Ltd. neither assumes nor authorizes any other person to
assume for us any liability in connection with the sale of our Motorhomes other than expressed above.
All correspondence should be directed to the dealer from whom the Motorhome was purchased and must specify the
serial number and date of purchase of Motorhome in question.
Pleasure-Way Industries Ltd. ‘s Warranty Policies
1. Warranty repairs, within the three year or 36,000 miles/60,000 kilometers (whichever comes first) limited
warranty.
2. Pleasure-Way warranty registration cards must be on file before any claims will be processed. Claims made
without warranty registration cards will be rejected until proof of ownership can be established.
3. Pleasure-Way Industries Ltd. will not reimburse any claims for any work done on any components or
appliances that are covered under their respected manufacturers’ warranties. These warranties must be claimed through
the manufacturer of the appliance or component. Examples: refrigerator, microwave, roof air conditioner, water pump,
toilet, stove, TV & VCP, etc.
4. All warranty work required to be done, on the chassis must be taken to an authorized Dodge dealership and
processed through their warranty procedures. Pleasure-Way Industries Ltd. will not reimburse any claims regarding the
chassis. Pleasure-Way Industries Ltd. will pay for the removal and reinstallation of Motorhome components only if
absolutely necessary to perform Dodge warranty repairs. Pleasure-Way Industries Ltd. will not reimburse any costs in
the removal and reinstallation of these components if it is:
a) out of the warranty period;
b) non-warranty repairs; and/or
c) routine maintenance or service.
* NOTE: Exterior side storage compartments may not be moisture-free due to weather and humidity conditions. It is
advised that valuables stored in this compartment be sealed in their own water-tight containers.

7
SAFETY
For your safety and ease of mind while travelling with your Pleasure-Way Motorhome, we have provided safety
components throughout the vehicle. In order for your vehicle to maintain the safest possible conditions, these
components must be tested and maintained on a regular basis, according to the detailed manufacturer’s operating
instructions.
All Pleasure-Way Motorhomes in Canada are CSA and CMVSS Certified, and may exceed the approved installation
criteria.
All Pleasure-Way Motorhomes in the United States are FMVSS certified and bear the R.V.I.A. seal of approval, and
may exceed the individual state requirements.
Smoke Detector
A smoke detector is provided on the ceiling of your unit near the front. Smoke detectors may give you a warning of
fire and smoke, but only if you use and maintain them in accordance to the manufacturer’s instructions. Testing of this
detector should be carried out weekly. Ensure you connect the battery inside the detector upon receiving of your
new unit and that you install a fully charged fresh battery at least once a year.
Fire Extinguisher
A 5-pound capacity fire extinguisher is provided at the side door main entrance for ease of accessibility from the
interior or exterior. Warning: This fire extinguisher is a type “BC”, which will extinguish flammable liquids and
electrical fires, but not wood, paper and cloth fires. You should inspect the extinguisher at least once a month
according to the manufacturer’s instructions.
LP Gas Detector
A liquid propane (LP) gas detector is provided near the floor level at the rear of the motorhome interior. This detector
will operate to detect liquid propane gasses as well as other gasses that are heavier than air. Your components that
require LP gas are provided with complete ventilation to the exterior and are sealed off to the interior for your added
safety. This detector is powered by the auxiliary battery and is operating at all times unless the battery is disconnected.
The LP gas detector should be tested every week or every time before a trip, whichever occurs first. The test
procedure should be performed in accordance to the manufacturer’s instructions.
NOTE: The LP gas detector will sound to indicate a low coach battery.
Carbon Monoxide Sensor
A carbon monoxide sensor is provided in the monitor panel above the main entrance side doors. This detector only
indicates the presence of carbon monoxide gas at the sensor. Carbon monoxide gas may be present in other areas.
Warning: Carbon Monoxide Gas cannot be seen or smelled and can kill you. This detector should be tested at
least once per week or before every time the coach is taken on a trip. The test procedure should be in accordance to
the manufacturer’s instructions. Carbon monoxide sensors are installed in units equipped with generators or generator
ready options.
NOTE: The carbon monoxide sensor will sound to indicate a low coach battery.*
GFCI Outlet
Ground fault circuit interrupter (GFCI) 110 volt receptacle in the bathroom provides protection against line to ground
electrical shock hazards that could be harmful or even fatal. The outlets that are on this circuit are the exterior
receptacle, galley receptacle and fridge receptacle.
These receptacles are to be tested at least once a month in accordance with the manufacturer’s instructions.

8
Emergency Escape
If the need to make an emergency escape from the interior of your motorhome arises, all interior doors are equipped
with interior access latches. Your choice of escape routes are as follows, the main entrance at the side door, the
driver’s and passenger’s side doors, the rear doors (access through this door will be made easier by relocating the night
stand in the TD models), and the RD and TS models are equipped with a rear safety window located on the passenger’s
side of the coach.
Refueling
When you are refueling your fuel tank , ensure that your vehicle is shut off and your main LP valve is shut off. Ensure
that your pilot lights have been extinguished as well. Warning: Even with the main LP valve shut off there is
enough gas in the LP lines for the pilot light to continue to burn.
Filling the LP Gas Fuel Cylinder
When you are filling the LP Gas Fuel Cylinder, ensure that all pilot lights have been extinguished and that there are no
open flames present. Ensure that your vehicle is turned off.
NOTE: Ensure the propane system valve is fully shut when vehicle is in motion. It is not safe to travel while propane
appliances are in use.

9
MOTORHOME EXTERIOR
Motorhome Size
Your Motorhome is larger than your standard van or automobile, so please be careful when entering underpasses,
garages, parkades, etc.
Length Bumper to Bumper: 21’ 11” (6680 mm)
Wide Body Width: 6’ 6” (1982 mm, excluding mirrors)
Height: 9’ 6” (2896 mm, with roof air conditioning)
NOTE: The height of your Motorhome may vary depending upon the tire pressure level, air ride pressure level and
optional components mounted on the roof. The width of the motor home will very with the positions of the outside
mirrors. All measurements are approximate. There are many variables in the construction of the vehicle for
measurements to be absolute.
Driver’s Side Storage Compartment
Located at the rear of the driver side panel, this compartment features a 11 1/2" (H) x 34“ (L) x 16"(D)* locking storage
area. It should be used for items not damaged by moisture, as humidity and certain weather conditions may add
moisture to this compartment.
NOTE: Compartment size is approximate, some of the molded areas may infringe on the size.
Driver’s Side Component Compartment
Located centered on the Driver’s side panel , this compartment contains three main components used in your RV: (1)
shore power hook-up; (2) cable TV hook-up; (3) pressurized city water hook-up.
Driver’s Side LP Compartment
Located with the driver’s side rocker panel, this compartment houses the propane tank remote fill and breather.
NOTE: Only fill your propane tank to 80% capacity.
Driver’s Side Furnace Vent
Located on the driver’s side, this vent is the exhaust and fresh air return for your furnace. NOTE: For maximum
efficiency of your furnace be sure the vent is free from obstruction.
Driver’s Side Exterior Shower Compartment (Optional)
Located beside the vehicle fuel fill door, this compartment contains a retractable shower head and hot and cold water
taps. NOTE: When winterizing your Motorhome be sure to winterize this tap and the shower hose.

10
Driver’s Side Sewer Hose Compartment
Located in front of the driver’s side rear tire, this compartment contains a 10’ sewer hose with drain adapter.
Driver’s Side Sewer Dump Valves
Located in the driver’s side running board door. These dump handles allow you to dump your gray and black waste
tanks.
NOTE: Dump your black water first to allow your gray water to flush the black water through the hose.
Driver’s Side Fridge Vents
Located center on the Driver’s side panel. These vents allow for air flow for your fridge coils, which help with the
cooling process of the fridge.
NOTE: Ensure that these vents are free from all obstructions.
Passenger’s Side Fresh Water Holding Tank Fill
Located in front of the water heater vent, this compartment allows you to fill the fresh water holding tank. It also
contains the vent tube for your fresh water holding tank.
Passenger’s Side Exterior 110-Volt Plug
Located on the passenger’s side center panel, this plug will only function if power is supplied through the generator or
shore power.
Passenger’s Side Exterior Porch Light
Located in the centre upper section of the passenger’s side wall, this light is controlled by the switch on the kitchen end
gable.
Passenger’s Side Coach Battery
Located under the passenger side seat, this battery is a sealed self venting battery supplied by Dodge.
*NOTE: All compartment sizes are approximated; some of the molded areas may infringe on the size.
.

11
Maintenance Schedule
It is recommended that you regularly maintain your Pleasure-Way Motorhome in order to get the maximum benefits
from your unit. The life and performance of each component depends upon proper use, operation and maintenance.
With a regular maintenance schedule you should be able to catch any components that need attention while you are
prepared for them, allowing you to have many years and miles of trouble-free travelling. NOTE: Please refer to your
Dodge manual for mechanical maintenance.
Helpful Hints
1. To maintain your fibreglass front clip and fibreglass running boards we suggest that you wax these pieces
annually, with an automobile wax, as these are painted components.
2. When storing your Pleasure-Way Motorhome, you should try to park as level as possible.
3. When storing your Pleasure-Way Motorhome, please ensure that: all the holding tanks are empty and flushed,
all LP gas valves have been turned off, all electrical components are switched off, and the red key kill switch is in the
off position.
4. To maintain your monitor probe system it is recommended that after the tanks have been flushed and cleaned,
a probe cleaner (which can be purchased from your local RV dealer) should be added to your tanks. Please follow the
manufacturer’s recommendations.
TRAVEL PREPARATION
Before You Leave
Prior heading off on your adventures, you should always check to ensure that:
- the LP gas is off at the main valve
- all black and gray waste water tanks are empty and closed.
- all electrical cords and exterior hoses are stored back into their respective compartments
- chassis fluid levels are at recommended levels
- chassis tire pressure levels are at recommended levels
- chassis exterior lighting is functional
- air ride bag pressures are at recommended levels
- all exterior components are secure and closed
- the refrigerator power switch is changed to 12-Volt
- all interior compartments and drawers are closed and locked into position
- all interior components are secure and in place
- the furnace control switch on the thermostat is off
- the TV swing-out is locked into a position
- the site is left in better condition than when you arrived.

12
While In Motion
It is not recommended that you use any of your appliances while in motion. Warning: Do not use any LP gas
appliances while in motion. While you are in motion, you will have power to all 12-Volt components such as the
dome lights, water pump, roof vent, 12-Volt receptacle, TV, and DVD. You will not have power to the microwave,
110-Volt receptacles, coffee maker and roof air conditioner unless your vehicle is equipped with a inverter.
Upon Arrival at Your Site
Once you arrive at a site, please ensure that:
- your motorhome is parked in a level position so that your components will be at their optimum performance
(place a bubble level in the freezer shelf of the refrigerator to use as a base and level your unit according to
this)
- all exterior vents are clear from obstructions
- the black and gray water waste tank valves are closed
-hook up your 110-Volt power cord to your coach and then to the site receptacle (if supplied at site)
- hook up your fresh water line to the city water pressure connection (if supplied at site) or fill fresh water
tank. (It is recommended for pressurized city water that a water regulator is used.)
-turn the LP gas on
-turn the refrigerator switch power to LP gas selection or 110-Volt power (AC).
-turn the water heater on ( Before turning it on, make sure the water heater is filled with water)

13
MOTORHOME SYSTEMS
LP Gas System
Your motorhome is equipped with a Liquid Propane (LP) gas system that provides fuel to the appliances, which are
designed to use this fuel for operation.
The storage tank is located under the chassis.
The main shut-off valve is operated electronically by the switch located in the driver’s rear bench face frame beside the
distribution panel.
The filler valve and bleeder valve for the LP gas is located in the driver side rocker panel LP compartment door.
The LP gas regulator is located on the propane tank under the vehicle. LP gas regulators must always be installed with
the diaphragm vent facing downward. Regulators that are not in compartments have been equipped with a protective
cover. Make sure that the regulator vent faces downward and that the cover is kept in place to minimize vent blockage
that could result in excessive gas pressure causing fire or explosion.
The LP gas tank gauge is located in the monitor panel above the passenger’s side entry door.
Warning: Do not bring or store LP gas containers, gasoline or other flammable liquids inside the vehicle,
because a fire or explosion may result. LP gas containers should not be placed or stored inside the vehicle as LP gas
containers are equipped with safety devices that relieve excessive pressure by discharging gas into the atmosphere.
Warning: It is not safe to use cooking appliances for comfort heating. Cooking appliances need fresh air for safe
operation. Unlike homes, the amount of oxygen supply in the unit is limited due to the size of the vehicle. Proper
ventilation when using the cooking appliance(s) will avoid dangers of asphyxiation. It is especially important that
cooking appliances not be used for comfort heating as the danger of asphyxiation is greater when the appliance is used
for a long period of time. Therefore, before operation, be sure to open a source of ventilation.
Warning: Do not use portable fuel burning equipment, including wood and charcoal grills and stoves inside the
motorhome. The use of this equipment inside the recreational vehicle may cause fire or asphyxiation.
DO NOT FILL LP CONTAINER TO MORE THAN 80% CAPACITY. Overfilling the LP gas container can
result in uncontrolled gas flow, which can cause fire or explosion. A properly filled container will contain
approximately 80% of its volume of LP gas.
If you smell gas:
1. Extinguish any open flames, pilot lights and all smoking materials.
2. Do not touch any electrical switches.
3. Shut off the gas supply at the tank valve or gas supply connection.
4. Open all the doors and other ventilating openings.
5. Leave the area until the odour clears and you are sure there is no further risk to you or others.
6. Have the gas system checked and leakage source corrected before using again.

14
Fresh Water System
The water system built into your motorhome provides full service similar to the system in your home. A 12-Volt self-
priming pump draws pressurized water from the fresh water tank to all cold faucets and the water heater. An automatic
pressure switch located in the water pump maintains a positive line pressure between 20 to 30 p.s.i. The fresh and gray
water tanks are located underneath the floor. The black water tank is located above the floor under the shower pan.
To fill the fresh water tank, use the gravity water fill located on the passenger’s side of the van beside the water heater.
First, unlock the water fill compartment and remove the large cap; then place the water hose into the fill. Turn on the
water, but not on high pressure because you may have water spilling out. There are two ways of knowing when your
water tank is full: (1) by checking the monitor panel located inside your coach; and (2) when water starts coming back
through the gravity fill.
NOTE: If you notice water running out from underneath the van, there is a drain tap located on the side of the tank,
that is probably open. This tap is there to help you drain your fresh water tank without having to open the taps and
pump it out.
The city water connection is located in the driver’s side component compartment. The city water connection is a
convenience for you when you have access to an outside water source. To hook up the city water connection you
should make sure that the water pump switch is turned off inside the coach and that all faucets are turned off as well.
Attach your water hose and turn on the water supply (but not on high pressure to prevent excessive water force in the
unit).
NOTE: In different areas the water pressure may vary. It is advisable to use a water pressure regulator because
excessive pressure may result in water-line damage. The city water system bypasses the fresh water holding tank and
feeds the water lines directly so that you will not have to use the water pump. To disconnect the city water system, first
turn off the water source, then open a faucet to relieve some of the pressure in the lines (if you do not open a faucet to
relieve some of the pressure, when you unhook the water line, water may spray out), then unhook the water line.
Water Pump Trouble Shooting
The water pump is located in the cabinet below the sink.
If the pump will not prime, please check:
- to make sure there is water in the holding tank
- to make sure that the battery is not run down
- for kinks in the inlet water line
- for leaks at inlet fittings (if air is leaking into inlet fittings, tighten fittings or apply clamps as necessary)
- for clogged lines
- the inline flow filter, located beside your water pump.
If the water pressure drops:
- make sure faucet aerators are clean
- check to make sure there is water in the holding tank
- check to make sure the battery is not run down
- check faucets and connections for leaks.
If the pump runs when there is no apparent demand for water:
- make sure there is water in the holding tank
- check all faucets and fixtures to make sure they are all shut off and not leaking
- check line for leaks.

15
Water Heater
Your motorhome is equipped with a 6-gallon water heater located on the interior in the kitchen area, below the cook
top. To turn the water heater on there is a switch in the monitor panel area above the side entrance door. Please refer to
the manufacturer’s instruction manual for lighting and maintenance instructions. You must ensure there is water in the
tank prior to turning the burner on to heat the water ( to check this pull the pressure release valve in the exterior vent
area). LP gas is automatically supplied to the main burner to heat water to a desired temperature and then automatically
shuts off (you must have the LP tank valve on for this to take place). A regulated mixture of gas and air is ignited
automatically providing a flame, which is directed into the heating tube. The heating assembly is sealed off from the
RV interior and is vented to the outside.
Toilet
Please refer to the manufacturer’s operating instructions.
Toilet Trouble Shooting:
1. Water keeps running in the bowl:
- check to see if all the levers are turned all the way back. Sticking may be caused by foreign material on the waste
valve blade seal at the bottom of the bowl. If the problem persists, you may need to replace the water valve.
2. The Toilet leaks, there is water on the floor:
- if the leak is in the back of the toilet, check the water supply line connection and refer to the manufacturer’s
installation instructions. If the leak is at the toilet flange area (where the toilet mounts to the floor), check the toilet
flange nuts for tightness.
3. Poor flush pressure:
- the levers must be held fully open during the flush. A good flush should be obtained within 2 to 3 seconds. If the
problem persists, remove the water supply line and check the water supply. The water supply rate should be at least 10
litres/2.5 gallons per minute to ensure an adequate flush.
Shower
To protect the surface of your ABS plastic shower pan, it is recommended that a rubber shower mat be placed in the
shower pan. Use a non-abrasive cleaner to clean your shower compartment. NOTE: Do not use highly concentrated
or high acid content household cleaners, as these may damage the shower compartment.

16
Waste System
Before using your waste holding tank, deodorize it by adding one gallon of water and commercial tank deodorizer
through the toilet.
Draining Waste Holding Tanks
1. Be sure the holding tank valve is closed, then remove the termination cap.
2. Join the sewer hose to the coupling on the main drain outlet.
3. Place the end of the sewer hose into the sanitary dumping station opening. Make sure the hose does not sag or create
a p-trap.
4. Open the termination valve on the solid waste holding tank. Once this tank is empty, then open the valve for the
gray waste tank. A garden hose may be left running into the toilet with the valve open to further rinse the tank and
sewer hose.
5. Close the termination valves and replace the cap.
6. Deodorize the empty tank by adding one gallon of water and commercial holding tank deodorizer through the tank.
NOTE: If the holding tank is allowed to overfill, the overflow may back up through the toilet drain.
The drainage from the sinks and shower pan is collected in a separate gray water holding tank. This tank has its own
dump valve but ties into the same termination valve outlet as the waste holding tank. Drain the gray water holding tank
in the same way after the draining the waste holding tank. This will help flush out the solids out of the sewer hose.
NOTE: If the gray water tank is allowed to overfill, the overflow may back up through the shower drain. If you are
using a sewer hook up in a RV park, keep the valve closed until the holding tank is at least partially full, then drain.
The large quantity of waste flow will provide more effective drainage and reduce tank stoppages.
NOTE: It is important to clean your monitor probes in your holding tank to ensure their reliability. See your RV dealer
for suggested cleaning solutions.

17
How to Winterize Your Pleasure-Way Motorhome
1. Turn the furnace fan control switch located on the bottom of the thermostat to the “OFF” position.
2. Drain your fresh water, black water and gray water holding tanks underneath your vehicle. Do this at an appropriate
sanitary dumping station.
3. Your unit is equipped with 3 water heater bypass valves: one at the top of your water heater; one at the bottom of the
water heater; and one that is between the red and blue water lines. Close the valves on the top and bottom of your
water heater and open the valve that is between your red and blue water lines. NOTE: When the handle of the valve
is in line with the water line, the valve is open. When the handle of the valve crosses the water line, the valve is closed.
4. Drain your water heater tank by accessing the tank from the exterior vent door and unscrewing the anode tube in the
heater holding tank. (A 1 1/16” socket will be required to perform this procedure.)
5. On the inlet side of the water pump, connect a hose with the other end in a gallon of non-toxic RV antifreeze. Let
the antifreeze pump through the lines by turning on both the hot and cold water taps in the sinks. Allow a cup of
antifreeze to remain in the p-traps under the sinks to winterize these components. Also, if you have a faucet for a
shower, run the antifreeze into the p-trap under the shower pan through the drain. Flush the toilet a few times until the
antifreeze appears. NOTE: A siphon hose can be purchased at your local RV store.
6. Now your Pleasure-Way Motorhome is winterized and your water system is ready for winter. To get your water
system ready for use again, simply fill your fresh water tank with water and flush the antifreeze out of the lines.
NOTE: After flushing out the antifreeze, remember to return the water heater by-pass valves to their normal position.
Always use a non-toxic RV antifreeze for this procedure.
7. Be sure that your auxiliary batteries are fully charged and check them once a month during below freezing
temperatures.
Winter Use
We recommend that the water system not be used when the outside temperature drops below the freezing point. You
should ensure that your unit is completely winterized by that time. If it is necessary to use the water system, we
suggest that you bring containers of fresh water with you and add non-toxic RV antifreeze to the gray and black water
holding tanks. NOTE: Keep in mind that as you add more water to the holding tanks the antifreeze will dilute more
than the recommended amount and may start to freeze earlier at cold temperatures.

18
Living Area Electrical System
The Motorhome living area electrical system is designed for convenience. It is capable of supplying the vehicle with at
least two sources of power. A 12-Volt auxiliary battery supplies power to the interior components (except AC current
plug receptacles, roof air conditioner, microwave, fridge and coffee maker) for short-term use. This battery is
automatically charged when the motorhome is running or when you are plugged into a 110 volt power source.
For long term use, your vehicle may be powered by plugging into a 110-Volt external power source with the supplied
25-foot power cable. The yellow 25-foot power cable supplied with your coach will have to be connected to your
coach and then to a 110 volt power source (30 amp outlet is recommended). This will supply 110-Volt power
throughout the interior and supply power through a power converter to all 12-Volt components.
NOTE: Always connect the power cord to your coach first and then to the power source.
The furnace and range operate only on LP gas and the refrigerator can operate on all 3 sources (LP gas, 12-Volt and
110-Volt). The furnace fan operates on 12-Volt power.
Your unit is equipped with a 110/12-Volt power converter. Its function is to take part of the 110-Volt current that is
received when the unit is plugged into an external power source and change it to 12-Volts (which powers most of the
motorhome components). It also provides 110-Volt power to the components that only require 110-Volts.
NOTE: The 12-Volt or DC power on your fridge should be used while in motion (if necessary).
12-Volt Manual Reset Breakers and Converter Output Fuses
Your motorhome has three manual re-setting breakers. If you have the optional electric rear sofa, you will have three
manual resetting breakers. Access to these breakers is through a compartment door found beside the furnace under the
fridge. These breakers have a 30 and 15-amp capacity. The 30-amp breaker controls the power converter and the 15-
amp breaker controls the refrigerator when it’s running on 12-Volts. If you have the electric sofa option, you will have
an additional 30-amp breaker. This breaker controls the power to your electric sofa.
If you are experiencing any difficulties with either your power converter, refrigerator or optional electric sofa when on
12-Volts, check these breakers first to see that they are not tripped. The small re-set button is located on the end of the
breaker. Simply push it in if it is tripped.
There are two 30-amp converter output fuses located behind your converter distribution panel. In order to access these
two fuses on the TD model, remove the driver’s side rear seat cushion and remove the cover panel over top of the
converter compartment. On the TS or RD models, access these through the rear entrance door by reaching over the rear
centre partition.
External Power
A 25- foot, 30-amp power cord is provided in the driver’s side storage compartment. In order to activate all power
circuits, connect the yellow power cord to your coach in the driver’s side component compartment and to an adequate
110-Volt power source. The connector is rated for 30-amp capacity. NOTE: The male end of the power cord is a 30-
amp plug, therefore you may require an adapter to convert the plug into the 110-Volt style. Most RV parks are
equipped with 30-amp plug-ins. Remember to always attach the power cord to your coach first, and then to the power
source.
Monitor Panel

19
There is a monitor panel located above the main entrance side doors. In this panel is the carbon monoxide sensor,
water heater control switch, generator control switch (optional) and the water pump control switch which also monitors
the black water, gray water, fresh water, LP gas and battery levels.
12-Volt Battery Disconnect Switch
There is a red key, 12-Volt disconnect switch located on the driver’s side of the coach, in the door located on the
driver’s bench face. When the key is in the “ON” position it will be locked in place. When the key is in the “OFF”
position it can be easily removed, which will stop all 12-Volt power supplied to your coach. NOTE: Disconnect from
the auxiliary battery if you are not going to be plugged into 110-Volt or if you are not using the vehicle because the LP
detector and the CO detector will draw your auxiliary battery down over a prolonged period of time.
Auxiliary Battery
Your motorhome is equipped with a Dodge factory installed auxiliary battery besides the chassis battery in order to
provide 12-Volt power to your interior components (and to not create a drain on the chassis battery). The chassis
battery is not tied into the living coach area system in order to provide constant starting power for the engine.
The Dodge Sprinter chassis is equipped with a charging system that allows both batteries to be charged when the
engine is running, but will not allow the chassis battery to discharge when there is a demand from the living area
system. The time required to charge it completely will depend on how low the battery is. The auxiliary battery will
charge at a slower rate when you are using driving lights, chassis air conditioning, etc. The auxiliary battery will also
be charged when plugged into shore power or when operating your generator.
NOTE: The chassis battery is only charged through the alternator when the motor is running.
Battery Care
Your auxiliary battery must be regularly cleaned and maintained at least once a month in order to provide a reliable and
constant power source to your Motorhome. To ensure satisfactory battery performance, battery terminal cleanliness is
essential. NOTE: Please see the DODGE manufacturer’s instructions for detailed maintenance recommendations.
Warning: Batteries give off explosive gases that can cause severe personal injury. Do not smoke in or around the
battery and keep open flames and other sources of ignition well away from the battery. Remember, batteries can and
do, EXPLODE! Be very careful. Battery electrolytes can cause severe eye damage and skin burns. Always wear
protective equipment (goggles, rubber gloves, a protective apron, etc.) when working with batteries.
Generator
If your unit is equipped with a generator, it will be located under the vehicle in front of the spare tire. Access to the
generator is from underneath the chassis. There is no access through the interior as to prevent exhaust gases from
seeping into the living compartment. The generator will provide an added source of power to run the electrical system
when you are not plugged into a 110-Volt power source. To start your generator you will see an Onan start/stop switch
located on the monitor panel. Simply hold the button down until the generator starts, it may take a few seconds initially
for it to start. Your generator draws its gas supply from your LP gas tank. Once the generator is running, it supplies
power to the entire electrical system, just as if your unit were plugged into a 110-Volt power source. You will have to
balance your electrical consumption as you have a limited number of watts available.
Please refer to the manufacturer’s operating manual for complete operating instructions and maintenance procedures.
NOTE: If your unit is equipped with a generator, it is essential that you run your generator at least ½ hour a month
under load (microwave, AC, coffee maker, etc.) to keep the generator fuel from damaging the carburetor.
NOTE: For your safety and protection, all generator or generator-ready units are equipped with an automatic transfer
switch that will allow your coach to receive power from either shore power or your generator.

20
MOTORHOME INTERIOR
Interior Cockpit Map Light
The interior map lights (located on the overhead cabinet above the driver’s and passenger’s captain’s chairs) have a 2-
way switching system. These map lights are wired into the headlight switch and are powered from the chassis battery
only, not the auxiliary battery like the rest of the interior lights. The first option is to have the headlight knob turned to
the centre. This will turn the map lights on. When you open the doors to the motorhome these lights will come on and
they will shut off when you shut the door. The second option is to have the headlight knob turned all the way to the
left - this lets you turn the map lights on and off by using the map light switch while the doors are closed. NOTE: Do
not leave the knob in this position for an extended period of time if you are not driving, as this will drain and kill the
chassis battery.
Refrigerator - Dometic
Your Dometic refrigerator is designed for 3-way operation, using 12-Volt DC, 110-Volt AC and LP gas power. When
the refrigerator is switched to AC or DC, the ammonia/water mixture is heated by a heating element instead of a burner.
When your motorhome is stationary, it should be leveled for your refrigerator to provide the proper cooling. A bubble
level should be placed on the freezer shelf to check the refrigerator for levelness. If the refrigerator is not level you
may have improper cooling.
For LP gas operation, turn the selector switch to gas and follow the instructions on the fridge for lighting. Turn the
fridge thermostat to the highest temperature that will still provide adequate refrigeration. For 110-Volt AC operation,
make sure the power cord is connected and switch the selector switch to AC power. For the 12-Volt DC operation
setting, power is provided by the auxiliary battery. However, the 12-Volt power should not be used when stationary in
order to prevent battery drainage. NOTE: The refrigerator should be turned to 12-Volt when the vehicle will be in
motion and the LP gas must be turned off.
NOTE: The DC or 12-Volt setting is for transportation purposes only. It is recommended that if you are going to be
stopped for more than a short period of time, you should switch your refrigerator to propane or an AC setting and plug
into a 110-Volt supply.
NOTE: Please refer to the manufacturer’s operating manual for complete operating instructions and maintenance
procedures.
NOTE: For operating instructions for the remainder of your appliances, please see each respective manufacturers’
operating manuals.
TV and DVD (Optional)
Table of contents
Other Pleasure-Way Motorhome manuals

Pleasure-Way
Pleasure-Way EXCEL 2011 User manual

Pleasure-Way
Pleasure-Way 2022 REKON 4X4 User manual

Pleasure-Way
Pleasure-Way 2021.5 PLATEAU TS User manual

Pleasure-Way
Pleasure-Way PLATEAU TS 2022 User manual

Pleasure-Way
Pleasure-Way PLATEAU TS 2020 User manual

Pleasure-Way
Pleasure-Way LEXOR TS 2018 User manual