Plextor PX-B310U User manual

BD-ROM, DVD±R DL (DOUBLE LAYER/DUAL LAYER),
DVD±R/RW, DVD-RAM, CD-R/RW DRIVE
December 2008
INSTALLATION AND USERS
MANUAL
Model PX-B310U External USB Drive
Model PX-B310SA Internal SATA Drive

Plextor reserves the right to make improvements in the products
described in this manual at any time without prior notice.
Plextor makes no representation or warranties with respect to the
contents hereof and specifically disclaims any implied warranties of
merchantability or fitness for any particular purpose. Further, Plextor
reserves the right to revise this manual and to make changes in its
content without obligation to notify any person or organization of such
revision or change.
This manual is copyrighted, all rights reserved. It may not be copied,
photocopied, translated, or reduced to any electronic medium or
machine-readable form without Plextor’s prior permission.
Manual copyright ©2008 Plextor
First edition, December 2008.
Licenses and Trademarks
Plextor and the Plextor logo are registered trademarks of Shinano Kenshi.
All other licenses and trademarks are property of their respective owners.
Record Your Serial Number
For future reference, record the serial number in the space provided
below.

PX-B310U/ PX-B310SA Installation and Users Manual iii
FEDERAL COMMUNICATIONS COMMISSION STATEMENT
This device complies with Part 15 of the FCC Rules. Operation is subject to the following
two conditions:
(1) This device may not cause harmful interference, and
(2) this device must accept any interference received, including interference that may
cause undesired operation.
CAUTION: Any changes or modifications not expressly approved by the party
responsible for compliance could void the user's authority to operate the
equipment.
CANADIAN DEPARTMENT OF COMMUNICATIONS
STATEMENT
This digital apparatus does not exceed the Class B limits for radio noise emissions from
digital apparatus set out in the Radio Interference Regulations of the Canadian Department
of Communications.
This class B digital apparatus complies with Canadian ICES-003.
Cet appareil numérique de la classe B est conforme a la norme NMB-003 du Canada.
LASER INFORMATION
These products have been designed and manufactured according to IEC 60825-1 on the
Safety of Laser products. This product comes under “Class 1 Laser Products.”
CAUTION: Use of controls or adjustments or performance of procedures other
than those specified herein may result in hazardous radiation exposure.
A Laser Caution Label is attached on the top of the internal drive model.
The laser beam emitted from the optical pickup is visible and invisible. Accordingly:
•Do not open the optical pickup housing.
•Obtain service only from Plextor-authorized personnel.
CAUTION: To disconnect the internal DVD/CD drive from an electrical current, pull
out the computer’s power plug.

PX-B310U/ PX-B310SA Installation and Users Manual iv
Table of Contents
Record Your Serial Number.............................................................ii!
Table of Contents.............................................................................. iv!
1. Getting Started............................................................................... 1!
About this Manual ........................................................................... 1!
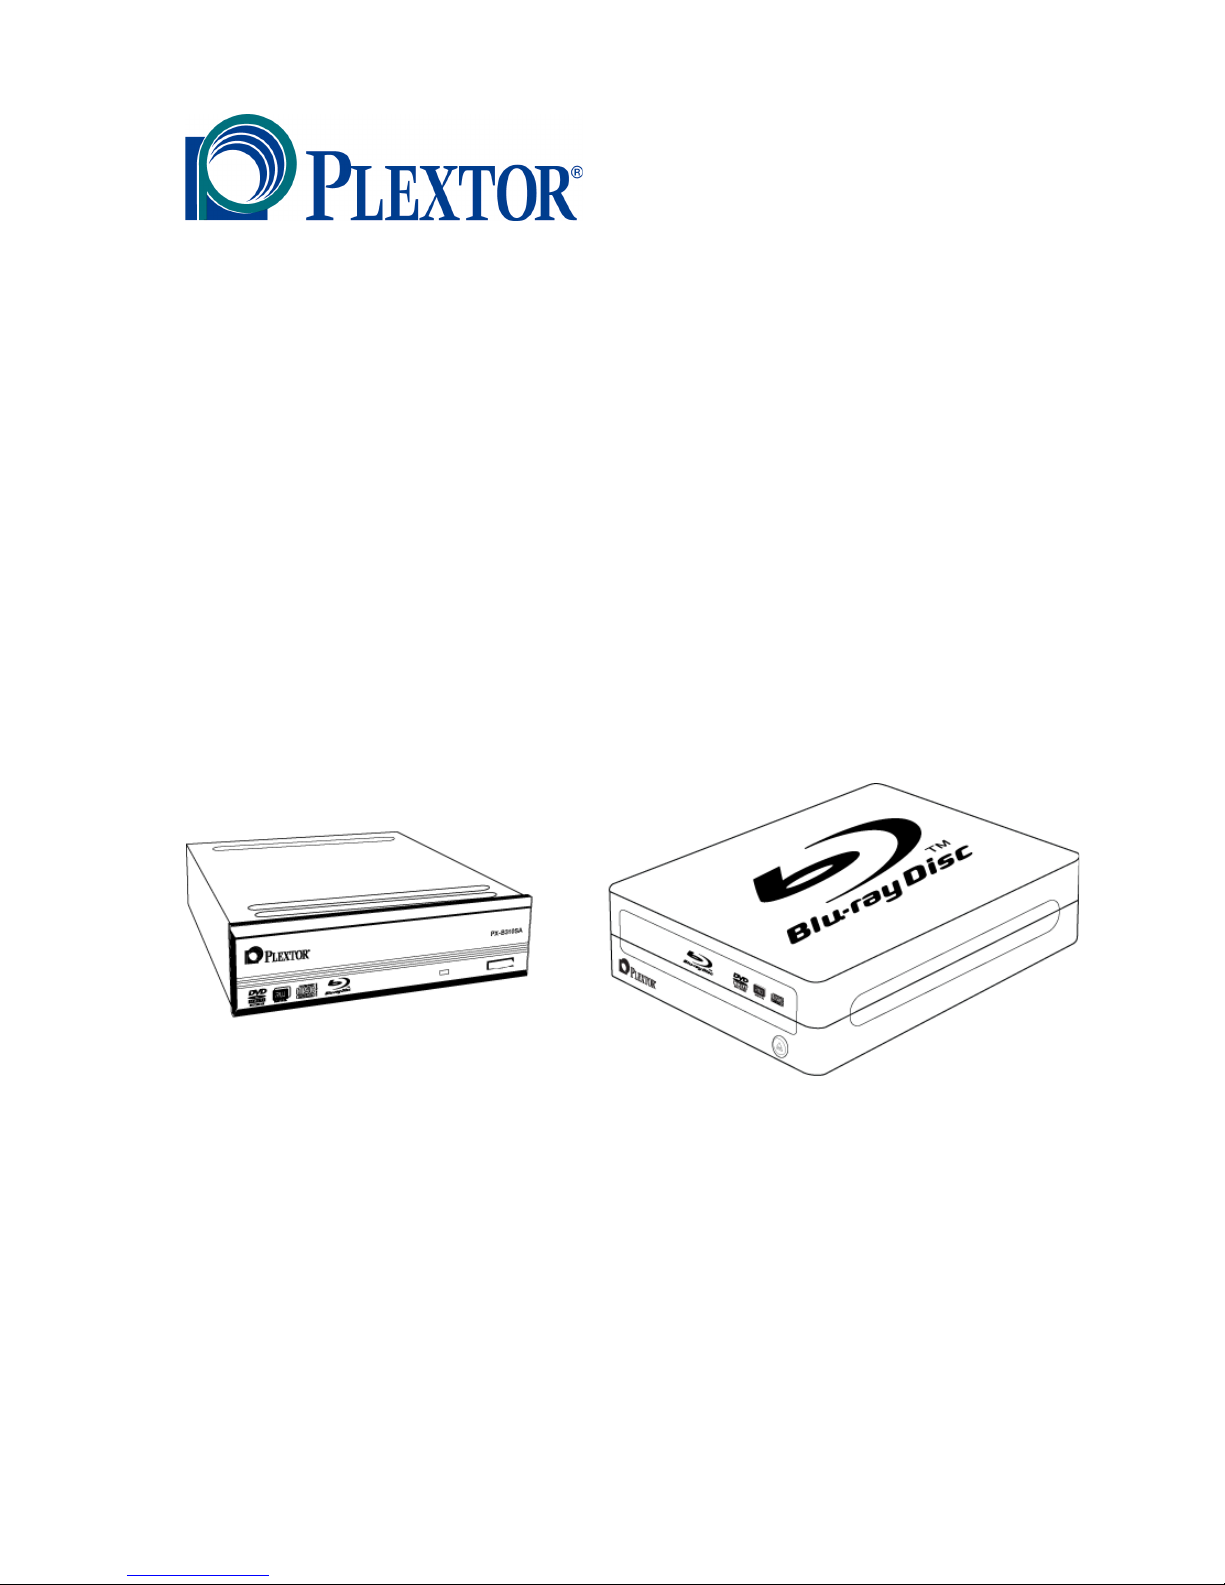
Meet Your Plextor DVD Rewriter................................................... 2!
What the PX-B310U and PX-B310SA Do.................................. 2!
Features of the PX-B310U and PX-B310SA .............................. 3!
Minimum Configuration to Use the PX-B310U/ PX-B310SA .. 5!
What You Can Do with the PX-B310U or PX-B310SA............. 6!
About Software................................................................................ 6!
Precautions....................................................................................... 8!
Where to Go From Here .................................................................. 9!
2. Installing the PX-B310U External USB Drive .......................... 10!
PX-B310U Drive Features and Controls ....................................... 10!
Front Panel—PX-B310U External Drive .................................. 10!
Rear Panel—PX-B310U External Drive ................................... 11!
What Else Is In the PX-B310U Box .............................................. 11!
Save Your Box! ......................................................................... 12!
PX-B310U QuickStart Installation ............................................ 12!
3. Installing the PX-B310SA Internal SATA Drive ...................... 15!
PX-B310SA Drive Features and Controls..................................... 16!
Front Panel—PX-B310SA Internal Drive ................................. 16!
Rear Panel—PX-B310SA Internal SATA Drive....................... 17!
What Else Is In the PX-B310SA Box............................................ 18!
Save Your Box! ......................................................................... 18!
Mount the PX-B310SA Drive ....................................................... 19!
Record the Serial Number ......................................................... 19!
Mount the Drive in the Computer.............................................. 19!
4. Using Your PX-B310U and PX-B310SA ................................... 24!
What Media to Use ........................................................................ 24!
BD Media .................................................................................. 24!
DVD Media ............................................................................... 24!
DVD-RAM Media ..................................................................... 25!
CD-ROM Media ........................................................................ 25!
More About Media for Your Plextor Drive............................... 26!

Table of Contents
PX-B310U/ PX-B310SA Installation and Users Manual v
Tray Loading and Operation..........................................................26!
Handling DVD and CD Media ..................................................27!
Cleaning Discs ...........................................................................27!
Mounting Position..........................................................................28!
Playing BDs ...................................................................................28!
Playing DVDs ................................................................................29!
Writing to DVD Media ..................................................................30!
Specifying +R/RW or -R/RW....................................................30!
Writing to CD-R and CD-RW Media ............................................30!
Using the Disc/Busy Indicator .......................................................30!
5. Maintenance and Troubleshooting.............................................32!
Cleaning the your Plextor Drive ....................................................32!
Upgrading Firmware......................................................................33!
Emergency Eject ............................................................................34!
Troubleshooting .............................................................................35!
Make Sure the Drive Is Recognized ..........................................35!
6. Frequently Asked Questions .......................................................37!
Appendix A: Technical Support .....................................................39!
How to Contact Plextor Technical Support ...................................40!
Before You E-mail or Call for Support..........................................40!
Returns ...........................................................................................41!
Contacting Plextor’s RMA Department.....................................41!
Packing Your Drive ...................................................................41!
Shipping Your Drive to Plextor .................................................42!
Appendix B: Warranty....................................................................43!
If You’re Outside the U.S. or Canada............................................44!
Index..................................................................................................46!

Table of Contents
vi PX-B310U/ PX-B310SA Installation and Users Manual
This page intentionally left blank.

PX-B310U/ PX-B310SA Installation and Users Manual 1
1. Getting Started
Congratulations! Thank you for purchasing a Plextor® optical disc
drive, a reliable, high-performance BD player and recordable DVD and
CD writer, rewriter, and player. We appreciate the confidence you have
shown in us. Our goal is to put you—and keep you—on the leading edge
of optical disc technology.
About this Manual
Please read this manual carefully and keep it handy for easy reference.
Use the manual for installation, operation and troubleshooting. If your
drive needs service, see your dealer or call Plextor’s Technical Support
Department.
In this manual you should find all the information you need to
successfully install, operate and troubleshoot your drive. If you run into
a problem that doesn't seem to be covered, however, please contact us.
(See “Appendix A: Technical Support” for the different ways you can
reach us.) You will be connected to our friendly, helpful band of tech
support engineers. What might seem like an uncooperative drive to you
could very well be a 30-second fix to them. But we will never know
unless you contact us.

Section 1. Getting Started
2PX-B310U/ PX-B310SA Installation and Users Manual
Meet Your Plextor DVD Rewriter
The PX-B310U External USB and the PX-B310SA are BD read and
DVD ReWritable/CD ReWritable drives that provides professional
quality BD reading and DVD and CD performance for writing, rewriting
and reading.
What the PX-B310U and PX-B310SA Do
For BDs, the PX-B310U and PX-B310SA:
•Reads BD-ROM, BD-R, BD-RE, and BD-R DL media at
up to 6X speed
For DVDs, the PX-B310U and PX-B310SA:
•Writes DVD+R (recordable DVD, “plus” format) media at
up to 16X speed on recommended media.
•Writes DVD+R DL (double layer) media at up to 8X speed.
•Writes DVD-R DL (double layer) media at up to 8X speed.
•Writes DVD-R (recordable DVD, “dash” format) media at
up to 16X speed on recommended media.
•Writes DVD+RW (rewritable DVD, “plus” format) media
at up to 8X speed.
•Writes DVD-RW (rewritable DVD, “dash” format) media
at up to 6X speed.
•Writes DVD-RAM discs at up to 12X.
•Reads stamped DVD discs at up to 16X.
•Reads DVD-RAM discs at up to 12X.
For CDs, the PX-B310U and PX-B310SA:
•Writes to CD-R (recordable CD) media at up to 48X speed.
•Writes to CD-RW (rewritable CD) media at up to 32X speed.
•Reads all CD-ROM and CD-R data media at a maximum of 48X
speed.
•Reads CD-DA (audio) media at up to 48X speed
•Reads CD-R/RW audio media at up to 40X speed.

Section 1. Getting Started
PX-B310U/ PX-B310SA Installation and Users Manual 3
Features of the PX-B310U and PX-B310SA
•Interface:
USB interface: The PX-B310U easily installs in virtually any PC
with a USB 2.0 (recommended or USB 1.1 interface.
Serial ATA interface: The PX-B310SA takes advantage of the
benefits of the Serial Advanced Technology Attachment
(SATA) interface, with its smaller, more flexible cables and
faster interface speed.
•High speed transfers:
The PX-B310U supports high speed transfers via the USB
interface.
The PX-B310SA supports next-generation high speed transfers
via the Serial ATA 1.0 interface.
•Flash memory: Allows upgrading the PX-B310U and PX-B310SA to
the latest firmware revision (available from the Plextor web site)
without opening the computer or physically accessing the drive.
•Black tray: Reduces the effect of optical distortion by absorbing
reflections from the laser beam, enhancing read quality.
•Plug and Play: Supports Windows Plug and Play.
•CPRM support: The PX-B310U and PX-B310SA support Content
Protection for Recordable Media, so you can play CPRM copy-
controlled media.

Section 1. Getting Started
4PX-B310U/ PX-B310SA Installation and Users Manual
DVD Features
•Lossless linking for DVD+R/RW and DVD+R DL: Allows
DVD+RW and DVD+R DL discs to be edited and still play on
DVD-ROM players.
•Zero Link for DVD-R/RW, DVD-R DL: Has 0 byte gap between
sessions so the discs are compatible with all players. This allows
DVD-RW and DVD-R DL discs to be edited and still play on DVD-
ROM players.
•Double layer and dual layer DVD discs: Reads and writes DVD+R
DL (double layer) and DVD-R DL (dual layer) discs, so you can
burn up to 4 hours of high quality MPEG-2/DVD video on a single
8.5-gigabyte DVD disc.
•Wide media compatibility: Compatible with a wide range of DVD-
RAM, DVD±R and DVD±RW media.
•DVD Multi Recorder: Supports the DVD Multi specification for read
and write; can read and write DVD-RAM, DVD-ROM, DVD-Video,
multi-border, multi-session and DVD±VR.
•Versatile recording modes for DVD+R/RW: Including disc-at-once
(DAO), multi-session, and incremental write for DVD+R DL
(double layer) discs; DAO, multi-session, and incremental write for
DVD+R; and DAO, incremental write, and random access write for
DVD+RW.
•Recording versatility for DVD-R/RW, too: Including DAO,
incremental recording, and layer jump recording for DVD-R DL
(dual-layer); DAO, incremental recording, multi-border recording for
DVD-R; and DAO, multi-border recording, incremental recording,
and restricted overwriting for DVD-RW.

Section 1. Getting Started
PX-B310U/ PX-B310SA Installation and Users Manual 5
CD-R and CD-RW Features
•Variety of recording modes: Supports track-at-once, disc-at-once,
session-at-once, and variable and fixed packet writing.
•Buffer Underrun Proof Technology: Eliminates buffer underrun
errors, so you can safely use your computer for other tasks while
you’re writing to a CD-R or CD-RW disc.
•Wide compatibility: Wide CD-R and CD-RW media compatibility.
•Orange Book compatibility: Compatible with Orange Book, Parts II
and III.
•OPC: Optimum Power Control, which adjust the laser power for the
optimum write strategy.
•CD-TEXT: Supports CD-TEXT.
Minimum Configuration to Use the
PX-B310U/ PX-B310SA
Here’s what you’ll need in order to install and use the PX-B310U drive.
•Computer: Computer CPU, Memory, and configuration are
dependent on installed application requirements.
•Interface:
Model PX-B310UA requires a USB 2.0 interface.
Model PX-B310SA requires a Serial ATA controller that
supports the ATAPI command set.
•Hard disk size: To write to a CD in image mode (that is, to write an
image of a CD to your hard disk), you need 1 GB of free space. For a
DVD, 10 GB of free space is recommended. (For more accurate
guidelines, see the help files or documentation for the recording
software you’re using.)
•Operating System:
Model PX-B310U requires Windows XP or Windows Vista.
Model PX-B310SA requires Windows XP or Windows Vista.

Section 1. Getting Started
6PX-B310U/ PX-B310SA Installation and Users Manual
What You Can Do with the PX-B310U or PX-
B310SA
Just look at some of the things you can do with your PX-B310U or PX-
B310SA:
•Play BD media
•Record slide shows or digital video onto DVD-RAM, DVD+R DL,
DVD-R DL, DVD+R, DVD-R, DVD+RW and DVD-RW discs.
•Play DVD-RAM, DVD-ROM, DVD+R DL, DVD-R DL, DVD+R,
DVD+RW, DVD-R, and DVD-RW discs.
•Write onto DVD-RAM discs with your set-top box and read the
discs with your Plextor drive; or write to DVD-RAM with the
Plextor drive, then read those discs on your set-top box.
•Record data or audio onto writable or rewritable CD media.
•Play music CDs.
•Save photos and other images on rewritable or writable CDs.
•Create a CD or DVD “sneakernet” to share information with
colleagues—just use software such as Cyberlink BD Suite to drag
and drop files onto DVD+R, DVD+RW, CD-R or CD-RW media,
then continue adding files and sharing the same disc.
•Archive images and video to DVD or CD.
•Master new software programs on DVD or CD.
About Software
In order to record on DVD±R DL, DVD±R/RW, and CD-R/RW discs
you will need to have mastering, packet writing, or duplication software
installed on your computer system. If you purchased a retail kit from
Plextor, you’ll get software packages that include such software.
Cyberlink BD Suite is one software suite that lets you play Blu-ray discs
and write to DVDs and CDs. The software lets you write to and share
anything on CD or DVD, including music, photos, and videos; and you
can easily back up your critical data to a CD or DVD. (For more
information about Cyberlink BD Suite, install this application and
examine the help files.)

Section 1. Getting Started
PX-B310U/ PX-B310SA Installation and Users Manual 7
Take control of several powerful features of Plextor drives. With the
power of PlexUTILITIES you have now have extra support for your
Plextor hardware. PlexUTILITIES allows you to view basic and
advance drive information as well as offering high quality audio and
multimedia capabilities. By allowing you to measure and control the
burn quality of every disc, PlexUTILITIES makes coasters a thing of
the past. The distinctive design in PlexUTILITIES allows ease of use
for newcomers without compromising on the powerful features that
experienced burners demand.
PlexUTILITIES also features:
- View Basic and Advanced Drive Information List the drive’s hardware,
including serial number, firmware version and jumper settings, and
shows the capabilities of the drive. Concurrently, you can reveal
extensive information about the inserted disc— like format, sessions and
tracks, manufacturer, and CD TEXT.
- Permitting Drive Identification and Control allows you to control
different features of your Plextor drive.
- Measure Disc Burning Quality Test the quality of a written or pressed
disc by counting the number of errors, measure the mechanical
characteristics of blank media, show the write quality by checking the
jitter rate and the beta value of written media, and measure the quality of
the written DVD media by checking the pits and lands for compliance
with the DVD specifications.
- Automatic software and firmware updates immediately notify you of
pending updates to your Plextor drive so that you always have the most
current applications.
For details on software that is available for writing to DVDs or CDs,
please visit the web sites of the companies whose software you are
interested in, refer to their user’s manuals, or look at the help option
within the software.

Section 1. Getting Started
8PX-B310U/ PX-B310SA Installation and Users Manual
Precautions
Like the rest of your computer system, your PX-B310U or PX-B310SA
requires reasonable care in its installation and use.
•Keep the area around your drive clean from dust, smoke, and other
contaminants.
•Do not allow moisture or liquids, including water or cleaning fluids,
to touch the drive. Thinner, benzene, or alcohol-based solvents can
mar your drive’s surface.
•Do not drop or jolt the drive.
•Do not move, carry or transport a disc in the drive because this can
cause damage.
•Do not attempt to open the drive and service it yourself. Removing
the cover may expose you to harmful electrical voltages or the laser
beam. For your safety, entrust service to experienced service
personnel only.
•Keep your BDs, DVDs, and CDs free of dirt or other contaminants,
by storing them in jewel cases. Use only industry-standard discs. Do
not insert dirty, warped, poorly balanced, or cracked discs into the
drive.
•Do not clean discs using a circular motion. Instead, using a soft, dry
cloth, wipe gently in a radial motion; start at the center of the disc
and proceed to the outer edge.
•Do not attempt to clean your drive using solvent-based cleaners or an
air compressor.
•Do not attempt to clean your drive using a CD cleaning disc. These
discs can damage your drive permanently.

Section 1. Getting Started
PX-B310U/ PX-B310SA Installation and Users Manual 9
Where to Go From Here
•If you have an External USB drive, see Section 2, beginning on page
10, to learn how to install your drive.
•If you have an Internal drive with the Serial ATA interface, see
Section 3, beginning on page 15, to install it.

PX-B310U/ PX-B310SA Installation and Users Manual 10
2. Installing the
PX-B310U External USB Drive
This section explains how to physically install your PX-B310U external
USB drive in your computer.
PX-B310U Drive Features and Controls
Before proceeding, become familiar with the controls and features of
your Plextor drive. Match the parts of your drive to the illustrations
below.
Front Panel—PX-B310U External Drive
Figure 1: Front panel of the PX-B310U external USB drive
•Tray front door: Attached to tray drawer.
•Emergency eject hole: If the automatic eject button does not work,
insert the emergency eject tool, paper clip, or other thin, rigid object
in this hole to eject tray. Turn OFF power before using this feature.
•Disc/busy indicator: Illuminated green for disc reading or writing.
•Eject button: Push once to eject tray. Push again to insert the tray
back into the PX-B310U. To prevent wear on the drive, always use
the eject button to insert the tray.

Section 2. Installing the PX-B310U External USB Drive
PX-B310U/ PX-B310SA Installation and Users Manual 11
Rear Panel—PX-B310U External Drive
Also familiarize yourself with the drive’s rear panel.
Figure 2: Rear panel of the PX-B310U external USB drive
•USB Connector
Power connector: Connects to your computer’s power supply to
provide DC +5 volts and +12 volts to the PX-B310U.
•On/Off Switch
What Else Is In the PX-B310U Box
What you find in your Plextor box depends on what the company that
sold you the box put in—or took out—while the Plextor drive was in
their possession. Plextor currently sells the PX-B310U drive in this
configuration:
•PX-B310U BD Combo Super Multi drive
•USB cable
•Plextor software disc
•PX-B310U Quick Installation Guide

Section 2. Installing the PX-B310U External USB Drive
12 PX-B310U/ PX-B310SA Installation and Users Manual
Save Your Box!
Be sure to save the box after you have installed your drive. The box
and its packaging material were designed and drop tested to ensure
your drive can endure rough treatment and still arrive in working
order. If you have to ship your drive back to Plextor, you’ll want to
send it in the original box. (For more details about returning your
drive to Plextor, see page 41.)
If the security sticker on top of your box is cut, there may be a good
reason: for example, a dealer may have added other components or
software. Carefully check the contents to ensure nothing has been
removed. If something is missing, contact the party from whom you
purchased the box for an explanation.
NOTE: This applies to the Plextor retail box. Your drive may have been
shipped in a different box with other contents, depending on whom you
purchased the drive from and what they included inside the box.
If your drive came pre-installed, some or all of the items above may
have been installed and may not be separately available. See the Plextor
web site for locations to purchase additional or replacement accessories.
PX-B310U QuickStart Installation
Here’s an overview of what you’ll do to connect the drive:
1. Connect the USB cable to the External BD Combo Drive
Plug in the USB cable into the USB port on the back of your external
BD drive.
2. Connect the USB cable to your PC
Locate an available USB port on your PC and plug the other end of
the USB cable in that port.
Note: High Speed USB (2.0) ports provide high-speed data transfer rates.
You can connect the external DVD Combo drive to a USB (1.1) port, but
this is not recommended because it will significantly lower the external
DVD drive’s read speeds. If you are unsure about which ports are available
on your PC, check your PC manual or Windows device manager.

Section 2. Installing the PX-B310U External USB Drive
PX-B310U/ PX-B310SA Installation and Users Manual 13
3. Connect the power supply to your external BD Combo drive.
Plug the power supply into the back of your external BD Combo
drive.
4. Connect the power supply to a wall outlet.
Plug the power supply into the outlet or power strip. Then, turn on
the power switch.
Note: Your power plug and outlet may differ from the illustration. The
power switch must be turned off before unplugging the power cord.
Troubleshooting tip: You can verify that your external DVD drive has
power by pressing the EJECT button on the front of the external DVD drive
to open and close the tray. If the tray does not open, ensure that the cables
are plugged in properly and securely.
5. Install the software
Note: Please ensure your external DVD drive is detected and properly
installed by the operating system before installing application software. For
further troubleshooting assistance, please refer to your PC’s and Microsoft
Windows help, under the “help support” section, in “adding new devices”.
Insert the Software Installation Disc into your external DVD drive. Click on
Install Suite. Follow the on-screen instructions.

Section 2. Installing the PX-B310U External USB Drive
14 PX-B310U/ PX-B310SA Installation and Users Manual
This page intentionally left blank.
This manual suits for next models
1
Table of contents