PMRS BHR 21 IS User manual

Date of print : 04.12.2006
GA_BHR_PMRS_001_eng.doc Page1 / 49
Copyright notice in compliance with DIN ISO 16016 © PMRS GmbH
ATEX-TETRA-Hand-held Radio
BHR 21 IS
Users Guide

ATEX-TETRA-Handheld Radio BHR 21 IS
GA_BHR_PMRS_002_eng.doc Page 2 / 49
Copyright notice in compliance with DIN ISO 16016 © PMRS GmbH
History
EVers.: Date Author Change and Reason Status
01 18.05.06 HF Revision 2006 Draft
02 09.06.06 E-fr Editorial review Release
03 04.12.06 Udo A. PMRS Adaptation Release
04 14.06.07 Udo A. Review Additional notes Release
© 2004 - 2006 PMRS GmbH
PMRS GmbH
Tränkeweg 5
15517 Fürstenwalde
Telefon: + 49 30 2000 36212
Fax: + 49 30 657 62 480

ATEX-TETRA-Handheld Radio BHR 21 IS
GA_BHR_PMRS_002_eng.doc Page 3 / 49
Copyright notice in compliance with DIN ISO 16016 © PMRS GmbH
Contents
1 General.........................................................................................................................................5
1.1 Additional Safety Instructions ..............................................................................................6
1.2 Initial operation ....................................................................................................................6
1.3 Directions for maintenance..................................................................................................7
2 Disposal.......................................................................................................................................8
2.1 Rechargeable Batteries.......................................................................................................8
2.2 Product Disposal .................................................................................................................8
3 Charging the Rechargeable Battery..........................................................................................9
3.1 Charging in the Single-Unit Charging Device....................................................................10
3.2 Charging with the Travel Charging Device........................................................................10
3.3 Charging in the Multi-Unit Charging Device ......................................................................10
4 Switching On/Off the Hand-held radio Set .............................................................................11
5 Controls of the BHR 21 IS ........................................................................................................12
5.1 Layout of the Controls .......................................................................................................12
5.2 Connectors ........................................................................................................................13
5.3 Connecting Audio Accessories..........................................................................................13
5.4 Illuminated Ring (LED) ......................................................................................................14
5.5 Keypad ..............................................................................................................................14
5.6 Rotary Switches.................................................................................................................15
5.6.1 Select Group Switch (FS1).......................................................................................................... 15
5.6.2 Volume Control (FS2).................................................................................................................. 15
5.7 Function Keys/Buttons.......................................................................................................16
5.7.1 Send Button PTT (FT2) ............................................................................................................... 16
5.7.2 Programmable Function Button 1 (FT1)......................................................................................17
5.7.3 Function Button 3 (FT3) .............................................................................................................. 17
5.7.4 Function Button 4 (FT4) .............................................................................................................. 17
5.7.5 Softkeys Left (FT5) and Right (FT9) ........................................................................................... 17
5.7.6 M/OK Key (FT6) .......................................................................................................................... 18
5.7.7 Scroll Up/Down Keys (FT7 and FT8) .......................................................................................... 18
5.7.8 Escape/Clear Key (FT10)............................................................................................................ 19
5.7.9 Emergency Call Button................................................................................................................ 19
5.8 Key Lock............................................................................................................................19
6 Display .......................................................................................................................................20
6.1 Brightness Control.............................................................................................................20
6.2 Display Structure ...............................................................................................................20
6.3 Icon Area ...........................................................................................................................21
6.4 Menu System.....................................................................................................................22
6.4.1 General Structure ........................................................................................................................ 22
6.4.2 Submenus ................................................................................................................................... 23
7 Volume Control .........................................................................................................................24
7.1 Direct Volume Control .......................................................................................................24

ATEX-TETRA-Handheld Radio BHR 21 IS
GA_BHR_PMRS_002_eng.doc Page 4 / 49
Copyright notice in compliance with DIN ISO 16016 © PMRS GmbH
7.2 Volume Menu ....................................................................................................................24
7.3 Signal Tone Volume Control..............................................................................................24
8 Miscellaneous Device Settings................................................................................................25
8.1 Operating Mode / Select Network......................................................................................25
8.2 Call Parameters.................................................................................................................26
8.3 Date – Time.......................................................................................................................27
8.4 Language...........................................................................................................................27
8.5 Factory Settings.................................................................................................................27
8.6 Mute...................................................................................................................................27
8.7 Volume ..............................................................................................................................27
9 Individual Voice Calls...............................................................................................................28
9.1 Simplex and Duplex Transmissions ..................................................................................28
9.2 Call Setup Variants............................................................................................................28
9.3 Entering the Call Destination via the Keypad ....................................................................29
9.4 Call Setup..........................................................................................................................30
9.5 Using the Phonebook ........................................................................................................30
9.6 Redialling...........................................................................................................................31
9.7 Using the Calling List and Called List................................................................................31
9.8 Accepting Incoming Voice Calls ........................................................................................32
9.9 Connection Status .............................................................................................................32
9.10 Terminating the Connection ............................................................................................33
10 Group Calls..............................................................................................................................34
10.1 General............................................................................................................................34
10.1.1 Group Calls, Selected Group .................................................................................................... 34
10.1.2 Scan Lists, Multigroups ............................................................................................................. 34
10.1.3 Selecting a Group, Scan Properties.......................................................................................... 35
10.2 Establishing a Group Call................................................................................................36
10.3 Connection Status ...........................................................................................................36
11 Status Calls and Text Messages ...........................................................................................38
11.1 Receiving Status Calls and SDS .....................................................................................38
11.2 Reviewing Status Calls and SDS via the Menu System..................................................39
11.3 Transmitting a Status Call ...............................................................................................40
11.3.1 Transmitting a Pre-programmed Status Call............................................................................. 40
11.3.2 Transmitting a Status Number................................................................................................... 41
11.4 Transmitting a Text Message (SDS) ...............................................................................42
12 Technical Data.........................................................................................................................43
12.1 General technical data.....................................................................................................43
12.2 Technical data: Transmitter.............................................................................................43
12.3 Technical data: Receiver.................................................................................................43
12.4 Technical data: Battery pack ...........................................................................................43
13 Marking ....................................................................................................................................44
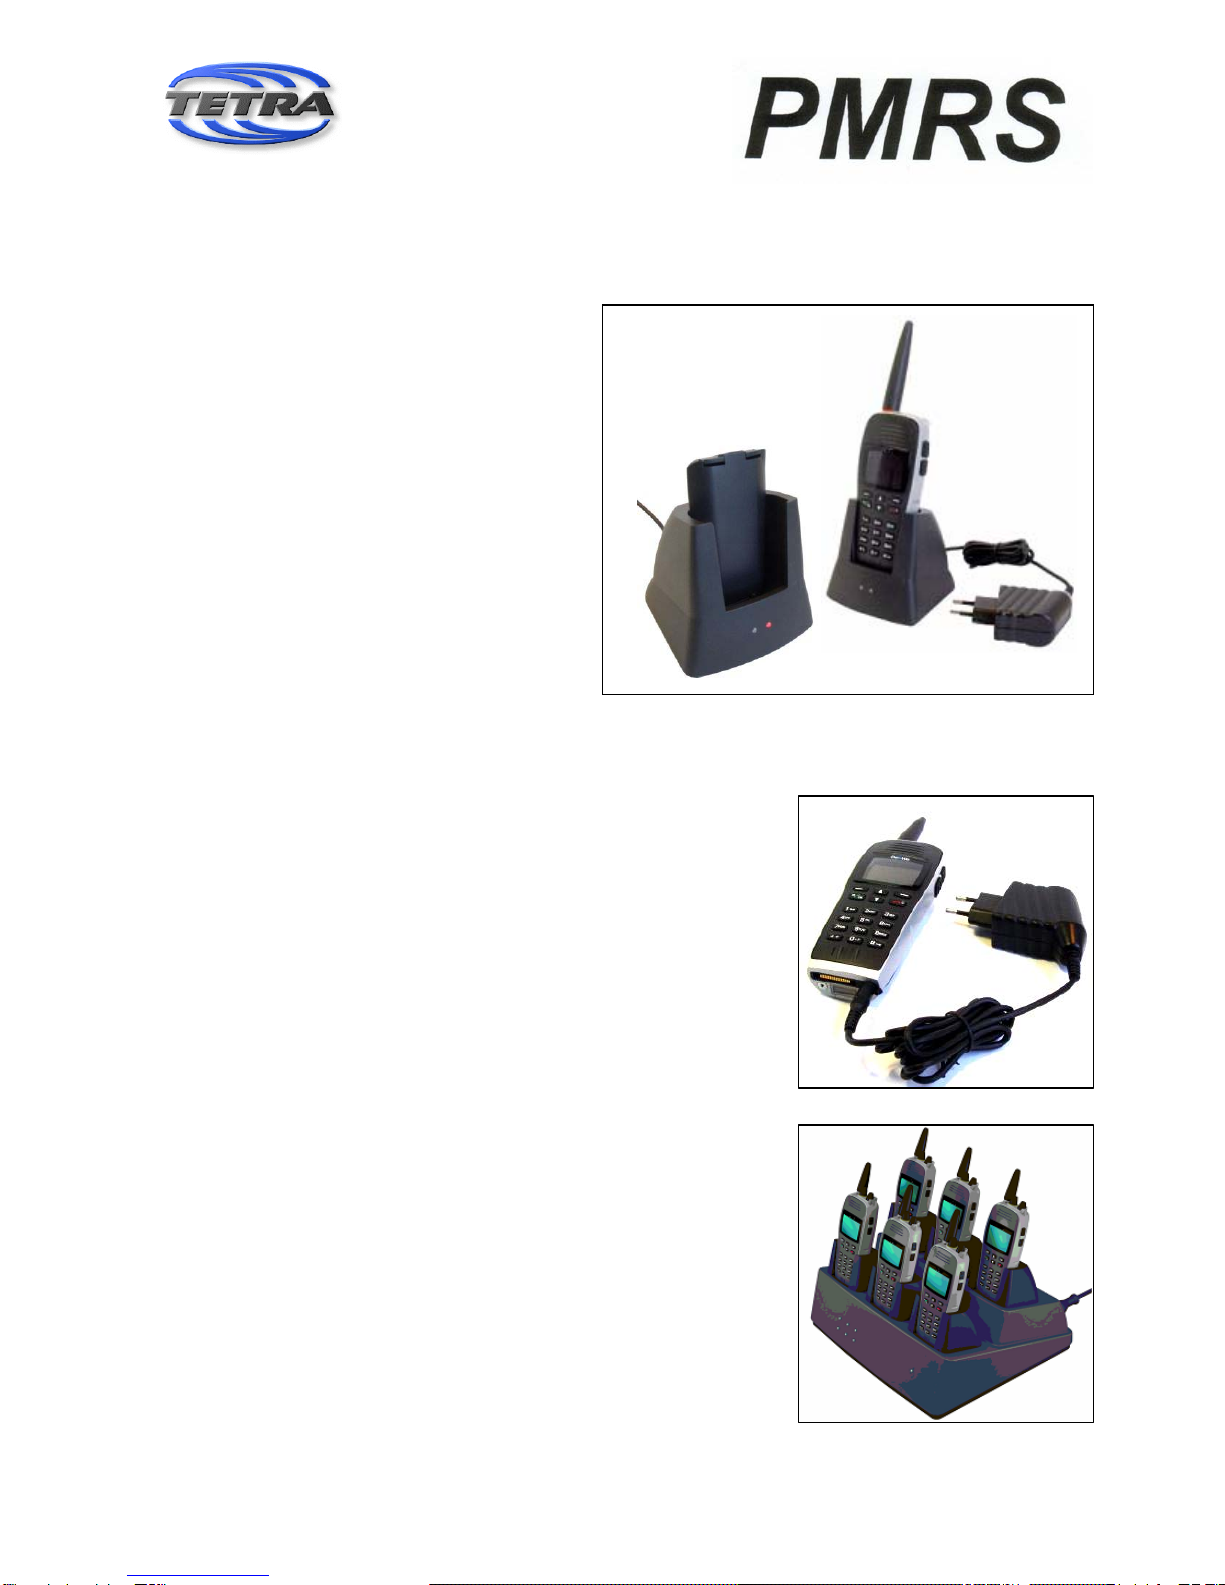
14 Scope of delivery....................................................................................................................45
15 Notice.......................................................................................................................................45

ATEX-TETRA-Handheld Radio BHR 21 IS
GA_BHR_PMRS_002_eng.doc Page 5 / 49
Copyright notice in compliance with DIN ISO 16016 © PMRS GmbH
1 General
The BHR 21 IS Hand-held radio set you acquired is a high-quality tool for radio communication in
professional digital TETRA radio communications networks. It complies with all the requirements for
operation in explosive areas.
These operating instructions describe the functions and user interface of the radio set. They will be
updated according to the latest software version and can be obtained from the manufacturer as
required.
In some topics of these operating instructions you will find references to various operational variants
that depend on "preprogramming" or "personalization" of the radio set. This refers e.g. to the setting
of the radio communications network parameters, functional variants and user-specific parameters
(Phonebook, group list etc.).
Note
)
Please read the commissioning and operating instructions
supplied with each BHR 21 IS radio set before using it.
These instructions provide all the relevant and mandatory safety
instructions, information on operating conditions and service
information.
Caution
The classification of hazardous areas according to zones in
compliance with 1999/92EC is the responsibility of the user, on
whose premises hazards of this kind exist or may arise or
whose work involves or may involve such hazards.1
Caution
Within the scope of the European directive 99/5/EC, the
operator must ensure that the health protection and safety of the
user of the terminal equipment and of other persons is
guaranteed.2
Caution
With respect to the exposure of people to electromagnetic fields
(110 MHz to 40 GHz), product standard EN 50385 must be
applied.
1In compliance with directive 94/9/EC amendment I, item 1.0.6
2In compliance with article 3 (1)a of 99/5/EC and 1999/519/EC)

ATEX-TETRA-Handheld Radio BHR 21 IS
GA_BHR_PMRS_002_eng.doc Page 6 / 49
Copyright notice in compliance with DIN ISO 16016 © PMRS GmbH
1.1 Additional Safety Instructions
The BHR 21 IS meets the requirements of the ATEX –standard / Protection class
II 2 G EEx ib IIC T4 as well as II 3D T130°C IP54.
You must not operate the device in areas that may be subject to metallic dust.
The EC-TYPE-EXAMINATION CERTIFICATE number is ZELM 06 ATEX 0319 X
A copy of the certificate is enclosed within the attachments and is to be considered.
Operate the BHR 21 IS with the battery pack BHR 21 IS (55000759), only then operating the device is
admissible.
Do not recharge the battery within EX-zones (hazardous areas).
Changing the battery in EX-zone is always allowed.
Use the BHR 21 IS only if the antenna is undamaged and tightly screwed to the device.
You must not remove the antenna within EX-zones.
Exchanging the device’s accessories in areas that might be subject to explosive dusts is not allowed.
The accessory connector on top of the device has to be shut by the sealing plug coming with the
device or any other plug of an accessory that has been certificated by the manufacturer.
You must only use accessories for the device which have been certificated by the manufacturer for
this purpose.
Do not use solvents or any other liquid substances for cleaning the device.
If any of these directions are not taken into consideration, operating the BHR 21 IS is not permitted.
Changes to the device’s case are not admissible. If device or battery is damaged, the device has to
be taken out of service. Same goes for lack damage to battery or face plate >2cm2.
The battery must not be disassembled or discarded into fire.
Device and battery are to be taken out of service in case of malfunction or mechanical defect
immediately. They are to be marked and removed from EX-zones.
Repairs may only be performed by the manufacturer (see page 2 for address). For further questions
please contact your local vendor or the manufacturer.
1.2 Initial operation
Charge the Li Ion battery before the initial operation of the hand-held radio. You may charge the
battery itself in a single or multiple charger as well as in combination with the radio.
At first you will have to apply the battery to the device by clicking it into the battery retainer. Now you
can switch on the hand-held radio.
Operation of portable radio types BHR 21 IS need to be prepared and programmed before usage.
Network and all other specific parameters for trunked mode operation (TMO) and/or direct mode
operation (DMO) need a specific configuration for each radio which is related to actual regulations of

ATEX-TETRA-Handheld Radio BHR 21 IS
GA_BHR_PMRS_002_eng.doc Page 7 / 49
Copyright notice in compliance with DIN ISO 16016 © PMRS GmbH
the relevant network operator and all relevant regulations within the country of use including
frequency regulations. Though firmware and software are included the radio has to be programmed
for specific use by the means of the delivered personalisation tool originally manufactured and
delivered from PMRS GmbH while setting all network relevant data, numbers, group assignments and
other features. Personalisation must be conducted by authorized personnel or service partners who
have been trained by PMRS GmbH and are able to show a valid authorisation certificate originally
issued from PMRS GmbH. Loading of Firmware must be conducted while the battery is already fully
charged.
Besides the battery the enclosed antenna is an essential part for accurate use of the radio. Operation
of the radio must be executed while the antenna is fixed to the radio in the designated position to the
antenna connector of the radio. Wetness, humidity and impurification of both the antenna connector of
the radio and the antenna itself may cause severe damage or usage problems of the radio. It has to
be assured that both connectors are dry and clean before fixing them to each other.
There is a leather carrying bag available fort he BHR 21 IS. This bag has been especially developed
for use in EX-zones and is part of the device’s ATEX-certificate. The BHR 21 IS may be used as well
as with or without this carrying bag in such areas. Only certificated carrying bags may be used for this
purpose.
1.3 Directions for maintenance
The device is free of maintenance.
Note the storage conditions of the battery. A battery that has been left uncharged for a long period will
permanently loose capacity. Therefore it should be recharged before a long period of storage. Before
reaching the storage limit a battery has to be fully dis- and then recharged, thus the it stays functional
and the storage limit has been reset.
Operating temperature -20 °C...+55 °C
Transport temperature -40 °C...+70 °C (short time)
Storage temperature --20 °C...+60 °C max. one month (without recharge)
-20 °C...+45 °C max. three month (without recharge)
-20 °C +25 °C max. one year (without recharge)

ATEX-TETRA-Handheld Radio BHR 21 IS
GA_BHR_PMRS_002_eng.doc Page 8 / 49
Copyright notice in compliance with DIN ISO 16016 © PMRS GmbH
2 Disposal
2.1 Rechargeable Batteries
This device is operated with a battery containing harmful substances. The battery must not be
disposed of in your domestic refuse. After the service life of the battery has ended, it must be
disposed of either via a PMRS customer service centre or via an appropriate collection point.
Heed the relevant regulations for environmental protection and disposal in the country of use.
2.2 Product Disposal
The products identified with the following icon are subject to the requirements of the
German ElektroG Act.
The ElektroG Act combines the requirements of the following EC directives:
•2002/96/EC (WEEE) for electric and electronic equipment wastes
•2002/95/EC for restricting the use of specific hazardous substances in
electronic equipment (RoHS directive).
Once the service life of a product has ended, this product must not be disposed of in
the standard domestic refuse. Even disposal via the municipal collection points for electric and
electronic wastes is not permitted.
In favour of an environmentally-friendly disposal or recycling of matters, PMRS GmbH has developed
a disposal concept and fully assumes the duty of taking back and disposing of electric and electronic
wastes according to the ElektroG Act on behalf of the manufacturer.
Please revert to your local service representative or directly to PMRS GmbH to dispose of the
product.
Contact:
PMRS GmbH
Aussenstelle Berlin
Köpenicker Straße 325 Haus 201
12555 Berlin
Tel. +49 30 6576 2480
Fax +49 30 6576 2480

ATEX-TETRA-Handheld Radio BHR 21 IS
GA_BHR_PMRS_002_eng.doc Page 9 / 49
Copyright notice in compliance with DIN ISO 16016 © PMRS GmbH
3 Charging the Rechargeable Battery
Please ensure that your rechargeable battery is always charged to guarantee the reliability of your
radio set at all times and the operability whenever required.
Caution
Caveat emptor
The warranty does not include damage caused by charging the
rechargeable battery using charging devices of third-party manufacturers.
ÆExclusively use the charging devices designed for the product.
The rechargeable battery can be charged via the power supply interface of the radio set when
inserted, or it can be charged separately. Since the rechargeable battery can be changed rapidly and
easily, a BHR 21 IS Hand-held radio set can also be kept in permanent operation.
When you remove the rechargeable battery from the radio set while it is switched on, the last settings
you made may be lost. For this reason, switch off the radio set before you remove the battery.
Push down the two locks (see figure to the right) to remove the battery.
The battery can then easily be folded out to the rear and removed to the
top. Analogously, for fitting the battery, first insert it into the bottom part
of the Hand-held radio set and then press at the top until it engages.
Thereafter you can switch on the Hand-held radio set.

ATEX-TETRA-Handheld Radio BHR 21 IS
GA_BHR_PMRS_002_eng.doc Page 10 / 49
Copyright notice in compliance with DIN ISO 16016 © PMRS GmbH
3.1 Charging in the Single-Unit Charging Device
The single-unit charging device provides the
possibility of charging the battery separately
or installed in the Hand-held radio set. For this
purpose, the complete radio set or the battery
must be placed into the single-unit charging
device as shown in the figures to the right.
A lit red LED indicates that the charging
device is ready for operation. The yellow LED
is permanently lit while the battery is being
charged.
After the battery has been charged by approx.
95 %, the yellow LED will go out. A flashing
yellow LED indicates a fault or abort of the
charging operation due to excess
temperature.
The single-unit charging device is available as
a separate piece of accessory.
3.2 Charging with the Travel Charging Device
The rechargeable battery can be charged directly via a travel
charging device. For this purpose, plug the connector of the
charging device into the charging socket on the bottom side of the
BHR 21 IS.
The charging operation is indicated through a pulsating battery icon
in the header of the display. As soon as the charging process has
been completed, the icon of the full battery is displayed.
3.3 Charging in the Multi-Unit Charging Device
The functions and handling of the multi-unit charging correspond to
those of the single-unit charging device.

ATEX-TETRA-Handheld Radio BHR 21 IS
GA_BHR_PMRS_002_eng.doc Page 11 / 49
Copyright notice in compliance with DIN ISO 16016 © PMRS GmbH
4 Switching On/Off the Hand-held radio Set
The BHR 21 IS Hand-held radio set is switched on by pressing the
Escape/Clear key (key C) for an extended period of time (approx. two
seconds). When the Hand-held radio set is switched on, the background
lighting is activated as well. During the booting process, a start screen is
displayed for approx. 3 seconds. At the same time, the radio set will start
scanning for the digital TETRA radio communications network.
The antenna icon flashes and the message "NETSEARCH“ will be
displayed.
After it has successfully registered in the radio network, the radio set is
ready for operation. The icons for field strength, the antenna icon (constant)
and the charging status of the battery are displayed.
The main field of the display indicating operational readiness displays the
name of the preprogrammed network with the device number. Underneath
it, the selected group or the preprogrammed clear text name ("group 12" in
our example) will be displayed.
If the radio set was in direct mode (DMO) when it was switched off, it will
return to direct mode as soon as it is switched on again. This is indicated
through the icon in the display header.
Press the Escape/Clear key for at least two seconds to switch off the radio
set. The prompt "OFF?“ will be displayed. If this prompt is confirmed by
pressing the softkey "OK", the radio set will be switched off after a brief
deactivation time.

ATEX-TETRA-Handheld Radio BHR 21 IS
GA_BHR_PMRS_002_eng.doc Page 12 / 49
Copyright notice in compliance with DIN ISO 16016 © PMRS GmbH
5 Controls of the BHR 21 IS
5.1 Layout of the Controls
FT 4:
Volume level
Scroll down
Illuminated ring
FT 3:
Select group
Scroll up
FS 2: Volume
Rotary switch
Soft end
FS 1: Select
group
Rotary switch
Soft end
Keypad
Digit entry
Antenna
FT 10:
End of call,
Escape/Clear
FT 9:
Right softkey,
Phonebook
FT 7 and 8:
Scroll Up/Down
Display
FT 6:
M/OK key,
Call acceptance
FT 5:
Left softkey,
Menu
FT 2:
Send button
(PTT, Push-to-
FT 1:
Programmable
Function button
The following overview shows the layout of
the controls and their standard functions.
Emergency call
button

ATEX-TETRA-Handheld Radio BHR 21 IS
GA_BHR_PMRS_002_eng.doc Page 13 / 49
Copyright notice in compliance with DIN ISO 16016 © PMRS GmbH
5.2 Connectors
5.3 Connecting Audio Accessories
On the top of the BHR 21 IS Hand-held radio set there is a 4-pin socket for connecting acoustic
accessories such as microphone-loudspeakers, headphones, helmet headset etc. The connection
socket is equipped with a cap as a protection against soiling.
Caution
Caveat emptor
As a rule, only those accessories may be connected that have been
approved by the manufacturer of the radio set and that have ATEX
approval.
ÆExclusively use the accessories designed for the product.
Never exert force when plugging or pulling the connector. The
mechanical coding of the socket and plug as well as the additional
colour coding must be observed. A snap-on contact prevents
accidental disconnection. Pull back the contact sleeve to
disengage the connection, then gently pull off the connector.
The radio set automatically detects plugged acoustic accessories.
The acoustic paths are automatically switched when the
accessories are connected/disconnected. A sequence of three
tones signals the detection and switchover acoustically.
Antenna socket
for vehicle eceptacle
Audio socket with
cap
I/O connector Charging socket

ATEX-TETRA-Handheld Radio BHR 21 IS
GA_BHR_PMRS_002_eng.doc Page 14 / 49
Copyright notice in compliance with DIN ISO 16016 © PMRS GmbH
Volume settings made for acoustic accessories are stored separately and automatically re-activated
when the accessories are used again. This feature facilitates different volume settings for the radio
set loudspeaker and the accessories.
You can use the PTT (push to talk) button on the accessories, or you can use the PTT button of the
radio set (will remain in operation).
5.4 Illuminated Ring (LED)
On the top of the BHR 21 IS Hand-held radio set there is a colour display in a ring at the bottom of
function button FS1 (select group switch). The different colour displays are to support the user
especially during voice connections when only the top of the device is visible due to the way it is
carried.
Description of the colour codes:
5.5 Keypad
The twelve-key, alphanumeric standard key pad is used for a context-sensitive input of digits, and in
the text message editor also for letters and special characters.
Green Reception
Flashing
yellow
Call signal, incoming call (ring tone)
Red Authorization to talk, transmission
Red + green Duplex mode active (telephone mode)

ATEX-TETRA-Handheld Radio BHR 21 IS
GA_BHR_PMRS_002_eng.doc Page 15 / 49
Copyright notice in compliance with DIN ISO 16016 © PMRS GmbH
5.6 Rotary Switches
Neither rotary switch on the top of the radio set features a mechanical stop. Once the limit position
has been reached, a reject tone is output when an attempt is made to turn the switch any further.
The following designations refer to the corresponding main function:
5.6.1 Select Group Switch (FS1)
Turn the Select Group switch (FS1) to jump to the list of all groups that
are available in the current multi-group (group profile). In this list, you
can turn the Select Group switch further to shift the selection line by
line depending on the direction, in which you turn the switch.
Once a group has been selected, press the M/OK key (FT6) to
determine this group as your own selected group.
Confirming your selection with the PTT button initiates the setup of a
group call to the selected group without registering this group as the
selected group.
5.6.2 Volume Control (FS2)
Turn the volume control (FS2) to directly change the volume of the radio set loudspeaker. The volume
control menu will be displayed. Further turning will increase/decrease the volume further.
FS1
FS 2

ATEX-TETRA-Handheld Radio BHR 21 IS
GA_BHR_PMRS_002_eng.doc Page 16 / 49
Copyright notice in compliance with DIN ISO 16016 © PMRS GmbH
5.7 Function Keys/Buttons
In this context, all the function keys/buttons will be described that are not part of the twelve-key
standard keypad.
5.7.1 Send Button PTT (FT2)
The various tasks of the send button PTT (push to talk) depend on the respective functional status of
the radio set.
5.7.1.1 Status: Ready for Operation
When the radio set is ready for operation, pushing of the PTT button
sets up a group call to the (own) selected group. In this status, the
number or designation of this group is displayed in the bottom display
line. If a group has not been selected, it is not possible to establish a
group call simply by pushing the PTT button. Instead, a reject tone will
be output.
5.7.1.2 Active Simplex Connection
During an active simplex connection in a group call or individual call,
pushing of the PTT button signals the desire to talk over this connection.
The PTT button must be kept pushed. Once the permission to send has
been granted, a short tone will be output to indicate "ready to send", i.e.
you can talk.
Release the PTT button to stop sending.
5.7.1.3 Active Duplex Connection
The PTT button does not have any function during an active duplex
connection.
5.7.1.4 Input Confirmation
After a subscriber number has been entered via the keypad, selected in the phonebook,
selected in the calling list or called list or after having selected a group in the Groups menu,
the PTT button can be used to confirm your input and send the corresponding connection
request to the infrastructure. Depending on the default call settings3the PTT button either
triggers a direct call with automatic call acceptance on the receiver side, or an individual
simplex call with manual hook signalling (for individual calls in each case).
5.7.1.5 Call Acceptance
An individual call coming in with ring tone can be accepted by pushing the PTT button.
3Please also refer to: Menu →Settings →Call parameters.

ATEX-TETRA-Handheld Radio BHR 21 IS
GA_BHR_PMRS_002_eng.doc Page 17 / 49
Copyright notice in compliance with DIN ISO 16016 © PMRS GmbH
5.7.2 Programmable Function Button 1 (FT1)
The FT1 button has not been assigned any function yet (default).
5.7.3 Function Button 3 (FT3)
5.7.3.1 Direct Access to the Group List
When the radio set is ready for operation, pressing function button FT3 will open the list of all
the groups programmed in the selected multi-group and assigned dynamically. This function
corresponds to that of rotary switch FS1.
5.7.3.2 Cursor Up in the Menu
Within the open menu system, function button FT3 is used for stepwise scrolling up the line
selection (scroll up).
5.7.4 Function Button 4 (FT4)
5.7.4.1 Direct Access to the Volume Menu
When the radio set is ready for operation, pressing function button FT4 will open the menu for
controlling the volume of the radio set loudspeaker.
5.7.4.2 Cursor Down in the Menu
Within the open menu system, function button FT4 is used for stepwise scrolling up the line
selection (scroll down).
5.7.5 Softkeys Left (FT5) and Right (FT9)
The respective function of the left-hand softkey (FT5)
and right-hand softkey (FT9) is indicated in the fields
above the softkeys in the footer of the display.
When the radio set is ready for operation (see figure),
the left-hand softkey is used to open the menu
system and the right-hand softkey is used to open the
phonebook.
In the menus for controlling the volume and the brightness, the left-hand softkey (FT5) is used for
decreasing and the right-hand softkey (FT9) for increasing the selected parameter.
Context
Softkey Context
Softkey

ATEX-TETRA-Handheld Radio BHR 21 IS
GA_BHR_PMRS_002_eng.doc Page 18 / 49
Copyright notice in compliance with DIN ISO 16016 © PMRS GmbH
5.7.6 M/OK Key (FT6)
The various tasks of the M/OK key depend on the respective functional status of the radio set. For
menu entries, this key is used for final confirmation of the input or for saving the selected setting.
5.7.6.1 Re-Dialling
When the radio set is ready for operation, pressing the M/OK key displays the subscriber
number called last. The desired connection is then established via the M/OK key or the PTT
button.
5.7.6.2 Input Confirmation/Call Setup
After a subscriber number has been entered via the keyboard, after a subscriber number has
been selected in the phonebook or in Called List or Calling List, call setup to this number is
initiated by pressing the M/OK button. Depending on the default call setting4, the OK key either
triggers an individual simplex call with mandatory manual hook signalling, or a duplex call (for
individual calls in each case).
5.7.6.3 Input Confirmation/Select Group
After a group has been selected in the Groups menu, this group is determined as the selected
group via the M/OK key.
5.7.6.4 Call Acceptance
An individual call coming in with ring tone can be accepted by pushing the PTT button.
5.7.7 Scroll Up/Down Keys (FT7 and FT8)
5.7.7.1 Direct Brightness Control
When the radio set is ready for operation, the scroll keys are used for directly controlling the
brightness of the display. A menu is not displayed for this purpose.
5.7.7.2 Cursor Functions
When the menu system is open and when lists are displayed, the scroll keys are used to
select lines. The possibility of scrolling is indicated by icons above the scroll keys in the violet
field in the footer of the display.
4Please also refer to: Menu →Settings →Call parameters

ATEX-TETRA-Handheld Radio BHR 21 IS
GA_BHR_PMRS_002_eng.doc Page 19 / 49
Copyright notice in compliance with DIN ISO 16016 © PMRS GmbH
5.7.8 Escape/Clear Key (FT10)
Depending on the function status of the radio set, the Escape/Clear key or delete key is used for the
following purposes:
•Switching on the device by pressing the key for an extended period of time
•Terminating an existing individual call connection
•Deletion of the last input, or of the entire input when pressing the key for an extended
period of time
•Return to the superordinate (previous) menu level
•Switching off the device by pressing the key for an extended period of time.
5.7.9 Emergency Call Button
To trigger an emergency call, the emergency call button must be pressed for at least one second.
The type of emergency call made depends on the default device configuration.
The following emergency calls are possible: voice calls in the form of group calls or individual calls,
calls to telephone subscribers or the transmission of an emergency call status to a group or an
individual subscriber.
5.8 Key Lock
Pressing the hash key three times enables a key lock. The enabled key lock
is indicated in the header of the display with a lock icon.
When a key is pressed while the key lock is enabled, a corresponding
message will be displayed.
Only the emergency call button, the volume control and the hash key are
still effective when the key lock is enabled. The hash key must be pressed
three times again to unlock the keys.
EMERGENCY
CALL

ATEX-TETRA-Handheld Radio BHR 21 IS
GA_BHR_PMRS_002_eng.doc Page 20 / 49
Copyright notice in compliance with DIN ISO 16016 © PMRS GmbH
6 Display
6.1 Brightness Control
When the radio set is ready for operation, the scroll keys are used for directly
controlling the brightness of the display. A menu is not displayed for this purpose.
The menu system can also be used to change the
brightness. Proceed as follows to do so:
Menu →6 Settings →7 Volume and then continue with
keys FT7 and FT8 for switchover.
The current brightness value will be displayed in percent
and can be changed via the softkeys.
6.2 Display Structure
The display is subdivided into three areas:
When entering the menu system, the header displays the name
of the respective menu. Once you are in the menu system, the
available submenus are displayed in the main display field in the
form of a list. These can be selected using the scroll keys or by
entering the leading line number. Confirm your selection by
pressing the respective softkey.
In all the display formats, the footer always displays the context-
sensitive functions of the softkey as as well as the available
scrolling or browsing options.
Header with function icons
Main display field
Footer, context of the softkeys
Table of contents