Revo Pico Wi-Fi User manual

WI-FI INTERNET RADIO
www.revo.co.uk
WIFI INTERNET RADIO
BROWSE
ON/OFF IR/FM
VOLUME
REPLY
BACK
®
NorwayItalianoDeutschFrançaisEnglish
Operating Guide
mode d’emploi Bedienungsanleitung Mode demploi Bruksanvisning

Contents
Welcome to Pico Wi-Fi 3
Benefits of Internet Radio 3
Pico Overview and Key Features 3
Warranty 3
Warranty Registration 3
Before Getting Started 3
Weatherproofing and Charging 3
Battery Information 3
Charging Pico 3
Pico’s Splashproof Design 3
Charge Management 3
Controls and Connections 4
Powering Pico 4
Remote Control Operation 4
Reciva Radio Portal 4
Connecting To Your Network 5
Choosing a Station 6
Station Updates 6
On-Demand Broadcasts 7
General Operation 7
Audio Menu 7
Adjusting Bass + Treble 7
Media Player Keys 7
Resetting Pico 7
FM Operation 8
M-Port 8
Configure Menu 8
Network Configuration 8
Version + Firmware Updates 8
Factory Reset 8
Languages 8
Register 8
Media Player Operation 9
Windows + Apple Mac Set-Up 9
Accessing Shared Music 9
General Media Player Operation 9
Windows PC UPnP Set-Up 10
Troubleshooting 11
Copyright and
Acknowledgements
Copyright © 2007 Revo Technologies Ltd.
All rights reserved.
Revo Technologies Ltd
The Inox Building
Caldwellside
Lanark
Scotland
United Kingdom
ML11 7SR
Tel. 01555 666 161
Int. Tel. +44 1555 666 161
Fax. 01555 66 33 44
Int. Fax. +44 1555 66 33 44
Email. [email protected]
Website: www.revo.co.uk
The information in this guide is believed to
be correct at the time of publication.
However, our policy is one of continuous
development and so the information is
subject to change without notice.
Revo, Pico and M-Port are trademarks or
registered trademarks of Revo Technologies
Limited.
iPod®is a registered trademark of Apple
Computer, Inc.
Safety Warnings
Do not operate this radio near water.
Avoid small objects and liquids from getting
into this product.
Do not remove screws or casing parts.
Use only the power supply unit supplied.
EEC: This product has been designed and
type-tested to comply with EU requirements
and carries a CE mark.
Technical Support
Should you encounter any difficulties with
the operation of your Revo Pico Wi-Fi, or
should you suspect that it may be faulty in
some way, please call our technical support
department on the number below:
01555 666 161
visit the troubleshooting section of our
website at: www.revo.co.uk/support
Preface
2
English

3
Benefits of Internet Radio
Access to 6,000+ internet radio stations
Search by genre or country
Access ‘Listen Again’ services
Station list updates automatically
No subscription charges
Pico Wi-Fi Overview
Pico Wi-Fi is the go anywhere internet radio,
acting as a portal to thousands of radio
stations around the world.
Pico Wi-Fi provides high quality digital audio
in a splashproof casing, with the
convenience of internal battery power.
Pico Wi-Fi can also be used as a high quality
speaker system for your iPod™(or other
MP3 player or external sound source).
Simply connect your device to Pico Wi-Fi’s
M-Port™ using the audio lead supplied.
Warranty
Revo Technologies Ltd warrants to the
purchaser that this product will be free
from parts and manufacturing defects in
the course of normal use for a period of
one year from the date of purchase.
This warranty does not apply in cases of
accidental damage, where the case has
been removed, wear and tear, negligence,
modification or inappropriate use.
Should you encounter problems with this
product, please contact your supplier or
alternatively see page 2 of this guide for
technical support contact details.
Warranty Registration
It is a warranty condition that you register
your purchase by either completing the
warranty card enclosed with your radio or
alternatively registering online at
www.revo.co.uk/register
In order to use your Pico Wi-Fi internet
radio you will require a wireless (Wi-Fi)
broadband Internet connection.
If your wireless network is configured to use
Wired Equivalent Privacy (WEP) or Wi-Fi
Protected Access (WPA) data encryption,
you need to know the WEP or WPA code
(Web Key) in order allow Pico Wi-Fi to
communicate with the network.
Pico Wi-Fi should be able to operate
anywhere within 35 metres of the wireless
base station – depending on the operating
environment and the specification of your
wireless base station.
Please ensure that your wireless network is
powered-up and connected to your
broadband Internet connection.
Thank you for buying our Pico Wi-Fi internet radio, we feel sure that it will
provide you with years of enjoyment and reliable service.
This guide has been designed to quickly get you up-and-running and listening
to internet radio, offer guidance on the more complex features of this
product and provide information on safety, warranty and registration.
Welcome to Pico Wi-Fi
Before Getting Started
Charging + Weatherproofing
Pico Battery Information
Inside Pico Wi-Fi there is a rechargeable
Nickel Metal Hydride battery pack.
Out-of-the-box this may carry a small amount
of charge, but it is suggested that you
perform a full charge before using Pico.
Charging Pico
Ideally Pico should initially be charged
overnight before being used. Thereafter a
full charge will take approximately 6 hours.
It can take 3 or 4 charges before Pico’s
internal batteries are performing at their
optimum level.
Pico Wi-Fi charges it’s batteries whenever it
is plugged into the mains, whether it is
being used at the time, or switched off.
If you are using Pico Wi-Fi while it is
charging from the mains, it will take up to
three times longer to charge the batteries
to full capacity, than if it was switched off.
Charge Management Circuit
Pico Wi-Fi has a charge management circuit
that ensures that it’s battery is never
over-charged. When the batteries have
taken a full charge, Pico will automatically
stop charging them.
Pico’s Splashproof Design
Pico’s case is sealed against the elements,
allowing Pico to be used outdoors, or in
places where there is moisture, such as a
bathroom. Pico has been designed to
withstand small splashes of water, such as
raindrops. It is not designed to be
submerged in water.
English

4
Controls and Connectors
Remote Control
Your Pico Wi-Fi radio can be powered from the mains using the power adaptor supplied, or
from it’s internal battery pack.
To power from the mains, insert the power adaptor plug into the DC power socket on the
rear of Pico Wi-Fi. Pressing the button will switch Pico Wi-Fi on.
Only use the power adaptor supplied. Replacements can be purchased from our website
www.revo.co.uk, or alternatively call us on 01555 666 161.
1. LCD Screen
2. Power ON/OFF
3. Browse
4. Back
5. M-Port
6. Infra-Red Sensor
7. Scroll Wheel
8. IR/FM
9. Volume
10. Reply
1. Menu
2. Scroll Left
3. Select
4. Reply
5. Back
6. Five Presets
7. Media Player
8. Browse
9. Volume Down
10. Scroll Right
11. Volume Up
12. IR/FM
13. Standby Media Player
Stop
Skip Back Skip Forward
Play / Pause
1. Telescopic Antenna
2. Software Reset
3. 3.5mm Headphone Socket
4. DC Power Socket
WIFI INTERNET RADIO
BROWSE
ON/OFF IR/FM
VOLUME
REPLY
BACK
®
reset
1.
2.
2.
1.
3.
4.
5.
8.
7.
6.
9.
10.
3.
4.
1.
2.
3.
4.
5.
6. 7.
9.
8.
11.
10.
12.
13.
The station list used by Pico Wi-Fi’ is
compiled and managed by Reciva Limited,
they also provide the internet radio
technology used in Pico Wi-Fi.
Pico Wi-Fi users are able to access
additional internet radio services by visiting
the Reciva Radio Portal at - www.reciva.com
and registering their purchase.
Reciva Radio Portal
Powering Pico Wi-Fi
English

5
Press the ON/OFF button to power-up
Pico Wi-Fi. Pico’s LCD screen will display
a welcome message.
After a few seconds this message will
change to ‘Initialising Network’
You will then be given the option to scan
for available networks. Press scroll wheel
to action this request.
NOTE: If you make a mistake at any point,
press BACK to return to previous screen.
If Pico can’t find a wireless network it will
display the following message.
If this happens please check that your
wireless router is switched on, refer to
the manufacturer if problem persists.
If Pico does find your wireless network,
it will display the network name, for
example:
In some cases Pico Wi-Fi may find more
than one network. Turn the scroll wheel
to see the names of each one – and press
the scroll wheel when the name of your
own network is displayed.
If your network is not configured to
request a password (WEP/WPA), Pico
will connect to the network and display:
If a WEP/WPA key (password) is
required, Pico will display the following:
After a few seconds, Pico will ask you to
input the WEP/WPA code and will display
the password entry screen as follows:
Use the scroll wheel to cycle back and
forward through the alpha-numeric
character list. Press the scroll wheel to
select a character.
Please note, WEP/WPA pass codes are
case-sensitive.
If you make a mistake while entering your
password, press the BACK button to
delete a character.
After selecting the final character of your
password, scroll to the word ‘END’ and
press the scroll wheel to enter your code.
Pico Wi-Fi should now successfully
connect to your network.
Pico Wi-Fi will automatically remember the
WEP/WPA code for your network, and
other networks you have used previously.
You will not need to re-enter these codes
in the future.
Connecting To Your Network
< Scan for
network >
My Home Network
Network Ok
Enter WEP key
<END<> 0 1234>
<END<> 0 1234>
Using saved key
Connecting to
Network
Initialising
Network
Revo Pico Wi-Fi
Internet Radio
No Wireless
Networks Found
< Scan for
network >
My Home Network
Network Ok
Enter WEP key
<END<> 0 1234>
<END<> 0 1234>
Using saved key
Connecting to
Network
Initialising
Network
Revo Pico Wi-Fi
Internet Radio
No Wireless
Networks Found
< Scan for
network >
My Home Network
Network Ok
Enter WEP key
<END<> 0 1234>
<END<> 0 1234>
Using saved key
Connecting to
Network
Initialising
Network
Revo Pico Wi-Fi
Internet Radio
No Wireless
Networks Found
< Scan for
network >
My Home Network
Network Ok
Enter WEP key
<END<> 0 1234>
<END<> 0 1234>
Using saved key
Connecting to
Network
Initialising
Network
Revo Pico Wi-Fi
Internet Radio
No Wireless
Networks Found
< Scan for
network >
My Home Network
Network Ok
Enter WEP key
<END<> 0 1234>
<END<> 0 1234>
Using saved key
Connecting to
Network
Initialising
Network
Revo Pico Wi-Fi
Internet Radio
No Wireless
Networks Found
< Scan for
network >
My Home Network
Network Ok
Enter WEP key
<END<> 0 1234>
<END<> 0 1234>
Using saved key
Connecting to
Network
Initialising
Network
Revo Pico Wi-Fi
Internet Radio
No Wireless
Networks Found
< Scan for
network >
My Home Network
Network Ok
Enter WEP key
<END<> 0 1234>
<END<> 0 1234>
Using saved key
Connecting to
Network
Initialising
Network
Revo Pico Wi-Fi
Internet Radio
No Wireless
Networks Found
< Scan for
network >
My Home Network
Network Ok
Enter WEP key
<END<> 0 1234>
<END<> 0 1234>
Using saved key
Connecting to
Network
Initialising
Network
Revo Pico Wi-Fi
Internet Radio
No Wireless
Networks Found
< Scan for
network >
My Home Network
Network Ok
Enter WEP key
<END<> 0 1234>
<END<> 0 1234>
Using saved key
Connecting to
Network
Initialising
Network
Revo Pico Wi-Fi
Internet Radio
No Wireless
Networks Found
< Scan for
network >
My Home Network
Network Ok
Enter WEP key
<END<> 0 1234>
<END<> 0 1234>
Using saved key
Connecting to
Network
Initialising
Network
Revo Pico Wi-Fi
Internet Radio
No Wireless
Networks Found
Scanning... 10
•••••
6 Music
Now tuning...
Station not
available
87.50MHz
99.50MHz
12:03:26
12-08-2006
Setting clock...
Revo Uno
Digital Radio
Welcome to DAB
•••••
1Xtra
txt us...on 0203
Clock not set...
English

When Pico Wi-Fi has connected to your
wireless network, you are now ready to
select a station.
Please Note: You can move back to the
previous screen at any time by pressing
the BACK button.
Pico Wi-Fi has three main menu headings
Stations, Configure and Media Player.
To select a radio station, turn the scroll
wheel until the word STATIONS appears,
then press the scroll wheel.
You will now be given the option of
selecting a station by location (country) or
by genre. Turn the scroll wheel and push
to select your preferred search method
Choosing location will give you an
alphabetical list of countries broadcasting
internet radio. Turn the scroll wheel
backwards or forwards to view the
country list. Press the scroll wheel to
select your desired location. For example:
You will then be given the choice of listing
all station types in this country, or listing
them by genre eg. Pop, Dance... etc.
Turn the scroll wheel and press to make
your selection, Pico Wi-Fi will now
download the station list for your choice.
You can now scroll through the station list
and make your selection by pressing the
scroll wheel.
Choosing Genre will give you an
alphabetical list of station types. Turn the
scroll wheel to view these.
Press the scroll wheel to select your
desired genre.
You will now be given the choice of viewing
all stations in this genre, or further
sorting them by location (country)
Now select your chosen station from the
alphabetical list.
Station Updates
Occasionally, Pico-Wi-Fi will tell you that it is
receiving an updated station list. It does this
automatically and periodically, ensuring that
Pico Wi-Fi always has the latest station
directory on-board.
Choosing a Station
<Albania >
16 Stations
Loading 323
Stations
Loading 323
Stations
<Cool FM >
96 kbps WMA
<Cool FM>
96 kbps WMA
Station Update
from Reciva
< Genre >
6537 Stations
< Dance >
323 Stations
< Dance >
323 Stations
<[All Station] >
323 Stations
<Genre >
6537 Stations
<Location >
6537 Stations
<Stations >
<[All Station] >
323 Stations
Scanning... 10
•••••
6 Music
Now tuning...
Station not
available
87.50MHz
99.50MHz
12:03:26
12-08-2006
Setting clock...
Revo Uno
Digital Radio
Welcome to DAB
•••••
1Xtra
txt us...on 0203
Clock not set...
6
OR
OR
Scanning... 10
•••••
6 Music
Now tuning...
Station not
available
87.50MHz FM
99.50MHz FM
94.50MHz
Preset 1
BBC 7
????
12:03:26
12-08-2006
Setting clock...
Revo Uno
Digital Radio
Welcome to DAB
•••••
1Xtra
txt us...on 0203
Clock not set...
English

General Operation
< On Demand >
< Chart Show >
Start Time
<00:03:03 >
< Live (Real
Audio) >
< On Demand >
< Chart Show >
Start Time
<00:03:03 >
< Live (Real
Audio) >
< On Demand >
< Chart Show >
Start Time
<00:03:03 >
< Live (Real
Audio) >
< On Demand >
< Chart Show >
Start Time
<00:03:03 >
< Live (Real
Audio) >
7
Changing Volume
To change Pico Wi-Fi’s volume, press the
VOLUME button and rotate the scroll wheel
clockwise to increase the volume level, and
anti-clockwise to reduce the volume. Pico
Wi-Fi will remember its previous volume
level after shutdown.
Internet Radio Presets
Pico Wi-Fi can store five presets by using
the Pico Wi-Fi remote control. To store the
current station press and hold one of the
preset buttons (1 - 5) on your remote
control. To select a stored station, simply
press the corresponding preset key
Returning To Main Menu
You may return to Pico Wi-Fi’s top-line main
menu at anytime by repeatedly pressing the
BACK button and working back through
previous menu items.
Requesting a Station
If you want to listen to a radio station that
is currently not listed in Pico Wi-Fi’s station
list, you can visit the Reciva website at
http://www.reciva.com/ and make a
request to add the station to the list.
OR
On-Demand Broadcasts
Some radio stations provide a number of
additional ways to listen to content; for
example being able to listen to radio
shows that have already been broadcast,
know as On-Demand or ‘Listen-Again’.
To choose between a ‘Live’ broadcast or
an On-Demand one, simply rotate the
scroll wheel and press to select.
If you select On-Demand, you will be
presented with a list of shows that are
available to ‘Listen Again’.
Rotate the scroll wheel until your choice is
displayed on the LCD and press the scroll
wheel to select.
Some stations may allow you to fast-
forward through an On-Demand
broadcast, do so by rotating the scroll
wheel clockwise and pressing to play.
Audio Menu
Pico Wi-Fi’s audio menu is accessed (in IR
and FM modes) by pressing and holding the
scroll wheel for a period of 2 seconds.
Adjusting Bass + Treble
It is possible to adjust Pico’s bass and treble
settings to suit your own audio preferences.
Any changes will be retained in memory for
future sessions.
Media Player Keys
Generally speaking, it is more convenient to
use Pico Wi-Fi’s remote control for
accessing media player functions. That said,
it is possible to access these functions via
the audio menu. Simply select ‘MP Keys’ to
list the various functions available. For more
information on using Pico’s Media player
functions, see page 9.
Resetting Pico Wi-Fi
In the unlikely even that Pico Wi-Fi should
‘crash’ or ‘freeze’ and stop responding to
key presses, it is possible to perform two
different kinds of ‘reset’ in order to bring it
‘back to life’.
Software Reset
Performing a ‘Software Reset’ will clear any
software ‘crash’, while still retaining
WEP/WPA codes and settings. To perform
a software reset you need to locate the
reset button located on Pico’s back panel
(see page 4). You will also need a pen or
paperclip to access the recessed button.
Factory Reset
A ‘Factory Reset’ can be activated from
Pico’s ‘Configure’ menu. Performing a
factory reset will completely reset Pico’s
memory, clearing all WEP/WPA codes and
user settings. This will effectively return Pico
to its default factory settings.
English

8
FM Operation Mode
To listen to FM radio stations switch Pico
on and press the IR/FM button.
If this is the first time Pico has been in FM
mode, it will start at the beginning of the
FM frequency range. Otherwise, the last
frequency or FM station will be displayed.
To scan through the FM frequency range,
turn Pico’s scroll wheel clockwise or anti-
clockwise. To ‘SEEK’ the next active
station, press the scroll wheel.
FM Station Presets
Pico can store five FM presets by using
the Pico Wi-Fi remote control.
To store the current frequency, press and
hold one of the preset buttons (1 - 5) on
your remote control.
To select a stored FM station, simply
press the corresponding preset key.
Scanning... 10
•••••
6 Music
Now tuning...
Station not
available
87.50MHz FM
99.50MHz FM
94.50MHz
Preset 1
BBC 7
????
12:03:26
12-08-2006
Setting clock...
Revo Uno
Digital Radio
Welcome to DAB
•••••
1Xtra
txt us...on 0203
Clock not set...
1
1
IR/FM
Scanning... 10
•••••
6 Music
Now tuning...
Station not
available
87.50MHz FM
99.50MHz FM
94.50MHz
Preset 1
BBC 7
????
12:03:26
12-08-2006
Setting clock...
Revo Uno
Digital Radio
Welcome to DAB
•••••
1Xtra
txt us...on 0203
Clock not set...
6 Music
Now tuning...
87.50MHz FM
99.50MHz FM
94.50MHz FM
Preset 1 saved
BBC 7
????????????????
Clock not set...
6 Music
Now tuning...
87.50MHz FM
99.50MHz FM
94.50MHz FM
Preset 1 saved
BBC 7
????????????????
Clock not set...
6 Music
Now tuning...
87.50MHz FM
99.50MHz FM
94.50MHz FM
Preset 1 saved
BBC 7
????????????????
Clock not set...
M-Port
Using M-Port
Revo’s M-Port allows for quick and easy
connection of an iPod®(or other MP3
player or external sound sources).
Using the connection lead supplied, Pico™
is transformed into a high quality digital
audio speaker system.
Connect one end of the supplied audio
lead to the headphone (or auxiliary out)
socket of your source device, then
connect the other end to the M-Port
on the side of Pico.
Pico’s LCD screen will now display the
words “M-Port Active”.
You should adjust the output volume level
on both the source device and on Pico
itself to gain optimal volume levels.
6 Music
•••Volume 18•••
M-Port Active
Network Configuration
Enables you to scan again for connection to
another wireless network, or to manually
configure the network parameters. You can
also choose to enable the ‘Low Signal
Warning’ prompt when your wireless
network signal is low.
Version
This will display such information as your
device s serial number and
hardware/software version numbers. This
information may be requested when dealing
with technical support issues.
Update Firmware
Use this to check whether there are any
firmware updates available for your Pico
Wi-Fi radio. Pico will check, and prompt you
if there is. You can then make the decision
whether to start a firmware download or
not. A firmware update can take several
minutes, do not switch Pico Wi-Fi off until
this procedure has been completed. Doing
so my cause permanent damage.
Language
This allows you to change Pico’s display
language. Languages supported include
English, French, German, Italian,
Norwegian, Danish, Dutch, Portuguese,
Spanish, Swedish and Finnish.
Factory Reset
See page 7 for details.
Register
This will display a key code that can be used
to register your radio on the Reciva
customer portal: http://www.reciva.com/
Configure Menu
English

9
Pico Wi-Fi’s media player functionality
allows you to play audio files (AAC, AIFF, AU,
MP3, RM, WAV and WMA) and playlists
(M3U) stored on a networked PC or Apple
Mac. The media player functions have been
tested and certified to operate with
Windows 2000, Windows XP, Windows
Vista and Mac OSX 10.2 or a later version.
Windows PC Set-Up
Ensure that your PC is available on the
network, then using Windows Explorer,
locate the folder where your audio files are
stored...then
Right click on the folder.
Select ‘Properties’
Click on ‘Sharing’
Select “Share this folder on the network’
and ‘Allow network users to change my
files’. Please note, do not try to make your
‘My Documents’ or any of its sub-folders
(e.g. ‘My Music’) shareable.
Apple Mac Set-Up
Setup Windows File Sharing on the MAC:
From the ‘Dock’, click ‘System Preferences’.
From the ‘System Preferences’ window
(under the ‘Internet & Network’ section)
click ‘Sharing’.
From the ‘Sharing’ window, do the following:
Under the ‘Services’ section, enable
‘Personal File Sharing’ and ‘Windows
Sharing’. Also, click ‘Start’ for each of these
services.
Under the ‘Firewall’ section, keep firewall off.
Under the ‘Internet’ section, keep ‘Internet
Sharing’ off.
Setup an Account:
From the ‘System Preferences’ window,
under the ‘System’ section, click ‘Accounts’.
Select an account and remember its ‘Short
Name’ and password. This information will
be used by Pico Wi-Fi when connecting to
your Mac.
Directory Setup:
From the ‘Dock’, click ‘Finder’. From the
‘Finder’ window, click ‘Applications >
Utilities’. Holding Ctrl click on ‘Directory
Access’ then select ‘Get Info’ and ensure
that read / write enabled. Next double click
on ‘Directory Access’ and enable the
following:
AppleTalk LDAPv3
SLP SMB/CIFS
Also, for the ‘SMB/CIFS’ item, click
‘Configure’ and select an appropriate
workgroup.
Copy and paste the audio files to
‘Documents’ in the ‘Finder’ window. Ensure
that your Mac is successfully connected to
the wireless network. Note, you may need
to wait for few minutes for the changes to
take effect.
You should now be able to access the audio
files on your Mac by selecting ‘Media Player
> Windows Shares’ on Pico, then selecting
your Mac from the list of devices. On
selecting your Mac, if no shared folders are
found press the scroll wheel and select user
- at this point you can enter in the ‘Short
Name’ and password for your Mac account.
Accessing ‘Shared’ Music
When Pico has connected to your wireless
network, press the BACK button until
‘Stations’ is displayed. Turn the scroll wheel
until ‘Media Player’ is on-screen, then press
the scroll wheel to select.
Now rotate the scroll wheel and select
“Windows Shares’, then rotate and select
‘Scan for PCs’. Pico will now display ‘Finding
PCs’. When the scan is complete, rotate
the scroll wheel and select your PC, Pico
will now search for shared folders. Turn the
scroll wheel to highlight the correct folder
and select.
Pico will display ‘File Scan...’ as it scans
through all the files on your Mac or PC.
PLEASE NOTE If you have a large number
of files, this operation could take several
minutes.
When Pico has finished scanning, it will
display ‘By Album’. You can now browse
through the scanned media files, which will
be organised ‘By Album’, ‘By Artist’, and
‘Playlist’ - if available.
IMPORTANT The first time Pico Wi-Fi
completes a file scan,a file called
“reciva_media_cache” is written to the folder
where the audio files are stored. This will
speed-up subsequent file scans.
Listening To A Single Track
Turn the scroll wheel until ‘By Artist’ is on-
screen then select. Now rotate the scroll
wheel until your artist choice is displayed,
then select. Now turn the scroll wheel until
your desired album is displayed, and select
it. The prompt ‘Add To Queue’ will appear at
this point. Turn the wheel until your chosen
track name is on-screen and select. It will
now start to play.
Listening To A Complete Album
Using the scroll wheel, locate and select
‘By Artist’, then select your choice of artist.
Now rotate the scroll wheel until your album
choice is displayed, then select. The prompt
‘Add To Queue’ will appear at this point,
push the scroll wheel to select and your
chosen album will start to play.
Queuing Tracks For Playback
Highlight your chosen track and press the
scroll wheel to select. ‘Track Added To
Queue’ will be displayed.
Queuing Albums For Playback
Highlight your chosen album and press the
scroll wheel to select. Rotate the scroll
wheel until ’Add To Queue’ is on-screen -
then select. ‘Tracks Added To Queue’ will be
displayed.
Media Player Operation
✓
✓✓
✓
English

10
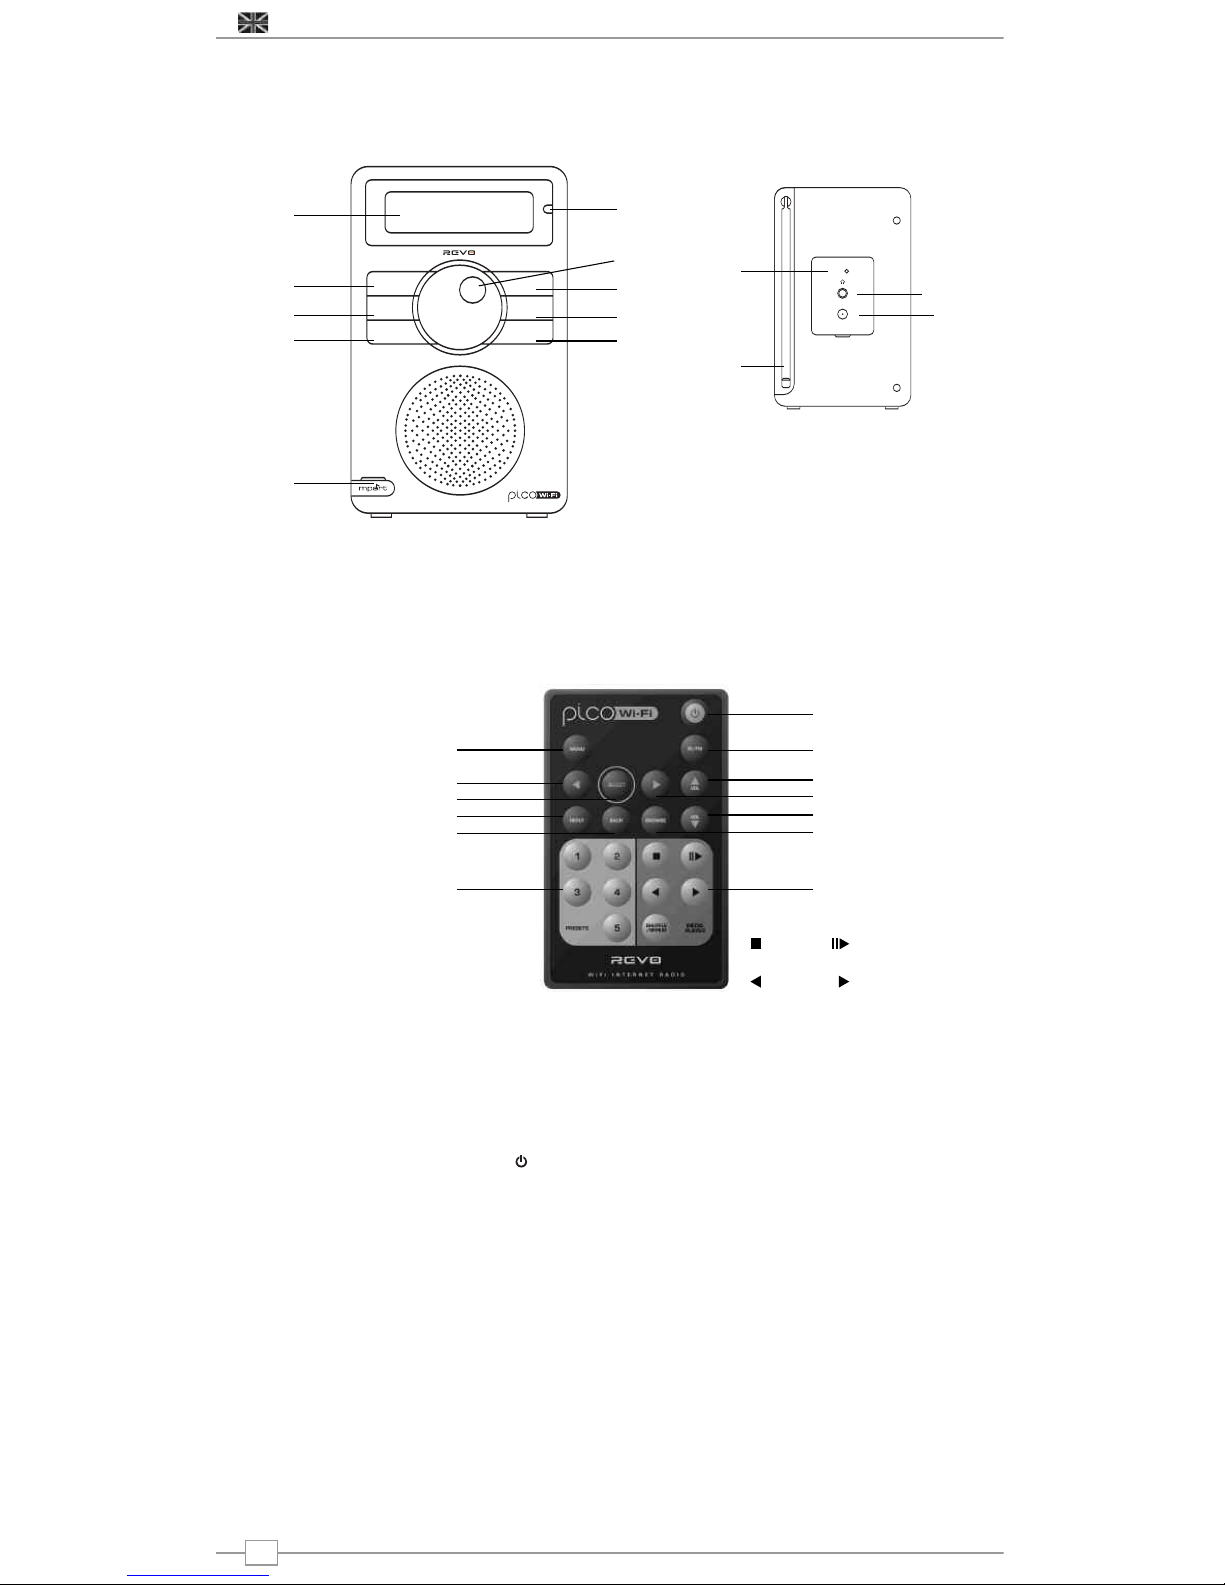
Controlling Playback
Use the STOP button on your Pico
Wi-Fi remote control to stop playback.
Use the PLAY/PAUSE button on the
remote control to start a track, pause a
track, or restart a paused track.
Use SKIP TO PREVIOUS TRACK to
start playback of the previous track in the
queue.
Use the SKIP TO NEXT TRACK to
start playback of the next track in the
queue.
Browsing A Queue
Press the BROWSE button - the currently
playing track name will be displayed. Turn
the scroll wheel to see the tracks that are
queued for playback. To jump ahead and
play a track from the queue, press the
scroll wheel to select and the track will play.
Removing Tracks From A Queue
Press the BROWSE button - the currently
playing track name will be displayed.
Turn the scroll wheel to the track that you
would like to remove from the queue. Press
and hold the STOP key on the remote for 2
seconds. Pico will display ‘Delete Track?’.
Turn the scroll wheel to highlight either
‘Yes’ or ‘No’. Press the scroll wheel to make
your selection. ‘Removed From Queue’ will
be displayed if you decided to delete a track.
To clear the entire contents of a queue,
select ‘Clear Queue’ from the the main
Media Player menu.
Playing Tracks Randomly
Select and add the individual tracks to the
queue as described previously.
Return to the main top-line Media Player
menu and select ‘Playback Mode’.
Rotate the scroll wheel to display ‘Shuffle’,
then select by pressing the scroll wheel.
Confirm that ‘Shuffle’ mode should be
enabled, by selecting YES or NO.
Repeating Tracks In A Queue
Select the individual tracks as previously
described.
Return to the main top-line Media Player
menu and select ‘Playback Mode’.
Rotate the scroll wheel to display ‘Repeat’,
then select by pressing the scroll wheel.
Confirm that ‘Repeat’ mode should be
enabled, by selecting YES or NO.
Windows PC UPnP Set-Up
If your PC is running Microsoft Windows XP
or Vista, then you can use Window Media
Player 11 (WMP 11) to act as your UPnP
(Universal Plug and Play) media server 1.0.
WMP 11 can be downloaded from
Microsoft’s website and installed by following
the instructions detailed in its installation
wizard.
Once installed, Windows Media Player 11
will create a library from all the media files
available to it on your PC. To add new media
files to the library, select ‘File > Add to
Library… > Advanced Options’, click ‘Add’
and choose the files you wish to add and
click ‘OK’.
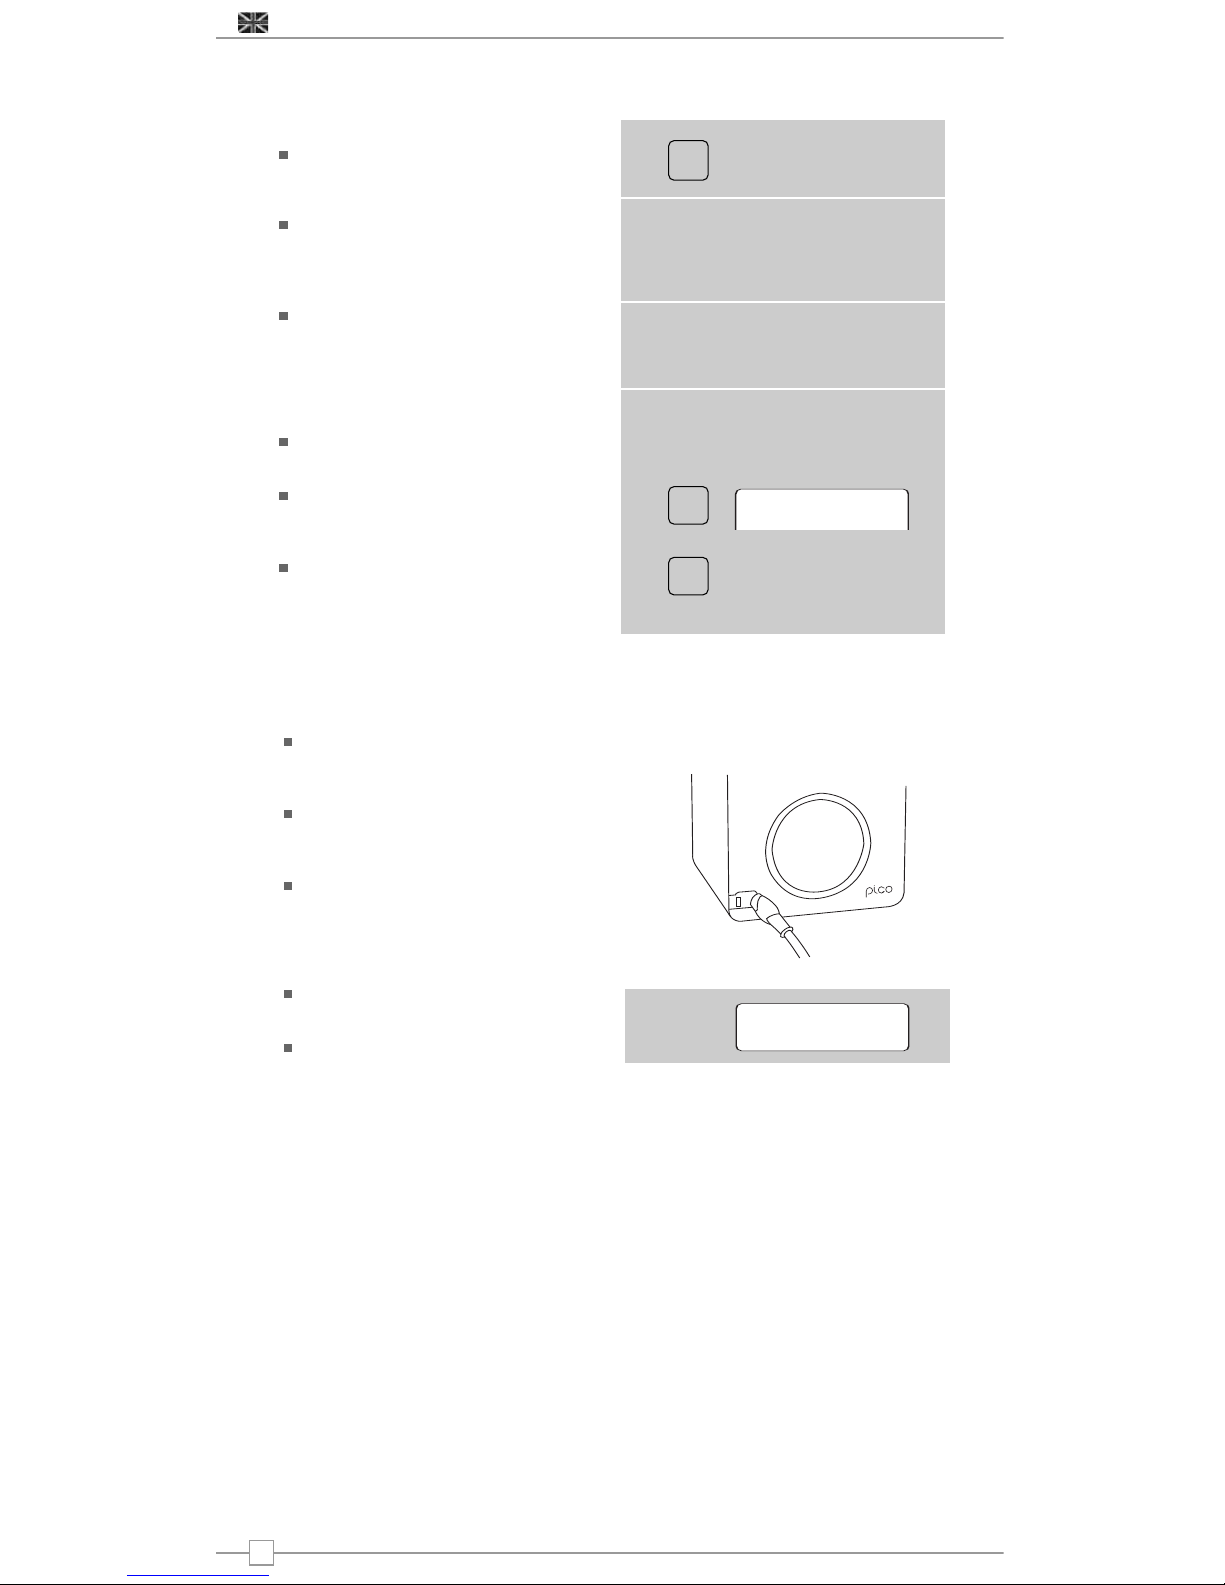
You will now need to connect Pico Wi-Fi to
Windows Media Player 11 and configure it
to allow the radio to access your media
library. In order to this, you will need to do
the following:
Keep pressing BACK to get to Pico’s top-
line menu and then turn the scroll wheel to
‘Media Player’ and press to select.
Now rotate scroll wheel and select ‘UPNP
Servers’. Pico will scan for all available
UPnP servers. Note, it may take a few
seconds for Pico to complete its scan and
before the scan has been completed, Pico
will display ‘[Empty]’. Pico will continue to
display ‘[Empty]’ if no UPnP servers are
found.
If “No PC Found” is displayed on Pico
Wi-Fi, click the library tab in Windows
Media Player and select media sharing, now
select share my media and then click ‘OK’.
At this point you can scan for UPnP
servers on Pico Wi-Fi again, Pico Wi-Fi will
now be listed as a unknown device in the
media sharing window click the ‘Allow’
button and then click ‘OK’. Pico Wi-Fi should
now be accessing your Windows Media
Player Library.
PLEASE NOTE that only WMA files in
Windows Media Player are accessible using
UPnP
Playing Music Using UPnP
When the UPnP server is configured to
share media files with Pico Wi-Fi, you can
begin playing music as follows:
Press the BACK button until ‘Stations’ is
displayed. Turn the scroll wheel until ‘Media
Player’ is on-screen, then press the scroll
wheel to select.
Turn scroll wheel to highlight ‘UPNP
Servers’ and press to select. Pico will scan
for all available UPnP servers. Please note,
it may take a few seconds for Pico to
complete its scan. Before the scan has
been completed, Pico will display ‘[Empty]’
and continue to do so if no UPnP servers
can be found.
After a successful scan, select your UPnP
server, by rotating the scroll wheel (if there
is more than one UPnP server), and then
pressing to select.
Pico will now list the media categories
available from the UPnP server, e.g. ‘Music’,
‘Playlists’ etc. Turn the scroll wheel to
choose which category you wish to browse,
then press to select. Turn the dial to
highlight a sub category and press to
select. Turn the scroll wheel to highlight the
media files that you wish to play, then press
to select. Pico will display ‘[Add to Queue]’,
press the scroll wheel again and Pico will
add the tracks to its queue and begin
playing them automatically.
English

11
Browsing A Queue
Press the BROWSE button - the currently
playing track name will be displayed. Turn
the scroll wheel to see the tracks that are
queued for playback. If you want to jump to
a particular place in the queue, press the
scroll wheel when the required track is
displayed. It is important to note here that
media files scanned from the radio’s
‘Windows Shares’ function can also be
added to the radio’s queue.
Full instructions on queue management,
controlling music playback etc. under UPnP
can be found on page 9.
If you are experiencing any problems with
your Pico Wi-Fi internet radio please read
the following ‘troubleshooting’ guide.
Alternatively can can visit the HELP section
of the Reciva website (www.reciva.com) the
support section of the Revo website
(www.revo.co.uk) or call our technical
support staff on 01555 66 61 61.
If you have trouble connecting Pico Wi-Fi to
your wireless network, these steps may help
to resolve the problem:
1. Confirm that a Wi-Fi connected PC can
access the Internet (i.e. can browse the
web) using the same network.
2. Check that a DHCP server is available, or
that you have configured a static IP address
on the radio. You can configure a static IP
address on the radio using the menu item
‘Configure -> Network Config -> Edit Config’,
and then select ‘No’ for ‘Auto (DHCP)’.
3. Check that your network’s firewall is not
blocking any outgoing ports. As a
minimum, the Pico needs access to UDP
and TCP ports 80, 554, 1755, 5000 and
7070.
4. Check your access point does not
restrict connections to particular MAC
addresses. You can view the radio’s MAC
address using the menu item ‘Configure ->
Network Config -> View Config -> MAC
address’.
5. If you have an encrypted network, check
that you have entered the correct key or
pass phrase into the radio. Remember that
text-format keys are case sensitive. If, when
attempting to connect to an encrypted
network, your radio displays: ‘Wireless
error’ followed by a 5-digit number, then
please ensure that you enter the correct
pass phrase for the network. If the problem
persists, then you may need to consult your
network configuration.
If Pico Wi-Fi can connect to the network
successfully, but is unable to play particular
stations, it may be due to one of the
following causes:
1. The station is not broadcasting at this
time of the day (remember it may be
located in a different time zone).
2. The station has reached the maximum
allowed number of simultaneous listeners.
3. The station is not broadcasting anymore.
4. The link on the radio is out of date.
5. The Internet connection between the
server (often located in a different country)
and you is slow. Try using a PC to play back
the stream via the broadcaster’s web site.
If you can play back the station with a PC,
but not via Pico Wi-Fi - use the form at
http://www.reciva.com/ to notify Reciva of
the problem - they can change the station
data that is used by the radio.
Troubleshooting
English

Safety Information
The lightning flash with
arrowhead symbol within an
equilateral triangle is intended
to alert the user to the
presence of uninsulated
"dangerous voltage" within the
product's enclosure that may
be of sufficient magnitude to
constitute a risk of electric
shock to persons.
The exclamation point within an
equilateral triangle is intended
to alert the user to the
presence of important
operating and maintenance
(servicing) instructions in the
literature accompanying the
appliance.
WARNING: TO REDUCE THE RISK OF FIRE
OR ELECTRIC SHOCK, DO NOT EXPOSE
THIS APPLIANCE TO RAIN OR MOISTURE.
IMPORTANT SAFETY INSTRUCTIONS
To reduce the risk of electrical shock, fire,
etc:
1. Read these instructions.
2. Keep these Instructions.
3. Heed all Warnings.
4. Follow all instructions.
5. Do not use this apparatus near water.
6. Clean only with dry cloth. For stubborn
stains, use a soft cloth dampened with a
weak solution of mild detergent and
water. Dry the apparatus immediately
afterwards with a clean cloth. Do not use
abrasive clothes, thinners, alcohol, or
other chemical solvents, because they
may damage the finish or remove the
panel lettering.
7. Do not block any ventilation openings. The
ventilation shall not be impeded by
covering the ventilation openings with
items, such as newspapers, table clothes,
curtains, etc.
8. Do not install near any heat source such
as radiators, heat registers, stoves, or
other apparatus (including amplifiers) that
produce heat.
9. Do not defeat the safety purpose of the
polarized or grounding - type plug. A
polarized plug has two blades with one
wider than the other. A grounding type
plug has two blades and a third grounding
prong. The wide blade or the third prong
are provided for your safety. If the
provided plug does not fit into your outlet,
consult an electrician for replacement of
the obsolete outlet.
10. Protect the power cord from being
walked on or pinched particularly at
plugs, convenience receptacles, and the
point where they exit from the apparatus.
If the power cord is damaged, it must be
repaired by a qualified repairer.
11. Only use attachments/accessories
specified by the manufacturer.
12. Use only with the cart, stand, tripod,
bracket or table specified by the
manufacturer, or sold with the apparatus.
When a cart is used, use caution when
moving the cart/apparatus combination
to avoid injury from tip-over.
13. Unplug this apparatus during lightning
storms or when unused for long periods
of time.
14. Refer all servicing to qualified service
personnel. Servicing is required when the
apparatus has been damaged in any way,
such as power-supply cord or plug is
damaged, liquid has been spilled or
objects have fallen into the apparatus, the
apparatus has been exposed to rain or
moisture, does not operate normally, or
has been dropped.
15. The apparatus shall not be exposed to
dripping or splashing and no objects filled
with liquids, such as vases, shall be
placed on the apparatus.
16. The mains plug or an appliance coupler is
used as the disconnect device, the
disconnect device shall remain readily
operable.
17. Please read Rating Labels at the bottom
of the Sender and Receiver for power
input and other safety information.
FCC
This device complies with Part 15 of the FCC
Rules Operation that is subject to following
two conditions:
(1) This device may not cause harmful
interference and,
(2) This device must accept any
interference received, including
interference that may cause undesired
operation.
WARNING: Changes or modifications to this
unit not expressly approved by the party
responsible for compliance could void the
user authority to operate the equipment.
PORTABLE CART WARNING
CAUTION:
TO REDUCE THE RISK OF ELECTRIC SHOCK:
DO NOT REMOVE SCREWS, COVERS OR THE CABINENT.
NO USER SERVICING PARTS INSIDE.
REFER SERVICING TO QUALIFIED SERVICE PERSONNEL.

Mode demploi
WI-FI INTERNET RADIO
WIFI INTERNET RADIO
BROWSE
ON/OFF IR/FM
VOLUME
REPLY
BACK
®
Français
www.revo.co.uk

Table des matières
Bienvenu chez Pico Wi-Fi 3
Les avantages de la radio Internet 3
Vue d’ensemble Pico et caractéristiques
des touches 3
Inscription à la garantie 3
Avant la mise en marche 3
Période de test et chargement 3
Information sur la Batterie 3
Chargement de Pico 3
Conçu pour résister aux éclaboussures 3
Gestion du chargement 3
Contrôles et connexion 4
Mise en marche de Pico 4
Fonctionnement du contrôle
à distance 4
Reciva Radio Portal 4
Se connecter à votre réseau 5
Choisir une station de radio 6
Mise à jour des stations de radio 6
Programme sur demande 7
Opérations générales 7
Menu Audio 7
Ajuster la Basse + les aigus 7
Touches Media Player 7
Réinitialisation de Pico 7
Fonctionnement FM 8
M-Port 8
Menu configuration 8
Configuration réseau 8
Version + mise à jour des
micro- logiciels 8
Système de réinitialisation 8
Langues 8
Enregistrement 8
Fonctionnement de Media Player 9
Accès à la musique partagée 9
Fonctionnement de Media Player 9
Installation de Windows PC UPnP 10
Dépannage 11
Droits d’auteur et
reconnaissances
Copyright © 2007 Revo Technologies Ltd.
Tous droits réservés.
Revo Technologies Ltd
The Inox Building
Caldwellside
Lanark
Scotland
United Kingdom
ML11 7SR
Tel. 01555 666 161
Int. Tel. +44 1555 666 161
Fax. 01555 66 33 44
Int. Fax. +44 1555 66 33 44
Email. [email protected]
Website: www.revo.co.uk
L’exactitude des informations contenues
dans ce mode d’emploi remonte à la date
de la publication. Cependant, notre politique
fonctionne sur un continuel développement
et pour cette raison, les informations
peuvent être modifiées, sans notice.
Revo, Pico et M-Port sont des marques
deposes de Revo Technologies Limited.
iPod® est une marque déposée de Appel
Computer Inc.
Safety Warnings
Ne pas manipuler cet appareil à proximité
de l’eau.
Eviter d’insérer des petits objets ou du
liquide à l’intérieur de ce produit.
Ne pas enlever les vis ou autre partie de
l’appareil. Utiliser uniquement le chargeur
fournit.
EEC: Ce produit a été conçu et testé en
respectant les normes Européennes et
porte une marque CE.
Assistance technique
Si vous rencontré des difficultés avec le
fonctionnement de votre Revo Pico Wi-Fi, ou
vous pensez que l’appareil est quelque peu
défectueux, veuillez contacter le service
assistance technique au numéro suivant :
00 44 1555 666 161 (UK)
Comme alternative, vous pouvez envoyer un
email à support@revo.co.uk ou bien visiter
notre section dépannage sur notre site web:
www.revo.co.uk/support
Préface
2
Français

Les avantages de la radio
internet
Accès à + de 6,000 stations de radio
Internet
Recherche par genre ou pays
Accès aux services « Listen again »
Mise à jour automatique de la liste de
stations
Pas de frais d’inscription
Vue d’ensemble de Pico Wi-Fi
Pico Wi-Fi est le passe-partout de la radio
internet, agissant comme un portail d’un
millier de stations de radio dans le monde.
Pico Wi-Fi fournit un son audio digital de
très haute qualité en cas d’éclaboussure
d’eau, avec comme avantage la puissance
de la batterie interne.
Pico Wi-Fi peut aussi être utilisé comme un
système de haut parleur de haute qualité
pour votre iPod™ (ou autre lecteur MP3 ou
source externe musicale).
Garantie
Revo Technologies Ltd garantie à l’acheteur
que ce produit est démuni de défauts
d’usine au cours d’une utilisation normale et
pour une période d’un an, à compter à
partir de la date de l’achat.
Cette garantie ne sera pas appliquée en cas
de dommages accidentels, si le couvercle a
été retiré, usure, négligences, modification
ou utilisation inappropriée.
Should you encounter problems with this
product, please contact your supplier or
alternatively see page 2 of this guide for
technical support contact details.
Inscription à la garantie
C’est une condition de garantie qui vous
permet d’enregistrer votre achat soit en
complétant la carte de garantie
accompagnant votre radio, ou en vous
inscrivant online sur
www.revo.co.uk/register
Pour pouvoir utiliser votre Radio Internet
Pico Wi-Fi, il vous sera demandé de
posséder une connexion internet sans fil
(Wi-Fi) à large bande.
Si votre réseau sans fil est configuré pour
utiliser Wired Equivalent Privacy (WEP) ou
Wi-Fi Protected Access (WPA) data
encryption, vous devez connaître le code
WEP ou WPA (Clé Web) pour pouvoir
permettre à Pico Wi-Fi de communiquer
avec le réseau.
Pico Wi-Fi devrait pouvoir fonctionner
n’importe où dans un rayon de 35 mètres
de la base WIFI – cela dépend du contexte
d’utilisation ainsi que de la spécificité de
votre réseau dans fil.
Assurez-vous s.v.p. que votre réseau sans fil
fonctionne et qu’il soit connecté à la
connexion internet large bande.
Merci d’avoir acheté la radio Pico Wi-Fi DAB internet, nous sommes
certains que cet appareil vous fournira beaucoup de plaisir ainsi qu’un très
bon fonctionnement
Ce mode d’emploi a été conçu pour vous fournir des informations sur
comment lire et écouter rapidement de la radio internet, en vous guidant
sur les caractéristiques les plus complexes de ce produit et en vous
fournissant des informations sur la sécurité, la garantie et l’enregistrement.
Bienvenu chez Pico Wifi
Avant la mise en marche
Chargement + Etanchéité
Information sur les piles Pico
A l’intérieur de Pico Wi-Fi, il y un paquet de
piles Nickel Metal Hydride rechargeable.
L’appareil fonctionne également si les piles
sont à peine chargée mais il est conseillé de
les charger complètement avant d’utiliser
Pico.
Charger Pico
Idéalement, Pico devrait au départ est
chargé pendant toute la nuit avant de
commencer à l’utiliser. Par la suite, le
chargement total prendra environ 6 heures.
3 ou 4 chargements sont nécessaires avant
que les piles de Pico n’atteignent un très
bon niveau de performance.
Les piles de Pico Wi-Fi se chargent toutes
les fois que l’appareil est branché, qu’il soit
utilise en même temps ou éteint.
Si vous utiliser Pico Wi-Fi pendant son
chargement, cela prendra 3 fois plus de
temps pour charger les batteries au
maximum, que s’il était éteint.
Circuit de gestion de
chargement
Pico Wi-Fi a une gestion de circuit de
chargement qui assure que ses piles ne
sont jamais sous-chargées. Lorsque les
pilles sont chargées au maximum, Pico
stoppera automatiquement de les charger.
L’étanchéité de Pico
Pico peut être utilisé en plein air, ou dans
des endroits humides, comme une salle de
bain. Pico a été conçu pour résister aux
éclaboussures d’eau, comme les gouttes de
pluie. Il n’a pas été conçu pour est
submergé dans l’eau.
3
Français

Contrôles et Connecteurs
Remote Control
Votre Radio Pico Wi-Fi peut être mise en marche principalement à partir du conducteur
principal en utilisant l’adaptateur ou les piles fournit.
Pour le mettre en marche, brancher l’adaptateur dans le connecteur DC à l’arrière de Pico
Wi-Fi. En appuyant sur le bouton power, Pico Wi-Fi s’allumera.
Veuillez utiliser uniquement l’adaptateur fournit. Son changement peut être effectué sur
notre site web : www.revo.co.uk, ou par téléphone au 01555 666 161.
1. Ecran LCD
2. ON/OFF
3. Parcourir
4. En arrière
5. M-Port
6. Sonde infra-rouge
7. Roulette
8. IR/FM
9. Volume
10. Répéter
1. Menu
2. A gauche
3. Sélectionner
4. Répéter
5. En arrière
6. CInq prédéfinis
7. Media Player
8. Parcourir
9. Baisser le volume
10. A droite
11. Augmenter le volume
12.IR/FM
13. Mise en veille
Media Player
Stop
En arrière En avant
Play / Pause
1. Antenne télescopique
2. Réinitialisation du logiciel
3. Connecteur casque radio
4. Connecteur DC
WIFI INTERNET RADIO
BROWSE
ON/OFF IR/FM
VOLUME
REPLY
BACK
®
reset
1.
2.
2.
1.
3.
4.
5.
8.
7.
6.
9.
10.
3.
4.
1.
2.
3.
4.
5.
6. 7.
9.
8.
11.
10.
12.
13.
La liste des stations de radio utilise par
Pico Wi-Fi’ est compilée et gérée par
Reciva Limited, ils fournissent également la
radio internet technologique utilisée pour
Pico Wi-Fi.
Les utilisateurs de Pico Wi-Fi peuvent
accéder en plus aux services de la radio
internet en visitant le portail Radio Reciva
sur www.reciva.com et
Le Portail Radio Reciva
Mise en marche de Pico Wi-Fi
4
Français

Appuyer sur le bouton ON/OFF pour
mettre en marche Pico Wi-Fi. L’écran LCD
de Pico affichera un message de bienvenu.
Après quelques instant ce message
disparaitra et « initialisation du réseau
»’apparaitra.
Il vous sera ensuite donner la possibilité
de parcourir différents réseau possibles.
Appuyer sur la roulette pour exécuter
cette action.
REMARQUE: Si vous faite une erreur
quelque soit l’endroit où vous vous trouvez,
appuyer sur Back (marche arrière) pour
retourner à l’écran précédent
Si Pico ne parvient pas à trouver de
réseau sans fil (Wifi), il affichera le message
suivant.
Lorsque cela arrive, vérifier que votre
router sans fil soit allumé, et si le problème
persiste, reporter le au constructeur
Si Pico ne trouve pas votre réseau sans
fil, il affichera le nom du réseau, par
exemple :
Dans certain cas, Pico Wi-Fi peut trouver
plus d’un réseau. Tourner la roulette pour
apercevoir les noms de chacun – et appuyer
sur la roulette lorsque le nom de votre
réseau s’affiche.
Si votre réseau n’est pas configure pour
requérir un mot de passé (WEP/WPA), Pico
se connectera au réseau et affichera :
Si un mot de passé est demandé
(WEP/WPA), Pico affichera l’écran suivant:
Après quelques secondes, Pico vous
demandera d’insérer un code WEP/WPA et
affichera sur l’écran le mot de passé d’écran
d’entrée comme suit :
Utiliser la roulette pour vous diriger dans
la liste de mots alphanumériques. Appuyer
sur la roulette pour sélectionner un
caractère.
Remarquez s.v.p. que les codes mot de
passé WEP/WPA sont importants.
Si vous faites une erreur en insérant votre
mot de passe, appuyer sur le bouton BACK
(marche arrière) pour effacer un caractère
Après avoir insérer le dernier caractère
de votre mot de passé, dirigez-vous sur le
mot ‘END’ et appuyer sur la roulette pour
insérer votre code. Pico Wi-Fi devrait
maintenant être connecté correctement à
votre réseau
Pico Wi-Fi vous rappellera
automatiquement le code WEP/WPA pour
votre réseau et pour d’autres que vous avez
utilise auparavant. Il ne vous sera pas
nécessaire d’insérer de nouveau ces codes
dans le future.
Se connecter à votre réseau
< Scan for
network >
My Home Network
Network Ok
Enter WEP key
<END<> 0 1234>
<END<> 0 1234>
Using saved key
Connecting to
Network
Initialising
Network
Revo Pico Wi-Fi
Internet Radio
No Wireless
Networks Found
< Scan for
network >
My Home Network
Network Ok
Enter WEP key
<END<> 0 1234>
<END<> 0 1234>
Using saved key
Connecting to
Network
Initialising
Network
Revo Pico Wi-Fi
Internet Radio
No Wireless
Networks Found
< Scan for
network >
My Home Network
Network Ok
Enter WEP key
<END<> 0 1234>
<END<> 0 1234>
Using saved key
Connecting to
Network
Initialising
Network
Revo Pico Wi-Fi
Internet Radio
No Wireless
Networks Found
< Scan for
network >
My Home Network
Network Ok
Enter WEP key
<END<> 0 1234>
<END<> 0 1234>
Using saved key
Connecting to
Network
Initialising
Network
Revo Pico Wi-Fi
Internet Radio
No Wireless
Networks Found
< Scan for
network >
My Home Network
Network Ok
Enter WEP key
<END<> 0 1234>
<END<> 0 1234>
Using saved key
Connecting to
Network
Initialising
Network
Revo Pico Wi-Fi
Internet Radio
No Wireless
Networks Found
< Scan for
network >
My Home Network
Network Ok
Enter WEP key
<END<> 0 1234>
<END<> 0 1234>
Using saved key
Connecting to
Network
Initialising
Network
Revo Pico Wi-Fi
Internet Radio
No Wireless
Networks Found
< Scan for
network >
My Home Network
Network Ok
Enter WEP key
<END<> 0 1234>
<END<> 0 1234>
Using saved key
Connecting to
Network
Initialising
Network
Revo Pico Wi-Fi
Internet Radio
No Wireless
Networks Found
< Scan for
network >
My Home Network
Network Ok
Enter WEP key
<END<> 0 1234>
<END<> 0 1234>
Using saved key
Connecting to
Network
Initialising
Network
Revo Pico Wi-Fi
Internet Radio
No Wireless
Networks Found
< Scan for
network >
My Home Network
Network Ok
Enter WEP key
<END<> 0 1234>
<END<> 0 1234>
Using saved key
Connecting to
Network
Initialising
Network
Revo Pico Wi-Fi
Internet Radio
No Wireless
Networks Found
< Scan for
network >
My Home Network
Network Ok
Enter WEP key
<END<> 0 1234>
<END<> 0 1234>
Using saved key
Connecting to
Network
Initialising
Network
Revo Pico Wi-Fi
Internet Radio
No Wireless
Networks Found
Scanning... 10
•••••
6 Music
Now tuning...
Station not
available
87.50MHz FM
99.50MHz FM
94.50MHz FM
Preset 1 saved
BBC 7
????????????????
12:03:26
12-08-2006
Setting clock...
Revo Uno
Digital Radio
Welcome to DAB
•••••
1Xtra
txt us...on 0203
Clock not set...
5
Français

Lorsque Pico Wi-Fi est connecté à votre
réseau sans fil, vous pouvez maintenant
sélectionner une station.
Remarquez s.v.p. que vous pouvez quitter
l’écran précédent en appuyant sur le
bouton BACK (marche arrière).
Pico Wi-Fi possède 3 menus principaux :
Stations, Configurer et Media Player.
Pour sélectionner une station de radio,
tourner la roulette jusqu’à ce que le mot
STATIONS apparaisse, ensuite appuyer sur
la roulette.
Maintenant il vous sera donné l’option de
sélectionner une station par localisation
(pays) ou par genre. Tourner la roulette et
appuyer pour sélectionner votre méthode
de recherche préférée.
Si vous choisissez localisation, une liste
alphabétique de pays pour la diffusion de
radio internet vous sera donnée. Tourner
la roulette en avant ou en arrière pour
visualiser la liste de pays. Appuyer sur la
roulette pour sélectionner votre
localisation désirée. Par exemple:
Vous aurez ensuite le choix d’écouter les
genres de stations dans ce pays ou
d’écouter les stations par genre, ex: Pop,
Dance... etc.
Tourner la roulette et appuyer dessus
pour sélectionner, Pico Wi-Fi téléchargera
maintenant la liste de station de votre
choix.
Vous pouvez maintenant défiler la liste des
stations et les choisir en appuyant sur la
roulette.
En sélectionnant « Genre », vous
obtiendrez une liste alphabétique des
types de stations de radio. Tourner la
roulette pour les visualiser.
Appuyer sur la roulette pour sélectionner
votre genre préféré.
Maintenant vous pourrez visualiser toutes
les stations de ce genre, ou les trier
également par localisation (pays)
Sélectionner maintenant votre station à
partir de la liste alphabétique.
Mise à jour des stations
De temps en temps, Pico-Wi-Fi vous
informera qu’il a reçu une liste de mise à
jour des stations. Ceci a lieu
automatiquement et périodiquement,
Assurant que Pico Wi-Fi possède le
dernier annuaire des stations de radio.
Choisir une station tion
<Albania >
16 Stations
Loading 323
Stations
Loading 323
Stations
<Cool FM >
96 kbps WMA
<Cool FM>
96 kbps WMA
Station Update
from Reciva
< Genre >
6537 Stations
< Dance >
323 Stations
< Dance >
323 Stations
<[All Station] >
323 Stations
<Genre >
6537 Stations
<Location >
6537 Stations
<Stations >
<[All Station] >
323 Stations
Scanning... 10
•••••
6 Music
Now tuning...
Station not
available
87.50MHz FM
99.50MHz FM
94.50MHz FM
Preset 1 saved
BBC 7
????????????????
12:03:26
12-08-2006
Setting clock...
Revo Uno
Digital Radio
Welcome to DAB
•••••
1Xtra
txt us...on 0203
Clock not set...
OR
OR
Scanning... 10
•••••
6 Music
Now tuning...
Station not
available
87.50MHz FM
99.50MHz FM
94.50MHz FM
Preset 1 saved
BBC 7
????????????????
12:03:26
12-08-2006
Setting clock...
Revo Uno
Digital Radio
Welcome to DAB
•••••
1Xtra
txt us...on 0203
Clock not set...
6
Français

Fonctionnement général Operation
< On Demand >
< Chart Show >
Start Time
<00:03:03 >
< Live (Real
Audio) >
< On Demand >
< Chart Show >
Start Time
<00:03:03 >
< Live (Real
Audio) >
< On Demand >
< Chart Show >
Start Time
<00:03:03 >
< Live (Real
Audio) >
< On Demand >
< Chart Show >
Start Time
<00:03:03 >
< Live (Real
Audio) >
Changer le volume
Pour changer le volume de Pico Wi-Fi’s,
appuyer sur le bouton VOLUME et faite tourner
la roulette dans le sens des aiguilles d’une
montre, pour augmenter le volume et dans le
sens inverse des aiguilles d’une montre, pour
baisser le volume. Lorsque vous éteindrez Pico
Wi-Fi, le précédent volume qui a été imposé
vous sera rappelé.
Les Radio Internet Prédéfinies
Pico Wi-Fi peut mémoriser 5 radio prédéfinies
en utilisant le contrôle à distance Pico Wi-Fi.
Pour mémoriser la station actuelle, maintenir le
bouton prédéfini (preset) enfoncé (1 - 5) sur
votre contrôle à distance. Pour sélectionner
une station mémorisée, appuyer sur la touche
prédéfinie (preset) correspondante
Retourner au menu principal
Vous devez vous rendre au menu principal Pico
Wi-Fi à chaque fois en appuyant de manière
répétitive sur le bouton « en arrière » (BACK)et
en repassant par les articles du menu
précédents.
Demander une station
Si vous désirez lire une station de radio qu’il
n’est pas possible de lire actuellement dans la
liste des stations de Pico Wi-Fi, vous pouvez
vous rendre sur le site Web de Reciva
http://www.reciva.com/
OR
Programme sur demande
Quelque station de radio permettent
d’écouter le contenu de différentes
manières; par exemple permettre
d’écouter des spectacles à la radio qui ont
été déjà diffuses, connu comme « sur
Demande » ou « Ecoute encore ».
Choisir entre une émission en direct or
une émission sur demande, en faisant
simplement tourner la roulette et en
appuyant dessus pour sélectionner.
Si vous sélectionner « Sur demande », une
liste de shows disponible en Lecture
s’affichera.
Faire tourner la roulette jusqu’à ce que
votre choix apparaisse sur l’écran LCD et
appuyer sur la roulette pour sélectionner.
Quelque station de radio vous permette de
changer rapidement de station à travers
des diffusions sur demande, en faisant
rouler la roulette dans le sens des
aiguilles d’une montre et en appuyant sur
Lecture.
Menu Audio
Le menu audio de Pico Wi-Fi est accessible
(en modes IR et FM) en appuyant et
maintenant enfoncé la roulette pendant 2
secondes.
Ajuster la basse + les aigus
Il est possible d’ajuster la basse et les aigus
de Pico en imposant vos propres préférences
audio. Chaque changement sera retenu en
mémoire pour des sections futures.
Touches de Media Player
Généralement, il est plus pratique d’utiliser
le contrôle à distance de Pico Wi-Fi pour
accéder aux fonctions de Media player. Ceci
dit, il est possible d’accéder à ces fonctions
à travers le menu audio en sélectionnant
simplement ‘les touches MP’ pour lister les
différentes fonctions possibles. Pour plus
d’information sur l’utilisation des fonctions
de Pico Media player, rendez-vous page 9.
Réinitialiser Pico Wi-Fi
Dans l’hypothèse que Pico Wi-Fi tombe e
panne ou se bloque et ne répond plus
lorsqu’on appuie sur les touches, il est
possible d’exécuter deux différentes sortes de
‘reset’(réinitialisation) pour lui rendre la vie.
Réinitialisation du logiciel
Exécuter une ‘réinitialisation du logiciel’
effacera toute panne du logiciel, en retenant
les codes WEP/WPA ainsi que les
installations. Pour exécuter une réinitialisation
du logiciel, vos avez besoin de localiser le
bouton réinitialisation situé au dos de
l’appareil. (voir page 4). Vous aurez également
besoin d’un stylo ou d’une trombone pour
accéder au bouton.
Système de Réinitialisation
Un système de réinitialisation peut être actif à
partir du menu de configuration de Pico.
Exécuter un système de réinitialisation
réinitialisera complètement la mémoire de
Pico , en effaçant tous les codes WEP/WPA
ainsi que installations. Ceci ramènera Pico à
son système d’installation de défaut.
7
Français

Mode de fonctionnement FM
Pour écouter les stations de radio FM,
allumer Pico et appuyer sur le bouton
IR/FM.
Si c’est la première fois que Pico est en
mode FM, il commencera au début de la
gamme de fréquence FM. Autrement, la
dernière fréquence de la station FM
s’affichera.
Pour parcourir la gamme de fréquence
FM, tourner la roulette de Pico dans le
sens des aiguilles d’une montre ou dans le
sens inverse. Pour rechercher la prochaine
station active, appuyer sur la roulette.
Prédéfinir les stations FM
Pico peut mémoriser 5 stations FM
prédéfinies en utilisant le contrôle à
distance de Pico Wi-Fi.
Pour mémoriser la fréquence actuelle,
appuyer et maintenir enfoncé un des
boutons prédéfinis (1- 5) sur votre contrôle
à distance.
Pour sélectionner une station de radio FM
mémorisée, appuyer simplement sur la
touché prédéfinie correspondante.
Scanning... 10
•••••
6 Music
Now tuning...
Station not
available
87.50MHz FM
99.50MHz FM
94.50MHz FM
Preset 1 saved
BBC 7
????????????????
12:03:26
12-08-2006
Setting clock...
Revo Uno
Digital Radio
Welcome to DAB
•••••
1Xtra
txt us...on 0203
Clock not set...
1
1
IR/FM
Scanning... 10
•••••
6 Music
Now tuning...
Station not
available
87.50MHz FM
99.50MHz FM
94.50MHz FM
Preset 1 saved
BBC 7
????????????????
12:03:26
12-08-2006
Setting clock...
Revo Uno
Digital Radio
Welcome to DAB
•••••
1Xtra
txt us...on 0203
Clock not set...
Scanning... 10
•••••
6 Music
Now tuning...
Station not
available
87.50MHz FM
99.50MHz FM
94.50MHz FM
Preset 1 saved
BBC 7
????????????????
12:03:26
12-08-2006
Setting clock...
Revo Uno
Digital Radio
Welcome to DAB
•••••
1Xtra
txt us...on 0203
Clock not set...
Scanning... 10
•••••
6 Music
Now tuning...
Station not
available
87.50MHz FM
99.50MHz FM
94.50MHz FM
Preset 1 saved
BBC 7
????????????????
12:03:26
12-08-2006
Setting clock...
Revo Uno
Digital Radio
Welcome to DAB
•••••
1Xtra
txt us...on 0203
Clock not set...
Scanning... 10
•••••
6 Music
Now tuning...
Station not
available
87.50MHz FM
99.50MHz FM
94.50MHz FM
Preset 1 saved
BBC 7
????????????????
12:03:26
12-08-2006
Setting clock...
Revo Uno
Digital Radio
Welcome to DAB
•••••
1Xtra
txt us...on 0203
Clock not set...
M-Port
Utiliser M-Port
M-Port de Revo permet de se connecter
facilement et rapidement à un iPod® (ou
autre lecteur MP3 ou sources externes de
sons)
En utilisant la connexion fournit, Pico™
Se transforme en un système de haut
parleur digital de haute qualité.
Connecter une extrémité du fil audio au
casque radio (ou sortie auxiliaire) connecteur
de votre appareil, puis connecter l’autre
extrémité au M-Port, sur le coté de Pico.
L’écran LCD de Pico affichera maintenant les
mots “M-Port Actif”.
Vous devez ajuster le volume sur les deux
périphériques sur Pico lui-même pour
obtenir la meilleur qualité de son possible.
6 Music
•••Volume 18•••
M-Port Active
Configuration du réseau
Il vous permet de parcourir des connexions à
un autre réseau sans fil, ou de configurer
manuellement les paramètres du réseau.
Vous pouvez aussi choisir de rendre actif le
signal d’avertissement sur la lenteur du réseau,
apparaissant lorsque votre réseau sans fil est
particulièrement lent.
Version
Ceci affichera de telles informations comme le
numéro de série de votre appareil ou le numéro
de version des programmes/logiciels. Cette
information doit être demandée lorsqu’il s’agit
de problèmes concernant le support technique.
Mise à jour du micro logiciel
Utiliser ceci pour vérifier s’il y a des mises à
jour pour micro logiciel disponibles pour votre
radio Pico WI-fi. Pico vérifiera et vous le
signalera lorsqu’il y en aura.
Vous pouvez ensuite choisir de commencer le
téléchargement d’un micro logiciel ou non. Une
mise à jour de micro logiciel peut prendre
plusieurs minutes, n’éteignez pas Pico Wi-Fi
jusqu’à ce que cette procédure ait été
complétée. Si vous le faite, vous pourriez
encourir des dommages permanents.
Langue
Cette option vous permet de changer la langue
d’affichage de votre Pico. Les langues fournies
disponibles sont Anglais, Français, Allemand,
Italien, Norvégien, Danois, Hollandais,
Portugais, Espagnol, Suédois, et Finlandais.
Système de réinitialisation
Voir page 7 pour détails.
Enregistrer
Il affichera un code qui pourra être utilise
pour enregistrer votre radio sur le portail des
clients Reciva : http://www.reciva.com/
Configurer le Menu
8
Français
Other manuals for Pico Wi-Fi
1
Table of contents
Languages:
Other Revo Radio manuals