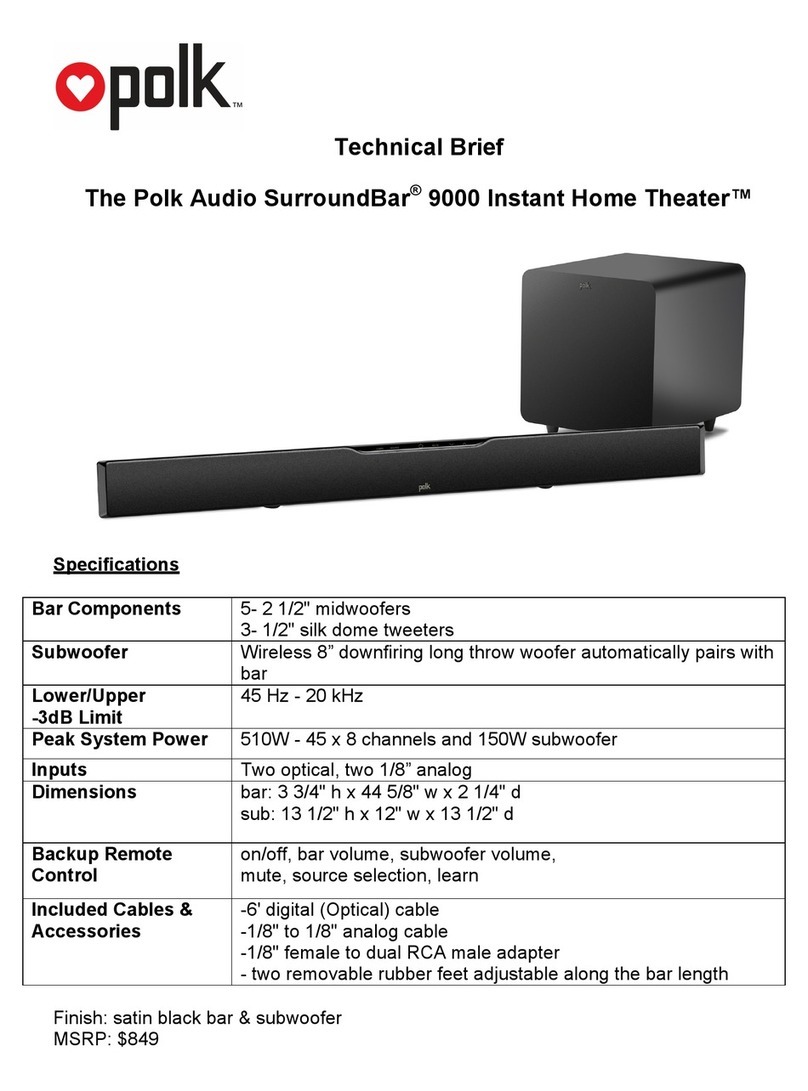
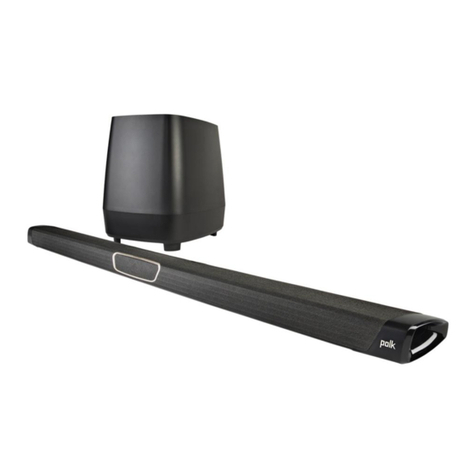
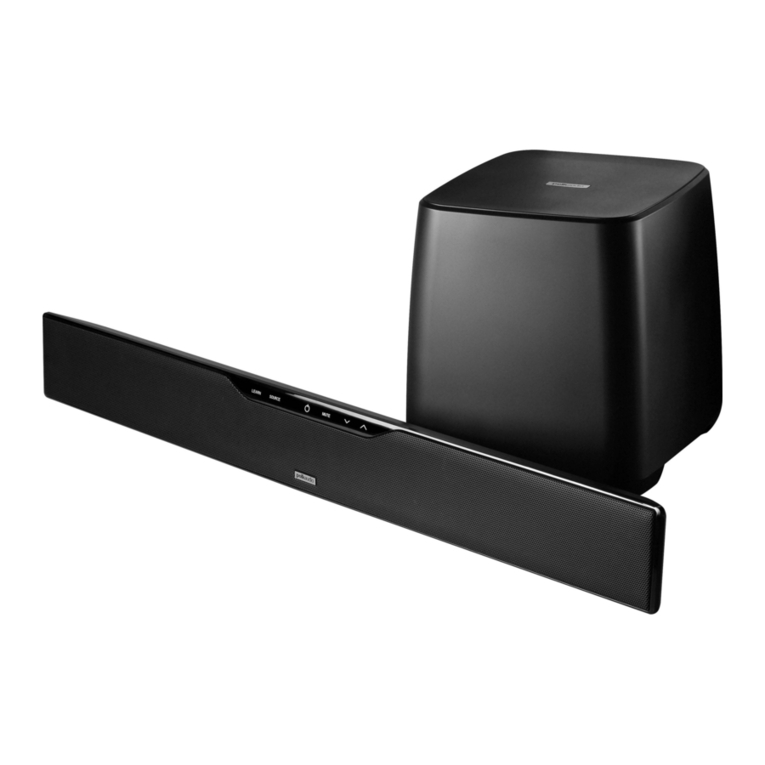
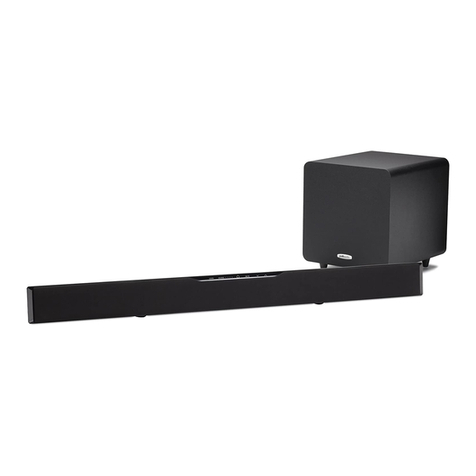
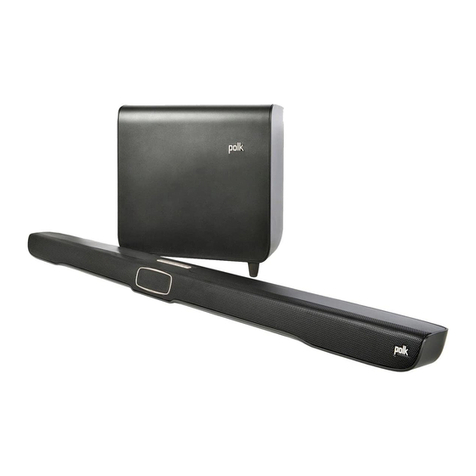
Polk Audio Surroundbar 9000 User manual

ENGLISH
FRANÇAIS
ESPAÑOL
surroundbar®
9000
instant
home theater

2 Po k Audio Customer Service 800-377-7655 (Outside USA & Canada: 410-358-3600)
ENGLISH
IMPORTANT SAFETY INSTRUCTIONS
This produ t was designed and manufa tured to meet stri t quality and safety standards.
There are, however, some installation and operation pre autions whi h you should
be parti ularly aware of.
1. Read Instru tions. All the safety and operating instru tions should
be read before the system is operated.
2. Retain Instru tions. The safety and operating instru tions should
be retained for future referen e.
3. Heed Warnings. All warnings on the applian es and in the operating
instru tions should be adhered to.
4. Follow Instru tions. All operating and use instru tions should be followed.
5. Cleaning. Unplug the applian e from wall outlet before leaning. Do not
use liquid leaners or aerosol leaners. Use a damp loth for leaning.
6. Atta hments. Do not use atta hments not re ommended by the produ t
manufa turer as they may ause hazards.
7. Water and Moisture. Do not use these applian es near water‹for example,
near a bath tub, washbowl, kit hen sink, or laundry tub, in a wet basement,
or near a swimming pool, and the like.
8. A essories. Do not pla e these applian es on an unstable art, stand, tripod, bra ket,
or table. The audio/video produ ts may fall, ausing serious injury to a hild or adult,
and serious damage to the produ ts. Use only with a art, stand, tripod, bra ket,
or table re ommended by the manufa turer, or sold with the applian es. Any mounting
of the applian es should follow the manufa turer’s instru tions, and should use mounting
a essories re ommended by the manufa turer.
9. Ventilation. Slots and openings in the abinet are provided for ventilation and to ensure
reliable operation of the applian es and to prote t them from overheating, and these openings
must not be blo ked or overed. The openings should never be blo ked by pla ing the produ ts
on a bed, sofa, rug, or other similar surfa e. This produ t should never be pla ed near or over
a radiator or heat register. This produ t should not be pla ed in a built-in installation su h
as a book ase or ra k unless proper ventilation is provided or the manufa turer’s instru tions
have been adhered to.
10. Power Sour es. This produ t should be operated only from the type of power sour e
indi ated on the marking labels. If you are not sure of the type of power supply to your
home, onsult your applian e dealer or lo al power ompany.
11. Grounding or Polarization. This produ t is equipped with polarized alternating- urrent
line plugs (plugs having one blade wider than the other). This plug will fit into the power
outlet only one way. This is a safety feature. If you are unable to insert the plug fully into
the outlet, try reversing the plug. If the plug should still fail to fit, onta t your ele tri ian
to repla e your obsolete outlet. Do not defeat the safety purpose of the polarized plug.
12. Power Cord Prote tion. Power-supply ord should be routed so that it is not likely to be walked
on or pin hed by items pla ed upon or against it, paying parti ular attention to ords at plugs,
onvenien e re epta les, and the point where they exit from the applian es.
13. Lightning. For added prote tion for this audio/video produ t during a lightning storm,
or when it is left un-attended and unused for long periods of time, unplug it from
the wall outlet and dis onne t the antenna or able system. This will prevent damage
to the produ t due to lightning and power-line surges.
14. Power Lines. An outside antenna system should not be lo ated in the vi inity of overhead
power lines or other ele tri light or power ir uits, or where it an fall into su h power lines
or ir uits. When installing an outside antenna system, extreme are should be taken to keep
from tou hing su h power lines or ir uits as onta t with them might be fatal.
15. Overloading. Do not overload wall outlets and extension ords as this an result
in a risk of fire or ele tri sho k.
16. Obje t and Liquid Entry. Never push obje ts of any kind into this produ t through openings,
as they may tou h dangerous voltage points or short out parts that ould result in a fire
or ele tri sho k. Never spill liquid of any kind on this audio/video produ t.
17. Servi ing. Do not attempt to servi e this produ t yourself, as opening or removing
overs may expose you to dangerous voltage or other hazards. Refer all servi ing
to qualified servi e personnel.
18. Damage Requiring Servi e. Unplug this produ t from wall outlets and refer servi ing
to qualified servi e personnel under the following onditions:
a.When the power supply ord or plug is damaged.
b.If liquid has been spilled, or obje ts have fallen into the produ t.
.If the produ t has been exposed to rain or water.
d.If the produ t does not operate normally by following the operating
instru tions. Adjust only those ontrols that are overed by the operating
instru tions, as an improper adjustment of other ontrols may result
in damage and will often require extensive work by a qualified te hni ian
to restore the produ t to its normal operation.
e.If the produ t has been dropped or the abinet has been damaged.
f.When the produ t exhibits a distin t hange in performan e this indi ates
a need for servi e.
19. Repla ement Parts. When repla ement parts are required, be sure the servi e
te hni ian has used repla ement parts spe ified by the manufa turer or that
the parts have the same hara teristi s as the original part. Unauthorized
substitutions may result in fire, ele tri sho k or other hazards.
CAUTION: Danger of EXPLOSION if battery is in orre tly repla ed.
Repla e only with the same or equivalent type. (CR2025)
WARNING: Do not expose batteries or battery pa k to ex essive
heat su h as sunshine, fire or the like.
20. Safety Che k. Upon ompletion of any servi e or repairs to this produ t,
ask the servi e te hni ian to perform safety he ks to determine that
the produ ts are in proper operating ondition.
21. Carts and Stands. The applian es should be used only with a art or stand
that is re ommended by the manufa turer. An applian e and art ombina-
tion should be moved with are. Qui k stops, ex essive for e, and uneven
surfa es may ause the applian e and art ombination to overturn.
Use aution when moving the art/apparatus ombination to avoid
injury from tip-over.
22. This produ t is not intended for use outdoors.
The CAUTION marks shown here are lo ated on the ba k of your SurroundBar®Speaker System
CAUTION: To prevent ele tri sho k, mat h
wide blade of plug to wide slot, insert fully.
CAUTION: No naked flame sour es, su h as
andles, should be pla ed on the apparatus.
CAUTION: The manufa turer is not responsible for any radio or TV interferen e aused
by unauthorized modifi ations to this equipment. Su h modifi ations ould void the user
authority to operate the equipment.
Ra iation Exposure Statement
This devi e omplies with FCC radiation exposure limits set forth for an un ontrolled
environment and it also omplies with Part 15 of the FCC RF Rules.
This equipment should be installed and operated with a minimum distan e of 20 entimeters
between the radiator and your body.
Class B Emissions Limits: This Class B digital apparatus meets all requirements
of the Canadian Interferen e—Causing Equipment Regulations.
Operation
This equipment omplies with Part 15 of the FCC Rules and Industry Canada RSS-210.
Operation is subje t to the following two onditions:
1) This devi e may not ause interferen e, and
2) This devi e must a ept any interferen e, in luding interferen e
that may ause undesired operation of the devi e.
The devi e meets the exemption from the routine evaluation limits in se tion 2.5 of RSS 102
and omplian e with RSS-102 RF exposure, users an obtain Canadian information
Pro uct Disposal: Certain international, national and/or lo al laws and/or regulations
may apply regarding the disposal of this produ t. For further detailed information, please
onta t the retailer where you pur hased this produ t or the Polk Importer/Distributor
in your ountry. A listing of Polk Audio Importer/ Distributors an be found on the Polk
website www.polkaudio. om or by onta ting Polk Audio at: 5601 Metro Drive,
Baltimore, Maryland 21215, USA. Phone: +1-410-358-3600; in California: 1-800-377-7655.
Note:
This equipment has been tested and found to omply with the limits for a Class B digital devi e, pur-
suant to part 15 of the FCC Rules. These limits are designed to provide reasonable prote tion against
harmful interferen e in a residential installation. This equipment generates, uses and an
radiate radio frequen y energy, and, if not installed and used in a ordan e with the instru tions,
may ause harmful interferen e to radio ommuni ations. However, there is no guarantee that inter-
feren e will not o ur in a parti ular installation. If this equipment does ause harmful interferen e
to radio or television re eption, whi h an be determined by turning the equipment off and on,
the user is en ouraged to try to orre t the interferen e by one or more of the following measures:
Reorient or relo ate the re eiving antenna. In rease the separation between the equipment and
re eiver. Conne t the equipment into an outlet on a ir uit different from that to whi h the re eiver
is onne ted. Consult the dealer or an experien ed radio/TV te hni ian for help.

PLEASE TAKE INVENTORY
Please check to ensure you have everything in your Polk®
SurroundBar®9000 Instant Home Theater®(IHT) carton.
Inside, you should find:
SurroundBar
Subwoofer
Remote Control (Battery Included)
Subwoofer Power Cord
24V Power Supply
6' Digital (Optical) Cable
1/8" to 1/8" analog cable
1/8" to RCA adapter
Quick Start Guide
Owner’s Manual
Online Registration Card
Important Note: If anything is missing or damaged, or if your
Polk Audio SurroundBar 9000 IHT fails to operate, please notify
your dealer immediately. We recommend keeping your original
carton and packing materials in case you need to ship the unit
in the future.
ABOUT YOUR SURROUNDBAR 9000 IHT
Thank you for choosing the SurroundBar 9000 IHT from
Polk Audio. You’re about to discover how the legendary
Polk Audio sound makes watching TV and movies so much
more exciting. Using a single bar loudspeaker and a wireless
subwoofer, the SurroundBar 9000 IHT produces a wide
soundstage and rich, full sound. Polk®Digital Logic®offers
spectacular performance and convenience. And there’s
even more about the SurroundBar 9000 IHT you’ll enjoy:
Sleek, shallow design (just 2 1/4" deep) complements
today’s shallower contemporary TVs.
SmartBar™ programming enables you to program the
SurroundBar to your TV’s original IR remote control
(Backup remote control included).
Enjoy a rich, enveloping listening experience, better than
any built-in TV speakers, thanks to Polk Digital Logic with
SDA®Surround applied to Front and Surround channels.
Discrete amplification of all 8 channels with electronic
crossovers means each driver is tailored for better efficiency,
lower distortion and better dynamics, closely matching
that of a full-range system.
Optimized Center Array creates a more realistic center
channel experience for greater intelligibility of vocals and
mid-range clarity. The array also creates greater SPL,
dynamic range and better off-axis response.
Play all your digital-encoded source material: Dolby®
Digital 5.1 and DTS 5.1.
SRS TruSurround HD4™creates a high quality, feature-rich
surround sound experience from front-facing speaker
configurations, complete with rich bass, high frequency
detail and clear dialog.
Thunderous bass anywhere in the room thanks
to a high efficiency wireless subwoofer, which
can be placed up to 50' away.
Dual tuned ports on SurroundBar are designed and located
to provide optimum blending of mid-range and subwoofer
whether the bar is wall- or shelf- mounted.
Energy Star®certified.
6' Optical Cable included for the quickest, easiest hookup
from your TV to the SurroundBar 9000.
Built-in keyhole slots for wall-mounting ensure a wide
range of placement options.
Simple, touch-sensitive keypad controls on the bar include
programming function for your existing remote control.
INSIDE YOUR SURROUNDBAR 9000 IHT CARTON:
Remote Control
(Battery Included)
1/8" to 1/8" Analog Cable
1/8" to RCA Adapter
24V Power Supply
Customer Service Hours of Operation: Monday-Friday, 9AM-5:30PM EST po kcs@po kaudio.com 3

BAR CONTROLS
FRONT PANEL:
1. Learn—Puts the bar into “learning mode” so
you can program it to respond to commands
from your existing remote control.
2. Source—Changes which input source you
are listening to.
LED—Blue light indicates which Source has
been selected (see Source LED Guide above).
Source 1 or 2 LEDs will light green if Dolby
Digital signal is being decoded or orange
if DTS is being decoded.
3. Power ( )—Turns on the bar or puts
it in standby mode.
LED—A light that shines green, orange
or red to indicate operating status.
4. Mute—Mutes and unmutes the sound
coming from the SurroundBar 9000 IHT,
indicated by green slow flash.
5. Volume Up and Down ( / )—Adjusts
the volume of the SurroundBar 9000 IHT.
BACK PANEL:
6. Power Switch—Turns the bar on or off,
but you can leave it on all the time.
7. Power Connection—The bar power supply connects here.
8. Audio Inputs (Source 1, 2, 3 or 4)—Where you connect
your TV (or other sources) to the SurroundBar 9000.
Use the 6' optical cable provided (Source 1 or 2 are digital)
or 1/8" analog cable provided (Source 3 or 4 are analog).
9. SYNC—The SYNC button ensures the subwoofer
and bar are communicating. (See “SYNCING THE
BAR AND WIRELESS SUBWOOFER” on page 7.)
BAR PO ER ( ) LED
NORMAL OPERATING MODE:
Green Steady—Power is on; all is well.
Red Steady—The bar is in standby mode.
Green Two Blinks—A remote control or keypad
operation signal is received successfully.
Green Slow Blinking—System is muted.
Green Fast Blinking (After pressing volume up
button)—You have reached the maximum volume.
Green Fast Blinking (At power up)—The bar and
subwoofer have established a wireless connection.
BAR PO ER ( ) LED
LEARNING MODE: (See page 9 for instructions.)
Orange Blinking—The bar is in learning mode.
Orange Steady—The bar is in learning mode
and a function has been selected.
Green Blinking—The bar has successfully
learned a remote control command.
Red Blinking—The bar has failed to learn
a remote control command.
Red and Orange Blinking—Learned IR codes
have been successfully erased.
SOURCE LED
Green Blinking—Dolby Digital source
recognized (Source 1 and 2 only).
Green Steady—Dolby Digital source received
and is being decoded (Source 1 and 2 only).
Blue Steady—PCM or analog source received.
Orange Blinking—DTS source received
and is recognized (Source 1 and 2 only).
Orange Steady—DTS source received
and is being decoded (Source 1 and 2 only).
132W
123
45
67 8 9
SOURCE LED GUIDE
FRONT
BACK
SOURCE 1
SOURCE 2
SOURCE 3
SOURCE 4
4 Po k Audio Customer Service 800-377-7655 (Outside USA & Canada: 410-358-3600)

SUB OOFER CONTROLS
1. Power Switch—Turns the wireless subwoofer on
or off, but you can leave it on all the time if you wish.
2. Power Connection—The subwoofer power
cord connects here.
THE STATUS LIGHT ON THE IRELESS
SUB OOFER INDICATES THE FOLLO ING:
hen light shines green:
a. Green Steady—The bar and subwoofer are connected.
b. Green Slow Blinking—The subwoofer is searching
for the bar.
c. Green Fast Blinking—The subwoofer is in the
process of connecting with the bar.
hen light shines red:
a. Red Steady—The subwoofer is in standby mode.
b. Red Blinking—The subwoofer is in protection mode.
REMOTE CONTROL
1. Power ( )—Turns on the bar or puts
it in standby mode.
2. Mute—Mutes and unmutes the sound
coming from the SurroundBar 9000 IHT.
3. Source 1, 2, 3 or 4—Changes which input
source you are listening to.
4. Volume Up and Down ( + / –)—Adjusts
the master volume of the SurroundBar
9000 IHT system.
5. SUB Volume Up and Down ( + / –)
Adjusts the volume of the subwoofer.
Specifications
Dimensions
SurroundBar 3 3/4" H x 44 1/2" W x 2 1/4" D
(9.53 cm x 113.03 cm x 5.72 cm)
Subwoofer 13 1/2" H x 12" W x 13 1/2" D
(34.29 cm x 30.48 cm x 34.29 cm)
Weight
SurroundBar 8 lbs (3.63 kg)
Subwoofer 18.2 lbs (8.26 kg)
Power Requirements
SurroundBar 24V, 5 A
Subwoofer 100V - 240V~50Hz - 60Hz, 65W
Model SurroundBar 9000 Instant Home Theater
Remote Battery CR2025
12
Customer Service Hours of Operation: Monday-Friday, 9AM-5:30PM EST po kcs@po kaudio.com 5
12
3
45

HERE TO LOCATE YOUR BAR
FOR THE BEST SOUND
It’s easy. The bar comes with rubber feet already attached,
so it will sit securely on any flat surface. Just center the bar
under your TV screen. If your TV is housed in a media center,
you can place the bar above the TV.
If your TV is wall mounted, the bar can mount right beneath
it. The bar has built-in keyhole slots that make it easy.
Note: The rubber feet are detachable and may be removed
entirely (for wall-mounting the bar) or moved along the bottom
surface of the bar, depending upon your installation.
HERE TO LOCATE YOUR SUB OOFER
FOR THE BEST SOUND
Your wireless subwoofer is really easy to place and can
go just about anywhere in the room. Plus you don’t have
to worry about connecting wires, because the only wire
you have to plug in is the power cord. And that’s it.
Here’s a little trick: If you place
your subwoofer in a corner of
your room, it will reinforce the
subwoofer’s output, making it
sound louder.
Overall Dimensions
1. 3 3/4" H (9.53 cm)
2. 44 1/2" (113.03 cm)
Keyhole Slots
3. 24 1/2" (62.23 cm)
Top of Bar to Keyhole Slots
4. 1 11/16" (4.29 cm)
Note: If you wall mount your SurroundBar, ensure that your
wall anchors secure properly into the wall and that they can
bear the weight of the SurroundBar, which is 8 lbs (3.63 kg).
SOURCE
MUTE
LEARN
SOURCE
MUTE
LEARN
Shelf mounted bar sits in front of TV Wall mounted bar
6 Po k Audio Customer Service 800-377-7655 (Outside USA & Canada: 410-358-3600)
1
2
3
4

HO TO CONNECT YOUR BAR
This is really easy too. You likely have many sources for your
audio signal: your TV, your DVD player, or a cable/satellite box.
The bar is able to accept audio from up to four different sources.
The simplest approach is to connect the optical audio output of
your TV to the optical input on the back of the bar. This method
will provide the highest quality audio regardless of whether you
are watching TV or watching your favorite DVD.
If your TV does not have an optical output, you can use the optical
output from your DVD player or your cable/satellite box to connect
to the optical input on the bar. Then simply use the other bar
inputs for your other audio sources.
SYNCING THE BAR AND IRELESS SUB OOFER
The SurroundBar 9000 bar and wireless subwoofer come
from the factory preset to work together. If the wireless
subwoofer stops receiving an audio signal, follow these
instructions to re-establish the connection.
1. Turn off the subwoofer’s AC Mains switch.
2. Press and hold the SYNC button on the back
of the bar for three (3) seconds.
3. The LED on the back of the bar will blink,
indicating that the bar and the subwoofer
are ready to be connected.
4. Turn on the subwoofer’s AC Mains switch. When
the subwoofer LED turns solid green the bar
and subwoofer are connected and ready to use.
HO TO CONNECT YOUR SUB OOFER
Your subwoofer receives a wireless audio signal from the bar,
so all you need to do is plug in the power cord and make
sure the main power switch is ON.
L
R
ANALOG
AUDIO OUTPUT
DIGITAL OPTICAL
AUDIO OUTPUT
TV or Cable/Sat Box
SurroundBar 9000
Customer Service Hours of Operation: Monday-Friday, 9AM-5:30PM EST po kcs@po kaudio.com 7
Note: Remove the
protective cap prior
to inserting cable.

HO TO OPTIMIZE THE SOUND
HEN TV SPEAKERS ARE ON
You should hear sound from the bar. If you don’t, turn up
the volume on the bar using its volume control buttons.
If your bar is connected to your TV, there’s a very good chance
your TV speakers are also playing. It’s impossible to give specific
instructions on how to turn off the speakers for every TV, but
here’s a way to do it that covers many of the TVs out there.
1. On your TV remote control, find a “menu” or “setup” button.
2. Press this button. You should see an on-screen menu.
3. Next, look for an option to control audio functions
and select it.
The setting to turn off your TV’s internal speakers should be here.
If you can’t turn off your TV internal speakers, don’t worry.
Your SurroundBar 9000 IHT will make your TV sound much
better. To enjoy the best performance from your bar, you’ll
want it to play louder than your TV. Use the following steps
to adjust the volume balance between your TV and the bar:
1. If necessary, program your bar to respond to the volume
up and down control commands of your TV remote.
(See “HOW TO SETUP A REMOTE CONTROL FOR
YOUR SURROUNDBAR 9000 IHT” on page 9.)
2. Turn your TV volume all the way down using the control
buttons on your TV.
3. Then, using the volume keys on your bar, set the volume
to a normal listening level (do not use the remote control).
After you make these adjustments, your SurroundBar 9000 IHT
should always be louder than your TV speakers. Then use the
TV remote control to adjust the volume as you normally do.
FINE TUNING YOUR SUB OOFER VOLUME LEVEL
The next thing you’ll want to do is adjust the subwoofer
to blend with your bar. This will ensure the system produces
the best sound.
To set the subwoofer’s volume, play a variety of source material—
some music, a movie sound track with great special effects,
a movie chapter or a part of a concert in which people are
speaking. Adjust the volume until what you hear sounds
natural to you in your normal viewing location.
8 Po k Audio Customer Service 800-377-7655 (Outside USA & Canada: 410-358-3600)

Customer Service Hours of Operation: Monday-Friday, 9AM-5:30PM EST po kcs@po kaudio.com 9
2
LED
3
5
4
LED
VOL
SOURCELEARN
MUTE
LED
Press and hold “LEARN” for 2 seconds, or until LED
blinks orange, then release the “LEARN” button.
1
The SurroundBar is turned on and the LED is solid green.
And you have sound coming from the bar.
Hold TV remote 1' - 2' from SurroundBar.
Press and release Volume Up “ .”
LED turns solid orange.
Blinks orange
Solid orange
LED blinks with
each button press
LED
LED blinks green,
then turns solid green
Tap “Volume Up” button on your TV’s remote control
4 - 8 times, once per second. Tap, do not hold.
6
VOL
When the LED blinks green quickly for 3 seconds,
the command has been learned. The LED will
become solid green.
SOURCE
MUTE
LEARN
1' - 2'
HO TO SET UP A REMOTE CONTROL
FOR YOUR SURROUNDBAR IHT
SMARTBAR™PROGRAMMING NOTE:
For your SurroundBar to respond to your remote control, you
MUST FIRST program the bar to respond to your television’s
original IR (Infra-Red) remote. An RF (Radio Frequency)
remote will not work. Other remotes (cable, satellite) will
work only after you have programmed the bar to respond
to the TV’s IR remote.
Programming Instructions: Your SurroundBar IHT is currently
programmed to respond to the remote control that is included
with the product. However, we strongly recommend programming
the SurroundBar to also respond to your existing remote control
using the steps illustrated below. This will enable you to operate
all of your components using a single remote control. hile
programming the SurroundBar, ignore anything that
may be displayed on the TV screen.
Example: To teach your bar the “Volume Up”
command of your remote control:
Verify command works.
Repeat steps 1-6 to program “Volume Down” ( ), Source,
Mute and Power buttons ( ).
Note: If your bar fails to learn certain IR remote codes, the power
LED will blink red. Try erasing any previously programmed codes
(see below) and carefully repeat steps 1-6 above.
Code Erasing Procedure: If you have programmed your
SurroundBar IHT to respond to a remote control and you no longer
want it to do so, erase the codes by pressing the LEARN key for
about two seconds while the unit is in standby mode (power LED
is red). You’ll know that previously learned codes have been
successfully erased when the power LED blinks orange twice.
Note: This procedure removes ALL of your bar’s remote control
programming. If you only need to change the programming for
some of the bar buttons, follow the six steps in the sequence
previously described to redo any previous programming.
The SurroundBar will continue to respond to the provided credit
card remote control.
SUB VOLUME CONTROL ON THE BAR
While unit is on and LED is solid green.
1. Tap LEARN once, LED ( ) turns orange.
2. To adjust sub volume, tap up ( ) or down ( ).
3. To return to master volume, tap LEARN again,
LED ( ) turns green.
NOTE: Bass can also be adjusted with included remote control.

10 Po k Audio Customer Service 800-377-7655 (Outside USA & Canada: 410-358-3600)
TROUBLESHOOTING
The bar does not power on.
Ensure you have plugged the power supply
into a live wall outlet.
Ensure that all components of the power
supply are connected properly.
Ensure the power supply is properly connected
to the bar power input.
Ensure the rear panel power switch is in the “ON” position.
The subwoofer does not power on.
Ensure the subwoofer is plugged into a live wall outlet.
Ensure the rear panel power switch is in the “ON” position.
No sound from the bar.
Check that the TV or cable box is providing a signal.
If necessary, check using an alternate source.
Check that the bar is receiving power and is turned on.
Turn up the volume of the bar.
Check the input cables to make sure they
are connected securely.
Turn up the volume of your television or cable box.
Check mute status: Is the bar status light slowly blinking
green? If so, press the MUTE button on the bar.
No sound from the subwoofer.
See section “Subwoofer does not power on.”
Turn up the subwoofer volume using the remote control.
Is the subwoofer status indicator blinking green? If so,
the bar and subwoofer’s wireless connection has been
lost. Turn off both the bar and subwoofer. Then turn them
back on to re-establish communication. If this does not
fix the issue, refer to the section “SYNCING THE
BAR AND WIRELESS SUBWOOFER,” on page 7.
The sound coming from the bar is distorted.
Try turning down the volume of your audio
source, if possible.
Audio processing (see FAQ’s on page 11)—
there may be audio processing occurring prior
to reaching the bar. Disable this processing.
The included remote control won’t work.
Ensure the battery’s protective plastic tab
has been removed.
Replace the battery (CR2025).
Bass output is not loud enough.
Turn up the subwoofer’s volume using the remote control.
Place the subwoofer closer to a corner of the room.
Move subwoofer closer to viewing location within the room.
The bar won’t learn my remote control commands.
Carefully follow the programming instructions
on the previous page of this manual.
Hold the remote steady and 1-2 feet
from the front of the bar.
Quickly “tap” the button on your existing
remote until the status LED blinks green.
Note: The bar learns almost all IR commands,
but some IR protocols cannot be programmed.
The volume of my television speakers gets louder
than my SurroundBar 9000 system over time.
Turn off your TV speakers per the instructions
on page 8 of this manual.
When the remote control volume button is held down,
your television may change volume levels faster than
the bar. Use the buttons on the bar to adjust the volume
of the bar to the correct balance with the TV speakers.
The subwoofer’s output is intermittent,
or sounds weak or is distorted.
The wireless subwoofer could be too far away
from the bar to receive a sufficiently strong signal.
Try moving the subwoofer closer.

Customer Service Hours of Operation: Monday-Friday, 9AM-5:30PM EST po kcs@po kaudio.com 11
FAQ’S (FREQUENTLY ASKED QUESTIONS)
My TV does not have an optical output.
How do I connect my audio?
You have several options for connecting your audio:
Use the optical output of your source unit (cable/satellite box,
DVD player, etc.) and connect directly to the SurroundBar 9000
using the supplied optical cable.
Use the 1/8" (3.5mm) analog / headphone output of your TV
(if available) and connect directly to the SurroundBar 9000
using the supplied 1/8" (3.5mm) to 1/8" (3.5mm) analog cable.
Use the RCA audio outputs (white/red pair) on your TV
(if available) and connect directly to the SurroundBar 9000
using the supplied 1/8" (3.5mm) to 1/8" (3.5mm) analog
cable and 1/8" (3.5mm) to RCA adapter.
hat if my provided optical cable is too short?
We did our best to provide a cable of adequate length;
however, there might be a few setup instances in which
the cable may be too short. If that is your situation,
your local electronics store will have cables that
meet your required length.
My audio sounds strange and distorted.
Your SurroundBar 9000 requires a clean, unaltered stereo
or Dolby Digital or DTS signal for proper audio performance.
If the sound from your SurroundBar 9000 is strange
or distorted, then check the audio menus of whatever
source(s) are connected to your SurroundBar 9000
and make sure any audio processing is turned off.
hy can’t I successfully program the SurroundBar 9000
to respond to my remote control?
There are many remote control formats, and we have done
our best to make the SurroundBar 9000 compatible with the
most popular brands. However, there are likely some cases
in which the bar will not be able to learn your remote codes.
In this case, please use the remote control provided with
the SurroundBar 9000 product or try a different universal
remote control.
Note: RF only remotes will not work with this system.
How do I control the SurroundBar 9000?
There are three ways to control your SurroundBar 9000:
Use the touch-sensitive buttons on the front of the bar.
Use the provided remote control.
Program the SurroundBar 9000 to respond to your
existing remote (see instructions page 9).
My SurroundBar 9000 was responding to commands,
but now it isn’t. hat should I do?
In this rare event, simply turn off the power (switch located
on the back of the bar), wait a few seconds, and then turn
the power back on. This should restore control.
How do I erase previously learned remote
control commands?
If you have programmed your SurroundBar 9000 to respond
to a remote control and you no longer want it to do so, then
you can erase the codes by pressing the LEARN key for about
two seconds while the unit is in standby mode (power LED
is red). The SurroundBar 9000 will continue to respond
to the provided credit card remote control.
Can I adjust the subwoofer level control from the bar
keypad if I cannot locate the provided remote control?
Yes. You can control the subwoofer volume from the
bar keypad by tapping the LEARN key prior to using the
volume buttons. When the power LED shines orange,
the volume keys ( / ) control the subwoofer volume.
Tap the LEARN key again when you are done with
the adjustment.
To contact Customer Service/Technical Support:
If you have a question or comment, please feel free to call
us or email us. In North America and Canada, call Polk Audio
Customer Service: 800-377-7655 (M-F 9-5:30 EST) or via email
polkcs@polkaudio.com. Outside the US, call 410-358-3600.

Polk Audio is a DEI Holdings, Inc. Company. Polk Audio, Polk,
The Speaker Specialists, SDA, Polk Digital Logic and SurroundBar
are registered trademarks of Polk Audio, Inc.
Products that have earned the Energy Star®are designed to protect
the environment through superior energy efficiency.
Manufactured under license from Dolby Laboratories. Dolby and the
double-D symbol are registered trademarks of Dolby Laboratories.
Manufactured under license under U.S. Patent Nos: 5,956,674; 5,974,380;
6,487,535 & other U.S. and worldwide patents issued & pending. DTS,
the Symbol, & DTS and the Symbol together are registered trademarks
& DTS Digital Surround and the DTS logos are trademarks of DTS, Inc.
Product includes software. © DTS, Inc. All Rights Reserved.
is a trademark of SRS Labs, Inc. TruSurround HD4 technology
is incorporated under license from SRS Labs, Inc.
12 Po k Audio Customer Service 800-377-7655 (Outside USA & Canada: 410-358-3600)
Like all wireless devices, your SurroundBar 9000 IHT may be susceptible
to RF interference from such sources as microwave ovens, WiFi computer
systems, video game systems, cordless telephones, blue tooth systems,
baby monitors and other devices. In particular, any devices operating in the
2.4GHz band may cause intermittent wireless connections between the
SurroundBar 9000 speaker and the subwoofer. It is also possible that your
SurroundBar 9000 IHT System may affect other wireless systems. For the
most part, you can avoid wireless performance problems by physically
separating these devices from your SurroundBar 9000 IHT System.
Maintaining a distance of several feet or more between your SurroundBar 9000
IHT speaker and any wireless device should prevent any mutual interference
effects. If you do notice any subwoofer signal dropouts take care to identify
the root cause (most commonly having other wireless devices too close)
and resolve accordingly. Any interference effects from a microwave oven
will cease once the oven stops operating and may be resolved on a long-term
basis by increasing the physical distance between your SurroundBar 9000 IHT
System and the microwave oven.
A Note Regarding ireless Performance:
WARNING: LISTEN CAREFULLY
Polk Au io lou speakers an subwoofers are capable of playing at extremely high volume levels,
which coul cause serious or permanent hearing amage. Polk Au io, Inc. accepts no liability
for hearing loss, bo ily injury or property amage resulting from the misuse of its pro ucts.
Keep these guidelines in mind and always use your own good judgment when ontrolling volume:
• You should limit prolonged exposure to volumes that ex eed 85 de ibels(dB).
Refer to the O upational Health and Safety Administration (OSHA) guidelines at:
www.osha.gov/dts/osta/otm/noise/standards_more.html.

Customer Service Hours of Operation: Monday-Friday, 9AM-5:30PM EST po kcs@po kaudio.com 13
FRANÇAIS
CONSIGNES DE SÉCURITÉ IMPORTANTES
Ce produit a été onçu et fabriqué pour répondre à de stri tes normes de qualité
et de sé urité. Veuillez ependant porter attention aux onsignes de sé urité suivantes
se rapportant à son installation et à son utilisation.
1. Lisez toutes les onsignes de sé urité et d’utilisation avant d’utiliser et appareil.
2. Conservez les instru tions de sé urité et d’opération pour référen e future.
3. Observez les onsignes ontenues dans e manuel et affi hées sur le produit.
4. Suivez toutes les instru tions d’opération et d’utilisation.
5. Nettoyage. Débran hez l’appareil avant de le nettoyer. N’utilisez jamais
de nettoyant liquide ou en aérosol. Utilisez un hiffon humide.
6. A essoires. N’utilisez jamais d’a essoires non re ommandés par le fabri ant.
Ils pourraient provoquer un danger.
7. Eau et humidité. N’utilisez jamais et appareil près d’une sour e d’eau ou d’humidité—
par exemple près d’une baignoire, d’un évier, d’un lavabo ou dans un sous-sol humide
ou près d’une pis ine ou autre sour e d’eau.
8. A essoires. Ne pla ez jamais e produit audio-visuel sur un harriot, so le, meuble
ou support instable. Le produit pourrait tomber, s’endommager et/ou blesser grièvement
un enfant ou un adulte. Utilisez uniquement un harriot, so le, meuble ou support spé ifié
par le fabri ant ou vendu ave le produit. Toute installation du produit doit se faire selon
les dire tives du fabri ant et en utilisant des a essoires re ommandés par le fabri ant.
9. Aération. Les ouvertures et les fentes situées sur le boîtier préviennent la sur hauffe
et assurent la fiabilité du produit et ne doivent jamais être ouvertes ou obstruées.
Elles ne doivent jamais être obstruées en plaçant le produit sur un lit, un sofa, un tapis
ou autre surfa e similaire. Ce produit ne doit jamais être installé sur ou à proximité d’un
radiateur ou d’un registre de haleur. Ce produit ne doit pas être installé dans un meuble,
une bibliothèque ou un bâti à moins d’assurer une aération adéquate ou d’observer
les dire tives du fabri ant.
10. Alimentation CA. Ce produit ne doit être utilisé qu’ave le type d’alimentation CA spé ifié
sur l’étiquette apposée au produit. Si vous ne onnaissez pas le type d’alimentation utilisé
dans votre région, ommuniquez ave le revendeur du produit ou ave votre fournisseur
lo al d’éle tri ité.
11. Mise à la terre et polarisation. Ce produit est muni d’une fi he d’alimentation CA polarisée
(une des deux bro hes étant plus large que l’autre). Cette fi he ne peut être in sérée dans la
prise de ourant que d’une seule façon. C’est un dispositif de sé urité. Si vous ne parvenez pas
à bien insérer la fi he dans la prise de ourant, renversezla. Si vous ne parvenez toujours pas
à insérer la fi he dans la prise de ourant, faites rempla er la prise obsolète par un éle tri ien.
Ne ontournez jamais le dispositif de sé urité de mise à la terre de la fi he polarisée.
12. Prote tion du ordon d’alimentation CA. Les ordons d'alimentation CA doivent être disposés
hors des zones passantes où ils risquent d’être é rasés, pin és ou endom magées, parti ulière
ment à proximité des prises de ourant, des blo s multiprises et à la sortie de l’appareil.
13. Foudre et surtension. Pour assurer la prote tion de e produit ontre la foudre ou la
surtension lorsqu’il n’est pas utilisé pour de longues périodes, débran hez son ordon
d’alimentation de la prise de ourant CA et dé onne tez le système de âble ou d’antenne.
14. Lignes éle triques. Une antenne extérieure ne doit pas être installée à proximité de
lignes éle triques aériennes ou autres dispositifs éle triques ou d’é lairage sur lesquels
elle pourrait tomber. Lors de l’installation d’une antenne extérieure, il est impératif de
vousassurer que ette dernière ne pourra jamais entrer en onta t ave de tels disposi
tifs ou lignes éle triques. Il pourrait y avoir danger de mort.
15. Sur harge. Ne sur hargez jamais les prises de ourant, les rallonges ou les blo s
multiprises; ela pourrait onstituer un risque d’in endie ou de ho éle trique.
16. Objets et liquides. N’insérez jamais d’objets dans les ouvertures de e produit. Ils pourraient
entrer en onta t ave des points de voltage dangereux ou provoquer des ourts- ir uits;
ela pourrait provoquer un risque d’in endie ou de ho éle trique. Ne renversez jamais
deliquides sur le produit.
17. Servi e. Ne tentez jamais de réparer e produit vousmême ar ouvrir son boîtier ou en retirer
le ouver le pourrait vous exposer à des voltages dangereux ou à d’autres dangers. Confiez
tout servi e à un te hni ien qualifié.
18. Dommages et servi e. Débran hez l’appareil de la prise CA et onta tez
un réparateur qualifié lorsque:
a.Le ordon d’alimentation a été endommagé.
b.Un objet ou du liquide s’est introduit dans le produit.
.Le produit a été exposé à la pluie ou à de l’eau.
d.Le produit ne fon tionne pas normalement selon les instru tions du fabri ant. Réglez
uniquement les ontrôles spé ifiés dans le manuel de l’utilisateur ar le réglage inapproprié
de ertains autres ontrôles pourrait endommager le produit et requérir l’intervention
d’un réparateur qualifié pour le remettre en ordree.
e.Le produit a subi une hute ou son boîtier a été endommagé.
f. Le produit ne semble pas fon tionner normalement— e qui indique
la né essité de servi e.
19. Piè es de re hange—Lorsque des piè es de re hange sont requises, assurez-vous que
le te hni ien de servi e utilise des piè es de re hange spé ifiées par le fabri ant ou des
piè es ayant les mêmes ara téristiques que les piè es d'origine. Des substitutions non
autoriséesrisquent de provoquer un in endie, des ho s éle triques ou d’autres dangers.
AVERTISSEMENT: Danger D’EXPLOSION si la batterie est inexa tement substituée.
Rempla ez seulement par la même hose ou le type équivalent. (CR2025)
AVERTISSEMENT: N’exposez pas les piles ou le paquet de piles à la haleur
ex essive telle que le soleil, le feu ou une autre sour e de haleur semblable.
20. Contrôle de sé urité—Après haque ontrôle te hnique ou réparation de et appareil,
demandez au te hni ien d'effe tuer un ontrôle pour assurer que l’appareil est en bon
état de fon tionnement.
21. Chariots et so les. Les appareils doivent être utilisés uniquement ave
des hariots ou des so les re ommandés par le fabri ant. Un appareil
sur hariot doit être dépla é ave soin. Des arrêts soudains, une poussée
ex essive ou une surfa e négale pourraient provoquer le renversement
du hariot ave risque de plessures.
22. Ce produit n’est pas onçu pour utilisation extérieur.
Les AVERTISSEMENTS i-dessous sont situés à l’arrière de votre système
d’en eintes SurroundBar®.
AVERTISSEMENT: pour prévenir les ho s éle triques, insérez la fi he
bien à fond en vous assurant que la lame large de la fi he s’insère dans
la fente large de la prise CA.
AVERTISSEMENT: au une sour e de flamme, omme une handelle,
ne doit être pla ée sur l’appareil.
Mise en gar e: Le fabri ant n’ est pas responsable des interféren es radio ou télévision ausées
par des modifi ations non autorisées de et appareil. De telles modifi ations pourraient annuler
l’autorisation d’utiliser l’appareil.
Dé laration sur l’exposition aux irradiations: Cet équipement est onforme aux limites de radiation
établies par la FCC omme indiquées dans le adre d'un environnement d’a ès libre et est onforme
à la se tion 15 des réglementations de la FCC. Cet équipement doit être installé et utilisé à une
distan e minimale de 20 m entre la sour e d’irradiations et votre orps.
Limites es émissions e classe B
Cet appareil numérique de la lasse B respe te toutes les exigen es
du Règlement sur le matériel brouilleur du Canada.
Fonctionnement
Cet appareil est onforme à la se tion 15 des règlements de la FCC et à la norme RSS-210
d’Industrie Canada. Son fon tionnement est soumis aux deux onditions suivantes:
1) Ce dispositif pourrait ne pas auser d’interféren e.
2) Ce dispositif est sus eptible à toute interféren e, in luant de l’interféren e
qui pourrait provoquer le fon tionnement fautif du dispositif.
Le dispositif ren ontre l’exemption des limites ourantes d’évaluation dans la se tion
2.5 de RSS 102 et la onformité à l’exposition de RSS-102 rf, utilisateurs peut obtenir
l'information anadienne sur l’exposition et la onformité de rf.
Récupération Du Pro uit
Certaines lois ou ertains règlements internationaux, nationaux et/ou
régionaux pourraient s’appliquer à la ré upération de e produit. Pour
plus d’information, ommuniquez ave le revendeur de e produit ou ave
l’importateur/distributeur de e produit dans votre pays. Vous trouverez
la liste des importateurs/distributeurs des produits Polk Audio sur le site
www.polkaudio. om ou en ommuniquant ave Polk Audio: 5601 Metro
Drive, Baltimore, Maryland 21215, USA—Tél.: +1 410 358-3600.
Note:
Ce dispositif a été testé et dé laré onforme au hapitre 15 des règlements de la FCC en e qui
attrait aux limites d’interféren es générées par un appareil numérique de lasse B. Ces limites ont
été établies pour assurer une prote tion raisonnable ontre les interféren es nuisibles dans une
installation résidentielle. Ce dispositif génère, utilise et peut irradier des radiofréquen es et, s’il
n’est pas installé et utilisé onformément aux instru tions, pourrait auser de l’interféren e nuisible
aux radio ommuni ations. Toutefois, il n’y a au une garantie que de l’interféren e ne sera pas
présente en ertains types d’installation. Si e dispositif génère de l’interféren e nuisible à la ré ep-
tion radio ou télévision— e qui peut être déterminé en allumant et éteignant le dispositif—l’utilisa-
teur peut essayer d’éliminer l’interféren e par un ou plusieurs des moyens suivants: réorienter ou
dépla er l’antenne de ré eption; a roître la distan e entre le dispositif et le ré epteur; bran her le
dispositif à une prise de ourant reliée à un ir uit distin t de elui sur lequel est bran hé le ré ep-
teur; onsulter le détaillant ou un te hni ien radio/TV qualifié pour obtenir de l’aide.

14 Po k Audio Customer Service 800-377-7655 (Outside USA & Canada: 410-358-3600)
FAITES L’INVENTAIRE
Assurez-vous que la boîte de votre SurroundBar®9000 Instant
Home Theater™(IHT) contient tous les items listés ci-dessous:
SurroundBar
Subwoofer
Télécommande (pile comprise)
Cordon d’alimentation du subwoofer
Bloc d’alimentation 24V
C ble numérique (optique) 1,82 m
C ble analogique 1/8" à 1/8"
Adaptateur 1/8" à RCA
Guide de démarrage rapide
Guide de programmation de la télécommande
Manuel d’utilisation
Carte d’enregistrement en ligne
Note importante: S’il manque des pièces, si vous découvrez
des avaries ou si votre SurroundBar 9000 IHT Polk Audio ne
fonctionne pas, contactez immédiatement votre revendeur.
Conservez la boîte et l’emballage—ils assureront la protection
du produit en cas de transit éventuel.
VOTRE SURROUNDBAR 9000 IHT
Merci d’avoir choisi la SurroundBar 9000 IHT de Polk Audio.
Vous découvrirez bientôt à quel point le son légendaire Polk Audio
rend les films et la télévision autant plus excitants. N’utilisant
qu’une seule enceinte SurroundBar et un subwoofer sans fil,
la SurroundBar 9000 IHT reproduit une scène sonore vaste,
précise et enveloppante. La technologie brevetée Polk®Digital
Logic™assure à la fois performance et agrément. Voici d’autres
atouts de la SurroundBar 9000 IHT:
Design compact (5,7 cm de prof.) se marie parfaitement
avec les télés modernes à écran plat.
La programmation SmartBar™vous permet d’utiliser
la télécommande IR originale de votre télé.
(télécommande dédiée fournie)
Un son ambiophonique bien meilleur que celui des
haut-parleurs de votre télé gr ce à la technologie
Polk Digital Logic avec SDA®Surround.
L’amplification discrète des huit canaux assure plus
d’efficacité, plus de dynamique et moins de distorsion,
rivalisant avec la sonorité de chaînes à multiples enceintes.
La technologie Optimized Center Array assure des médiums
clairs, une netteté phonique exceptionnelle, une dynamique
remarquable et une diffusion très large.
Reproduit toutes vos sources numériques:
Dolby®Digital 5.1 et DTS 5.1.
La technologie SRS TruSurround HD4MC permet aux chaînes
n’utilisant que deux haut-parleurs de reproduire une scène
sonore ambiophonique incroyable avec des graves profonds,
des aigus détaillés et des dialogues clairs et précis.
Le subwoofer SANS FIL assure des graves profonds
et puissants partout dans la pièce et peut être installé
jusqu’à 15 m de la barre.
Les deux évents accordés de la SurroundBar assurent
un superbe équilibre sonore avec le subwoofer, que
la barre soit installée au mur ou sur une tablette.
Certifiée Energy Star®
Le c ble optique de 1,8 m fourni assure une connexion
on ne peut plus facile de votre télé à la SurroundBar 9000.
Les fentes en trou de serrure offrent multiples options
d’installation murale.
Les touches à effleurement de la barre vous permettent
de programmer facilement votre propre télécommande.
CONTENUS DE LA BOÎTE SURROUNDBAR 9000 IHT:
Cordon d’alimentation
du subwoofer
Télécommande
(pile comprise)
Câble numérique
(optique) 1,82 m
Bloc d’alimentation 24V
Guide de démarrage rapide
Câble analogique 1/8" à 1/8"
Adaptateur 1/8" à RCA

Customer Service Hours of Operation: Monday-Friday, 9AM-5:30PM EST po kcs@po kaudio.com 15
CONTRÔLES DE LA SURROUNDBAR
Panneau avant:
1. Learn—Met la SurroundBar en mode d’apprentissage,
vous permettant de la programmer pour qu’elle
réponde à votre propre télécommande.
2. Source—Détermine la source d’entrée audio.
DEL—La DEL luit bleu pour indiquer la source
sélectionnée (voir SOURCE LED GUIDE ci-dessus).
Elle luit vert si un signal Dolby® Digital est en
décodage ou orange si un signal DTS est en décodage.
3. Interrupteur ( )—Allume la SurroundBar
ou la met en mode d’attente.
DEL—Cette DEL luit vert, orange ou rouge
pour indiquer l’état d’activité.
4. Mute—Active ou désactive le mode sourdine de la
SurroundBar 9000 IHT en clignotant lentement vert.
5. Volume ( / )—Règle le volume
de la SurroundBar 9000 IHT.
Panneau arrière:
6. Power—Allume (ON)/éteint (OFF) la Surroundbar, mais
vous pouvez le laisser à la position ON en permanence.
7. 24V—Branchez le bloc d’alimentation de la Surroundbar ici.
8. Entrées audio (Source 1, 2, 3 ou 4)—Connectez ici la sortie
de votre télé (ou autres sources). Utilisez le c ble optique
fourni pour les sources numériques (SOURCE 1et SOURCE
2) et le c ble 1/8" fourni pour les sources analogiques
(SOURCE 3 et SOURCE 4).
9. SYNC—Le bouton SYNC assure la connexion entre
le subwoofer et la SurroundBar. (Voir «SYNCHRONISATION
DE LA SURROUNDBAR AU SUBWOOFER SANS FIL»
à la page 18.)
DEL DE TENSION ( ) DE LA SURROUNDBAR
MODE D’OPÉRATION NORMAL:
Vert continu—Sous tension—tout va bien.
Rouge continu—Sous tension et en mode d’attente.
Vert - deux clignotements—Un signal du pavé numérique
ou de la télécommande a été reçu avec succès.
Vert clignotant - lent —Système en sourdine.
Clignotement vert rapide (après avoir appuyé sur la touche
«volume»)—Vous avez atteint le volume maximum.
Vert clignotant - rapide (à la mise sous tension)—
La SurroundBar et le subwoofer ont établi une
connexion sans fil.
DEL DE TENSION ( ) DE LA SURROUNDBAR
MODE D’APPRENTISSAGE: (instructions à la page 20)
Orange clignotant—La barre est en mode d’apprentissage.
Orange continu—La barre est en mode d’apprentissage
et une fonction a été sélectionnée.
Vert clignotant—La barre a acquis un code
de la télécommande avec succès.
Rouge clignotant—La barre n’a pas réussi
à acquérir un code de la télécommande.
Rouge et orange clignotant—Les codes IR
acquis ont été effacés avec succès.
DEL—SOURCES
Vert clignotant—Source Dolby Digital repérée
(SOURCE 1 et 2 seulement)
Vert continu—Source Dolby Digital reçue et en
cours de décodage (SOURCE 1 et 2 seulement).
Bleu continu—Source PCM ou analogique reçue.
Orange clignotant—Source DTS reçue et
reconnue (SOURCE 1 et 2 seulement).
Orange continu—Source DTS reçue et en cours
de décodage (SOURCE 1 et 2 seulement).
132W
12345
6789
SOURCE 1
SOURCE 2
SOURCE 3
SOURCE 4
GUIDE DEL
DES SOURCES
AVANT
ARRIÈRE

16 Po k Audio Customer Service 800-377-7655 (Outside USA & Canada: 410-358-3600)
CONTRÔLES DU SUB OOFER
1. Power—Allume (ON)/éteint (OFF) le subwoofer, mais
vous pouvez le laisser à la position ON en permanence.
2. AC Input—Branchez le cordon d’alimentation
du subwoofer ici.
DEL DU SUB OOFER
Le voyant d’activité DEL du subwoofer sans
fil indique son état d’activité.
Lorsque le voyant luit vert:
a. Vert continu—La barre et le subwoofer sont connectés.
b. Vert clignotant - lent—Le subwoofer recherche
le signal de la barre.
c. Vert clignotant - rapide—Le subwoofer est en cours
de connexion avec la barre.
Lorsque le voyant luit rouge:
a. Rouge continu: Le subwoofer est en mode d’attente.
b. Rouge clignotant: Le subwoofer est en mode de protection.
TÉLÉCOMMANDE
1. Interrupteur ( )—Allume la SurroundBar
ou la met en mode d’attente.
2. Mute—Active ou désactive le mode
sourdine de la SurroundBar.
3. Source 1, 2, 3 ou 4—Sélectionne l'entrée
de la source audio.
4. VOL ( + / – )—Règle le volume global
du système SurroundBar 9000 IHT.
5. SUB ( + / – )—Règle le volume du subwoofer.
Spécifications
Dimensions
SurroundBar 3 3/4" H x 44 1/2" L x 2 1/4" P
(9,53 cm x 113,03 cm x 5,72 cm)
Subwoofer 13 1/2" H x 12" L x 13 1/2" P
(34,29 cm x 30,48 cm x 34,29 cm)
Poids
SurroundBar 8 lb (3,63 kg)
Subwoofer 18,2 lb (8,26kg)
Puissance requise
SurroundBar 24V, 5 A
Subwoofer 100V - 240V~50Hz - 60Hz, 65W
Modèle SurroundBar 9000 Instant Home Theater
Pile de la télécomande CR2025
12
12
3
45

Customer Service Hours of Operation: Monday-Friday, 9AM-5:30PM EST po kcs@po kaudio.com 17
OÙ INSTALLER VOTRE SURROUNDBAR
POUR MAXIMISER LE SON
C’est simple. Gr ce à ses coussinets de caoutchouc,
la barre peut être installée sur n’importe quelle surface
plate. Vous n’avez qu’à centrer la barre sous l’écran de
votre télé. Si votre télé est installée dans un meuble,
vous pouvez placer la barre au-dessus de la télé.
Si votre télé est fixée au mur, installez la barre juste
en dessous. La barre est munie de fentes en trou
de serrure pour installation murale.
Note: Les coussinets de caoutchouc peuvent être retirés
(pour installation murale) ou repositionnés le long de la surface
inférieure de la SurroundBar selon le type d’installation.
OÙ PLACER VOTRE SUB OOFER
POUR MAXIMISER SA PERFORMANCE
Vous pouvez placer le subwoofer
sans fil à peu près n’importe où
dans la pièce puisqu’il ne requiert
aucun fil audio. Vous n’avez qu’à
brancher son c ble d’alimentation
dans une prise de courant et le
tour est joué.
Un petit conseil: Si vous placez le subwoofer dans un coin,
sa sortie acoustique sera accrue et il semblera jouer plus fort.
Dimensions hors-tout
1. 3 3/4" H (9,53 cm)
2. 44 1/2" (113,03 cm)
Fentes en trou de serrure
3. 24 1/2" (62,23 cm)
Du dessus de la barre aux fentes en trou de serrure
4. 1 11/16" (4,29 cm)
Note: Si vous installez votre Surroundbar au mur, assurez-vous
que les chevilles d’ancrage sont bien fixées au mur et qu’elles
peuvent supporter le poids de la SurroundBar 3,63 kg (8 lb).
SOURCE
MUTE
LEARN
SOURCE
MUTE
LEARN
SurroundBar placée devant votre télé SurroundBar installée au mur
1
2
3
4

18 Po k Audio Customer Service 800-377-7655 (Outside USA & Canada: 410-358-3600)
COMMENT CONNECTER VOTRE SURROUNDBAR
C’est très facile. Vous avez probablement plusieurs sources
audio—télé, DVD, iPod ou c ble/satellite. Vous pouvez connecter
jusqu’à quatre sources différentes à la Surroundbar. Nous vous
recommandons de connecter la sortie optique de votre télé
à une des deux entrées optiques située à l’arrière de la
SurroundBar pour assurer la meilleure qualité audio possible.
Si votre télé n’a pas de sortie optique, vous pouvez connecter
la sortie optique de votre lecteur DVD ou de votre récepteur
c ble/satellite à une des deux entrées optiques de la SurroundBar
et connecter vos autres sources audio aux deux entrées
analogiques de la SurroundBar.
SYNCHRONISATION DE LA BARRE
AVEC LE SUB OOFER
La Surroundbar 9000 et le subwoofer sans fil sont préréglés
à l’usine pour fonctionner ensemble. Si le subwoofer sans
fil cesse de recevoir un signal audio, suivez ces simples
instructions pour rétablir la connexion.
1. Éteignez le subwoofer (POWER–OFF).
2. Appuyez sur la touche SYNC (situé à l’arrière de la
Surroundbar) et tenez-la enfoncée pour trois (3) secondes.
3. Le voyant DEL situé à l’arrière du subwoofer clignotera
signalant que la Surroundbar et le subwoofer sont
prêts à se connecter.
4. Allumez le subwoofer (POWER—ON). Lorsque
la DEL du subwoofer luit vert continu, la Surroundbar
et le subwoofer sont connectés et prêts à être utilisés.
COMMENT CONNECTER VOTRE SUB OOFER
Votre subwoofer reçoit un signal audio sans fil de la SurroundBar
alors vous n’avez qu’à le brancher dans une prise de courant CA
et vous assurer que l’interrupteur POWER est à la position ON.
L
R
ANALOG
AUDIO OUTPUT
DIGITAL OPTICAL
AUDIO OUTPUT
132W
SurroundBar 9000 Télé ou Boîtier Câble/Satellite
Note: Si nécessaire,
retirez le capuchon
avant d’insérer le c ble.

Customer Service Hours of Operation: Monday-Friday, 9AM-5:30PM EST po kcs@po kaudio.com 19
COMMENT OPTIMISER LE SON LORSQUE
LES HAUT-PARLEURS DE LA TÉLÉ SONT ACTIFS
Si vous n’entendez pas la SurroundBar, montez le volume
de la barre à l’aide de ses touches de contrôle de volume.
Si votre barre est connectée à votre télé, les haut-parleurs
de la télé sont probablement actifs. Il est impossible
d’expliquer comment désactiver les haut-parleurs de
toutes les télés mais voici comment désactiver les
haut-parleurs de la plupart télés courantes:
1. Sélectionnez «menu» ou «setup» sur la télécommande
de la télé.
2. Appuyez sur ce bouton. Un menu devrait apparaître à l’écran.
3. Sélectionnez le réglage des fonctions audio. Le réglage
qui permet de désactiver les haut-parleurs de la télé
devrait s’y trouver.
Si vous n’arrivez pas à désactiver les haut-parleurs de votre télé,
ne vous inquiétez pas. Votre SurroundBar améliorera quand
même considérablement le son de votre télé, mais elle devra
jouer plus fort que votre télé. Suivez les étapes suivantes pour
équilibrer le volume de la SurroundBar avec celui de la télé.
1. Si nécessaire, programmez votre SurroundBar pour qu’elle
réponde au contrôle de volume de la télécommande de votre
télé. (Consultez la section «COMMENT PROGRAMMER
UNE TÉLÉCOMMANDE POUR CONTRÔLER VOTRE
SURROUNDBAR 9000 IHT» sur cette page.)
2. Baissez le volume de votre télé au minimum utilisant
les boutons de contrôle de volume de votre télé.
3. Ensuite, utilisant les touches de contrôle de volume
de votre SurroundBar, réglez le volume à un niveau
d’écoute normal (n’utilisez pas la télécommande).
Suite à ces réglages, votre SurroundBar 9000 IHT devrait
toujours jouer plus fort que les haut-parleurs de votre télé.
Utilisez ensuite la télécommande de votre télé pour ajuster
le volume global.
RÉGLAGE PRÉCIS DU VOLUME DE VOTRE SUB OOFER
Vous devez maintenant régler le volume du subwoofer sans
fil de façon à équilibrer sa sortie avec celle de la SurroundBar.
Vous harmoniserez ainsi le son global du système.
Pour ajuster le volume du subwoofer, faites jouer une variété
de contenus sonores—de la musique, un concert, un film
avec effets sonores abondants, un film plus intimiste avec
des conversations…puis réglez le volume du subwoofer
jusqu’à ce que le son soit naturel et bien équilibré depuis
votre position d’écoute habituelle.

20 Po k Audio Customer Service 800-377-7655 (Outside USA & Canada: 410-358-3600)
2
DEL
3
5
4
DEL
VOL
SOURCELEARN
MUTE
DEL
Appuyez sur la touche LEARN pour deux secondes—
ou jusqu’à ce que la DEL clignote orange - puis relâchez-la.
1
La SurroundBar est allumée, le voyant DEL luit vert continu
et du son provient de la barre.
Tenez la télécommande de la télé à 30-60cm
de la SurroundBar.
Appuyez brièvement sur la touche de volume “ .”
La DEL luit orange continu.
clignote orange
luit orange continu
La DEL clignote
àchaque pression
DEL
La DEL clignote vert
puis luit vert continu.
Pressez la touche de volume “ ” de la télécommande
de votre télé 4 à 8 fois en autant de secondes.
Ne la tenez pas enfoncée.
6
VOL
Lorsque la DEL clignote vert pour 3 secondes,
la commande a été programmée. La DEL luit
vert continu.
SOURCE
MUTE
LEARN
30-60cm
PROGRAMMATION D’UNE TÉLÉCOMMANDE
POUR CONTRÔLER VOTRE SURROUNDBAR IHT
NOTE SUR LA PROGRAMMATION SMARTBARMC:
Pour que la SurroundBar réponde à votre télécommande,
vous DEVEZ D’ABORD la programmer pour qu’elle réponde
à la télécommande IR (infrarouge) originale de votre télé.
Les télécommandes RF (radiofréquences) ne sont pas
compatibles. Les autres télécommandes IR (c ble, satellite)
ne peuvent être programmées que lorsque vous aurez
programmé la barre pour qu’elle réponde à la télécommande
IR de votre télé.
Guide de programmation: La SurroundBar IHT est programmée
à l’usine pour répondre à la télécommande fournie. Mais il est
fortement recommandé de programmer votre SurroundBar pour
qu’elle réponde également à votre télécommande préférée
en suivant les étapes illustrées ci-dessous. Ceci vous permettra
de contrôler toutes vos composantes en utilisant une seule
télécommande. Au cours de la programmation de votre
SurroundBar, ignorez toute image qui pourrait apparaître
à l’écran de votre télé.
Exemple: pour programmer la barre à répondre au contrôle
de volume ( ) de votre télécommande:
Vérifiez si la commande fonctionne.
Répétez les étapes 1 à 6 pour programmer les touches
de volume ( ), Source, Mute et Tension ( ).
Note: si votre barre ne réussit pas à acquérir certains codes
IR de la télécommande, la DEL de tension ( ) clignotera rouge.
Tentez d’effacer les codes précédemment programmés (voir
ci-dessous) et répétez les étapes 1 à 6 précédentes.
Procédure pour effacer les codes: Si vous avez programmé
votre SurroundBar pour qu’elle réponde à une télécommande
et que vous désirez supprimer cette programmation, appuyez
sur la touche LEARN pour environ deux secondes lorsque
la SurroundBar est en mode d’attente (la DEL ( ) luit rouge
continu). Vous saurez que les codes précédemment programmés
ont été effacés lorsque la DEL clignote orange deux fois.
Note: Cette procédure efface toute votre programmation de la
SurroundBar. Si vous désirez modifier la programmation de seule-
ment certaines des touches de la barre, suivez les instructions
des six étapes précédentes pour reprogrammer la SurroundBar
selon vos besoins. Elle répondra quand même toujours à la petite
télécommande fournie.
RÉGLER LE VOLUME DU SUB OOFER
DEPUIS LA SURROUNDBAR BAR
Lorsque la barre et le sub. sont allumés et que la DEL
luit vert continu.
1. Pressez LEARN une fois, la DEL ( ) de la barre luit orange.
2. Pour régler le volume du subwoofer, pressez
volume ( ) ou ( ).
3. Pour retourner au contrôle de volume principal, pressez
LEARN une autre fois - la DEL ( ) luit vert continu.
NOTE: Le volume du subwoofer peut également être réglé
à l’aide de la petite télécommande fournie.
Other manuals for Surroundbar 9000
2
Table of contents
Languages:
Other Polk Audio Home Cinema Speakers manuals

Polk Audio
Polk Audio Omni SB1 User manual

Polk Audio
Polk Audio SurroundBar 6000 User manual

Polk Audio
Polk Audio SURROUNDBAR 500 User manual

Polk Audio
Polk Audio SurroundBar 2000 User manual

Polk Audio
Polk Audio Surroundbar 9000 User manual

Polk Audio
Polk Audio Blackstone TL1900 User manual

Polk Audio
Polk Audio RTS105 User manual

Polk Audio
Polk Audio Magnifi One User manual

Polk Audio
Polk Audio LCi-RTS105 User manual

Polk Audio
Polk Audio Surroundbar 3000 User manual