14 7
Audio
AUDIO setup menu consist of : DOWNMIX, SPDIF OUTPUT and DRC.
Downmix
1. LT/RT : When the disc is played with DOLBY DIIGITAL PRO LOGIC
stereo effect, signal decoder will produces 2 channel L (left) and R
(right) simulation effect.
2. STEREO: When playing5.1channeldisc, the outputsignalwillbecome
stereo signal 2 channel L (left) and R (right).
SPDIF Output
1. SPDIF/OFF : Turn off the Digital Audio output.
2. SPDIF/RAW : Select this option if the player connected to Digital
Amplifier with digital input (COAXIAL / OPTICAL). When playing a disc that recorded with DOLBY DIGITAL
/ DTS audio format, digital signal will comes out without modulation process.
3. SPDIF/PCM : Select this if the player connected to 2 channel Digital Amplifier. When playing a disc that
recorded with DOLBY DIGITAL audio format, digital signal will be modulated to the 2 channel PCM signal
through Digital Audio output.
Note : Audio DTS format only can comes out through Audio Digital if you set SPDIF Output to SPDIF/RAW.
DRC
Used to set the different between the highest and lowest level on the audio output. Press “/” button to
enter to DRC option and press “/” navigator to select the option, then press “/” button to activate.
DVD PLAYER OPERATING INSTRUCTION
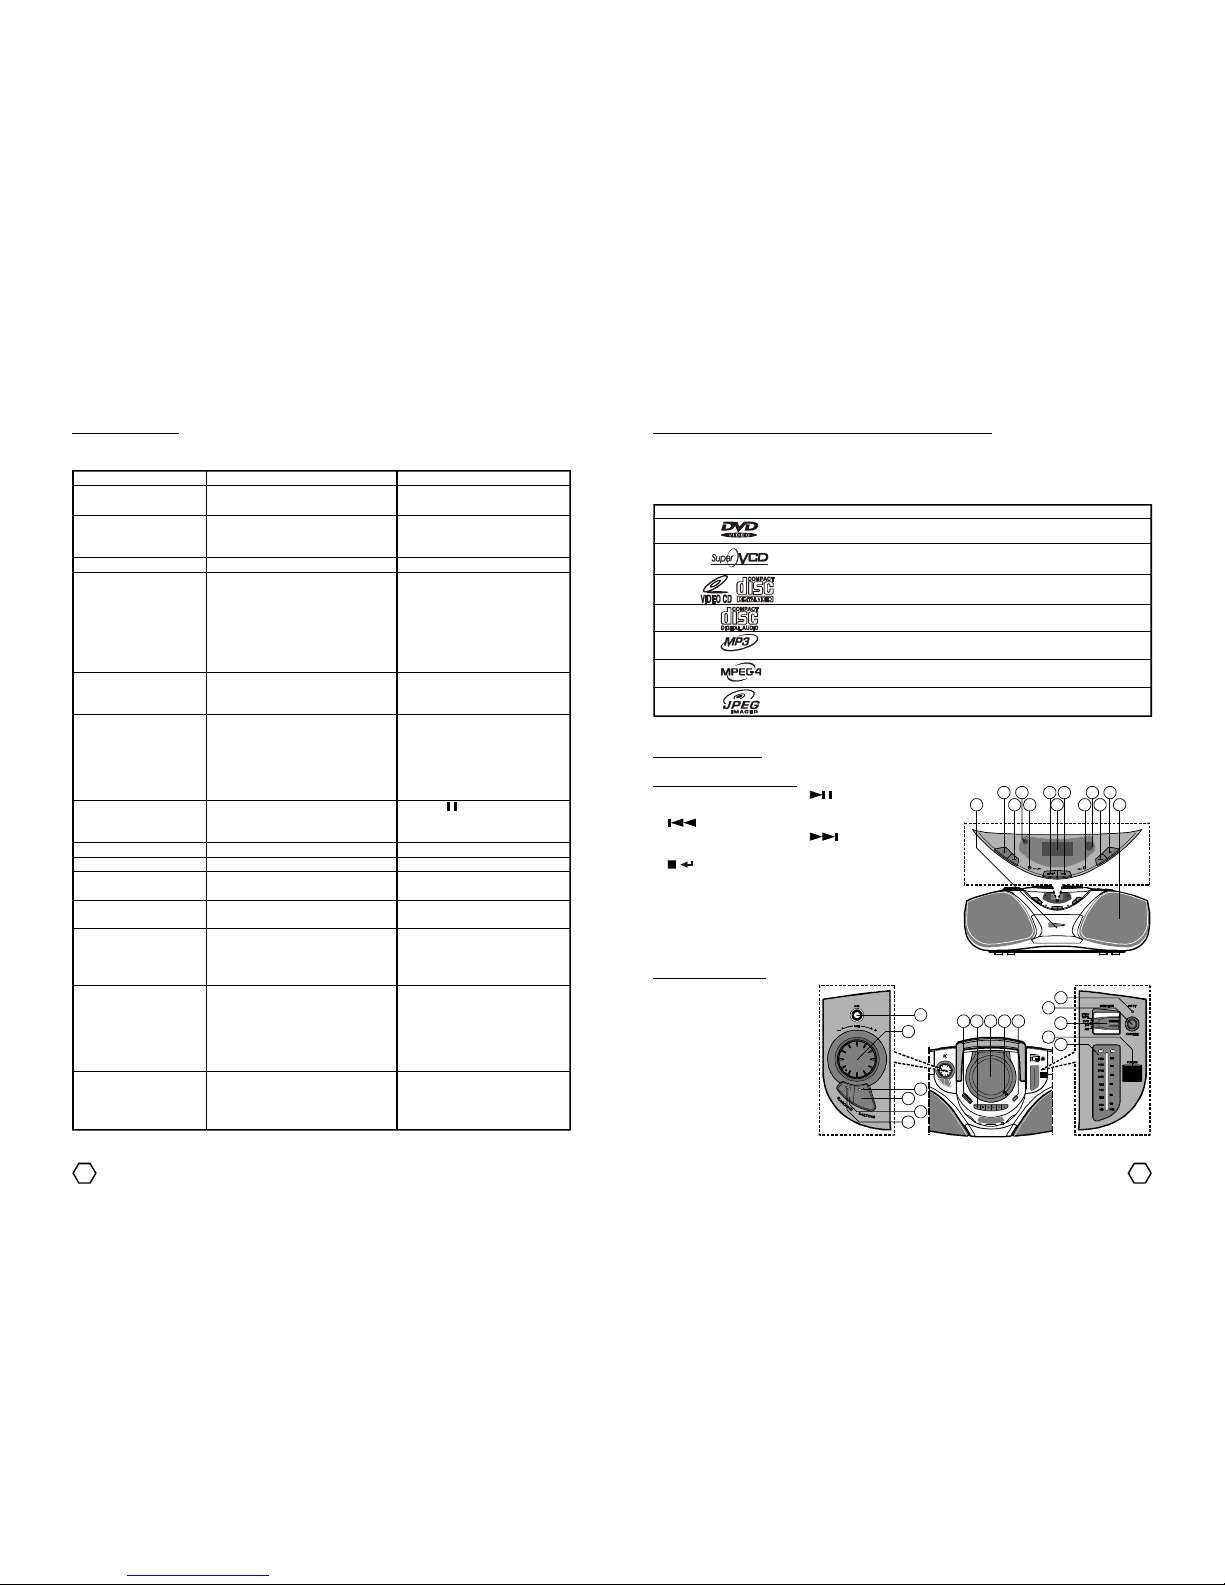
Playing DVD/SVCD/VCD/CD disc
1. Slide the FUNCTION on the top panel to the DVD function. Press OPEN marking to open the disc
compartment. Insert the desired disc to be played. Close the disc compartment and disc will be played
automatically.
-For DVD disc after the unit loading the disc, will be displayed disc menu on the TV screen and DVD
symbol on the LCD screen will lights up.
-For VCD 2.0 disc after the unit loading the disc, will be displayed disc menu on the TV screen and VCD
& PBC symbol on the LCD screen will lights up.
-For VCD 1.1 and CDDA disc after the unit loading the disc, automatically go to the track and play.
2. To freeze the picture for a moment (pause), while playing press “ /STEP” on the remote or “ ” on the
front panel once. To back to play condition, press “ /” button on the remote or “ ” button on the
front panel.
3. To stop play, press “ ” (stop) button once, the unit will remember the last play position when “ ” (stop)
button is pressed (Resume). On the screen will be displayed “ ” (stop) symbol and “PRESS PLAY KEY
TO CONTINUE” appearance, press “ /” button on the remote or “ ” button on the front panel of the
unit to play from the point when “ ” (stop) button is pressed. To truly stop the play permanently, press
“” (stop) button twice to deactivate resume function.
Playing MP3/MPEG4/JPEG disc
MP4 is a compression system of the digital video data with MPEG4 international standard and use MP3/AC3
or others audio format. MPEG4 itself is a compression system of digital video data that produced almost equal
MPEG2 (DVD) picture quality with smaller size. As sample, used extension is “*.avi”.
MP3 is a compression system of digital audio data with MPEG audio layer 3 format that produces data savings
12 - 14 times more than conventional system with equalize CDDA quality that be able to save more than 600
minutes play time. While JPEG disc is a disc that contains many pictures in JPEG format (Joint Photographic
Expert Group).
Operation mode of the MP3/MP4/JPEG disc
While playing MP3/MP4/JPEG disc, there are 3 operation mode : FILELIST, FOLDER and PLAYLIST. To change
the mode in stop condition, press “PROG/MEM” button repeatedly. If one disc contains MP3 and JPEG files,
you can displaying the JPEG file by pressing “PROG/MEM” button.
1. Filelist Mode : Used to play all the files continuously from beginning to
the end, not per folder for the MP3/MP4/JPEG disc. Press “/”
navigator button to select track, then press “/” button to play it.
Track also can be selected using “0-9” numeric buttons, press numeric
buttons according to the track number or sequence.
2. Folder Mode : In the folder mode, browser menu will displayed the content (files/folders) of the disc.
-To select the desired directory, press “/” navigator button to
highlight, then press “/” button to select/confirm. Or pressing
“0-9” numeric buttons to select the folder directly.
Example : To select “R & B Inside” press “1” button, then press “ /
” button.
-After the folder has selected, the content of the folder will be displayed.
General
GENERAL setup menu consist of : TV DISPLAY, ANGLE MARK, CAPTIONS and SCREEN SAVER.
TV Display
1. Pan Scan : Select this if the player connected to normal ratio TV
screen (4:3), picture will fulfill the screen but will sliced on the right
and left of the picture.
2. Letter Box : Select this if the player connected to normal ratio TV
screen (4:3), you will watch the picture’s source aspect ratio with
black border on the top and bottom.
3. Wide : Select this if the player connected to wide screen (16:9).
Notes :
-Picture’s aspect ratio is depends to the disc recording format, not all DVD disc can display the picture on
the selected aspect ratio.
-You should select TV Display setting according with the TV type.
Angle Mark
Only can perform if the DVD disc recorded in many camera angle.
1. ON : When playing DVD disc, OSD will display the angle mark on the right top corner of the TV screen.
2. OFF : The angle mark not be displayed.
Captions
1. ON : To displaying text on the TV screen.
2. OFF : Captions not displayed on the TV screen.
Screen Saver
When the player without activity or does not received signal for 4 minutes, Screen Saver will appear. This
facility is used to prevent the damage of the display screen.
1. ON : To activate the Screen Saver option.
2. OFF : Screen Saver is not active.