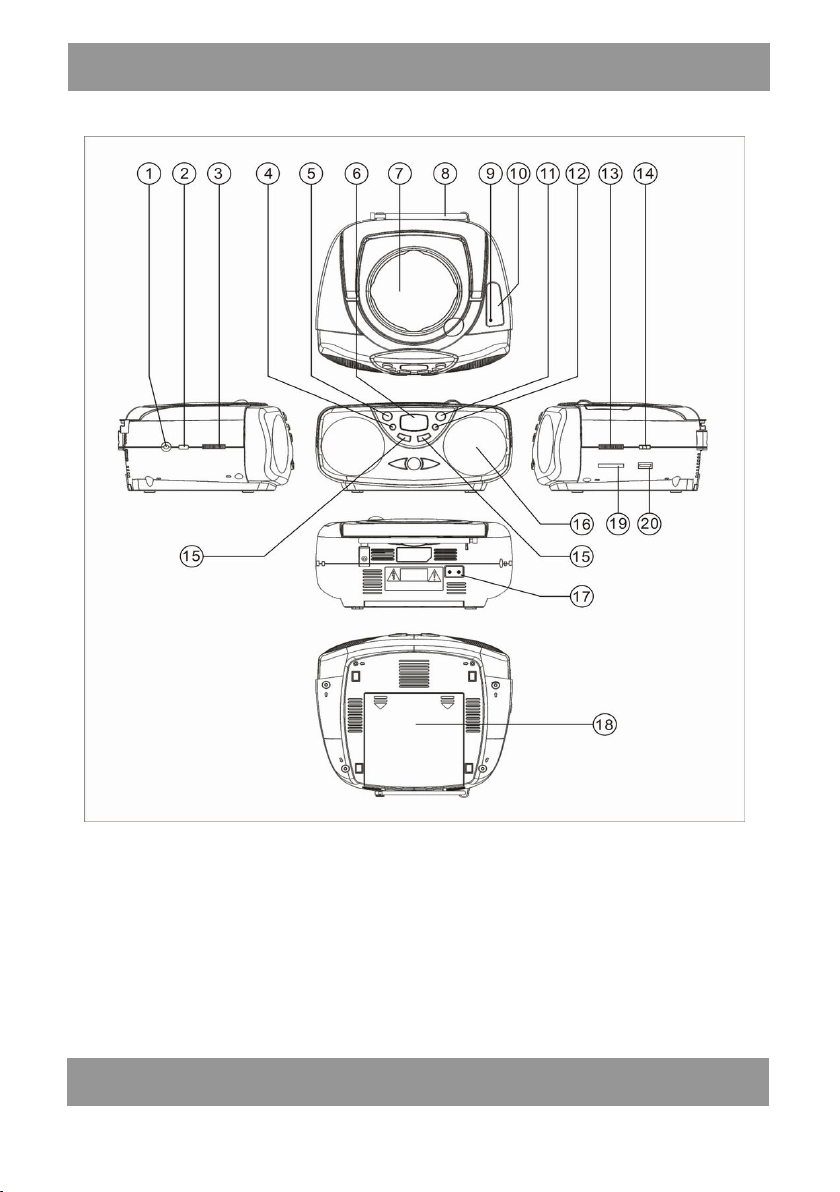
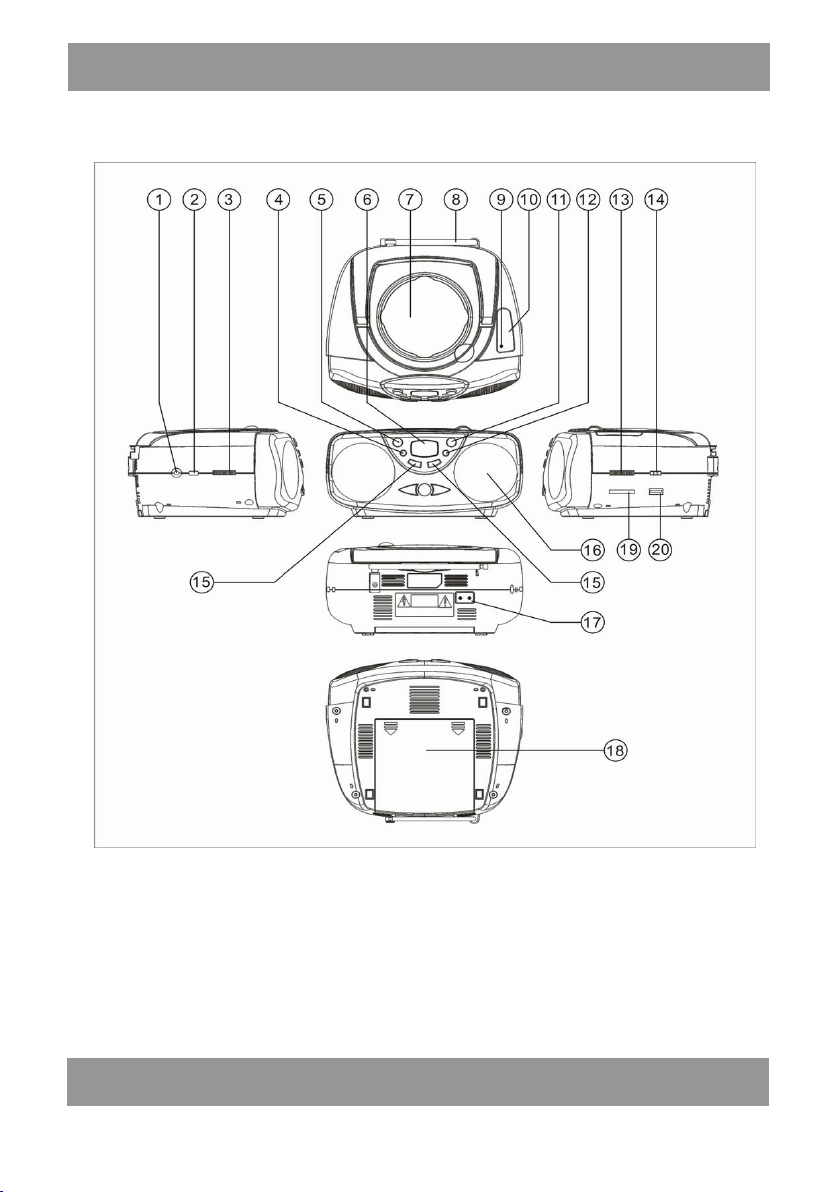
Instrukcja Obsługi PL
4
zacznie mi g ać.
9.W ce l u pow tórze ni a odtw arzani a c ałe j płyty C D nale ży nacis nąć dw a r azy
przyc is k REPE AT (powtórz) (1 2) .Ws kaźni k Pow tórz Ws zys tko na Wyś w ie tlaczu
Ście żek CD bę dzie podśw ie tlony ni e przeryw ani e.
10.Nac is nąć po raz tr ze ciP rzy cis k P OW TÓ RZ (1 2 ), Ws kaźni k Los ow y na
Wyśw ie tl aczu Ś c ie że k CD podś wie tli stałym ś wiatłem śc ieżkę , któr a bę dzie
odtw arzanalos owo.
11. A by zatr zymać odtw arzanie nale ży nacis nąćP rzy cis k CDS TO P (5).
12. J eś li c hc eciePańs tw o wyłączyć Odtw ar zacz CD nale ży pr ze s tawi ć S el ektor
Funkcj i(2 ) do położeni a " OFF".
UWAGA: Przy wybraniu tej funkcji należy się upewnić, że urządzenie znajduje się
w trybie ODTWARZANIA. W innym przypadku wybór spowoduje ustawienie
zaprogramowanego odtwarzania.
ZAPROGRAMOWANEODTWARZANIECD
Ta funkcja umożliwia odtwarzanie ścieżek utworów muzycznych w
zaprogramowanej kolejności.
1.Pr zy zatrzymane j płyc ie C D naci s nąć przyci s k P ROG. P rzy ci sk (4). Wy świ etl acz
Ś ci eżek CD (6) w yśw ie tli “P01” a ws kaźni k “PR OG ” zaczni e mig ać.
2.Nac is nąć Przy ci sk CD FWD S kip (15)l ub CD RE V S ki p (1 5 ), aby w ybrać utw ór
do zaprog ram ow ani a.
3.Nac is nąć ponow nie P rzy ci sk P ROG(4)w ce l u zapamię tania w ybor u.
Wyś wi etlacz Ści eżek CD (6 )prze jdzie do “P02 ”.
4.Nac is nąć Przy ci skCDFWDS ki p(15)lub CDRE VS ki p(15) , aby w ybr ać
nas tę pny utw ór do zapr og ram ow ania i nac is nąć P rzy cis kP ROG(4)wce lu
zapam ię tani a wyboru.
5.Można powtórzyć kroki # 2 - #3 w ce lu zaprog ram ow ania maks ym al nie do 20
ś cie żek. W przypadku próby zaprog ramow ani a ponad 20 ś cie że k, Wy świ etl a cz
Ś ci eżek CD (6) pow róci do położe ni a “0 1 ”, a s tar y w pis zos tanie nadpis any
bie żąc ym now ym w pi sem .
6.Nac iś ni jPrzy ci skCDS TO P (5 ),aby zakończyć pr og r am ow anie i powróc ić do
norm alne go tr ybu odtwarzania.
7.Wce l u s prawdze niazaprog ram ow anyc h śc ie że k nale ży nac is kać ci ąg le P rzy ci s k
PRO G(4),aby pokazać w s zys tkie zaprogramow ane utwor y. W yś wi etl acz
Ś ci eżek CD (6 )w yśw ie tli najpi e rw nume r programu i nas tę pni e m ig ając y