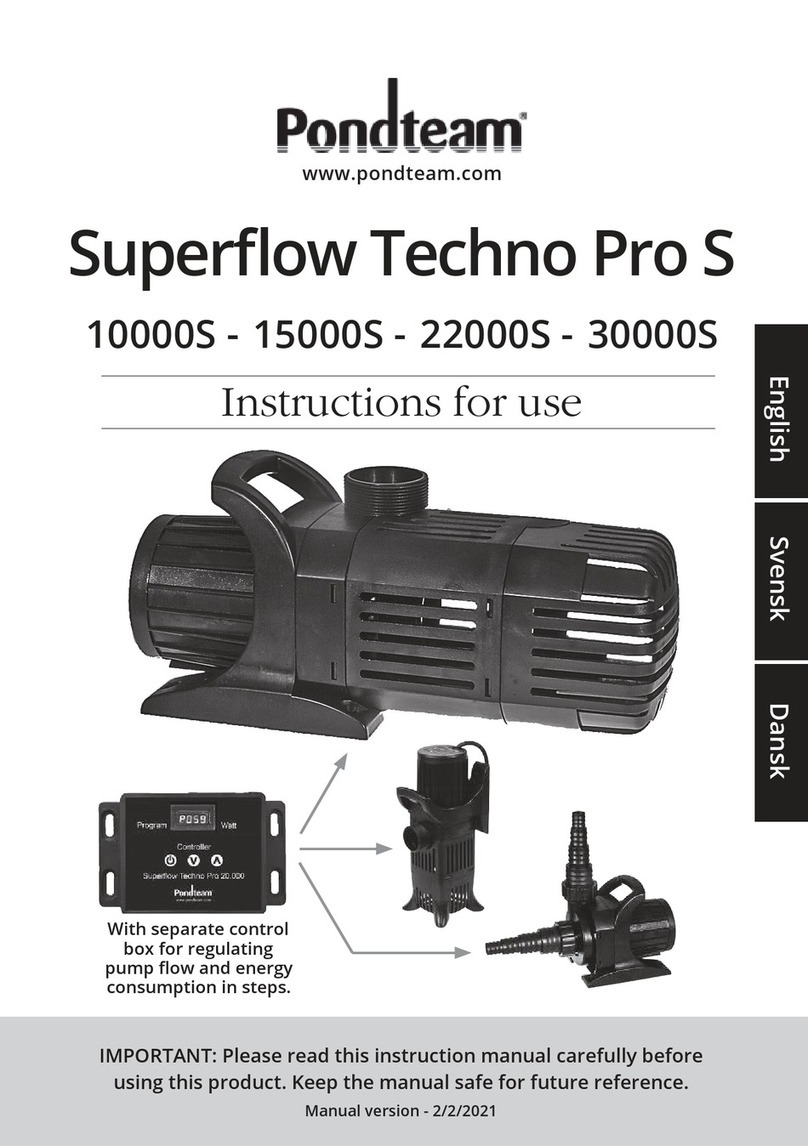
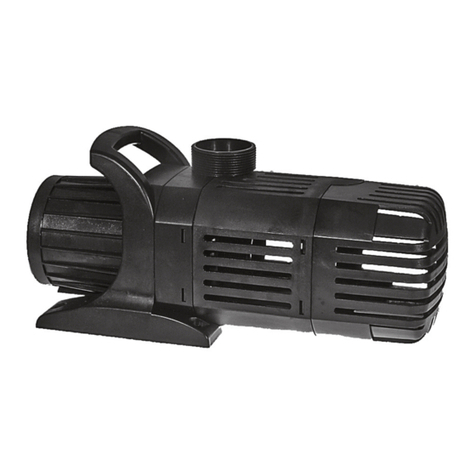
PONDTEAM Superflow Techno Pro S 50000S User manual

Superow Techno Pro S
50000S
Instructions for use
IMPORTANT: Please read this instruction manual carefully before
using this product. Keep the manual safe for future reference.
Manual version - 2022/10/04
www.pondteam.com
With separate control box for
regulating pump ow and energy
consumption in steps.
English Svensk Dansk

2
We recommend that you check our website for the most recently updated manuals.
www.pondteam.com
Instructions for use of the
Superow Techno Pro S pumps
Read these instructions carefully before using the pump. As we constantly
improve and further develop our products, accessories etc. they can differ
from the pictures on the packaging.
Description
The Superflow Techno Pro pumps are designed for demanding filtration,
waterfall and circulation in garden pools and similar water systems. However,
they can also be used for fountains (fountain nozzles are not included but can
be purchased separately).
The open vortex rotor can handle particles up to approx. 8 mm without
becoming blocked.
The design of Superflow Techno Pro with external control allows step-wise
control of both water flow and the pump's energy consumption in addition to
a long service life. In the display of the controller, the programme steps for
performance are displayed when the control buttons are pressed up and down.
Shortly after setting the programme, the pump's power consumption is
displayed in watts.
In the display, the letter F stands for the Flow %, while the letter P stands for
Power - the energy consumption in Watt.
On all models, the control box is interchangeable and available as a spare part.
The pump is also equipped with electronic dry flow protection, which
automatically stops the pump when dry running or when the rotor is blocked.
This is only an emergency stop and must not be used for level control.
Pump must never run dry.
Superflow Techno Pro can be used both submerged and dry mounted (below
surface level). Furthermore, they are also suitable for operation in salt water,
as no external metal parts are present in the pump.
The Superflow Techno Pro pump is one of the most energy-friendly and quiet
pumps on the market with the latest SINE-wave technology.

English
3
Contents
1. Pump with 10 m rubber
cable (IP68)
2. Control box
3. Filter cover
Safety regulations
The pump may only be used in garden ponds and similar water systems with no
persons in the water. Do not use in swimmingpools and other liquids than water.
Electrical installations must comply with applicable regulations. If in doubt,
consult an authorized electrician.
Before using the pump, make sure that the cable and plug have no visible damage.
The voltage on the nameplate must match your local power supply. The
pump must be connected to your power supply via a fault current protection
device with a breaking current of max. 30 mA. The electrical outlet must be
protected from water/moisture and must be located at least 2 meters from the
nearest water edge. Also make sure moisture/water cannot run along the cord
into the socket by making a "Drip Loop".
Before starting any work on the pump, switch off the power switch and
unplug the power cord. For safety reasons, the pump must only be repaired
by the supplier. All unauthorized intervention in the pump will void any
warranty (this does not apply to regular maintenance as specified in this manual).
The pump must not be used or handeled by children or persons who do not
understand how to use it.
Never lift or carry the pump in the cable and do not shorten or try to extend
the cable. This will void any warranty.
4. Rotor cover
5. Rotor
6. O-ring rotor
7. Footplate
8. User manual
Fittings buys seperate.
Technical data
Model SF Techno Pro 50000S
Max head height 8 meter
Adjustable flow l/t circa 20000-55000
Adj. energy consumption circa 185-600 watt
Inlet/outlet 3" / 3"
Guarantee 3 years
Article no. 30339

4
Dry mounting
The Superflow Techno Pro pump can also be mounted dry outside the basin.
In this case, the pump is placed in a pump-well next to the basin. It must be
placed below the water level of the basin as it is not self-priming and therefore
the water must run into the pump by itself.
1. Remove the filter cover.
2. Fit a tight connection + pipe/hose to the pump inlet and outlet. Make sure
everything is tight. The suction hose’s diameter should be as large as possible
and at least 3”. Intake distance should be max. 50 cm. long if diameter not
above 3”.
3. Make sure that the suction path and pump is filled with with water before
starting the pump.
4. To prevent the pump from clogging, install a pre-filter on the suction inlet.
Avoid blockage of the pre-lters and never let the pump run dry.
Even equipped with an electronic overheating protection it might cause
severe damage to the pump.
Installation
The Superflow Techno Pro pump is designed for use for waterfalls, streams
and filters. The pump's vortex rotor can handle particles up to 8 mm, but on
muddy or sandy bottom the pump must be placed on a tile or similar solid
support. Sand must be avoided as any damage caused by this is not covered
by warranty.
The pump must be fully immersed in water so that it is completely filled with
water without air pockets before it is started up. The pump must NOT run dry
and be fully located at least 20 cm below the water surface, otherwise it can
suck in air. Avoid blockage of prefilters and never let pump run dry, as this
will prevent motor cooling and cause damage and potential burn out motor.
The water temperature must not exceed 35°C. and water depth max. 1,5 m.

A1
A2
B
F
CD
E
English
5
Maintenance
Follow the safety precautions listed, turn off the pump and unplug the power
cord before starting to operate the pump.
1. Pull the footplate (F), towards the cabel to take it off.
2. Start by unscrewing the 4 screws from the filter cover (A1).
3. Unscrew the 4 screws from the metal plate (A2) and then the 7 screws from
the rotor cover (B). Then pull off the rotor cover (B) from the pump motor (E)
(7 nuts are on the pump motor (E) to which the screws were attached).
4. Pull the rotor (C) out of the pump housing and take care of the large
O-ring (D), located in the pump housing flange.
5. Clean the rotor-well (hole in E) and the parts in lukewarm water with a sponge
or soft brush.
6. Once the parts are cleaned, mount the O-ring (D) in the flange, taking care
to get it positioned correctly.
7. Put the rotor (C) back into the rotor-well.
8. Check that the rotor can be rotated effortlessly and that the O-ring is
properly placed.
9. Fit the rotor cover (B) and tighten the 4 screws and nuts in the pump motor (E).
Check with your finger that the rotor (C) can be turned.
10. Then mount the metal plate (A2) with associated screws in the rotor covers (B).
11. Mount the filter cover with the associated screws in the metal plate (A2).
12. Place the footplate (F) in the designated slot and press it into place.
NOTE: If the pump is used in calcareous (hard) water, the rotor and
rotor-well should be cleaned regularly with a descaling agent so that
the pump does not block due to limescale.
Damage caused by limescale is NOT covered by warranty.
NOTE: Check the pump regularly and clean it if necessary. This does
not require any technical knowledge if you follow the instructions above.
The Superflow Techno Pro S pump can handle particles up to 8 mm and this
means that maintenance is kept to a minimum.

6
Avoid overheating
If the pump becomes too hot, the built-in safety relay is triggered and the pump
is switched off so that no damage to the motor occurs. The pump must then
be cooled down to normal temperature before restarting.
Before starting the pump again, check the following:
1. Check that the suction pipe/hose has a suitable diameter of at least 3" and
that it is not clogged.
2. Check that the pre-filter is clean and not clogged.
3. Check that the rotor is not blocked/clogged by dirt.
Only when the above is checked can the pump be restarted.
Seasonal care
The pump must be protected from frost. Before winter, the pump must be
removed from the pond and cleaned thoroughly.
We recommend using a good quality airpump over winter. This will ensure
oxygen for the fish and cause less watermovement during hibernation.
Any damage caused by frost is NOT covered by warranty.
Guarantee
This pump is covered by a 3-year warranty against production and material
defects, effective from the date of purchase. Nota with date applies as proof
of warranty and a copy of it must be sent along with the pump in case of
complaint. During warranty period, we repair or replace the defective parts
(our choice) with original spare parts free of charge. The warranty does not
apply to normal wear and tear or damage that has occurred as a result of
breach, misuse and/or neglect of the specified operating instructions. The
rotor is a wear and tear part and is not covered by warranty.
Liability is limited to replacement of the faulty product only. No other costs
will be reimbursed. This guarantee is not transferable and does not affect your
statutory rights.
OBS: The connection cable of the pump or control box must under
no circumstances be shortened or extended. The pump is calibrated with
the supplied cable and will not operate if changes are made to the cable.
Any warranty will lapse upon such changes.

English
7
Error Display
Error code
ER01
ER02
ER03
ER04
ER05
Cause
Control box works
with fault current.
Control box
overheated.
The pump is idling
for too long.
The rotor is blocked
The pump is set at
too low a program/
energy consumption.
Too high or low
voltage (volts).
Solution
Check cable and connections
for short circuits.
The control box must be able
to ventilate and must not be
wrapped or enclosed.
Place it in the shade.
Check if the pump gets water
- it must not run dry.
Check if the rotor is blocked
and remove any objects.
Increase the pump's program/
energy consumption.
Check the power supply.
Techno Pro 50000S Controller
The controller is designed with the latest SINE-
wave technology and have a display to show
program, power use and error codes.
The pump cable should only be mounted or
dismounted with the powercable unplugged
from the socket.
Controller should be placed at least 30 cm.
above ground level.
Tips: If the buttons are not responding - You might have locked the display!
Press and hold the (Left) Start/Stop button for 3 seconds until the display
flashes 2 times - this is the procedure that opens/lock the controller.

8
The control box for Superow techno Pro S
The box can control the flow of a Superflow Techno Pro pump from stages 30 - 100.
At power on - the display first shows the previous set value, which is stored on
memory in case of power failure. In about 10 seconds pump will reach the flow.
You can turn the pump on / off at the left button - "OFF" it is showed in display.
When You turn on - Flow-value "F" number (30 - 100%) is shown and after a
short while, the display switches to show the energy consumption in Watt. "P" for
Power.
The energy consumption in the max setting can vary with the pump load, but
is usually lower than that indicated on packaging.
The control box should be positioned in a ventilated place and not exposed direct
to heavy rain or sunlight. Do not wrap or encapsulate as overheating will damage it.
Control box operation.
To control the pump during operation, do the following:
1. Press your finger on the up/down arrows on the display. The display lights up.
(Display will enter low power mode after 25 sec. without use)
2. Wait a few seconds and then calmly press the desired setting.
3. When the pump responds, the finger can be held on the up/down arrow
until the desired setting appears in the display.
4. The pump can also be turned on / off in the display.
Display Lock function:
Press and hold the (Left) Start/Stop button for 3 seconds until the display
flashes 2 times - this is the procedure that lock/opens the controller preventing
unintentional mistakes.
When operating the control box, be careful not to press the up/down arrows
too quickly. Be sure to press the box setting markings gently and carefully so
that the check box has time to register your settings.
If the control box should stop responding, you can reset it by turning off the
power, waiting 1-2 minutes, and then turning it back on.

English
9
Parts for the Superow Techno Pro 50000S
A1
A2
B
F
CD
E
Pump motor
Art.nr. 31368
Filter cover in metal
Art.nr. 30930
Rotor cover
Art.nr. 31344
Footplate
Art.nr. 30940
Rotor
Art.nr. 31331
O-ring rotor
Art.nr. 31363
E
A1 B
C
F
D
Metal plate
A2
Control box
Art.nr. 30949

Pondteam®is a registered trademarks. Other trademarks used in this manual, on our website or in
our catalogues are the property of their respective owners. We reserve the right to change specifi-
cations of products, App’s and recommendations without notice.
Some products are protected internationally by registered design and patents – further patents pending.
Waste management
A defect product must Not be thrown in the normal municipal waste, but
must be delivered at one of the home municipality's recycling stations.
Superow Techno Pro S
50000S
Instructions for use
www.pondteam.com
Pondteam AB
Mossvagen 17 - 23237 Arlov - Sweden • www.pondteam.com
Reservations for printing errors - Copyright Pondteam AB - 04/10/2022
Superow Techno Pro S

Superow Techno Pro S
50000S
Bruksanvisning
VIKTIGT: LÄS NOGA IGENOM BRUKSANVISNINGEN INNAN DU ANVÄNDER
DEN HÄR PRODUKTEN. SPARA BRUKSANVISNINGEN FÖR FRAMTIDA BRUK.
Manual version - 2022/10/04
www.pondteam.com
Inklusive kontrollbox för
ödesreglering och kontroll
av energiförbrukning.
Svensk

2
Bruksanvisning Superow Techno Pro S
Läs den här bruksanvisningen noggrant innan du använder pumpen.
Då vi kontinuerligt förbättrar och utvecklar våra produkter, kan tillbehör m.m.
skilja sig från bilderna på förpackningarna.
Beskrivning
Superflow Techno Pro pumparna är avsedda för trädgårdsdammar
och liknande vattensystem. Den lämpar sig utmärkt till filter, vattenfall,
bäckar, cirkulation och syresättning. De kan också användas till fontäner
(fontänmunstycken är inte inkluderade men kan köpas separat.)
Pumpen har en extern styrbox som gör att både funktion och
energiförbrukning enkelt kan justeras. Flödet kan ändras i olika förprog-
rammerade steg samtidigt visar displayen kontinuerligt energiförbrukningen
i watt.I displayen står bokstaven F för flödesprogram och bokstaven P
visar strömförbrukningen i watt. Pumpen är försedd med ett elektroniskt
torrkörningsskydd, som stänger av pumpen automatiskt vid torrgång eller
om rotorn blockeras. Detta är endast avsett som ett nödstopp och ska inte
användas i syfte som nivåreglering. Pumpen ska aldrig köra torr. Superflow
Techno Pro pumparna lämpar sig även för torrmontering i en pumpgrop
(under vattenytans nivå).
På alla modellerna är styrboxen utbytbar och kan fås som reservdel.
Superflow Techno pumparna är synkrona enfas växelströms pumpar med
kondensator. Motorn är helt vattentät, skyddsklass IP68.
Den öppna vorteximpellern klarar partiklar upp till ca 8 mm utan att blockeras
Superflow Techno Pro pumpmodellerna är några av de mest energisnåla och
tysta pumparna på marknaden, med den senaste SINE-wave tekniken.
Vi rekommenderar att Ni tittar på vår hemsida för att se de senaste
uppdaterade bruksanvisningarna.

3
Innehåll
1. Pumphus med 10 m gummikabel (IP68)
2. Extern styrbox
3. Metall filterkåpa
4. Rotorlock
Teknisk data
Modell SF Techno Pro 50000S
Max lyfthöjd 8 meter
Regulerbart flöde l/t ca. 20000-55000 l/t
Reg. energiförbrukning ca. 185-600 watt
Inlopp / Utlopp 3” / 3”
Garanti 3 år
Artikel nr. 30339
Toleransen i strömförbrukning kan variera 15%, för de olika programmen.
Säkerhetsföreskrifter
Pumpen får bara användas till trädgårdsdammar, och liknande. De elektriska
installationerna måste överensstämma med gällande föreskrifter. Är du det
minsta tveksam skall en auktoriserad elektriker rådfrågas. Innan du använder
pumpen förvissa dig om att kabel och kontakt inte har några synliga skador.
Spänningen i det lokala elnätet skall överensstämma med vad som står på
typskylten. Pumpen skall alltid anslutas över en jordfelsbrytare på högst 30 mA.
Elanslutningen skall skyddas mot fukt och placeras minst 2 meter från
dammen. Kontakten får inte utsättas för fukt.
Innan du utför något arbete i dammen skall pumpen kopplas från elnätet
genom att du drar ur kontakten. Av säkerhetsskäl får pumpen bara repareras
av leverantören.
Alla obehöriga ingrepp i pumpen gör att garantin bortfaller.
Pumpen får inte användas av barn eller personer som inte förstår hand-
havandet.
Pumpen skall aldrig bäras eller hängas i elkabeln. Elkabeln får inte kortas eller
modifieras på ngt sätt. Då detta kommer medföra att garantin bortfaller.
Svensk
5. Rotor
6. O-ring
7. Fotplatta
8. Bruksanvisning

4
Användning
Pumpen skall nedsänkas helt under vattenytan så pumphuset fylls med vatten
utan luftbubblor, och placeras minst 20 cm under vattenytan då den annars
kan suga luft. Pumpen får INTE går torr, detta kan leda till att pumpmotorn
inte kyls som den ska. Vilket i sin tur kan leda till skador och ev. att motorn
bränner och går sönder. Viktigt att rengöra pumpen och ev. förfilter
regelbundet för att förhindra att pumpen sätts igen / går torr.
Vattentemperaturen får inte överstiga 35°C och placeringsdjupet ej mer än
1,5 meter.
På vintern skall pumpen skyddas mot frost.
Pumpen stängs och sätts igång genom elkontakten eller genom kontrollboxen.
Pumpen klarar partiklar upp till ca 8 mm, men bör placeras ovanför en smutsig
botten på en stabil yta, som tex. en sten.
Torrmontering
Superflow Techno Pro kan också torrmonteras utanför dammen. Placera
pumpen i en pumpgrop. Pumpen skall placeras under vattenytans nivå.
Detta då pumpen inte är självsugande utan vattnet måste rinna in i den.
1. Ta bort filterkåpan.
2. Montera en tät slangadaptor och slang till pumpens insug och utlopp.
Förvissa dig om att det inte läcker. Sugslangen in till pumpen ska ha så
stor diameter som möjligt, minst 3". Sugslangen ska vara max 50 cm lång,
om diametern inte är mer än 3".
3. Försäkra er om att sugslangen och pumpen är fyllda med vatten innan
pumpen kopplas till elnätet.
4. För att förhindra smuts in i pumpen, bör du montera ett förfilter på
sugslangen.
Undvik att förltret sätts igen och låt aldrig pumpen köra torr.
Även om pumpen är utrustad med överhettningsskydd, kan stora skador
åsamkas på pumpen om den körs torr.

A1
A2
B
F
CD
E
5
Underhåll
Följ säkerhetsinstruktionerna och koppla ur pumpen från elnätet genom att dra
ur kontakten innan underhåll görs på pumpen (alltså Ej genom att ta loss kabel
mellan pumpen och kontrollboxen).
1. Dra fotplattan (F) mot kabeln för att dra av den.
2. Börja med att skruva ur de 4:a skruvarna från filterkåpan (A1).
3. Skruva ur de 4:a skruvarna från metallplattan (A2) och därefter de 7 st
skruvarna från rotorlocket (B). Dra sedan loss rotorlocket (B) från pump-
motorn (E) (7 st muttrar finns på pumpmotorn (E) som skruvarna varit fästa i).
4. Dra ut rotorn (C) ur rotorbrunnen. Tänk på den stora O-ring (D) som ligger i
en skåra i pumphuset, så den inte försvinner.
5. Rengör rotorbrunnen (hålet i E) och de andra delarna i ljummet vatten och
med en mjuk svamp eller borste (tex. gammal tandborste).
6. När delarna är rengjorda, montera den stora O-ringen (D) korrekt på plats i
skåran.
7. Sätt tillbaka rotorn (C) i rotorbrunnen.
8. Kontrollera att rotorn (C) kan rotera fritt och att O-ringen (D) ligger rätt.
9. Montera rotorlocket (B) på plats med tillhörande skruvar och muttrar i
pumpmotorn (E). Kontrollera med fingret att rotorn (C) kan rotera fritt.
10. Montera sedan metallplattan (A2) med tillhörande skruvar i rotorlocker (B).
11. Montera filterkåpan med tillhörande skruvar i metallplattan (A2).
12. Placera fotplattan (F) i avsedd skåra och tryck den på plats.
OBS! Kontrollera med jämna mellanrum pumpen och rengör den. Detta kräver
inga tekniska kunskaper utan det räcker med att följa bruksanvisningen. Superflow
Techno pumpen klarar partiklar upp till 8 mm vilket gör underhållet minimalt.
OBS! Om pumpen används i kalkhaltigt (hårt) vatten skall rotor och pump
rengöras regelbundet med avkalkningsmedel så det inte bildas kalkavlagringar.
Svensk

Förhindra överhettning
Pumpen är försedd med en värmesäkring och stängs automatiskt av vid torrgång
eller överhettning. Om pumpen blir för varm löser det inbyggda termoskyddet
ut och stänger av pumpen. Detta så att inga skador ska uppstå på pumpen.
Pumpen måste sedan svalna till normal temperatur, innan den kan startas igen.
Innan pumpen startas kontrollera följande:
1. Kontrollera att sugslangen har tillräcklig dimension och inte är tilltäppt.
2. Är förfiltret tilltäppt?
3. Kontrollera så att det inte sitter smuts, som stoppar rotorn.
När ovanstående är kontrollerat kan pumpen startas igen.
Förvaring på vintern
Skydda pumpen mot att frysa in. Innan första frosten och vintern kommer, tas
pumpen in och rengörs, enligt ovanstående anvisningar. Lägg sedan pumpen
i en hink med vatten och förvara den frostfritt. Vi rekommenderar att en
luftpump av bra kvalitet används över vintern, till dammen. På så sätt syresätts
vattnet för fiskarna under deras "dvalperiod". Detta utan att vattnet är i större
rörelse, vilket minimerar fiskarnas energiförbrukning.
Skador orsakade av frost täcks INTE av någon garanti.
Garanti
Den här pumpen täcks av en 3 års garanti mot produktions- och materialfel,
utifrån inköpsdatumet på kvittot. Garantin gäller inte mot handhavande fel,
kalk, frost eller felaktigt bruk eller normalt slitage. Garantin gäller ej om
skötsel enligt tillhörande instruktioner ej följts.
Inköpskvittot gäller som garantisedel. Vid garantireklamation skall inköps-
kvittot eller kopia medfölja. Under garantiperioden repareras eller byts
pumpen ut (vårt val).
OBS! Rotorn är en förslitningsdetalj och omfattas ej av garantin, utan finns
att köpa som reservdel.
Garantin gäller endast själva produkten och inga följdskador. Garantin gäller
utöver konsumentköplagen och är ett frivilligt åtagande från leverantören.
Garantin bortfaller om elkabeln kortas eller ingrepp görs i pumpens elektriska
delar. Anslutnings kabeln till pumpen eller till kontrollboxen får under inga
omständigheter kapas eller förlängas. Pumpen är kalibrerad hos tillverkaren
med avsedd kabel och kommer inte fungera om åverkan görs på kablarna.
Garantin bortfaller om ingrepp görs på elkablar eller produktens elektriska delar.
6

Error Display på kontrollboxen
Felkod i displayen
ER01
ER02
ER03
ER04
ER05
Orsak
Problem med
spänningen till
kontrollboxen.
Kontrollboxen är
överhettad.
Pumpen kör utan
motstånd (torrt) en
längre tid.
Pumpen är blockerad
eller kabelfel.
Pumpen är ställd på
för lågt program/
energiförbr.
För hög eller låg
spänning.
Lösning
Kontrollera kabeln och ström-
försörjningen.
Kontrollboxen får inte till-
räcklig ventilation. Boxen får
inte kapslas in eller placeras i
solljus.
Kontrollera att pumpen får
tillräckligt med vattenkylning.
Kontrollera att pumpen inte är
blockerad och/eller kabeln är
ansluten korrekt.
Öka pumpens program/
energiförbr.
Kontrollera strömförsörjningen.
7
Techno Pro 50000S kontrollbox
Kontrollboxen är designad med den senaste
SINE-wave-teknologin och har en display som
visar program, strömanvändning samt felkoder.
Pumpkabeln bör endast monteras eller demonteras
med strömkabeln urdragen från uttaget.
Kontrollboxen bör placeras minst 30 cm ovan
marknivå.
Svensk
Tips: Om knapparna på styrboxen inte svarar - Ni kan ha råkat låsa displayen!
Tryck och håll inne Start/Stopp knappen (den längst till vänster), i 3 sekunder,
tills displayen blinkar 2 gånger. På detta sätt låses displayen upp eller låses om så
önskas.

Reglering
När boxen ansluts lyser displayen upp.
Pumpen startar långsamt för att inom ca 10 sekunder uppnå önskat värde.
Vid strömavbrott kommer boxen ihåg värdet den var inställd på.
För att reglera pumpen under drift gör du följande.
1. Tryck med ett finger på displayens upp/nerpil. Displayen lyser då upp.
2. Vänta någon sekund och tryck lugnt på önskad åtgärd.
3. När pumpen reagerar kan fingret hållas på upp/ner så ändras displayen
fortlöpande.
Pumpen kan också sättas på/stängas av via displayen.
Tänk på att inte trycka hastigt utan lugnt och mjukt så kontrollboxen hinner
registrera åtgärden.
Vid behov återställs boxen genom att strömsladden dras ur kontakten.
OBS! Pumpen eller kontrollboxens anslutningskabel får inte under
några omständigheter skarvas, eller förlängas. Pumpen är kalibrerad med
den medföljande kabeln och kommer sluta fungera om några ändringar
görs på kabeln. Garantin upphör omedelbart att gälla vid sådan åverkan.
8
Kontrollboxen till Superow Techno Pro S
Boxen kan styra flödet av en Superflow Techno Pro-pump från stegvis 30 - 100.
Vid påslag - displayen visar först det tidigare inställda värdet, som lagras i minnet vid
strömavbrott. Efter cirka 10 sekunder kommer pumpen att nå flödet.
Du kan slå på/stänga av pumpen med den vänstra knappen - "OFF" inställda flödet
visas i displayen.
När du slår på - Flödesvärde "F" nummer (30 - 100%) visas och efter en kort stund
växlar displayen för att visa energiförbrukningen i watt. "P" för Power.
Energiförbrukningen i maxinställningen kan variera med pumpbelastningen,
men är vanligtvis lägre än vad som anges på förpackningen.
Kontrollboxen ska placeras på en ventilerad plats och inte utsättas direkt
för kraftigt regn eller solljus. Då det kan orsaka överhettning/kortslutning,
vilket kommer orsaka skador på kontrollboxen.

A1
A2
B
F
CD
E
Delar til Superow Techno Pro 50000S
9
Pumpmotor
Art.nr. 31368
Filterkåpa
Art.nr. 30930
Rotorlock
Art.nr. 31344
Fotplatta
Art.nr. 30940
Rotor
Art.nr. 31331
O-ring rotor
Art.nr. 31363
Svensk
E
A1 B
C
F
D
Metallplatta
A2
Kontrollbox för att
reglera flödet i olika steg.
Art.nr. 30949

Superow Techno Pro S
50000S
Bruksanvisning
www.pondteam.com
Avfallshantering
En defekt pump får inte slängas bland ordinarie hushållssopor utan
skall lämnas in på en av kommunen bestämd plats för elmateriel
tex en miljöstation. Pondteam är med i elkretsen för återvinning av
elavfall och REPA för återvinning av emballage.
Pondteam AB
Mossvagen 17 - 23237 Arlöv - Sverige • www.pondteam.com
Copyright Pondteam International AB - 04/10/2022
Pondteam®är ett registrerat varumärke. Andra varumärken som används i manualen eller på hemsi-
dan tillhör respektive företag. Vi förbehåller oss rätten att ändra produkter, specifikationer, appar och
rekommendationer.
Table of contents
Languages:
Other PONDTEAM Water Pump manuals
Popular Water Pump manuals by other brands

Hydromatic
Hydromatic S4HVX Series Installation and service manual

MIL'S
MIL'S HOSPIVAC V3 SIRELLA General Installation and Maintenance Instructions

Davey
Davey QB Series Installation and operating instructions

SKF
SKF LINCOLN A Series User and maintenance instructions

Tsurumi Pump
Tsurumi Pump Aquascape Pro PL Series Instruction and maintenance

DMEGA
DMEGA Mega Power I Instruction guide

Wayne
Wayne WaterBug WWB Quick start instructions

Core Separations
Core Separations SciMed CI Series manual

ubbink
ubbink Elimax Series Instructions for use

SKY KING
SKY KING 3SSH1.6/80-D36/400 user manual

pumpa
pumpa BLUE LINE PXSM Translation of the original instruction manual

Sealey
Sealey WPD415.V2 quick start guide