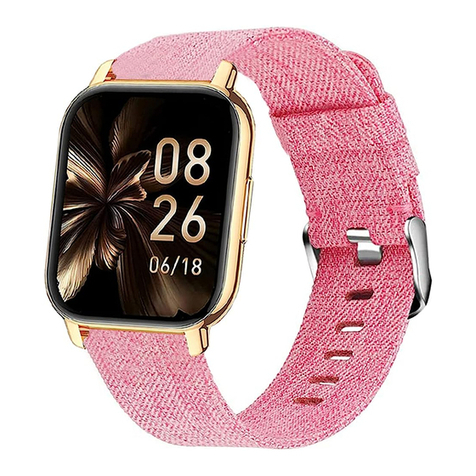
Popglory P96 User manual

All pictures in this manual are only for illustration.
The functions and firmware of the product will be updated.
Please feel free to contact us via orders if you have any
product problems.
P96
User Manual
Smart Watch

English Version
Charging Diagram…………………………………….01
App Installation…………………………………………02
Download App……………………………………………02
Account Registration and Login…………………….02
Device Pairing……………………………………………03
Watch Instruction.…………………………………….05
Power Key Instruction…………………………………05
Functions Introductions…………………………….05
Product Specifications………………………………09
Frequently Asked Questions………………….…10
Safety Warnings…………………………………………14

Charging Diagram
Please operate strictly as shown as the below pictures:
(1) Please align the charging cable to the contacts on
the back of the watch.
(2) Please plug it into a USB port on computer,
charging base or power bank to charge. (The USB
adapter is not included in the package.)
(3) Make sure the USB plug of the charging cable is
firmly connected to the port. When the watch vibrates
and the battery icon with % appears on the screen,
it means the charging is normal.
(4) Please charge the watch before use. The charging
process takes about 2 hours. The charging time should
not be too long. If the charging is completed, please
cut off the power in time.
Charging Contacts
Magnetic Charging Cable
USB Plug

GloryFit App is compatible with:
Note:
It only works with smart phones, not with tablet
or personal computers.
iOS 9.0 and above Android 5.0 and above Bluetooth 5.0 and above
App Installation
1. Download App
Please use the watch with GloryFit App.
You can download 'GloryFit' from App Store or
Google Play, or by scanning the QR Code below:
2. Account Registration and Login
Register an account with email. Please remember
the account and password for the future login.

3. Device Pairing
It is required to turn on the Bluetooth and allow
GloryFit to access the GPS on your smart phone
during the pairing.
Warm Tip: Do not connect the watch directly in
Bluetooth list.
Operation Method:
Open the app → 'Device' → click 'Add a new device'
→ 'Select device' to find the watch (P96) in the
search list and click 'P96' to complete the pairing.

Note:
(1) Please follow the above operations to connect
the watch correctly.
(2) Android phones must allow the app to obtain
permissions and run in the background, otherwise
it will affect the user experience.
(3) During the connection process, please keep the
distance between the phone and the watch within
1 meter and the enough battery power of watch.
If the above operations don't work, please restore
the watch to factory settings. Turn on Bluetooth and
follow the above steps to connect again.
Connected Not connected

1. Power Key Instruction
(1) Screen on/off
(2) Return
(3) Pause
(1) Power on
(2) Power off
(1) Switch
watch face
(2) Switch
function list
Long press RotatePress
Power Key
Watch Instruction
Functions Introductions
1. Watch Faces:
Setting on watch:
a. Long press the screen, the watch faces will appear
after vibration.
b. Swipe down the screen and tap 'Setting-Watch face'.
Then swipe the watch screen horizontally to select
the watch face you like.
Setting in the App:
Login your Account in the App. Then select 'Device' -
'Watch faces'.
You can also select 'Custom dial' and choose a photo
you like as the watch face.

2. Message Notification:
When the watch is connected to the phone, please allow
notification access for GloryFit in the phone and turn on
'Call reminder', 'SMS reminder' and 'App reminder' in
the app. The watch will display text messages, incoming
calls and app notifications such as Facebook, WhatsApp,
Twitter, etc. Each notification can be deleted separately.
Note: You cannot reply to text messages on the watch.
More operation details can be found at FAQs 1.
3. Heart Rate Monitoring:
Enter the heart rate interface. After the value is
stable, you can view the current heart rate status.
For 24/7 real-time heart rate monitoring,
please turn on the 'Auto test' in the App.
5. Blood Oxygen Monitoring:
Enter the blood oxygen interface. After the value is
stable, you can view the current blood oxygen status.
4. Blood Pressure Monitoring:
Enter the blood pressure interface. After the value is
stable, you can view the current blood pressure status.

6. Sleep Monitoring:
Please wear the watch correctly when you sleep.
The watch can automatically detect and record the
user's sleep status including deep sleep / light sleep
/ awake, so that users can intuitively understand their
sleep status.
7. Smart Sidebar:
Update the list of functions that users have entered
in real-time. Swipe right the main screen, click the
function icon to enter directly to save users' time.
8. Training:
The watch supports 100+ sports modes, such as
Outdoor running / Cycling / Mountaineering / Dancing /
Yoga / Sit-ups / Bungee Jumping / Marathon.
You can set different exercise goals according to your
physical fitness.
9. Music Control:
The phone player should be turned on firstly, then you
can control the mobile music player to perform the
function of 'next' / 'previous' / 'pause' and 'play' on the
watch under connection.

10. Weather Forecast:
The weather forecast function supports current weather
viewing. It will be convenient for you to set reasonable
travel arrangements timely.
This function can only be used when the watch is
connected to the App. At the same time, the phone's
GPS is on and the App is allowed to access the phone's
location.
11. Quick Setting:
Swipe down the main screen to enter into the quick
settings bar, including 'Do not disturb', 'Brightness
adjustment', 'Theme' and 'Settings'.
When you don't want to be disturbed during sleep time
or other time periods, you can set the start time and
end time of 'Do not disturb' in the App and will not be
disturbed during that period.
12. More Functions:
The watch has other functions such as alarm clock (which
can only be set in the App), flashlight, timer, stopwatch,
raising hand to activate display, vibration adjustment,
brightness adjustment, sedentary reminder, remote
camera, finding device, finding phones, physiological
cycle reminder, resetting, shutdown, and viewing watch
information.
Note:
1. More detailed information analysis and data recording
can be viewed in the App.
2. The measurement results are only for the fitness
reference and cannot be used as a medical purpose.

Product Specifications
P96 1.69 inches
260mAh
About 2 hours
IP67
240*280
5V
5.0
Magnetic charge
Model:
Battery Capacity:
Charging Time:
Water-resistant
Level:
Resolution:
TFT
20mm
Screen Type:
Strap Width:
About 5-7 days
Usage Time:
About 15-20 days
Standby Time:
Screen Type:
Charging Voltage:
Bluetooth Version:
Charging Mode:
-10℃-45℃H260mm* W42mm
* D10mm
Operating
Temperature: Watch Size:

FAQS
1. How to receive the messages on the watch?
(1) If you have allowed all permissions when installing
the app, please open the app 'GloryFit' - 'Device' -
'App Reminder' - open the app you want to receive
notifications. Then you will receive a message prompt.
(2) If you have not allowed all usage permissions
when installing the app, please uninstall and reinstall
the app. Then repeat the previous operation steps.
Notice:
a. The watch needs to be connected to the app.
b. The watch only receives message reminders
displayed in the message notification bar of the
smart phone.
c. Keep the distance between the watch and the
smart phone within five meters.
d. Android phone users need to open the 'Me'
interface in the app, click 'Permission Settings' -
'Background Activity Permission' firstly. Then allow
the app to run in the background to ensure continuous
receipt of message prompts.
e. The iPhone users need to turn on 'Share System
Notification' of P96 in iPhone's Bluetooth.

2. How to get accurate steps?
(1) Fill in your gender, age, height and weight
information in the app so that the watch can update
the more correct step size and update the algorithm.
(2) When you swing your arms, the watch will record
your steps. If you walk less than 30 steps in a row,
it will be considered as invalid step and won't be
recorded.
3. How to set the duration of the screen-on time?
Swipe down the main interface of the watch and click
the icon in the lower right corner, or swipe up on the
main interface, find and click 'Screen time' - swipe
up and down to select the screen on time you want.
4. How to set the vibration intensity?
a.Swipe down the main interface of the watch and
click the icon in the lower right corner.
b.Swipe up the main interface, find and click 'Vibration'.
c.Swipe up and down to select 'High', 'Medium' or
'Low' in the menu.
5. How to get accurate measurement of blood oxygen,
blood pressure, and heart rate?
(1) Incorrect wearing posture will affect the accuracy
of measurement data. For example, when the watch
is not close to the skin, it will create the deviation of

the green light detector.
(2) The way of swing of the arm and the misalignment
of the watch on the skin will affect the accuracy of
measurement data. Wearing the watch too tightly,
raising your hand and making a fist will affect blood
circulation and may affect the heart rate signal.
(3) The correct measurement way is to put your arm
flat, relax and keep still while making sure the watch
is close to your skin. Note: Even when worn correctly,
individual differences such as skin color, hair, tattoos,
and scars may affect the measurements.
(4) This watch is not intended for medical use, all
measurements are for general fitness purposes.
7. How to switch the watch language?
After the watch is connected to the GloryFit App, click
'Device' - 'Universal settings' - 'Device Language', and
select the language you want.
8. How to set watch time and time format?
Set the watch time: Please connect the watch with the
6. How to set the weather temperature unit?
After the watch is connected to the GloryFit app, select
'Home', click the weather icon in the upper left corner
to enter the weather interface, and click '℃/℉' in the
upper right corner to switch the temperature unit.

phone firstly. Then the watch time will be synchronized
with the phone time. If the time is still wrong, please
unbind the watch and reconnect it.
Set the time format: After the watch is connected to the
GloryFit App, click 'Device' - 'Universal settings' - 'Time
system', and select 12 or 24 hours.
9. How to set the female health function?
After the watch is connected to the GloryFit app,
click 'Me' - 'Physiological Cycle'.
Set the start time, length and cycle, then click 'Start'
to complete the setting.

Safety Warnings
1. This product is not a toy - do not allow children or
pets to play with this product. Always store product
out of reach of children. Choking can result if the
device itself or the many small parts it contains are
swallowed.
2. The device, accessories, heart rate monitor sensor,
blood oxygen measurement and related measurement
data are for general fitness and wellness purposes
only. They are not for medical purposes, and are not
intended to diagnose, monitor, treat, cure or prevent
any disease or condition.
Note:
For detailed operating instructions,
please refer to the e-manual.
Email: p96@fitwatch4u.com
Table of contents
Other Popglory Watch manuals