TABLE OF CONTENTS
INTRODUCTION 3
SAFETY OVERVIEW 5
Safety Instruction Convention 5
Operational Tips and Instruction
Convention
5
TABLE OF CONTENTS 6
TERMINOLOGY 7
VOLTstack Power Modes 7
VOLTstack Power States 7
Amp Hour (Ah) 7
Battery Management System (BMS) 7
Battery Pack 7
Face Plate 7
KiloWatt Hour (kWh) 7
Net Power 8
Rear Plate 8
Run Time 8
State of Charge 8
SUNstack Solar Kit 8
Surge 8
VOLTstack Power Block 8
VOLTSTACK SAFETY 9
Safety Label Locations 9
Important Safety Information 9
Operator Responsibility 9
Environmental Considerations 10
Paralleling Outputs 10
Electrical Arcing 11
Grounding 11
Floating Neutral 11
Connecting to Grid 12
COMPONENT IDENTIFICATION
AND LOCATION
13
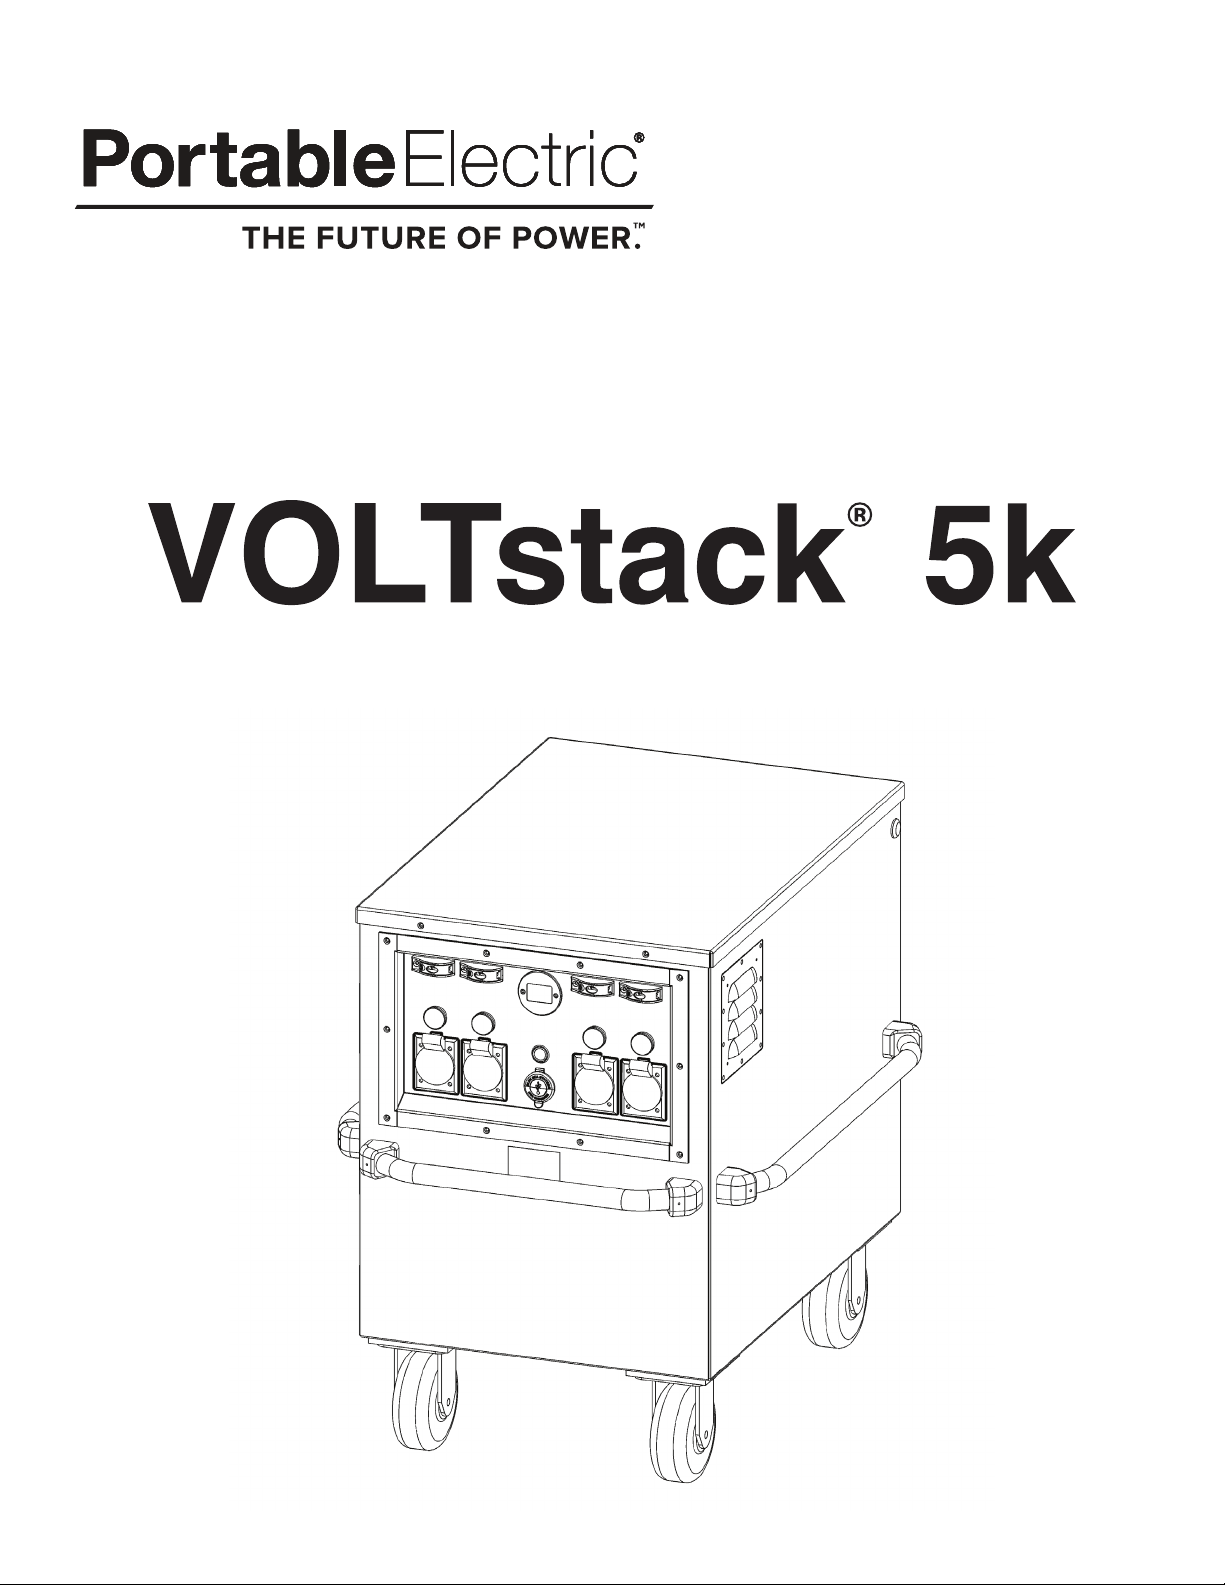
Exterior 13
Face Plate 14
Rear Plate 14
Interior 15
Serial Number 15
GETTING STARTED 16
Pre-Operation Check 16
Recharging 16
Turning Power On 16
Turning Power O 16
OPERATION 17
Applications 17
Battery Storage Capacity 18
Battery Monitor State of Charge 18
Battery Monitor Operation 19
Type 1 Battery Monitor 19
Discharging 19
Charging 19
State or Charge Low 19
Fault Warning 19
Connection Error 19
Standby Operation 19
Power ON Operation 20
Low State of Charge Cut-o 20
Load vs Run Time 20
AC Charging Operation 20
Solar Charging Operation 21
Important Safety Information 21
Getting Started 22
Charging Complete 22
Power On While Charging 23
USB 5V Charging 24
Self Consumption 24
Controller Settings 24
DC Operating Fuse Replacement 24
Hot and Cold Temperature Operation 24
High Temperature AC Output 25
High Temperature AC Charging 25
High Temperature Shut-Down 25
Cold Temperature AC Output 25
Cold Temperature AC Charging 25
MAINTENANCE 26
Maintenance Schedule 26
Opening the Lid 28
Caster Maintenance 28
Air Intake Filter Maintenance 29
Environmental Fan Maintenance 30
Interior and Power Block Maintenance 31
Connection Points Maintenance 31
Battery System Maintenance 31
Replacement Parts 32
STORAGE 33
Storage Environment 33
Storage Procedure 33
Storage Precautions 33
VOLTstack Health in Storage 34
TRANSPORTATION 35
Transportation Preparation 35
Ground Transportation 35
Transportation by Air 35
TROUBLESHOOTING 36
TECHNICAL INFO 37
5k Wiring Diagram 37
AC Terminal Strip Wiring 38
Device Power Ratings 39
Spec Sheet 40
Dimension Sheet 41
Version 1.0 September 2019 6