Porter&Charles SPPS60TM User manual

User Manual EN
Mode d’emploi FR
COMBI MICROWAVE
1631001-a

1
USA
Dear Customer,
Before going any further, we want to thank you for preferring our Porter & Charles product. We
are sure that this modern, functional and practical microwave oven, manufactured with top
quality materials, will fully meet your expectations.
We ask you to read the instructions in this booklet very carefully as this will allow you to get the
best results from using your microwave oven.
KEEP THE DOCUMENTATION OF THIS PRODUCT FOR FUTURE REFERENCE.
Always keep the instruction manual handy. If you lend the microwave oven to someone
else give them the manual as well!
This Combi Speed Oven complies with Part 18 of the FCC rules.
The user manual is also available for download at www.porterandcharles.ca

2
USA
Contents
The advantages of microwaves.......................................................................................................10
Description of your oven..................................................................................................................11
Function Description.......................................................................................................................12
Basic settings ...................................................................................................................................13
Setting the clock.............................................................................................................................13
Hiding/Displaying the Clock............................................................................................................13
Safety blocking...............................................................................................................................13
Basic Functions................................................................................................................................14
Microwaves.....................................................................................................................................14
Quick Start......................................................................................................................................14
Grill.................................................................................................................................................14
Microwave + Grill............................................................................................................................15
Microwave + Hot-Air.......................................................................................................................16
Grill + Fan.......................................................................................................................................16
Defrosting by time (manual)............................................................................................................17
Defrosting by weight (automatic)....................................................................................................17
Memory function.............................................................................................................................18
Special functions..............................................................................................................................19
Special Function P: Heating food ...................................................................................................19
Special Function P: Cooking...........................................................................................................20
Special Function P: Defrosting & Toasting .....................................................................................21
Using the Browning Plate ................................................................................................................22
When the oven is working................................................................................................................23
Interrupting a cooking cycle............................................................................................................23
Altering parameters ........................................................................................................................23
End of a cooking cycle....................................................................................................................23
Defrosting..........................................................................................................................................24
General instructions for defrosting..................................................................................................25
Cooking with a microwave oven .....................................................................................................26
Cooking with the grill .......................................................................................................................28
Roasting ............................................................................................................................................31
What kind of ovenware can be used?.............................................................................................33
Microwave function.........................................................................................................................33
Grill and Hot-Air functions...............................................................................................................33
Combined functions........................................................................................................................33
Oven Cleaning and Maintenance.....................................................................................................35
Front surface ..................................................................................................................................35
Oven interior...................................................................................................................................35
Oven ceiling....................................................................................................................................36
Accessories....................................................................................................................................36
What should I do if the oven doesn’t work?...................................................................................37
Substitution of light bulb .................................................................................................................37
Technical characteristics.................................................................................................................38
Specifications .................................................................................................................................38
Installation instructions ...................................................................................................................39
Installation.........................................................................................................................................84

3
USA
GROUNDING INSTRUCTIONS
This appliance must be grounded. In the event of an electrical short circuit,
grounding reduces the risk of electric shock by providing an escape wire
for the electric current. This appliance is equipped with a cord having a
grounding wire with a grounding plug. The plug must be plugged into an
outlet that is properly installed and grounded.
Warning! IMPROPER USE OF THE GROUNDING CAN RESULT IN A RISK
OF ELECTRICAL SHOCK.
Consult a qualified electrician or serviceman if the grounding instructions
are not completely understood, or if doubt exists as to whether the
appliance is properly grounded, and do not use an extension cord. If the
power supply cord is too short, have a qualified electrician or serviceman
install an outlet near the appliance.
.
When heating food in plastic or paper containers, keep an eye on the appliance
due to the possibility of ignition.
The appliance is intended for heating food and beverages. Drying of food or
clothing and heating of warming pads, slippers, sponges, damp cloth and similar
may lead to risk of injury, ignition or fire.

4
USA
IMPORTANT SAFETY INSTRUCTIONS
When using electrical appliances basic
safety precautions should be followed,
including the following:
Warning! To reduce the risk of burns,
electric shock, fire, injury to persons,
or exposure to excessive microwave
energy:
Read all instructions before using
the appliance.
Read and follow the specific
“PRECAUTIONS TO AVOID
POSSIBLE EXPOSURE TO
EXCESSIVE MICROWAVE
ENERGY” found on this manual.
This appliance must be grounded.
Connect only to properly grounded
outlet. See “GROUNDING
INSTRUCTIONS” found on this
manual.
Install or locate this appliance only
in accordance with the provided
installation instructions.
Some products such as whole
eggs and sealed containers –for
example, closed glass jars are able
to explode and should not be
heated in this oven.
Use this appliance only for its
intended use as described in the
manual. Do not use corrosive
chemicals or vapors in this
appliance. This type of oven is
specifically designed to heat, cook,
or dry food. It is not designed for
industrial or laboratory use.
As with any appliance, close
supervision is necessary when
used by children.
Do not operate this appliance if it is
has a damaged cord or plug, if it is
not working properly, or if it has
been damaged or dropped.
This appliance should be serviced
only by qualified service personnel.
Contact nearest authorized service
facility for examination, repair, or
adjustment.
Do not cover or block any openings
on the appliances.
Do not store this appliance
outdoors. Do not use this product
near water –for example, near a
kitchen sink, in a wet basement,
near a swimming pool, or similar
locations.
Do not immerse cord or plug in
water.
Keep cord away from heated
surfaces.
Do not let cord hang over edge of
table or counter.
When cleaning surfaces of door
and oven that comes together on
closing the door, use only mild,
nonabrasive soaps, or detergents
applied with a sponge or soft cloth.

5
USA
IMPORTANT SAFETY INSTRUCTIONS
To reduce the risk of fire in the oven cavity:
Do not overcook food. Carefully attend appliance when paper, plastic, or other
combustible materials are placed inside the oven to facilitate cooking.
Remove wire twist-ties from paper or plastic bags before placing bag in oven.
If materials inside the oven ignite, keep oven door closed, turn oven off, and
disconnect the power cord, or shut off power at the fuse or circuit breaker
panel.
Do not use the cavity for storage purposes. Do not leave paper products,
cooking utensils, or food in the cavity when not in use.
Liquids such as water, coffee, or tea are able to be overheated beyond the
boiling point without appearing to be boiling. Visible bubbling or boiling when
the container is removed from the microwave oven is not always present.
THIS COULD RESULT IN VERY HOT LIQUIDS SUDDENLY BOILING OVER
WHEN THE CONTAINER IS DISTURBED OR A UTENSIL INTO THE
LIQUID.
To avoid that type of situation when heating liquids, put a teaspoon or glass
rod inside the container.

6
USA
PRECAUTIONS TO AVOID POSSIBLE
EXPOSURE TO EXCESSIVE
MICROWAVE ENERGY
(a) Do not attempt to operate this oven with the door open since open –door
operation can result in harmful exposure to microwave energy. It is important
not to defeat or tamper with the safety interlocks.
(b) Do not place any object between the oven front face and the door or allow
soil or cleaner residue to accumulate on sealing surfaces.
(c) Do not operate the oven if it is damaged. It is particularly important that the
oven door closes properly and that there is no damage to the: (1) door (bent),
(2) hinges and latches (broken or loosened), (3) door seals and sealing
surfaces.
(d) The oven should not be adjusted or repaired by anyone except properly
qualified service personnel.
Pacemakers:
Most pacemakers are shielded from interference from electronic products, including
microwaves. However, patients with pacemakers may wish to consult their
physicians if they have concerns.

7
USA
PRECAUTIONS TO BE OBSERVED
BEFORE AND DURING SERVICING TO
AVOID POSSIBLE EXPOSURE TO
EXCESSIVE MICROWAVE ENERGY
(a) Do not operate or allow the oven to be operated with the door open.
(b) Make the following safety checks on all ovens to be serviced before
activating the magnetron or other microwave source, and make repairs as
necessary: interlock operation, proper door closing, seal and sealing
surfaces (arcing, wear, and other damage), damage to or loosening of hinges
and latches, evidence of dropping or abuse).
(c) Before turning on microwave power for any service test or inspection within
the microwave generating compartment, check the magnetron, wave guide
or transmission line, and cavity for proper alignment, integrity and
connection.
(d) Any defective or misadjusted components in the interlock, monitor, door seal,
and microwave generation and transmission systems, shall be repaired,
replaced, or adjusted by procedures described in this manual before the
oven is released to the owner.
(e) A microwave leakage check, to verify compliance with the Federal
Performance Standard, should be performed on each oven prior to release to
the owner.

8
USA
Microwave safety
Warning! Never leave the oven unwatched,
especially when using paper, plastic or other
combustible materials. These materials can
char and may fire. FIRE RISK!
Warning! Do not heat pure alcohol or
alcoholic drinks in the microwave. FIRE
RISK!
Warning! Do not heat liquids or other foods
in closed containers since these may
explode readily.
Warning! This appliance is not intended for
use by persons (including children) with
reduced physical, sensory or mental
capabilities, or lack of experience and
knowledge, unless they have been given
supervision or instruction concerning use of
the appliance by a person responsible for
their safety. Children should be supervised
to ensure that they do not play with the
appliance.
Warning! If the oven has a combined
function mode (microwave with other means
of heating), children should not be allowed to
use the oven without adult supervision on
account of the high temperatures generated.
Warning! The oven cannot be used if:
- The door is not closed correctly;
- The door hinges are damaged;
- The surfaces of the contact between the
door and the oven front are damaged;
- The door window glass is damaged;
- There is frequent electrical arcing inside
the oven even though there is no metal
object inside.
The oven can only be used again after it
has been repaired by a Technical
Assistance Service technician.
Beware!
Never heat baby foods or drinks in bottles or
jars with the teats or lids on them. After
heating the food mix or shake well so that
the heat is spread evenly. Check the food
temperature before feeding this to the child.
DANGER OF BURNING!
To avoid food overheating or burning it is
very important not to select long time
periods or power levels that are too high
when heating small quantities of food. For
example, a bread roll can burn after 3
minutes if the power selected is too high.
For toasting, use just the grilling function and
watch the oven all the time. It you use a
combined function to toast bread it will catch
fire in a very short time.
Make sure you never catch the power cables
of other electrical appliances in the hot door
or the oven. The cable insulation may melt.
Danger of short-circuiting!

9
USA
Microwave safety
This oven is exclusively for domestic use!
Use the oven only for preparing meals.
Avoid damaging the oven or other
dangerous situations by following these
instructions:
Do not switch on the oven without the
turntable support, the turntable ring and
the respective plate being in place.
Never switch on the microwave when it
is empty. If there is no food inside there
may be an electrical overcharge and the
oven could be damaged. RISK OF
DAMAGE!
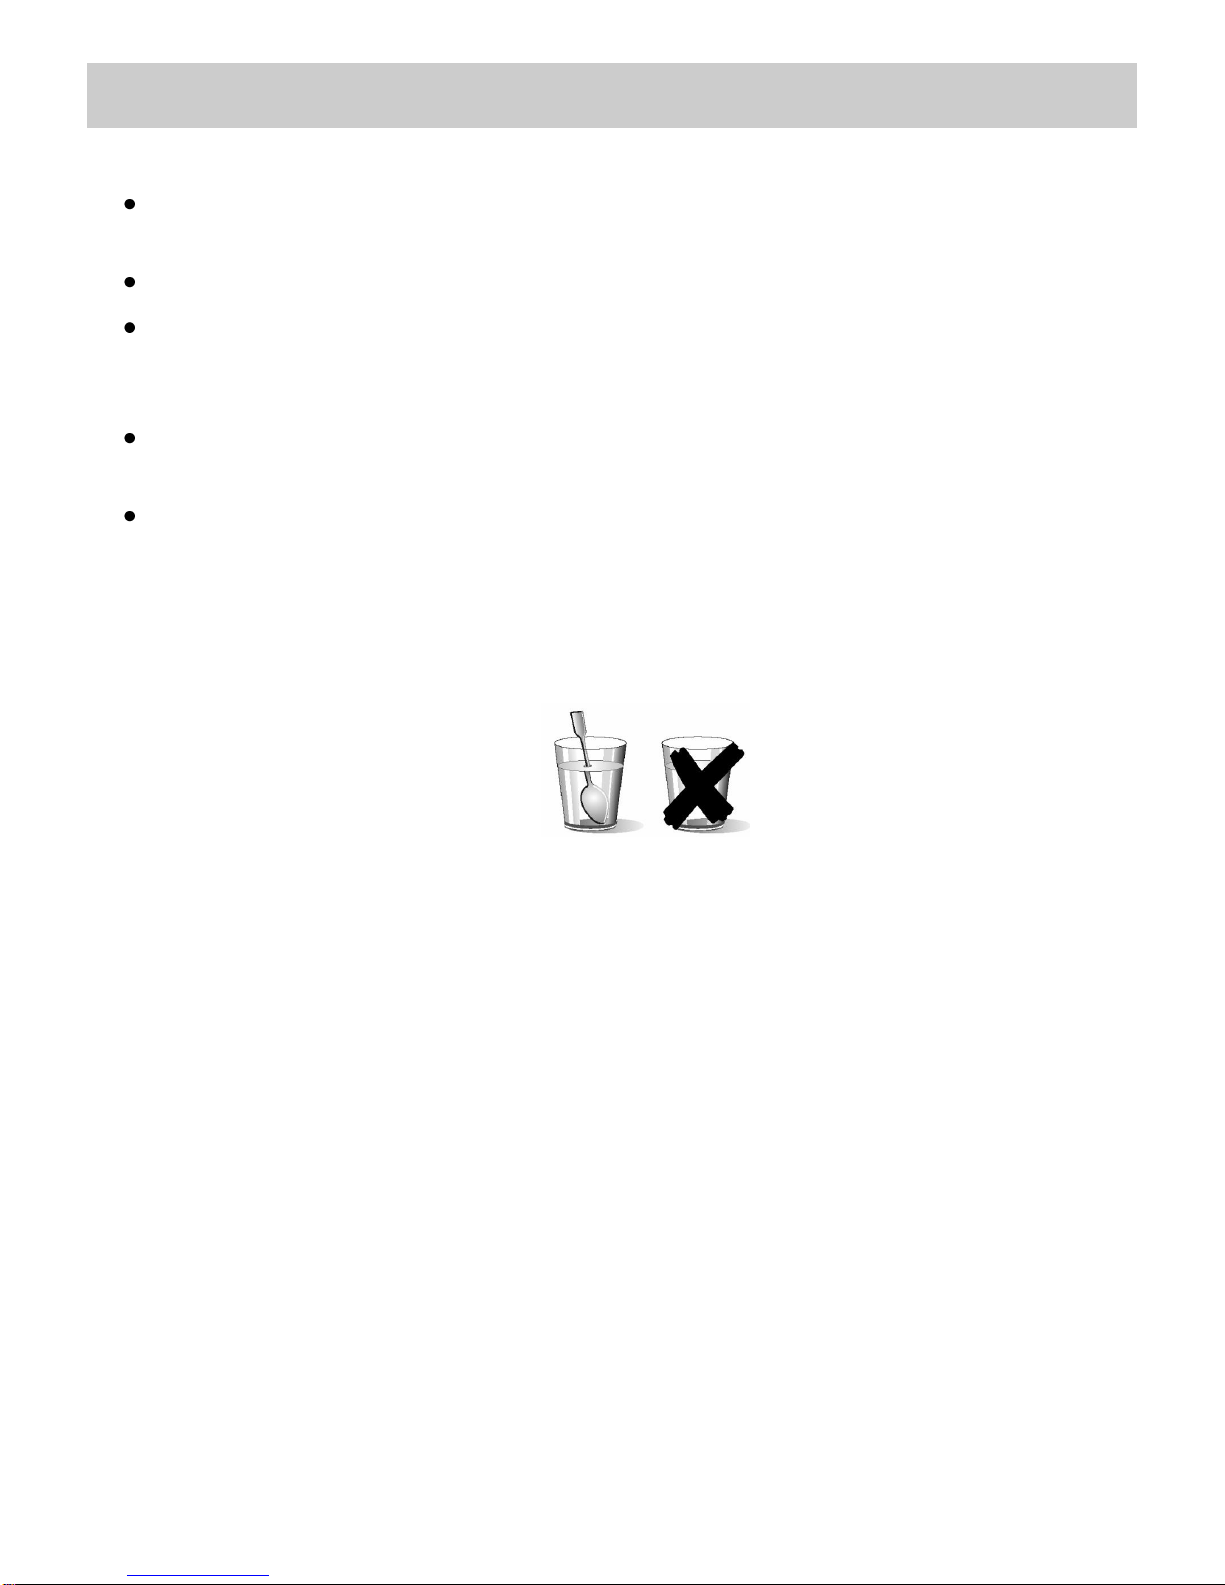
For carrying out oven programming
tests put a glass of water inside the oven.
The water will absorb the microwaves and
the oven will not be damaged.
Use only dishes suitable for
microwaves. Before using dishes and
containers in the microwave, check that
these are suitable (see the section on
types of dishes).
Never remove the mica cover on the
ceiling of the oven interior! This cover
stops fat and pieces of food damaging the
microwave generator.
Do not keep any inflammable object
inside the oven as it may burn if the oven
is switched on.
Do not use the oven as a pantry.
Eggs with their shells and whole boiled
eggs must not be heated in microwave
ovens because they may explode.
Do not use the oven for frying as it is
impossible to control the temperature of oil
heated by microwaves.
To avoid being burnt, always use oven
gloves for handling dishes and containers
and touching the oven.
Do not lean or sit on the open oven
door. This may damage the oven,
especially in the hinge zone. The door can
bear a maximum weight of 8 kg.
The turntable and the grills can bear a
maximum load of 8 kg. To avoid damaging
the oven, do not exceed this load.
Cleaning:
Warning! Your microwave oven must be
cleaned regularly. All food remains must
be removed (see section on Oven
Cleaning). If the microwave oven is not
kept clean its surface may deteriorate and
this may shorten the oven’s working life
and could even result in a dangerous
situation.
The door contact surfaces (the front of the
cavity and the inside part of the doors)
must be kept very clean in order to ensure
the oven functions correctly.
Do not use harsh abrasive cleaners or
sharp metal scrapers to clean the oven
door glass since they can scratch the
surface, which may result in shattering
of the glass.
Do not use high pressure or stream jet
cleaning appliances.
Please follow the instructions regarding
cleaning in the section “Oven Cleaning and
Maintenance”.
Repairs:
Warning –Microwaves! The outer
protection of the oven must not be
removed. It is dangerous for anyone not
authorized by the manufacturer to carry
out any kind of repair or maintenance
work.
If the power cable is damaged it should be
substituted by the manufacturer,
authorized agents or technicians qualified
for this task in order to avoid dangerous
situations. Furthermore, special tools are
required for this task.
Repair and maintenance work, especially
of current carrying parts, can only be
carried out by technicians authorized by
the manufacturer.

10
USA
The advantages of microwaves
In conventional ovens, heat radiated by electrical
elements or gas burners slowly penetrates the
food from outside to inside. On account of this
there is a major amount of energy is wasted
heating the air, the oven components and the food
containers.
In a microwave oven, heat is generated by the
food itself and the heat travels from inside to
outside. No heat is lost to the air, the walls of the
oven cavity or the dishes and containers (if these
are suitable for use in microwave oven), in other
words, only the food is heated.
Microwave ovens have the following advantages:
1. Shorter cooking times; in general these are up
to 3/4 less than the time required for
conventional cooking.
2. Ultra-fast food defrosting, thus reducing the
danger of bacterial development.
3. Energy savings.
4. Conservation of the nutritional value of foods
due to the shorter cooking times.
5. Easy to clean.
How a microwave oven works
In a microwave oven there is a high tension valve
called a magnetron which converts electrical
energy into microwave energy. These
electromagnetic waves are channelled to the
interior of the oven through a wave guide and
distributed by a metallic spreader or through a
turntable.
Inside the oven the microwaves propagate in all
directions and are reflected by the metal walls,
uniformly penetrating the food.
Why food heats up
Most foods contain water and water molecules
vibrate when subjected to microwaves.
The friction between molecules produces heat
which raises the temperature of the food, de-
freezing it, cooking it or keeping it hot.
Since the heat arises inside the food:
This can be cooked with little or no liquid or
fats/oils;
De-freezing, heating or cooking in a microwave
oven is quicker than in a conventional oven;
The vitamins, minerals and nutritional
substances in the food are conserved;
The natural colour and aroma of the food are
unchanged.
Microwaves pass through china, glass, cardboard
or plastic but do not go through metal. For this
reason, metal containers or ones with metal parts
must not be used in a microwave oven.
Microwaves are reflected by metal...
... but go through glass and china...
... and are absorbed by foods.

11
USA
Description of your oven
1. –Control Panel
7. –Turntable ring
2. –Door window glass
8. –Turntable plate
3. –Lateral supports
9. –Rectangular Glass Tray
4. –Catches
10. –Rectangular Rack
5. –Hot Air output
11. –Browning Plate
6. –Turntable Support
1. Function selection knob
2. Safety Block key
3. Start key
4. OK key
5. Clock key
6. Stop Key
7. Rotating Knob
A
B
C
D
E
F
G
H
I
J
K
L
M
N
O
A. Clock indicator
I. Defrost by weight indicator
B. Function indicator
J. Weight indicator
C. Cooking Memories indicators
K. Power indicator
D. Minus” key
L. Temperature indicator
EDuration indicator
M. Power/Weight display
F. “Plus” key
N. Safety Block indicator
G. Special Function indicator
O Clock/Duration display
H. “Defrost by time indicator
.

12
USA
Description of your oven
Function Description
Symbol
Function
Microwave
Power Output
Foods
Microwave
200 W
Slow defrosting for delicate foods; keeping food hot
400 W
Cooking with little heat; boiling rice
Rapid defrosting
600 W
Melting butter
Heating baby food
800 W
Cooking vegetables and food
Cooking and heating carefully,
Heating and cooking small portions of food
Heating delicate food
1000 W
Cooking and rapidly heating liquids and pre-cooked foods
Microwave
+ Grill
200 W
Toasting food
400 W
Grilling poultry and meat
600 W
Cooking pies and cheese-topped dishes
Grill
Grilling food
Microwaves +
Hot-Air
200
Meat roast and simmer
400
Poultry roast
600
Other fast roasts
Hot-Air
---
Roast and bake
Grill + Fan
---
Food even browning

13
USA
Basic settings
Setting the clock
After your microwave oven is first plugged in or
after a power failure, the clock display will flash to
indicate that the time shown is not correct. To set
the clock, proceed as follows:
1. Press the Clock key (5) when the
Clock/Duration display is showing the clock.
The hour numbers will start to flash.
2. Press the “+” and “-” keys to set the correct
hour value.
3. Press again the Clock key (5) to set the
minutes. The minute numbers will start to
flash.
4. Press the “+” and “-” keys to set the correct
minute value.
5. To finish, press the Clock key (5) again.
Hiding/Displaying the Clock
If the clock display disturbs you, you can hide it by
pressing the Clock key for 3 seconds. The dots
that separate the hours and minutes will flash but
the rest of the clock display will be hidden.
If you want to see the clock display again, press
the Clock key again for 3 seconds.
Safety blocking
The oven operation can be blocked (for example,
to stop it from being used by children).
1. To block the oven, press the Safety Block
key (2) for 3 seconds. You will hear a sound
signal and the message “SAFE” will be
displayed. Safety Block indicator will
illuminate. The oven is blocked in this state
and cannot be used.
2. To unblock the oven, press the Safety Block
key (2) again for 3 seconds. You will hear a
sound signal and the Safety Block indicator will
turn off.

14
USA
Basic Functions
Microwaves
Use this function to cook and heat vegetables, potatoes, rice, fish and meat.
1. Turn the Function Selector knob (1) until the
Microwave function indicator flashes. The
Duration display shows 1:00 flashing.
2. Turn the Rotating knob (7) in either direction to
set the duration.
3. Press the OK key (4) to validate. The
microwaves power value flashes on the Power
display. The microwaves power indicator starts
to flash.
4. Turn the Rotating knob (7) in either direction to
set the microwaves power level. If you do not
turn this knob, the oven operates at 800 W
power.
5. Press the OK key (4) to validate.
6. Press the Start key (3). The oven will start to
operate.
NOTE:
The start button may be pressed at anytime
in the above sequence and the oven will
start the cooking process with the displayed
parameters.
Quick Start
1. Press the Start key (3). The oven starts to
function at maximum power for 30 seconds.
2. If you intend to extend the operating time, press
the Start key (3) again. Each time this key is
pressed, the operating time will increase by 30
seconds.
NOTE: If the power of 1000 W is selected, the
operating time is limited to a maximum of 15
minutes.
Grill
Use this function to brown the top of food quickly.
1. Turn the Function Selector knob (1) until the
Grill function indicator flashes. The Duration
display shows 15:00 flashing.
2. Turn the Rotating knob (7) in either direction to
set the duration.
3. Press the OK key (4) to validate.
4. Press the Start key (3). The oven will start to
operate.

15
USA
Basic Functions
Microwave + Grill
Use this function to cook lasagne, poultry, roast potatoes and toasted foods.
1. Turn the Function Selector knob (1) until the
Microwave + Grill function indicator flashes.
The Duration display shows 10:00 flashing.
2. Turn the Rotating knob (7) in either direction to
set the duration.
3. Press the OK key (4) to validate. The
microwaves power value flashes on the Power
display. The microwaves power indicator starts
to flash.
4. Turn the Rotating knob (7) in either direction to
set the microwaves power level. If you do not
turn this knob, the oven operates at 600W
power. The maximum power that can be
selected is 600 W.
5. Press the OK key (4) to validate.
6. Press the Start key (3). The oven will start to
operate.
NOTE:
The start button may be pressed at anytime in
the above sequence and the oven will start the
cooking process with the displayed
parameters.
Hot-Air
Use this function to bake food.
1. Turn the Function Selector knob (1) until the
Hot-Air function indicator flashes.
2. Turn the Rotating knob (7) in either direction to
set the duration.
3. Press the OK key (4) to validate. The
temperature value flashes. Turn the Rotating
knob (7) in either direction to set the
temperature.
4. The temperature value flashes. Turn the
Rotating knob (7) in either direction to set the
temperature.
5. Press the OK key (4) to validate.
6. Press the Start key (3). The oven will start to
operate.
.

16
USA
Basic Functions
Microwave + Hot-Air
Use this function to rapidly bake the foods.
1. Turn the Function Selector knob (1) until the
Microwave + Grill function indicator flashes.
The Duration display shows 20:00 flashing.
2. Turn the Rotating knob (7) in either direction to
set the duration.
3. Press the OK key (4) to validate. The
microwaves power value flashes on the Power
display. The microwaves power indicator starts
to flash.
4. Turn the Rotating knob (7) in either direction to
set the microwaves power level. If you do not
turn this knob, the oven operates at 400W
power. The maximum power that can be
selected is 600 W.
5. Press the OK key (4) to validate.
6. The temperature value flashes. Turn the
Rotating knob (7) in either direction to set the
desired temperature. If you do not turn this
button, the oven will operate at 160ºC.
7. Press the OK key (4) to validate.
8. Press the Start key (3). The oven will start to
operate.
Grill + Fan
Use this function to bake evenly the food and at the same time brown their surface.
1. Turn the Function Selector knob (1) until the
Grill + Fan function indicator flashes.
2. Turn the Rotating knob (7) in either direction
to set the duration.
3. Press the OK key (4) to validate. The
temperature value flashes. Turn the Rotating
knob (7) in either direction to set the
temperature.
4. The temperature value flashes. Turn the
Rotating knob (7) in either direction to set the
temperature.
5. Press the OK key (4) to validate.
6. Press the Start key (3). The oven will start to
operate.

17
USA
Basic Functions
Defrosting by time (manual)
Use this function to defrost any type of food quickly.
1. Turn the Function Selector knob (1) until the
Defrost by Time function indicator flashes. The
Duration display shows 10:00 flashing.
2. Turn the Rotating knob (7) in either direction to
set the duration.
3. Press the OK key (4) to validate.
4. Press the Start key (3). The oven will start to
operate.
5. Turn the food whenever the oven lets out a
beep and the display flashes the word.
Defrosting by weight (automatic)
Use this function to defrost meat, poultry, fish, fruit and bread quickly.
1. Turn the Function Selector knob (1) until the
Defrost by Weight function indicator flashes.
The Duration display shows the food type
“Pr 1” flashing.
2. Turn the Rotating knob (7) in either direction to
set the food type. If you do not turn this knob,
the oven operates with food type “Pr 1”.
3. Press the OK key (4) to validate. The food
weight value flashes on the Weight display. The
weight indicator starts to flash.
4. Turn the Rotating knob (7) in either direction to
set the food weight. If you do not turn this knob,
the oven operates with 200 g.
5. Press the OK key (4) to validate.
6. Press the Start key (3). The oven will start to
operate.
7. Turn the food whenever the oven lets out a
beep and the Weight display flashes the word:
.

18
USA
Basic Functions
The following table shows the defrosting by weight function programmes, indicating weight intervals, and
defrosting and standing times (in order to ensure the food is of a uniform temperature).
Programme
Food
Weight (g)
Time (min)
Standing time (min)
Pr 01
Meat
100 –2000
2 –43
20 –30
Pr 02
Poultry
100 –2500
2 –58
20 –30
Pr 03
Fish
100 –2000
2 –40
20 –30
Pr 04
Fruit
100 –500
2 –13
10 –20
Pr 05
Bread
100 –800
2 –19
10 –20
Important Note: see “General instructions for defrosting”.
Memory function
Define and store a memory
1. With the Function Selector (1), select one of
the Basic functions.
2. Set the desired parameters with the Rotating
Knob (7)
3. Press the Clock key (5) for 5 seconds. The
memory symbol “M1” starts blinking.
4. With the Rotating Knob (8) select in which
memory you want to store the defined
parameters (M1, M2 or M3)
5. Press the Ok Key (4) to confirm and store the
memory.
6. Recalling a memorized function
7. Rotate the Function Selector (1) to select the
stored memory.
8. Press the Start Key (3). The oven will start to
operate.
Delete a memory:
1. With the oven in stand-by select the desired
memory by turning the Function Selector
(1).
Press the Clock key (5) for 3 seconds. The
power/weight display shows the message “DEL”
for 3 seconds

19
USA
Special functions
Special Function P: Heating food
Use this function to heat various types of food.
1. Turn the Function Selector knob (1) until the
Special Function indicator “P” flashes (the
Duration display shows the food type “A01”
flashing by default).
2. Turn the Rotating knob (7) in either direction to
set the desired special function (A01 –A04:
see table below).
3. Press the OK key (4) to validate. The food
weight value flashes on the Weight display. The
weight indicator starts to flash.
4. Turn the Rotating knob (7) in either direction to
set the food weight.
5. Press the OK key (4) to validate.
6. Press the Start key (3). The oven will start to
operate.
7. Turn the food whenever the oven lets out a
beep and the Weight display flashes the word:
.
The following table shows the Special Function P1 programmes, indicating weight intervals, and
defrosting and standing times (in order to ensure the food is of a uniform temperature).
Programme
Food
Weight (kg)
Time (min)
Note
A 01
Soup
200 –1500
3 –15
Turn 1-2 x, keep
covered
A 02
Pre-prepared dishes
dense food
200 –1500
3 –20
Turn 1-2 x, keep
covered
A 03
Pre-prepared dishes
e.g. goulash
200 –1500
3 –18
Turn 1-2 x, keep
covered
A 04
Vegetables
200 –1500
2,6 –14
Turn 1-2 x, keep
covered
Important Notes:
Always use dishes for use in the microwave
oven and a lid or cover to avoid loss of liquids.
Stir or mix the foods several times during
heating, especially when the oven emits a
beep and the display is flashing as
follows: .
The time required to heat the food will depend
on its initial temperature. Food taken straight
from the fridge will take longer to heat up than
food that is at room temperature. If the food
temperature is not what is wanted, select a
greater or lesser weight next time you heat up the
food.
After heating, stir the food and then leave the
food to stand for some time to allow the
temperature to become uniform throughout the
food.
Warning! After heating the container may be very
hot. Although microwaves do not heat up most
containers, these may heat up through heat
transmission from food.
Table of contents
Languages:
Other Porter&Charles Microwave Oven manuals