PowerPoint P22820INTSS User manual

Read these instructions carefully before using
your
Microwave oven, and keep in safe place
for future
reference.
If instructions below are followed, your microwave oven will
provide you
with
many years of good
service.
Microwave Oven
INSTRUCTION MANUAL
MODEL:P22820INTSS
Supplied by Shomar Ltd
www.shomar.ie

Specifications
Model:
Rated Voltage:
Rated Input Power(Microwave):
Rated Output Power(Microwave):
Oven Capacity:
Turntable Diameter:
External Dimensions:
Net Weight:
230 V~50 Hz
1250 W
800 W
594x343.5x388 mm
20 l
245 mm
Approx. 1 kg
PRECAUTIONS TO AVOID POSSIBLE EXPOSURETO
EXCESSIVE MICROWAVE ENERGY
(a) Do not attempt to operate this oven with the door open
since this canresult in harmful exposure to microwave
energy. It is important not to break or tamper with the
safety interlocks.
(b) Do not place any object between the oven front face and
the door or allow soil or cleaner residue to accumulate on
sealing surfaces.
(c) WARNING: If the door or door seals are damaged, the
oven must not be operated until it has been repaired by a
competent person.
ADDENDUM
If the apparatus is not maintained in a good state of
cleanliness, its surface could be degraded and affect the
lifespan of the apparatus and lead to a dangeroussituation.
P22820INTSS
2
5

To reduce the risk of fire, electric shock, injury to
persons or exposure to excessive microwave oven
energy when using your appliance, follow basic
precautions, including he following:
1. Warning: Liquids and other foods must not be heated
in sealed containers since they are liable to explode.
2. Warning: It is hazardous for anyone other than a
competent person to carry out any service or repair
operation that involves the removal of a cover which
gives protection against exposure to microwave energy.
3. This appliance can be used by children aged from 8
years and above and persons with reduced physical,
sensory or mental capabilities or lack of experience
and knowledge if they have been given supervision or
instruction concerning use of the appliance in a safe way
and understand the hazards involved.Children shall not
play with the appliance.Cleaning and user maintenance
shall not be made by children unless they are older than
8 and supervised.
4. Keep the appliance and its cord out of reach of
children less than 8 years.
5. Only use utensils suitable for use in microwave ovens.
6. The oven should be cleaned regularly and any food
deposits should be removed.
7. Read and follow the specific:"PRECAUTIONS TO
AVOID POSSIBLE EXPOSURE TO EXCESSIVE
MICROWAVE ENERGY".
8. When heating food in plastic or paper containers,
keep an eye on the oven due to the possibility of ignition.
IMPORTANT SAFETY INSTRUCTIONS
WARNING
3

9. If smoke is emitted, switch off or unplug the appliance
and keep the door closed in order to stifle any flames.
10. Do not overcook food.
11. Do not use the oven cavity for storage purposes.
Do not store items, such as bread, cookies, etc. inside
the oven.
12. Remove wire twist-ties and metal handles from
paper or plastic containers/bags before placing them in
the oven.
13. Install or locate this oven only in accordance with the
installation instructions provided.
14. Eggs in the shell and whole hard-boiled eggs should
not be heated in microwave ovens since they may
explode, even after microwave heating has ended.
15.This appliance is intended to be used in household
and similar applications such as:
-staff kitchen areas in shops, offices and other working
environments;
-by clients in hotels, motels and other residential type
environments;
-farm houses;
-bed and breakfast type environments.
16. If the supply cord is damaged, it must be replaced by
the manufacturer, its service agent or similarly qualified
persons in order to avoid a hazard.
17. Do not store or use this appliance outdoors.
18. Do not use this oven near water, in a wet basement
or near a swimming pool.
19. The temperature of accessible surfaces may be high
when the appliance is operating. The surfaces are liable
to get hot during use.Keep cord away from heated
surface, and do not cover any vents on the oven.
4

20. Do not let cord hang over edge of table or counter.
21. Failure to maintain the oven in a clean condition
could lead to deterioration of the surface that could
adversely affect the life of the appliance and possibly
result in a hazardous situation.
22.The contents of feeding bottles and baby food jars
shall be stirred or shaken and the temperature checked
before consumption, in order to avoid burns.
23. Microwave heating of beverages can result in
delayed eruptive boiling, therefore care must be taken
when handling the container.
24.The appliance is not intended for use by persons
(including children) with reduced physical , sensory or
mental capabilities, or lack of experience and knowledge,
unless they have been given supervision or instruction
concerning use of the appliance by a person responsible
for their safety.
25.Children should be supervised to ensure that they do
not play with the appliance.
26.The appliances are not intended to be operated by
means of an external timer or separate remote-control
system.
27. Accessible parts may become hot during use.
Young children should be kept away.
28.Steam cleaner is not to be used.
29.During use the appliance becomes hot. Care should
be taken to avoid touching heating elements inside the
oven.
30.Only use the temperature probe recommended for
temperature-sensing probe.)
this oven.(for ovens provided with a facility to use a
5

To Reduce the Risk of Injury to Persons
Grounding Installation
DANGER
Electric Shock HazardTouching some of the interna
componentscan cause serious personal injury or death.Do
not disassemble this appliance.
WARNING
Electric Shock HazardImproper use of the grounding can
result inelectric shock. Do not plug into an outlet
untilappliance is properly installed and grounded.
This appliance must be grounded. In theevent of an
electrical short circuit,grounding reduces the risk of
electricshock by providing an escape wire forthe electric
current. This appliance isequipped with a cord having a
groundingwire with a grounding plug. The plug mustbe
plugged into an outlet that is properly installed and
grounded.
Consult a qualified electrician orserviceman if the grounding
instructionsare not completely understood or if doubtexists
as to whether the appliance isproperly grounded. If it is
necessary touse an extension cord , use only a 3-wire
extension cord.
1. A short power-supply cord is provided to reduce the risks
resulting from becoming entangled in or tripping over a
longer cord.
2. If a long cord set or extension cord is used:
1)The marked electrical rating of the cordset or extension
cord should be at least asgreat as the electrical rating of
the appliance.
2)The extension cord must be a grounding-type 3-wire
cord.3)The long cord should be arranged so thatit will not
drape over the counter top ortabletop where it can be
pulled on bychildren or tripped over unintentionally.
6

CLEANING
Be sure to unplug the appliance from thepower supply.
1.Clean the cavity of the oven after using with a slightly
damp cloth.
2.Clean the accessories in the usual way in soapy water.3.
The door frame and seal and neighbouring parts must be
cleaned carefully with a damp cloth when they are dirty.
4.Do not use harsh abrasive cleaners or sharp metal
scrapers to clean the oven door glass since they can
scratch the surface, which may result in shattering of the
glass.
5.Cleaning Tip---For easier cleaning of the cavity walls that
the food cooked can touch: Place half a lemon in a bowl,
add 300ml(1/2 pint) water and heat on 100%
microwave power for 10 minutes.Wipe the oven clean
using a soft, dry cloth.
7

CAUTION
Personal Injury Hazard
It is hazardous for anyone
other than a compentent person
to carry out any service or repair
operation that involves the removal
of a cover which gives protection
against exposure to microwave
energy.
Utensil Test:
1. Fill a microwave-safe container with 1 cup of cold
water (250ml) along with the utensil in question.
2. Cook on maximum power for 1 minute.
3. Carefully feel the utensil. If the empty utensil is
warm, do not use it for microwave cooking.
4. Do not exceed 1 minute cooking time.
Materials you can use in microwave oven
Utensils Remarks
Aluminum foil Shielding only. Small smooth pieces can be used to cover thin parts of
meat or poultry to prevent overcooking. Arcing can occur if foil is too
close to oven walls. The foil should be at least 1 inch (2.5cm) away from
oven walls.
Follow manufacturer’s instructions. The bottom of browning dish must be
at least 3/16 inch (5mm) above the turntable. Incorrect usage may cause
the turntable to break.
Microwave-safe only. Follow manufacturer's instructions. Do not use
cracked or chipped dishes.
Always remove lid. Use only to heat food until just warm. Most glass jars
are not heat resistant and may break.
Heat-resistant oven glassware only. Make sure there is no metallic trim.
Do not use cracked or chipped dishes.
Follow manufacturer’s instructions. Do not close with metal tie. Make
slits to allow steam to escape.
Use for short–term cooking/warming only. Do not leave oven unattended
while cooking.
Use to cover food for reheating and absorbing fat. Use with supervision
for a short-term cooking only.
Use as a cover to prevent splattering or a wrap for steaming.
Microwave-safe only. Follow the manufacturer’s instructions. Should be
labeled "Microwave Safe". Some plastic containers soften, as the food
inside gets hot. "Boiling bags" and tightly closed plastic bags should be
slit, pierced or vented as directed by package.
Microwave-safe only. Use to cover food during cooking to retain
moisture. Do not allow plastic wrap to touch food.
Thermometers Microwave-safe only (meat and candy thermometers).
Wax paper Use as a cover to prevent splattering and retain moisture.
Browning dish
Glass jars
Glassware
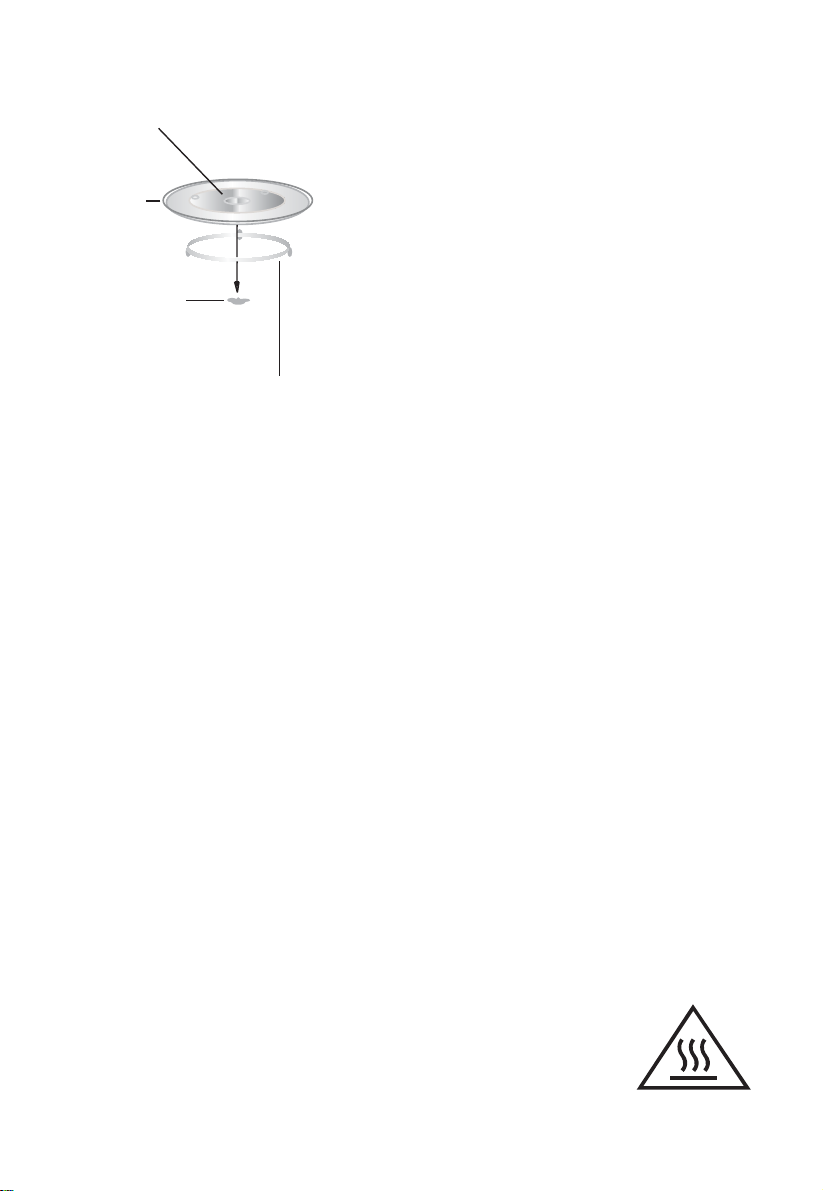
UTENSILS See the instructions on "Materials you can use in
microwave oven or to be avoided in microwave oven."
There may be certain non-metallic utensils that are not
safe to use for microwaving. If in doubt, you can test the
utensil in question following the procedure below.
Oven cooking
bags
Paper plates
and cups
Paper towels
Parchment
paper
Plastic
Plastic wrap
Dinnerware
8

A) Control panel
B) Turntable shaft
C) Turntable ring assembly
D) Glass tray
E) Observation window
F) Door assembly
G) Safety interlock system
Materials to be avoided in microwave oven
Utensils Remarks
Aluminum tray
Food carton with
metal handle
Metal or metal-
trimmed utensils
Metal twist ties
Paper bags
Plastic foam
Wood
F
G
A
CB
ED
SETTING UP YOUR OVEN
Names of Oven Parts and Accessories
Remove the oven and all materials from the carton and oven cavity.
Your oven comes with the following accessories:
Glass tray 1
Turntable ring assembly 1
Instruction Manual 1
Metal shields the food from microwave energy. Metal trim may
cause arcing.
May cause a fire in the oven.
Plastic foam may melt or contaminate the liquid inside when exposed
to high temperature.
Wood will dry out when used in the microwave oven and may split
or crack.
May cause arcing. Transfer food into microwave-safe dish.
May cause arcing and could cause a fire in the oven.
9

Hub (underside)
Glass tray
Turntable ring assembly
a. Never place the
glass tray
upside down. The glass
tray should never be restricted.
b. Both
glass tray
and
turntable ring assembly
must
always be used during cooking.
c. All food and containers of food are always placed
on the
glass tray
for cooking.
d. If
glass tray
or
turntable ring assembly
cracks or
breaks, contact your nearest authorized service
center.
Turntable Installation
Turntable shaft
The accessible surface
may be hot during
operation.
1.This appliance is only intended for domestic use.
2.This oven is intended for built-in use only.It is not intended
for counter-top use or for use inside a cupboard.
3. Please observe the special installation instructions.
4.The appliance can be installed in a 60cm wide
wall-mounted cupboard(at lease 55cm deep and 85cm
off the floor).
5.The appliance is fitted with a plug and must only be
connected to a properly installed earthed socket.
6.The mains voltage must correspond to the voltage
specified on the rating plate.
7.The socket must be installed and connecting cable must
only be replaced by a qualified electrician.If the plug is
no longer to accessible following installation,an all-pole
disconnecting device must be present on the installation
side with a contact gap of at lease 3mm.
8.Adapters,multi-way strips and extension leads must not be
used. Overloading can result in a risk of fire.
Installation and connection
10

") $%*
"*(" %$$*%$
%*
( '(- -+) (+ ' -! )(0+ %
Installation Instructions
Please Read the Manual Carefully Before Installation
A. Built-in furniture
380+2
340
11

380+2
5 0
%*
The bracket and bottom caninet template are needed when installating
in installation .both s
0
12

B.Prep are the cabi inet
put the template on the bottom plane of cabinet.
1. Read the instruction on the BOTTOM CANINET TEMPLATE ,
2. Make the marks on the bottom plane of cabinet according to marks"a" of
of the template
aa
CENTER LINE
FRONT EDGE
LEFT EDGE
TEDGERIGH
3. Remove the bottom cabinet template and fix the bracket with screw A.
aa
Screw A
Bracket
Bracket
Screw A
Centre line
13

C .Install the oven
4. Install the oven to the cabinet
- Make sure the back of the oven is locked by bracket.
- Do not trap or kink the power cord.
5. Open the door, fix the oven to the cabinet with Screw B, at the installation hole.
bracket
Installation Hole
Screw B
Then fix the Trim-kit plastic cover to the installation hole.
14

Operation Instructions
2) Turn " " to adjust the hour figures, the input time should be within 0--23.
3) Press " ", the minute figures will flash.
1. Clock Setting
When the microwave oven is electrified, the LED will display "0:00", buzzer will ring once.
1) Press " " to select clock function, the hour figures will flash.
4) Turn " " to adjust the minute figures, the input time should be within 0--59.
5) Press " " to finish clock setting. ":" will flash, and the time will light.
Note: 1) If the clock is not set, it would not function when powered.
2) During the process of clock setting, if you press " ", the oven
will go back to the previous status automatically.
Kitchen Timer/Clock
Stop/Clear
Kitchen Timer/Clock
Kitchen Timer/Clock
twice
15
2. Microwave Cooking
NOTE: the step quantities for the adjustment time of the coding switch are as follow:
0---1 min : 5 seconds
1---5 min : 10 seconds
5---10 min : 30 seconds
10---30 min : 1 minute
30---95 min : 5 minutes
Microwave Power Chart
1) Press the "MICROWAVE " key once, and "P100" display.
2) Press " MICROWAVE" for times or turn " " to select the microwave
power from100% to 10%. "P100", "P80", "P50", "P30", "P10" will display in order.
3) Press "START/+30SEC./CONFIRM " to confirm.
4)Turn " " to adjust the cooking time. (The time setting should be 0:05- 95:00.)
5) Press " START/+30SEC./CONFIRM " to start cooking.
Microwave Power 80% 50% 30% 10%100%
Display P100 P80 P50 P30 P10

16
1) Press " " twice, and the oven will display "dEF2".
2) Turn " " to select the defrost time. The MAX time is 95 minutes.
1) Press " " once, and the oven will display "dEF1".
2) Turn " " to select the weight of food from 100 to 2000 g.
3) Press " " to start defrosting.
1) In standby mode, press " " to start cooking with 100% power,
each added press will increase 30 seconds cooking time up to 95 minutes.
2) In cooking mode, except auto menu or weight defrost each press of
" " can increase 30 seconds of cooking time.
3) In standby mode, turn " " left to set cooking time with 100%
microwave power, then press " " to start cooking.
Weight/Time Defrost
Start/+30Sec./Confirm
3) Press " " to start defrosting.
Start/+30Sec./Confirm
Weight/Time Defrost
(1) Press " " e, LED will display 00:00.
(2) Turn " " to enter the correct timer. (The maximum cooking time is 95 minutes.)
(3) Press " " to start timer .
If the clock has been set (24-hour system), LED will display the current time.
Start/+30Sec./Confirm
Kitchen Timer/Clock
Note: The kitchen Time is differ from 24-hour system Kitchen Timer is a timer.
(4) When the kitchen time is reached, timer indicator will go out. The buzzer will ring 5 times.
onc
.ent
3. Quick Start
4. Defrost By Weight
5. Defrost By Time
6. Kitchen Timer

17
1) Turn " " clockwise till "A-6" displays.
Example: If you want to use "Auto Menu" to cook fish for 350g.
2) Press " " to confirm.
1) Turn " " right to choose the menu, and "A-1" to "A-8" will display, which
means pizza, meat, vegetable, pasta, potato,
2) Press " " to confirm.
3) Turn " " to choose the default weight as the menu chart.
4) Press " " to start cooking.
The menu chart:
Menu Weight Display
A-2
Meat
A-3
Vegetable
A-5
Potato
A-4
Pasta
A-6
Fish
A-8
Popcorn
200 g
400 g
250 g
350 g
450 g
200 g
300 g
400 g
50g(with 450 ml cold water)
100g(with 800 ml cold water)
200 g
400 g
600 g
250 g
350 g
450 g
1 cup(120 ml)
2 cups(240 ml)
3 cups(360 ml)
50 g
100 g
A-1
Pizza
A-7
Beverage
3) Turn " " to select the weight of fish till "350" displays.
4) Press " " to start cooking.
200
400
250
350
450
200
300
400
50
100
200
400
600
250
350
450
1
2
3
50
100
Start/+30Sec./Confirm
fish, beverage and popcorn.
7. Auto Menu

18
7) Press " " to start cooking, and buzzer will sound once ,
1) Press " " twice, and the oven will display "dEF2".
2) Turn " " to select the defrost time till "5:00" displays.
5) Press " " to confirm, and the screen displays "P 80".
6) Turn " " to adjust the cooking time till the oven displays "7:00".
At most 2 sections can be set for cooking.
Example: If you want to defrost food for 5 minutes and then cook with 80% microwave
power for 7 minutes, operate it as the following:
Start/+30Sec./Confirm
Weight/Time Defrost
defrosting time counts down; buzzer will sound once entering the second
cooking. When cooking finishes, buzzer sounds five times.
3) Press " " once, the screen display "P100".
4) Press " " once again or turn " " to choose 80% microwave power.
Microwave
Microwave
(2) In cooking state, press " " to inquire the time and the time will
display for 3 seconds.
1 . Lock-out Function for Children
Lock: In standby mode, press " " for 3 seconds, there will be a long beep
denoting entering the children-lock state and the current time will diplay if the time
has been set. Otherwise, the LED will display " ".
Lock quitting: In locked state, press " " for 3 seconds, there will be a long
"beep" denoting that the lock is released.
Stop/Clear
Stop/Clear
Kitchen Timer/Clock
8. Multi-section cooking
9. Inquiring Function
0
(1) In states of microwave cooking, press " ", the current power will be
displayed for 3 seconds. After 3 seconds, the oven will turn back to the former state;
Microwave

19
Trouble shooting
According to Waste of Electrical and Electronic Equipment
(WEEE) directive, WEEE should be separately collected and
treated. If at any time in future you need to dispose of this
product please do NOT dispose of this product with household
waste. Please send this product to WEEE collecting points
where available.
It is forbidden to run the unit without any food inside.
It is very dangerous.
PN:261800319718

Table of contents
Other PowerPoint Microwave Oven manuals
Popular Microwave Oven manuals by other brands

Frigidaire
Frigidaire FGBM15WCVFA installation instructions

DAEWOO ELECTRONICS
DAEWOO ELECTRONICS KOC-922T9S Service manual

Whirlpool
Whirlpool AMW 526 Instructions for use

Samsung
Samsung CE283DN Owner's instructions and cooking guide

Wolf
Wolf MDD24TESTH Use and care guide

GE
GE Spacemaker JVM1871 owner's manual