PQI CRYPTO WALLET User manual

1
Unlock the Future
User Guide Version 1.0ENG
2
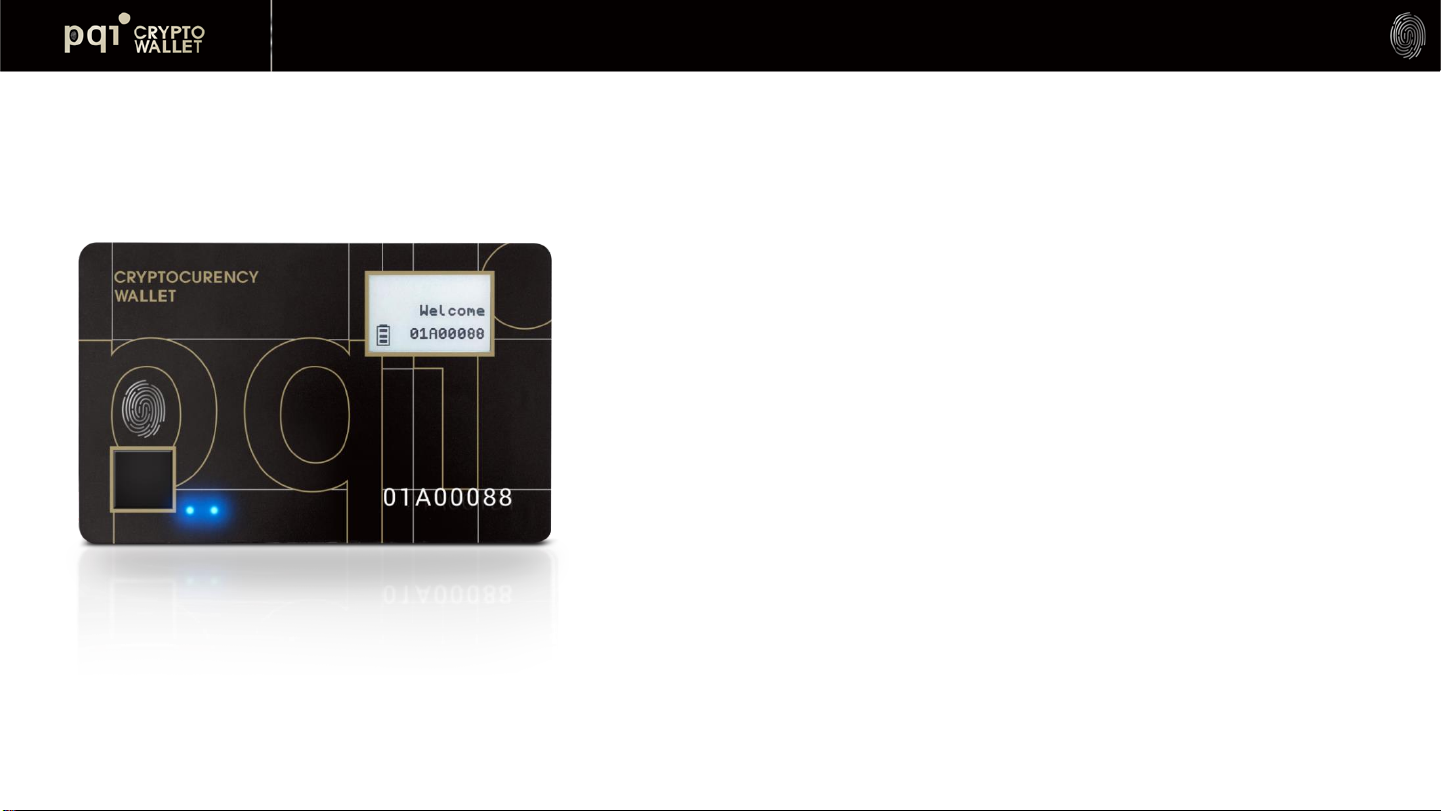
Ensure your cryptocurrency Safe and Secure. Patented
Standalone Mode. Multiple Wallets and Cryptocurrencies.
Experience the world of Non-Fungible Token innovation.
Unlock the future of possibility
A unique biometric key to explore the world of cryptocurrency.

Table of Contents
4 Package contents
Check wallet
Mobile App
5 Wallet function highlight
6 Standalone mode
6 Wallet Power Saving
10 Quick Start-Charging
6 Power button definition
15 Quick Start- Initiate wallet
Mac OS App
3
7 Standalone Mode: Operation
8 LED Indicator & E-ink Definition
9 Wallet Diagram
1 1 Quick Start-App Download
12 Quick Start- 3 Connection Way
26 Additional Settings
3 1 Mac OS App: UI Layout
13 Mobile App: Layout #1
14 Mobile App: Layout #2
40 Mac OS: Setting

4
1) Make sure the package received is well sealed
2) Unpack to check if all items are all included
3) Package contents.
•1 x Hardware Wallet
•1 x USB Cable
•2 x Mnemonic Sheets
•1 x USB Charging Case
Thank you for purchasing PQI CryptoWallet. You have just
awarded yourself a PASS to unlock the future of diversified
possibilities.
Package Contents


6
Single-click - Toggle to The Next Page
•Power ON
•Verify Fingerprint
•Loading →Main Wallet
•1st Cryptocurrency Summary
•1st Cryptocurrency QR Code
•1st Cryptocurrency Address
•2nd Cryptocurrency Summary …
•Single-Click : Power On
•Double-Click: Initiate Bluetooth pairing mode
•Long-Press Over 4 Seconds : Power OFF
(E-ink will refresh)
Standalone Mode
Power Button
Definition
•When wallet connects with host app (BLE mode) and there are no
operations (app and card) for 60 sec., BLE will disconnect to avoid
battery consuming continuously and the app will remind you for
“Session Expired”.
•If Wallet has no BLE or USB connection, it will power off
automatically after 120 sec. without any operations to avoid battery
consumption.
•Please “Log out” from App and click a specific wallet to log in again by
fingerprint.
BLE Model Power Saving

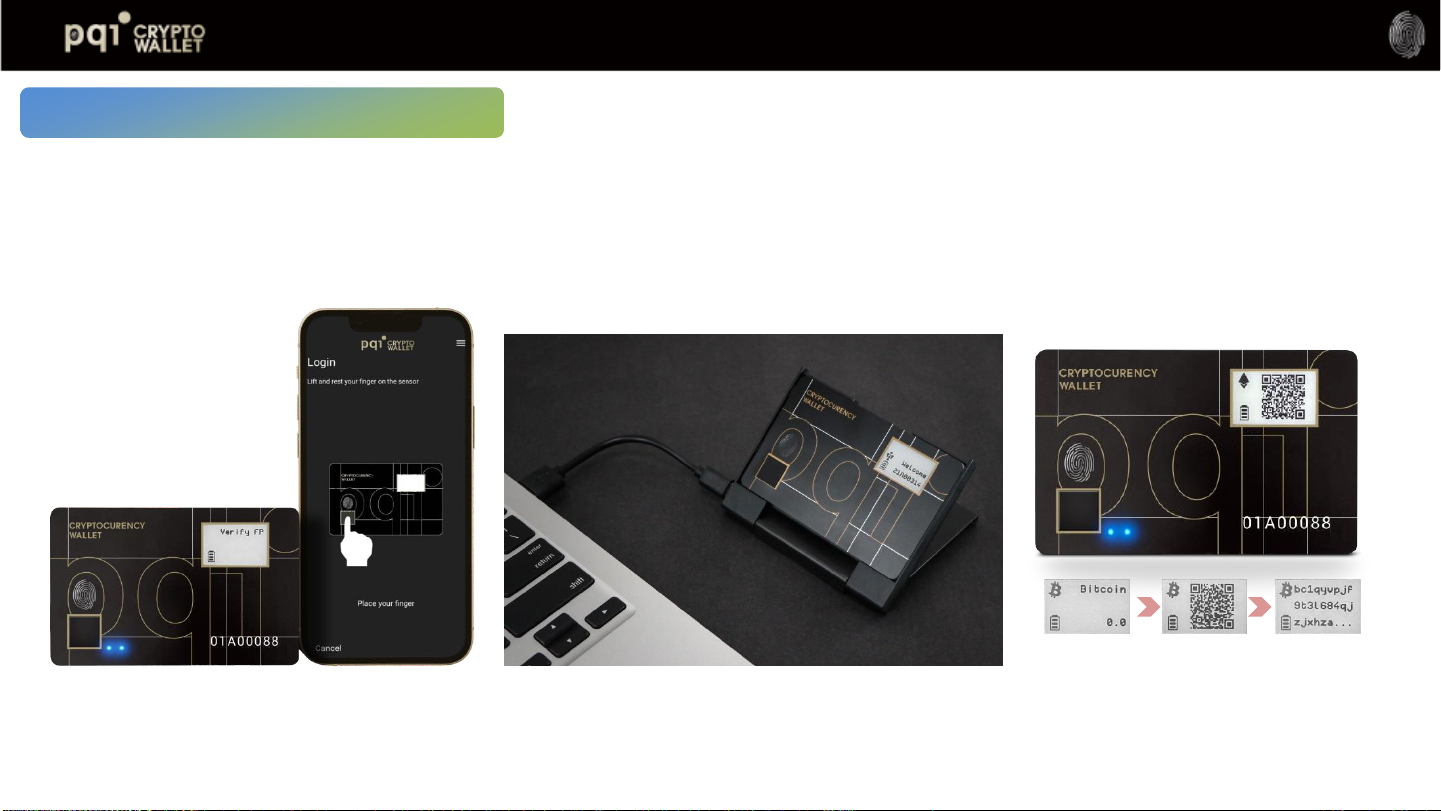
Standalone Mode: Operation
7
Power ON
Verify assigned
Fingerprint to login to
Main Wallet
Fingerprint Matched
1st Cryptocurrency
Summary
1st Cryptocurrency
QR code for
Receiving
transaction
Note
If there is no bound specific wallet, Standalone mode will always
support main wallet as default. If you bound fingerprint to specific
wallet, please verify by all bound fingerprint to login
Toggle power button to next page
continuously…
1st Cryptocurrency
Address for
Receiving
transaction
Name of Main
wallet

E-Ink
•E-Ink: Icons + message (English and Japanese).
•Message language is following App “OS
language” to show Japanese or English.
LED#1 LED#2 E-Ink Icon & Message
Power ON Static Blue Blue flashing BLE or USB –Battery –[Welcome]
BLE pairing mode Static Blue Cyan flashing Battery –[message]
BLE pairing confirmation Static Blue White flashing
BLE connected to host Static Blue Static Blue
Waiting for fingerprint
matching
Blue flashing Blue BLE or USB –Battery –[message]
Fingerprint matched Blue Green ON BLE or USB –Battery –[message]
Fingerprint not matched Blue RED ON BLE or USB –Battery –[message]
Battery charging Blue Yellow flashing USB –Battery charging
Battery charging
Low battery Blue RED flashing Battery low
Battery charging till booting N/A RED flashing No display
LED Indicator & E-ink Definition
USB Icon: Wallet device is connecting to USB
data port and be recognized as a HID device
w/o USB Icon: Wallet device is connecting to
USB but battery charging only
Battery Icon
•Level 3: Full (85%~100%)
•Level 2: 61%~85%
•Level 1: 36%~60%
•!: <35%, Low battery, and LED#2 is RED
flashing
8

9
9
Cryptocurrency #1
Cryptocurrency #2
Cryptocurrency #3
Cryptocurrency #10
Cryptocurrency #1
Cryptocurrency #2
Cryptocurrency #3
Cryptocurrency #10
The Wallet allows 2 individual Wallets
•Main Wallet + Hidden Wallet
•Easily login to Hidden Wallet from Main Wallet
•Each wallet stores up to 10 cryptocurrencies
Main Wallet
Hidden Wallet
Wallet Diagram
9
9

B. Connect to MacBook or Mac PC
→USB icon will be shown
→LED#2 will be flashing in yellow continuously to indicate charging initiation
Quick Start-Charging
A. Insert Your Wallet into USB charging case follow by below illustration
10
Insert the device in corresponding to the
charging pins
Then press down on the other side of the
device to finish install the device to
charging case
Insert the device to the charging case

1
1
Note:
•When PQI CryptoWallet is connected to a USB port and with no
LED on, please wait for 3-5 minutes as there is the protect circuit to
make sure the battery power is sufficient
•USB port of PC: USB mode- PQI CryptoWallet can work as USB
Wallet with Mac app
•USB power adaptor: BLE mode- PQI Wallet can work as BLE
Wallet with iOS, Android, and Mac app
Quick Start- App Download Make sure your PQI CryptoWallet is fully charged before initiation
•Mac PC
1) Insert your wallet card into the docking case and connect to a USB
port
2) Scan to QR code below or search PQI Crypto Wallet to download
the App
3) Download The App- PQI Crypto Wallet App
•Mobile
1) Scan to QR code or search PQI Crypto Wallet to download the App
11
BLE (Bluetooth Low Energy)
Pair and connect via BLE: Works
with the Mobile app and the Mac
app.
USB Connection
Snap in your device to the charging
case and connect to a Mac PC via
USB, then initiate Mac OS App.
Standalone mode
Standalone mode to check
amount and receive transaction
via QR code.
Quick Start- 3 Connection
Ways
12


Initiate Wallet
Login to PQI Wallet for more actions
1-1. BLE Pairing
(iOS, Android, Mac PC)
1-2. USB Connection
(Mac OS app)
2. Enroll Fingerprint &
Matching
3-1. Create a New
(Hidden) Wallet
3-2. Recover your Old
Wallet
4-1. Add
Cryptocurrencies
4-2. Select a
cryptocurrency &
Synchronizations
5. Transaction(s) or
Settings
1-1. BLE Connection
1-2. USB Connection
(Mac app)
2. Fingerprint Matching 3. Cryptocurrency
Synchronization
4. Transaction(s)
Send/Receive
Settings
•Initiate Hidden Wallet
(Create new (hidden) or recover wallet)
•Switch to Hidden Wallet
•Enroll/Delete Fingerprint(s)
•Add/Delete Cryptocurrency
•Log Out
•Reset
•Select Currency
Quick Start –Initiate wallet
15
1-1. BLE Pairing
1-2. USB Connection (Mac OS app)
16
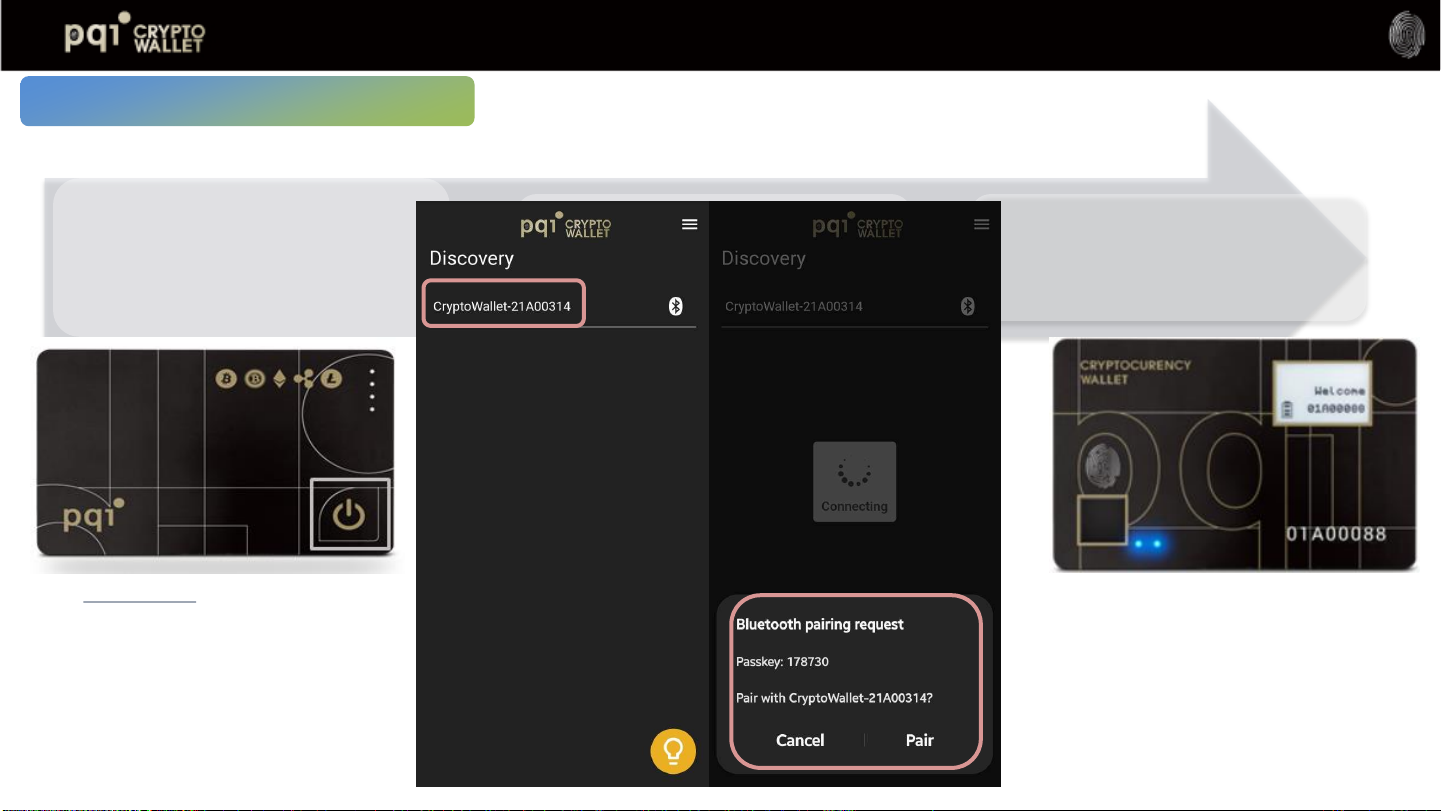
App: 1.1 Bluetooth Pairing
1) Double-Click on power button to
enter to Bluetooth pairing mode
2) The Keycode indicates in the APP
should match to your Keycode
from your PQI CryptoWallet
3) LED#2 of the Wallet device
shows white flashing with double-
click on power button, please
place your enrolling finger print
to the sensor to start pairing and
enrollment
If the your wallet device can not found, please clear
the wallet device from your phone memory and repeat
the Bluetooth Pairing process again

17
App: 2 Fingerprint
Enrollment
1) Put your assigned fingerprint on the
sensor
2) Dynamically press (lift & Rest) your
assigned fingerprint in different direction
till you have reach 100% of enrollment
completion
3) Verify enrolled fingerprint:
o“Matched” LED #2 indicates in Green
o“Mismatched” indicates in Red which
means a fingerprint authentication
failure occurred, please press “Verify”
and try again
4) Click “Enroll” if you wish to enroll more
fingerprints to the wallet device or Click
“Done” to finish

18
App: 3-1 Login to Initate Main Wallet
3-1. Create a New Wallet
3-2. Recover your Old Wallet
1) Create a new wallet
2) Select language for random
recovery phrases
3) Select the length of Mnemonic
phrase form 12 to 24 phrase)
4) Write down the recovery
phrase on Mnemonic Recovery
sheet and keep it in a safe
location
5) To enhance your security level ,
you can enter your own pass
phrase and make sure you also
keep the pass phase in a safe
location
Note: PQI DOES NOT keep any
records of your recovery phrase and
Passphrase, please make sure they
are saved in a safe place

1) Answer questionnaires following the “Recovery Sheet” that you wrote down when you firstly initiate the wallet
2) (option) For better security, you can assign “Passphrase” for those “Mnemonic words” for recovery, so that when
you do “recover wallet base on Mnemonic words”, it requires you to type correct “Passphrase” to recover. Please
remember your Passphrase and write it down and place at a safe place.
Note: PQI DOES NOT keep any records to any of your recover phrase or Passphrase 19
App: 3-1 Login to Initiate Main Wallet
3-1. Create a New Wallet
3-2. Recover your Old
Wallet

4-1. Add Cryptocurrencies
4-2. Select a cryptocurrency
& Synchronizations
5. Transaction(s) or Settings
20
App: 4-1 Add Cryptocurrencies
Each Cryptocurrency will
synchronize with chain to
show the total amount
balance, also the default
currency/ exchange rate will
preset to region of the host
App, however it is still
adjustable manually from
“Setting”
Table of contents


