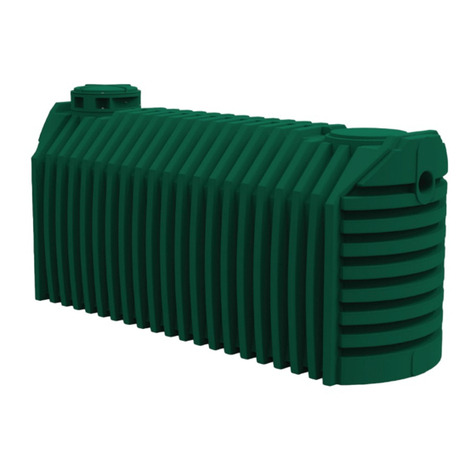
PREMIER TECH REWATEC PST-280 User manual

Installation guide and Owner’s manual Page 1/6 20200522
Septic tanks Item # 182065
Installation guide and Owner’s manual – Septic tanks
This guide provides information regarding the installation, operation, maintenance and warranty of the septic tanks from Premier
Tech. For additional information, contact our customer service at 1-800-632-6356.
1. Technical data
MATERIAL
Medium-density polyethylene (MDPE) plastic
CERTIFICATIONS
CSA (Canadian Standards Association) CSA-B66-10:
PST-280, PST-340, PST-390, PST-420, PST-500 and PST-660 models
BNQ (Bureau de Normalisation du Québec) NQ 3680-905:
PST-280, PST-340, PST-390, PST-440, PST-500 and PST-660 models
CHARACTERISTICS
Models
PST-280
PST-340
PST-390
PST-420
PST-440
PST-500
PST-660
Total nominal
capacity
740 US gal
900 US gal
1,030 US gal
1,140 US gal
1,160 gal. US
1,270 US gal
1,760 US gal
620 UK gal
750 UK gal
860 UK gal
950 UK gal
965 gal. imp.
1,060 UK gal
1,460 UK gal
2 800 L
3 400 L
3 900 L
4 300 L
4 400 L
4 800 L
6 650 L
Liquid capacity
600 US gal
800 US gal
880 US gal
950 US gal
975 US gal.
1,080 US gal
1,530 US gal
500 UK gal
660 UK gal
730 UK gal
790 UK gal.
810 UK gal.
900 UK gal
1,280 UK gal
2 260 L
3 000 L
3 300 L
3 600 L
3 700 L
4 100 L
5 800 L
Total length (A)
98"
119 ½"
130 ½"
148 ¾"
3,777 mm
148 ¾"
3,777 mm
115"
156"
2,495 mm
3,035 mm
3,320 mm
2,920 mm
3 965 mm
Total width (B)
49 ¼"
1,250 mm
49 ¼"
1,250 mm
49 ¼"
1,250 mm
49 ¼"
1,250 mm
49 ¼"
1,250 mm
52 3/8"
1,330 mm
52 3/8"
1,330 mm
Total height (C)
52 3/8"
1,330 mm
52 3/8"
1,330 mm
52 3/8"
1,330 mm
52 3/8"
1,330 mm
52 3/8"
1,330 mm
67 ¾"
67 ¾"
1,720 mm
1,720 mm
Inlet height (D)*
41 ½"
1,055 mm
41 ½"
1,055 mm
41 ½"
1,055 mm
41 ½"
1,055 mm
41 ½"
1,055 mm
55 ⅛"
55 ⅛"
1,400 mm
1,400 mm
Outlet height (E)*
38 ½"
980 mm
38 ½"
980 mm
38 ½"
980 mm
38 ½"
980 mm
38 ½"
980 mm
52"
52 "
1,320 mm
1,320 mm
Diameter of
openings (F)
18 ½"
470 mm
18 ½"
470 mm
18 ½"
470 mm
18 ½"
470 mm
18 ½"
470 mm
18 ½"
470 mm
18 ½"
470 mm
Approximate
weight**
364 lb
165 kg
408 lb
185 kg
435 lb
198 kg
529 lb
240 kg
463 lb
210 kg
584 lb
265 kg
717 lb
325 kg
* Pipe invert.
** Weights indicated are approximate and not binding (for handling and lifting purposes only).
Note: The characteristics can be modified at any time.

Installation guide and Owner’s manual Page 2/6 20200522
Septic tanks Item # 182065
2. Sizing and location
For residential systems, determine the size of the septic tank required according to the number of bedrooms in the home. To find
which tank is required, refer to the regulations or standards that apply in your region, state, province or country (the same applies for
the installation).
To improve the performance of any septic installation and extend the life of the treatment system, we recommend using a larger septic
tank than that prescribed. This also allows for the eventual addition of extra bedrooms without having to replace the existing septic
tank.
Location standards
Please refer to your local regulations for minimum distances.
3. Operation guidelines
The following recommendations are intended to ensure the optimum treatment efficiency and operation of your septic installation as
well as maintain it in proper working order.
It is not recommended to discharge any of the following substances into the septic tank:
•Oil and grease (engine oil, cooking oil, etc.);
•Wax and resins;
•Paints and solvents;
•Any kind of petroleum product;
•Any kind of pesticide;
•Any kind of septic tank additive;
•Any kind of toxic substance;
•Anything not easily biodegradable (e.g. coffee beans, cigarette butts,
•sanitary napkins, tampons, condoms, cotton swab, etc.).
It is important that all parties involved (installer, landscaper, owner, snow removal service, etc.) comply with the
following guidelines:
•Never install a septic tank in a place where the groundwater table can reach its base (otherwise, drain pipes could be required).
•Never install a septic tank in clayey soil.
•The profile of the lot must be such that surface run off flows away from the septic system.
•The septic tank must be watertight and be used for disposal of domestic wastewater only.
•Never connect a drain pipe, roof gutter, sump pump or air conditioning drain to your septic system.
•Never cover or bury the access lids of the septic tank. It needs to be accessible for maintenance and emptying.
•Respect the minimum distances prescribed by regulations.
•Backfill thickness over the septic tank must not exceed 90 cm (36").
•Never enter the septic tank.
•Install the septic tank where there is no motorized traffic.
•Never drive vehicles or place objects weighing over 200 kg (450 lbs) within 3 m (10') of the lids.
•Never overload the soil (ex: blown snow, embankment/slope) within 3 m (10') of the lids. The overload could damage the system.
•Never discharge water from a water softener backwash in your septic system.
•Never discharge water from a spa or pool backwash into any of the components of your septic system.
•Never discharge water from a recreational vehicle (camping trailer, caravan, etc.) into any of the components of your septic system.
•Never use an automatic bowl cleaner.
•The home must be equipped with an air vent that is in proper working order and complies with the applicable standards.
•Ensure rapid growth of vegetation to prevent soil erosion.

Installation guide and Owner’s manual Page 3/6 20200522
Septic tanks Item # 182065
4. Components of the septic tank
At delivery, make sure all the following components are included:
A. 1 polyethylene tank;
B. 1 baffle;
C. 1 T-type inlet device;
D. 1 Effluent Filter PL-122;
E. 1 lid for each access fastened with lag screws;
F. 1 rope fixed on top of the tank for handling purposes;
G. 1 Installation Guide and 1 Owner’s Manual.
5. Installation procedure
Step 1 – Excavation
Specific requirements
•Maximum thickness of backfill covering the septic tank:
•Hr ≤90 cm (36").
•Excavation clearance to the tank:
•D ≥30 cm (12") on all sides.
•Minimum thickness of bedding (Hf):
•15 cm (6") in loose soil or
•30 cm (12") in bedrock.
Note regarding the bedding: use 0-20 mm (0-¾") Ø gravel or sand well compacted and levelled.
Step 2 – Bedding preparation and tank placing
•Thoroughly level and compact the bedding.
•Place the septic tank.
•Handle the tank using the rope on top.
•Check the direction of the flow: the inlet should be higher than the
outlet. Arrows near the inlet and outlet indicate the direction of flow.
Step 3 – Connecting the septic tank
•Fill the septic tank with water.
•While filling the tank, connect the plumbing to the inlet and outlet.
•All septic tanks must be ventilated by an air duct at least 100 mm
(4") in diameter or be connected to the air duct of the residence.
D
Hr
Hf
Inlet
Outlet

Installation guide and Owner’s manual Page 4/6 20200522
Septic tanks Item # 182065
Step 4 – Initial backfill
•Backfill until you reach the tank shoulder (water level inside the
septic tank).
•It is important that the backfill material be deposited, not dumped.
Using a bulldozer for this step is not recommended.
•Backfill material should be free of organic matter and impermeable
soil, rock, debris or particles larger than 20 mm (¾") or any object
that could damage the septic tank.
Note: It is essential to backfill evenly each side of the septic tank.
Step 5 – Riser installation
When risers are required, proceed as follows:
•Clean the rim of the septic tank access (where the 4 holes are
located for the lag screws).
•Place the rubber seal on the access rim.
•Put the the riser in place, aligning the holes in the base of the riser
with the holes of the access rim.
•Tighten the riser in place by using the 4 lag screws and washers
provided for this purpose.
Step 6 – Final backfill of the septic tank
•When the septic tank is full of water, backfill up to the
desired height.
•The thickness of the backfill over the septic tank must
not exceed 90 cm (36").
•If necessary, use PSR-060 or PSR-140 risers.
•Secure the lids on the septic tank or the risers with the
supplied lag screws.
6. Maintenance
6.1 Maintenance of the septic tank
The septic tank should be inspected and emptied regularly. For example, in Québec, the septic tanks must be emptied every two (2)
years for principal residences and every four (4) years for secondary residences. However, a by-law governing the septic tank emptying
might have been adopted by a municipality or county, therefore, it is important to consult your local regulations for prescribed
inspection and emptying frequency. It is also possible that the septic tank has to be emptied according to the scum or sludge level in
the system. Once the septic tank is emptied and the effluent filter has been cleaned (if required), fill the septic tank with water.
Note: If your home is equipped with a garbage disposal or a sewage pump, we strongly recommend emptying your septic tank more
frequently. The use of this kind of equipment increases the amount of sludge in the septic tank.
p
Shoulder
RALLONGE6 po. OU14 po.
JOINTDEBUTYLE
4 VISTIRE-FONDACIERINOX.304
Risers PSR-060 150 mm (6") or
PSR-
140 355 mm (14")
Four (4) X 304 stainless steel lag screws
with 4 X washers
Rubber seal
90 cm (36")
maximum

Installation guide and Owner’s manual Page 5/6 20200522
Septic tanks Item # 182065
6.2 Maintenance of the effluent filter
Over time, the effluent filter will accumulate solids and could become saturated, which is why the filter must be cleaned periodically.
We recommend an inspection of the filter once a year. Cleaning of the effluent filter should be done each time the septic tank is
emptied. However, the maintenance frequency will depend on the wastewater flow generated as well as the type of establishment,
therefore, cleaning the effluent filter before emptying the septic tank might be necessary.
Main steps to follow to clean up the effluent filter:
STEP 1: Remove the two (2) septic tank access lids.
STEP 2: Lower the level or empty both chambers of the tank (if required).
STEP 3: Pull out the filter cartridge. Use protective gloves to manipulate the cartridge.
STEP 4: Hold the filter cartridge over the first chamber of the septic tank and clean it with a water jet.
STEP 5: Reinsert the cartridge into the filter, fill the septic tank with water (if required) and put the lids back on the septic tank. Screw
each lag screws of the lids.
7. Troubleshooting
7.1 Flooding
Certain sites are prone to flooding or to rises in groundwater levels. This can lead to a malfunction in your system or alter the
performance of your treatment system. If this happens, contact Premier Tech’s After-Sales Service Department.
7.2 Backflow
Backflow rarely occurs in residential septic systems. If it does, the effluent filter may be saturated, in which case, it needs to be
cleaned. The effluent filter retains solids in the septic tank in order to protect the treatment system from what is often irreversible
clogging. Have the septic tank emptied before cleaning the effluent filter. If the backflow is caused by the septic tank or associated
piping, have them checked to make sure they are not blocked. If, after verification, water does not flow properly, have your treatment
system checked by a wastewater treatment expert.
7.3 Odours
All septic systems are apt to generate gases and odours. The position of the air vent, as well as other factors unrelated to your
treatment system, can prevent septic gases from dispersing properly and lead to odours. If this happens, contact Premier Tech’s
After-Sales Service Department.
7.4 Winter closing of residences
If you close your residence (i.e. close the circuit-breaker) during a potential freezing period, you must contact Premier Tech’s After-
Sales Service Department to help establish the appropriate procedure. In doing so, you will ensure a longer life for your septic tank.
If you have any question or comments, do not hesitate to contact
Premier Tech at 1 800 632-6356.
The information contained in this document was up
-to-date and consistent with the information available at the
time of publication.
Premier Tech Ltd. makes no warranties or representations as to its accuracy. Because of its
continuous improvement policy, Premier Tech Ltd. and its affiliated companies reserve the right to change and/or
discontinue the manufacture of any product and/or m
odify technical data and prices, for any reason whatsoever
and at its sole discretion, without further notice and without liability to anyone in this regard. PREMIER TECH
®
and
PREMIER TECH & DESIGN
TM are trademarks of Premier Tech Ltd. or its affiliates.
© 2020 Premier Tech Ltd. All rights reserved.

Certificate of Warranty for the Premier Tech
High Performance Septic tanks
Installation guide and Owner’s manual Page 6/6 20200522
Septic tanks Item # 182065
1. PREAMBLE
Premier Tech Technologies Ltd. (hereinafter called "Premier Tech") is proud to
provide its customers with the present warranty on the high performance Septic
Tanks PST-280, PST-340, PST-390, PST-420, PST-440, PST-500 or PST-660
(hereinafter called "Septic Tank").
For the purposes of this warranty, "Customer" shall mean the person who has
acquired a Septic Tank (hereinafter called "Initial Purchaser") as well as any
subsequent purchaser (hereinafter called "Subsequent Purchaser(s)"), according
to the dispositions of section 8 of this present warranty. "Successor(s)" shall mean
any other person entitled to exercise Customer’s rights under the law.
2. NATURE OF THE WARRANTY
The following warranty is conditional to and only applies if the Septic Tank has
been installed according to the installation, maintenance and operation
instructions as described in the Installation Guide/Owner’s Manual.
2.1. Polyethylene reservoir
Premier Tech warrants the Septic Tank’s polyethylene reservoir (parts and labour)
against any manufacturing defect for a period of five (5) years from the date of
purchase by the Initial Purchaser (proof of purchase required).
2.2. Other components
Premier Tech also warrants all other components of the Septic Tank (parts and
labour) against any manufacturing defect for a period of two (2) years from the
date of purchase by the Initial Purchaser (proof of purchase required).
This conventional warranty is given by Premier Tech to its customers in addition
to the legal warranties and is expressly limited to the text of this certificate.
3. NOTICE
For this warranty to be valid, the Customer must notify Premier Tech in writing
immediately upon the appearance of any indication of an anomaly or irregularity in
the design or the operations of the septic Tank.
Such notice must be given by mail to Premier Tech’s head office at 1, avenue
Premier, Rivière-du-Loup, Québec, G5R 6C1, CANADA or by facsimile at (418)
862-6642.
Upon receipt of this notice, Premier Tech will examine the situation and, if
necessary, take appropriate corrective measures in accordance with the terms of
the present warranty.
4. GENERAL EXCLUSIONS
The following charges, damages or problems are excluded from the warranty:
(a) Any septic Tank emptying charges incurred to execute the present warranty.
These charges will be assumed by the Customer at the rate in force at the time of
the execution of the present warranty;
(b) Any transportation and shipping charges incurred to execute the present
warranty. These charges will be assumed by the Customer at the rate in force at
the time of the execution of the present warranty;
(c) Any damage or problem caused by a fortuitous event or “force majeure”, such
as, without limiting the generality of the foregoing, earthquake, flood, freeze,
hurricane, landslide, explosion or dynamiting;
(d) Any damage or problem caused by the fault or act of a third party;
(e) Any damage or problem arising from a defective installation of the Septic Tank
and/or of the products located upstream or downstream from the septic tank;
(f) Any damage or problem arising from any installation, modification, correction or
addition to the treatment system carried out after installation of the Septic Tank
without Premier Tech’s prior written approval;
(g) Any damage or problem if it is demonstrated that the installation, maintenance
and use of the Septic Tank have not been done in accordance with the
instructions and guidelines described in the Installation Guide/Owner’s Manual;
(h) Any damage or problem caused by the fault or action of the Customer or
Customer’s Successors;
(i) Any damage or problem, if it is found that the Customer or its Successors have
modified or changed the use of the property served by the Septic Tank resulting
in the alteration of the nature or quality of wastewater being treated and/or that
constitutes a violation of the applicable regulations;
j) Any damage or problem caused and/or resulting of the works performed in order
to access to the Septic Tank, including, without limiting the generality of the
foregoing, excavation, snow-removal or demolition.
5. PARTICULAR EXCLUSIONS
It is further expressly understood that the Customer may not carry out or cause
to be carried out any repair or verification of the Septic Tanks sold, or attempt to
carry out any work or to apply any corrective measures whatsoever to said work,
before notifying Premier Tech in accordance with the provisions of section 3 of
this warranty and before Premier Tech has visited the site, within a reasonable
time following receipt of said notice, in order to acknowledge the situation.
If the installation is not performed by an installer trained by Premier Tech or if the
Customer carries out or causes to be carried out repairs, or attempts to repair or
to apply corrective measures of any kind whatsoever to the Septic Tanks sold,
without prior authorization by Premier Tech, this warranty shall be considered null
and void and Premier Tech shall be considered completely discharged from any
and all of its obligations under this warranty.
6. INDEMNITIES AND DAMAGES
Subject to the application of the provisions and exclusions provided for in this
Warranty, Premier Tech's liability and obligations regarding any corrective
measure carried out or any attempt to correct an indicated problem shall be
limited to supplying a new Septic Tank or one or several parts/components of the
Septic Tank and to supplying the required labour, if applicable.
7. LIMITATION OF LIABILITY
Premier Tech’s compensation or indemnification obligation shall be limited to the
provisions of section 6 of this certificate of warranty and Premier Tech shall not be
held liable for any other damage or loss that may have been suffered or incurred
by the Customer or any third party in connection with the Septic Tank, its parts
and/or components which originate thereof.
No additional warranty, express or implied, hence excluding any direct or indirect
consequential damages (not limited to but including third parties loss) concerning
the design, sale or use of the Septic Tank and/or services provided by Premier
Tech is hereby granted. Premier Tech’s liability under its warranty obligation shall
in no case exceed the cost of the Septic Tank.
8. TRANSFER OF OWNERSHIP
In the event of transfer of ownership, sale, assignment or disposition in any other
way of the Customer’s property to a third party, this warranty shall continue to
apply. The person proceeding to the transfer of the property, sale, assignment or
any other type of disposition, undertakes to hand over to the Subsequent
Purchaser or its Successor, the warranty certificate received upon completion of
the work, as well as the Installation Guide/Owner’s Manual.
9. INSPECTION
The Customer and/or the Customer’s Successors shall allow Premier Tech or its
duly authorized representative to carry out all necessary monitoring and inspection
as required for implementation of this warranty.
10. INTERPRETATION
The terms of this warranty shall be interpreted and governed by the law in force in
the Province of Quebec and the provisions of this warranty.
11. PRIORITY OF THE CERTIFICATE OF WARRANTY
This warranty supersedes any contract or understanding, written or verbal,
entered into between the Customer and Premier Tech. In case of contradiction
between this warranty and any other documents and/or contracts entered into
between the Customer and Premier Tech, this warranty shall prevail.
12. SUBSEQUENT PURCHASERS AND SUCCESSORS
Subject to the provisions of this warranty and of section 8 in particular, this
warranty shall continue to apply to the Subsequent Purchasers and Customer’s
Successors and shall continue to have full effect until the end of the agreed
warranty period provided for in section 2 of this certificate.
This manual suits for next models
6
Table of contents
Other PREMIER TECH Water Heater manuals
Popular Water Heater manuals by other brands
Kospel
Kospel SP180 Assembly and operating instructions

Viessmann
Viessmann Vitocell-V 100 200 Service manual
Zip
Zip 1552 Installation and operating instructions
Thermor
Thermor AEROMAX VM Documentation for installation and use
STIEBEL ELTRON
STIEBEL ELTRON SNE 5 t ECO Operation and installation

Ariston
Ariston Marco Polo Gi7S 11L FFI instruction manual

