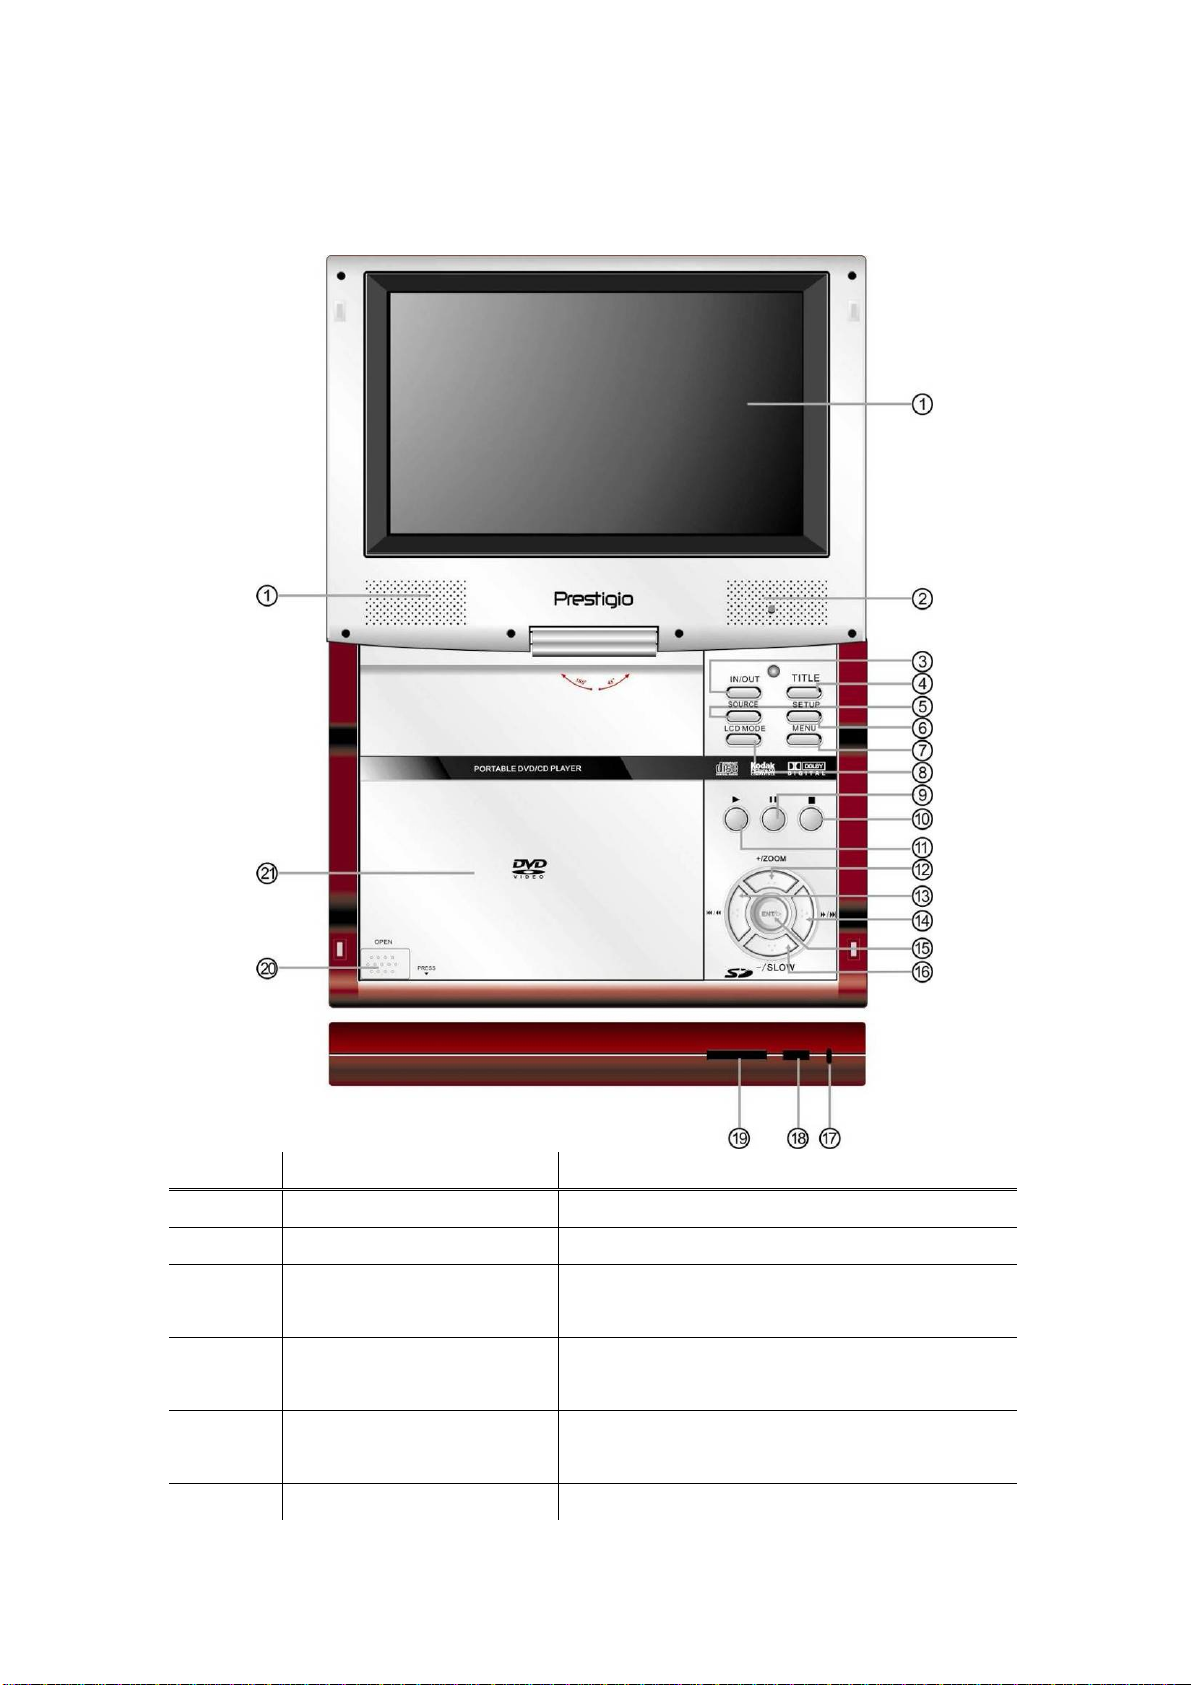
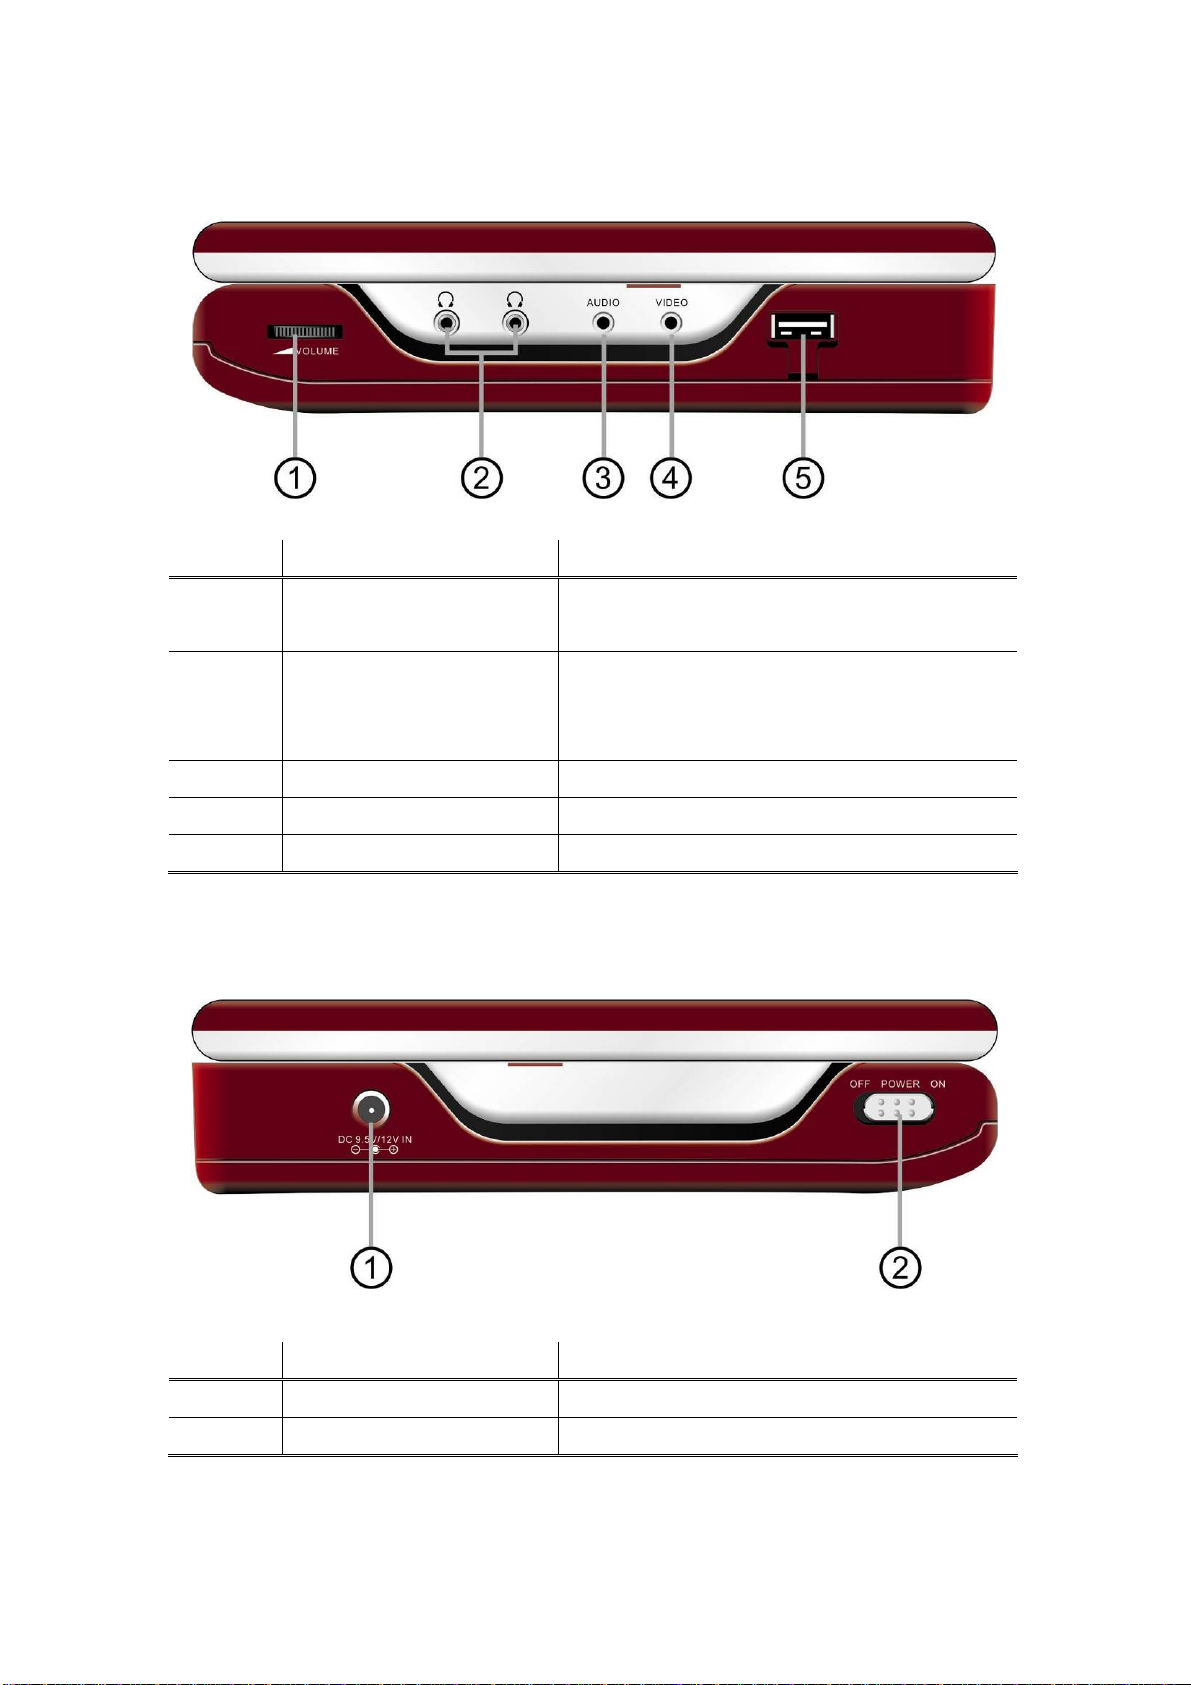
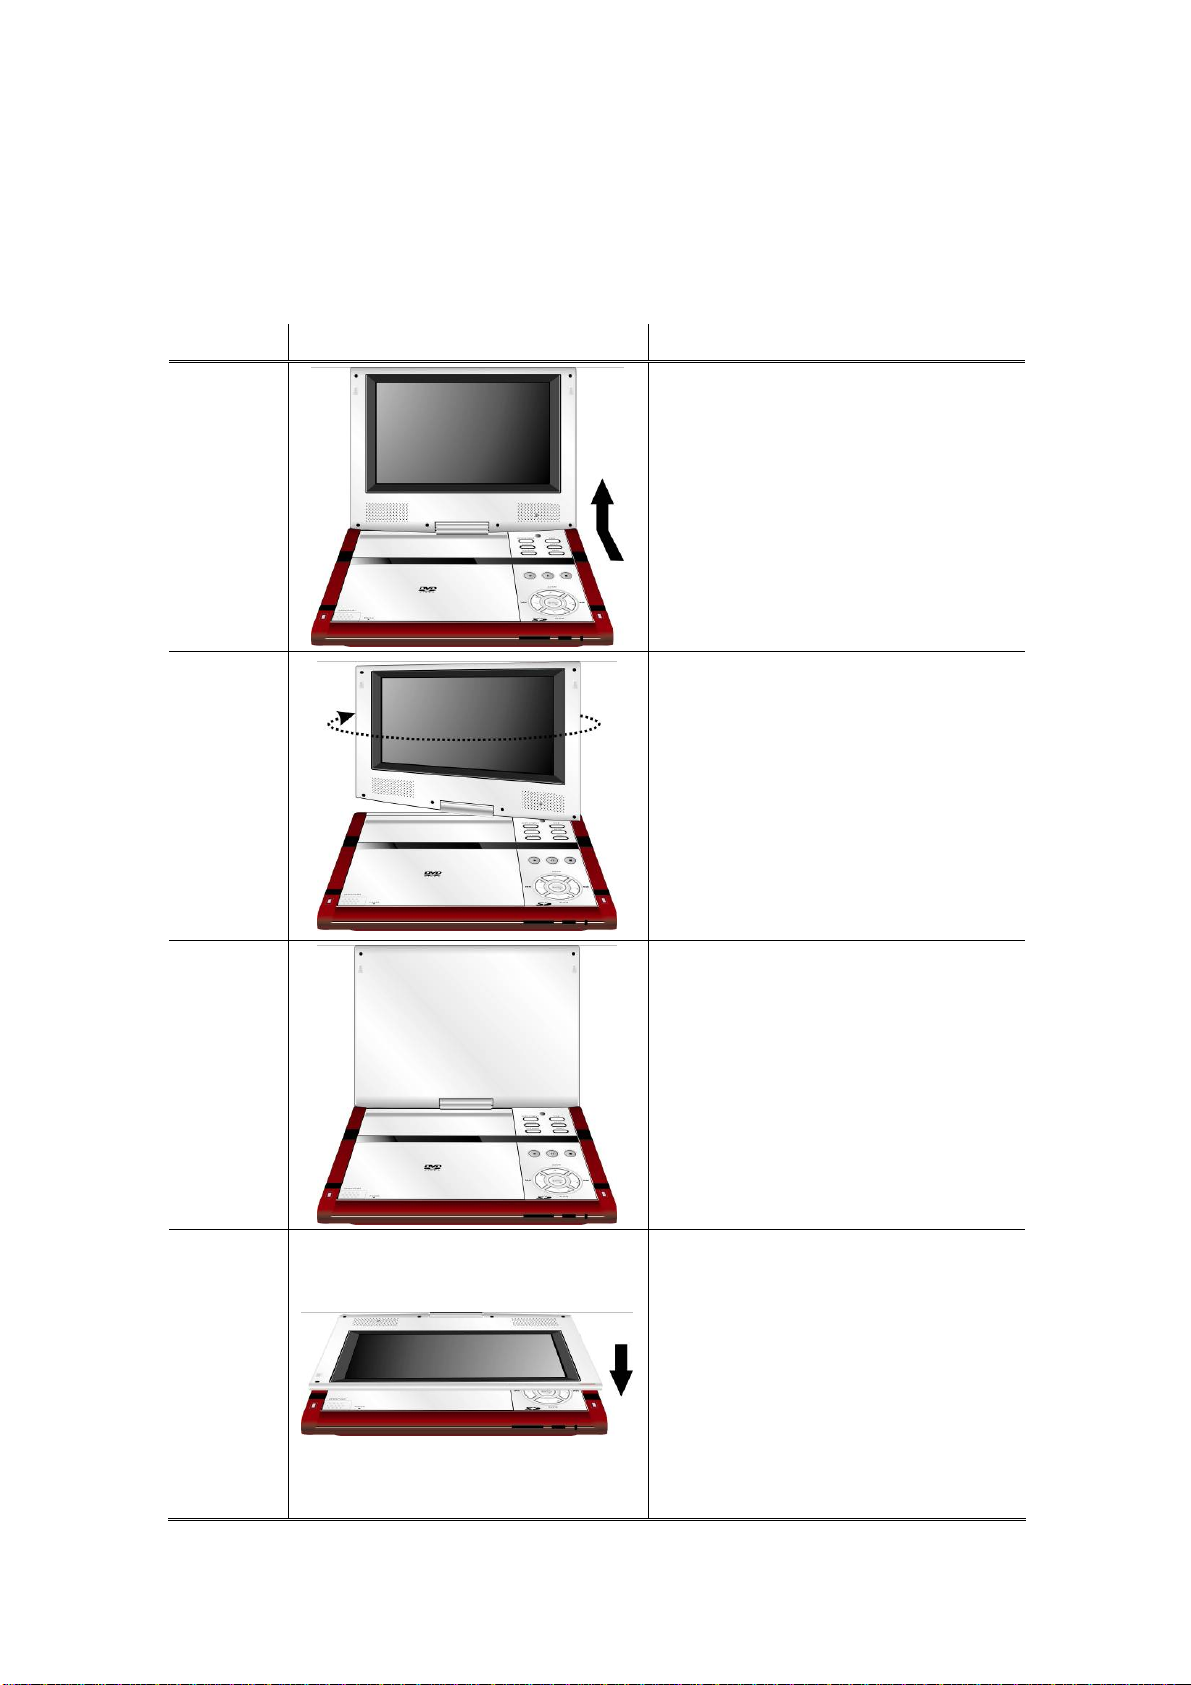
Prestigio PPDP 370 User manual

Table of Contents
1GETTING STARTED
1.1 SAFETY PRECAUTIONS
1.2 COPYRIGHT PROTECTION
1.3 PACKAGE CONTENT
2MAIN UNIT VIEWS
2.1 FRONT VIEW
2.2 RIGHT SIDE VIEW
2.3 LEFT SIDE VIEW
2.4 BOTTOM VIEW
3REVOLVING LCD PANEL
4REMOTE CONTROL OVERVIEW
4.1 BUTTON DEFINITION
4.2 REMOTE CONTROL BATTERY INSTALLATION
5SYSTEM CONNECTIONS
5.1 CONNECTING TO TV
5.2 CONNECTING TO AMPLIFIER
5.3 CONNECTING TO EXTERNAL AV SIGNAL SOURCE
5.4 CONNECTING TO HEADPHONES
5.5 CONNECTING TO AC ADAPTER
5.6 CONNECTING TO CAR DC ADAPTER
5.7 CONNECTING USB DEVICE OR SD CARD
6DEVICE BATTERY OPERATIONS
6.1 CHARGING BATTERY PACK
6.2 ATTACHING BATTERY PACK
6.3 DETACHING BATTERY PACK

7SOFTWARE COMPATIBILITY
7.1 COMPATIBLE DISC FORMAT
7.2 DISC MAINTENANCE
8GENERAL OPERATION
8.1 BEFORE PLAYING
8.2 ADJUSTING SCREEN ASPECT RATIO
8.3 SWITCHING BETWEEN MEDIA SOURCES
9DVD DISC PLAYBACK OPERATIONS
10 CD DISC PLAYBACK OPERATIONS
11 JPEG FILE VIEWING OPERATIONS
12 MP3 DISC PLAYBACK OPERATIONS
13 SYSTEM SETUP
14 USING CARRYING CASE
15 TROUBLESHOOTING
16 APPENDIX
16.1 PRODUCT SPECIFICATION
16.2 TECHNICAL SUPPORT AND WARRANTY INFORMATION
16.3 DISCLAIMER

The lightning flash with arrowhead symbol, within an equilateral triangle,
is intended to alert the user to the presence of un-insulated “dangerous
voltage” within the product’s enclosure that may be of sufficient
magnitude to constitute a risk of electric to persons.
The exclamation point within an equilateral triangle is intended to alert
the user to the presence of important operating and maintenance
(servicing) instructions in the literature accompanying the appliance.
WARNING:
zThe product is equipped with a low power laser device. To
unit. Please contact authorized service
enter for any service required.
he risk of electric shock, do NOT remove the cover.
hold responsibility for the
The device emits laser radiation when opened. Do NOT stare into
laser beam directly.
CAUTIONS:
ensure the quality of the laser device, do NOT open up the case or
attempt to repair the
c
zTo reduce t
No user-serviceable parts inside. Refer servicing to qualified
service personnel. Unplug the product from the wall outlet before
servicing or when it is not used for a long period of time.
zThe manufacturer should not
damage caused by any substitutions and modifications of the
product without authorization from the manufacturer or
authorized organization.

1Getting Started
hank you for purchasing Prestigio PPDP 370, a mobile digital media center. You
ave made an excellent choice and we hope you will enjoy all of its exciting features.
lease read through the user manual carefully before using the product, and follow
manual to fully enjoy all features of the product.
ce.
ark indicates actions that could lead to
serious injury to personnel operating the device or damage to
n tempt to disassemble or alter any part of the device that is not
descr
zDo n
devic
zIn the event of liquid entry into interior of device, immediately disconnect
Please consult your product distributor or the
onnect the device
e in vicinity of equipments generating strong
ta corruption and loss.
right Protection
rights. Use of this copyright
protection technology must be authorized by Macrovision, and is intended for
uses only unless otherwise authorized by
T
h
P
all of the procedures in the
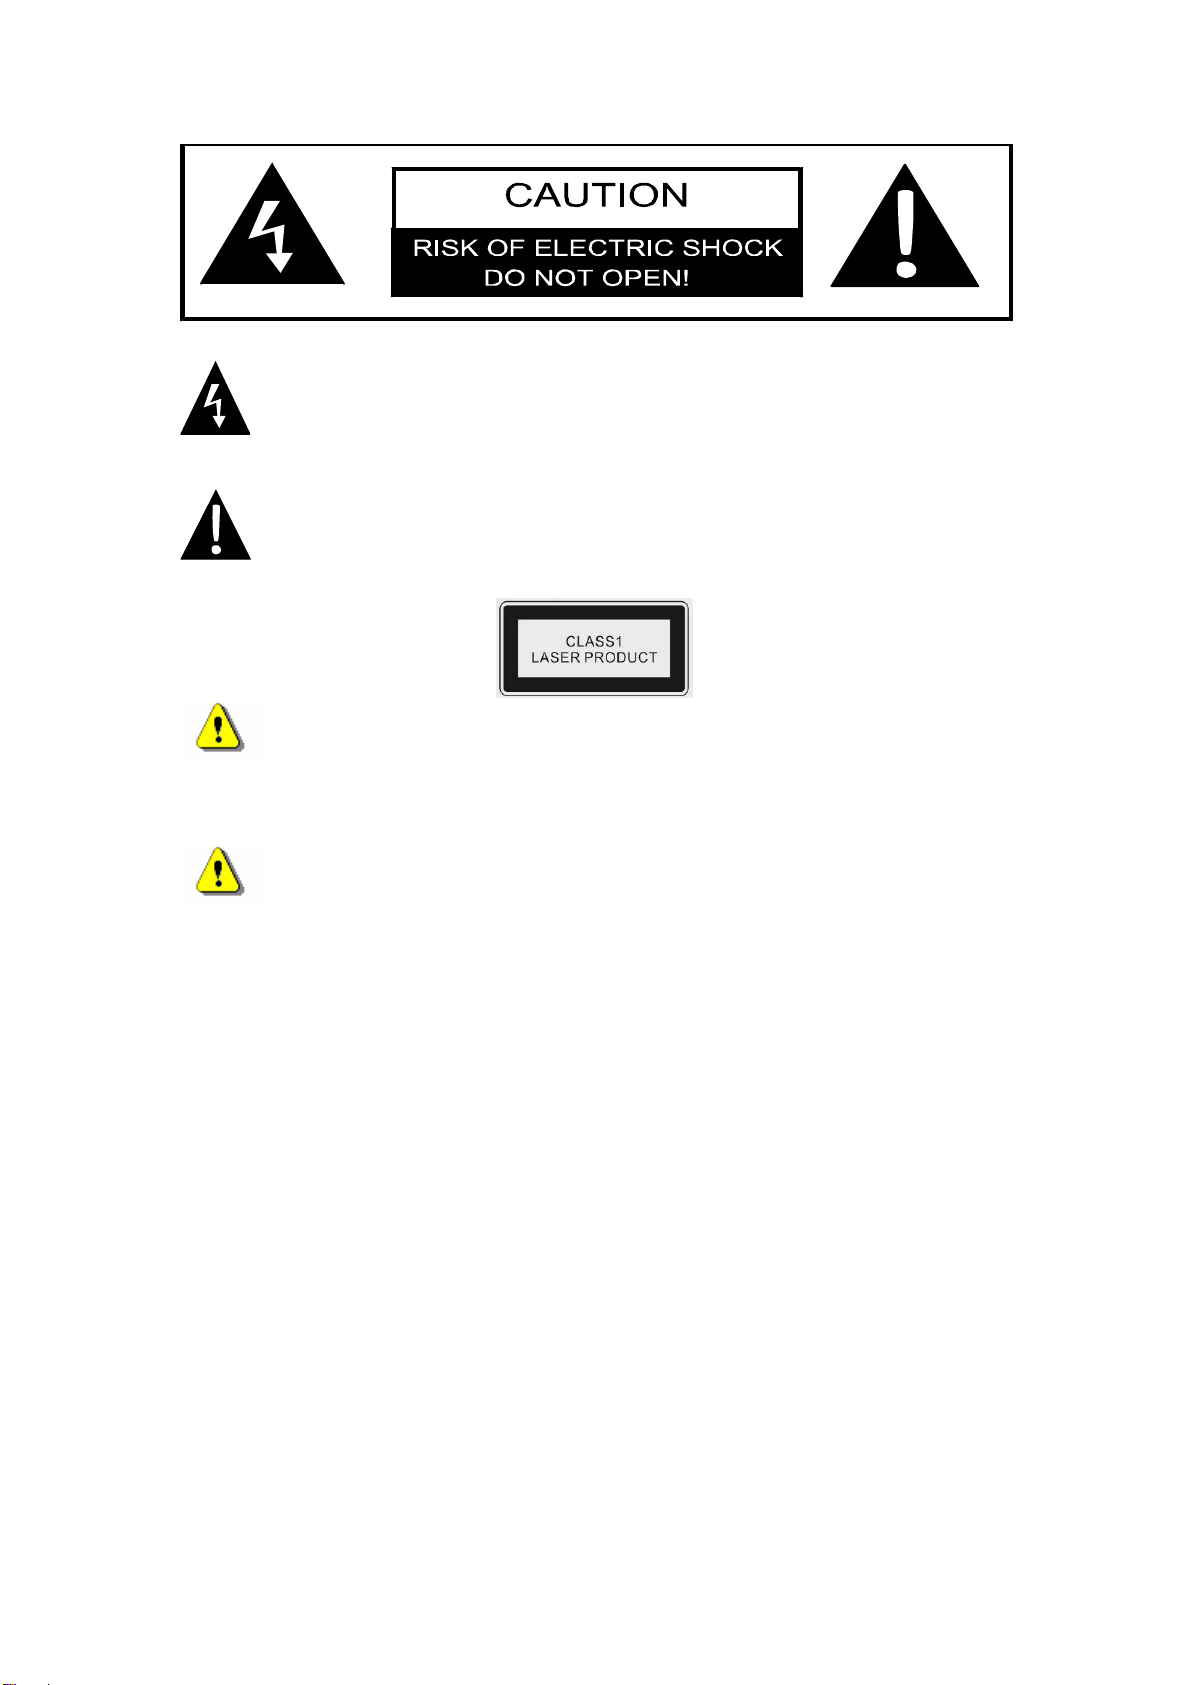
1.1 Safety Precautions
Please observe all safety precautions before using Prestigio PPDP 370. Please
follow all procedures outlined in this manual to correctly operate the devi
Warning: This m
the device if ignored or handled incorrectly.
ot at
zDo
ibed in this guide.
ot place the device in contact with water or any other liquids. The
e is NOT designed to be liquid proof of any sort.
the device from the computer. Continuing use of the device may result in
fire or electrical shock.
closest support center.
zTo avoid risk of electrical shock, do not connect or disc
with wet hands.
zDo not place the device near a heat source or directly expose it to flame or
heat.
zNever place the devic
electromagnetic fields. Exposure to strong magnetic fields may cause
malfunctions or da
1.2 Copy
This product incorporates copyright protection technology that is protected by
U.S. patents and other intellectual property
home and other limited viewing

Macrovision. Reverse engineering or disassembly is prohibited.
nly.
DVD players and discs are coded by region. If the region number described on
the DVD disc does not correspond to the region number of this product, the DVD
disc can not be played by the unit. Prestigio PPDP 370 is coded with region
number 2 and is intended for European standard DVD disc use o
1.3 Package Content
Item Description Quantity
Prestigio PPDP 370 1
User Manual 1
Warranty Card
Documentation CD 1
Remote control
(battery included) 1
Car DC Adapter 1
Power Supply Cable
with AC Adapter 1
Audio/Video Cable 1
Rechargeable Battery 1
Pack
Car Headrest 1
Bag/Carry Case

2Main Unit Views
2.1 Front View
Number Item Name Function
1 LCD Screen
2 Speaker
3 IN/OUT Button Press to switch between AV/IN and AV/OUT
modes.
Press to enter to the title menu
available.
or exit from
if
4 TITLE Button
5 SOURCE Button ress to cycle through Disk, USB,P
SD/MS/MMC modes if available.
6 SETUP Button enter or exit system setup menu.Press to

7 MENU Button Press to enter or to exit from the menu.
8 LCD MODE Button
ton in combination of -/+
or
Press the but
button to adjust screen brightness, col
and contrast.
Press and hold the button to change screen
aspect ratio.
9 Button Press to pause playback.
10 Button Press to stop playback.
11 ►(Play) Button Press to start playback.
12 ▲/+/ZOOM Button
ress to adjust screen
rast.
o cycle through
.
▲Button: Scroll up.
+Function: P
brightness, color and cont
ZOOM Function: Press t
zooming in/out functions
13 ◄//Button
◄Button: Scroll left.
Button: Press and hold to rewind
playback.
during
t,
Button: Press to return to previous lis
track or chapter.
14 ►//Button
►Button: Scroll right.
back.
Button: Press and hold to fast forward
during play
Button: Press to skip to next list, track,
or chapter.
15 ▼/-/SLOW Button nd contrast.
ction.
▼Button: Scroll down.
-Function: Press to adjust screen
brightness, color a
SLOW Function: Press to start slow
playback fun
16 ENT/►Button onfirm selection.
.
ENT Function: Press to c
►Function: Press to start playback
17 Charge Indicator Indicator light is red when charging.
Indicator light is green when fully charged.
18 Remote Control Sensor
19 SD/MMC/MS Card Slot Card slots for SD/MMC/MS memory cards.
20 OPEN Button Press to open the disc tray cover.
21 Disc Tray Cover Gently press the cover to close after disc is
placed on the tray.

2.2 R
ight Side View
Number Button Name Function
1 VOLUME Control Knob Scroll left and right to adjust volume of the
headphone or speaker.
2 Headphone Jack Connects to headphone sets. Speakers
automatically mute when headphone sets
inserted.
3 AUDIO OUTPUT Jack Connects to external audio devices.
4 VIDEO OUTPUT Jack eo devices.Connects to external vid
5 USB Device Port Connects to USB devices.
2.3 Left Side View
Number Button Name Function
1 DC 9.5V/12V Input Jack
Connects to power adapter provided.
2 Power ON/OFF Switch Slide to turn power ON/OFF.

2.4 Botto
m View
Number Button Name Function
1 Rechargeable Battery
Interface
Connects to rechargeable battery pack.

3Revolving LCD Panel
he revolving LCD panel is one of the prominent feature of Prestigio PPDP 370.
lease refer to the following instructions for proper LCD panel revolving operations
Instruction
T
P
Position Figure
A
1. Open the LCD panel to position
perpendicular to the operating
panel.
A as shown at the left figure.
The LCD panel should be
2. Revolve the LCD panel
clockwise around its axis to
adjust to desired viewing
angles.
B
3. The maximum revolving angle
is. Revolve the panel counter
clockwise until it clicks to
return to up right position.
C
4. To place the unit in the car
D
headrest bag provide, revolve
LCD panel 180∘clockwise and
fold it down towards operating
panel. The LCD panel should
be aligned perfectly with
operating panel to fit into the
bag.

4Remote Control Overview
4.1 Button Definition
Number Button Name Function
1 MUTE Button Press to turn on/off speakers
2 INFO Button Press to display detailed file information.
Press again to cancel.
3 TITLE Button Press to enter to or exit from the title menu
if available.
4 ▲▼►◄
Directional Buttons Press to navigate between different options.
5 ENTE Press to start pla confirmRButton yback or to
selection.
6 SETUP Button Press to enter system setup.
7 0-9 Number Button s.Press to select number
8 Next Button Press to skip to the next list, track or
chapter
9 Previous Button
chapter.
Press to return to the previous list, track, or

10 SUBT Button Press to select a subtitle language (m
languages
ulti
subtitle required). Press again to
cancel.
11 ANGLE Button Press to select camera angles (camera
angle adjusting function required).
12 A-B Button play a certain selected segmentPress to
repeatedly.
13 ZOOM Button le through zooming in/outPress to cyc
functions.
14 REP Button
.
Press to select different repeat and shuffle
patterns
15 MENU Button Press to return to or exit from the menu
during playback.
16 PAUSE Button
ume playback.
Press to pause playback and press PLAY
button to res
17 STOP Button Press to stop playback. Press PLAY but
to resume p
ton
layback at the same point. Press
.
STOP button twice to stop playback
completely
18 PLAY Button Press to start playback.
19 GOTO Button ser defined title, chapterPress to skip to a u
number or time.
20 +10 Button ter than 9.Press to select numbers grea
21 Rewind Scan Button Press to rewind during playback.
22 Forward Scan Button Press to fast forward during playback.
23 SLOW Button ction.Press to activate the slow playback fun
24 AUDIO Button different language
(multiple
hen playing CD disc.
Press to cycle through
when playing a DVD disc
languages subtitle required). Press to select
different audio track w

4.2 Remote Control Battery Installation
o remotely control the Prestigio
PDP 370, point the remote
ntrol unit towards the remote
ntrol sensor within a distance of
meters and 30∘from the center
e of remote control sensor.
T
P
co
co
5
lin
The remote control battery is in
to change battery when power ru
Push and hold on the side of
battery holder, then pull it out
cluded in the package. Please follow below steps
ns out.
1.
from the remote control unit as
shown in the diagram.
Place a battery with type of2.
on the holder with (+)
trol.
CR2025 3V
facing the back of remote con
3. Push the battery holder back into
the remote control unit. Please
firmlymake sure that the holder is
inserted.
CAUTION:
zDo NOT expose the remote control unit under direct sunlight.
zDo NOT recharge, dismantle, or heat up the battery.
zReplace the exhausted battery immediately to ensure proper
remote control unit functioning.

5System Connections
WARNING:
zPlease switch off all devices such as TV, DVD player, etc before
connecting to the unit.
zPlease match color coding on the unit and devices before
connection.
5.1 Connecting to TV
Follow the diagram to the left for connecting
Prestigio PPDP 370 with TV via
5.2 Connecting to Amplifier
Audio/Video cable.
Follow the diagram to the left for connecting
Prestigio PPDP 370 with amplifier via
Audio/Video cable.

5.3 Connecting to External AV Signal Source
Follow the diagram to the left for connecting
Prestigio PPDP 370 with other devices to
receive external AV signal source. Press on
NOTE: Noise may occur when there is an
external audio signal input while playing
from an internal AV source. Unplug the
audio cord to clear the noise
5.4 Connecting to Headphones
AV IN/OUT button to switch between
internal and external AV source.
Follow the diagram to the left for onnecting
Prestigio PPDP 370 with headphone.
WARNING:
Excessively loud volume may detriment hearing. Turn down the
volume before connecting to the earphone and then raise the
5.5 Connecting to AC Adapter
volume to appropriate level.
Follow the diagram to the left for connecting
Prestigio PPDP 370 with AC adapter.
NOTE:
Turn off device power before connecting to
AC adapter to prevent short circuit
accidents.

5.6 Connecting to Car DC Adapter
Follow the diagram to the left for connecting
Prestigio PPDP 370 to car DC adapter
while powering up the unit in car.
to
r adapter to prevent short circuit
s.
NOTE:
Turn off device power before connecting
ca
accident
WARNING:
zPlease disconnect Prestigio PPDP 370 from the car DC adapter
zDo NOT operate the unit or use the device for viewing purpose
while operating a vehicle.
zPlease place the unit in proper viewin
performance.
5.7 Connecting USB Device or SD Card
before starting up the vehicle.
g angle for better
Follow the diagram to the left for connecting
Prestigio PPDP 370 to USB device.
Follow the diagram to the left for connecting
Prestigio PPDP 370 to SD card.

6Device Battery Operations
Prestigio PPDP 370 is equipped with a Lithium Polymer rechargeable battery
attachable to the bottum of the device. Altho
fully charged battery pack delivers approxim
playing times. The full charging time of the battery pack is approximately 3.5
hours. Please follow below instuctions on how to charge battery pack and
attach/detach it from the device.
ugh it varies from disc contents, a
ately 2.5 ~ 3 hours of functional
Cautions:
zPlease fully charge battery pack before using for the first time
zBattery pack should only be used and charged between
temperature of 32℉and 100℉.
zPlease observe all caution and w
beginning of user manual to ensure proper device and battery
usage.
6.1 Charging Battery Pack
arning sections listed at the
Follow the diagram to the left for connecting
Prestigio PPDP 370 with battery pack for
ecting to
ircuit
accidents.
6.2 Attaching Battery Pack
charging.
NOTE:
Turn off device power before conn
AC adapter to prevent short c
1. Align the plastic tabs on the battery
pack with latches on the unit.

2. Push the ba
ttery pack in the direction
shown in the diagram.
e the battery pack towards the
6.3 Detaching Battery Pack
3. Slid
device until it clicks and locks into
place.
1. Press and hold the battery pack in the
direction ○,1shown in the diagram.
2. Slide the battery pack gently in the
direction ○,2shown in the diagram.
3. Remove the battery pack from the
device with cautions.

7Software Compatibility
7.1 Compatible Disc Format
Disc
Format Disc Logo Disc Size Playback Time/
Playable Sides
133 min (SS-SL)
242 min (SS-DL)
266 min (DS-SL)
12cm
484 min (DS-DL)
41 min (SS-SL)
DVD
75 min (SS-DL)
82 min (DS-SL)
8cm
150 min (DS-DL)
12cm 74 min
CD 8cm 20 min
JPEG N/A 12cm N/A
MP3 12cm 600 min
7.2 Disc Maintenance
zolding Discs
H
A d touching the playing surface of discs for it may damage the
disc surface.
voi
zCleaning Discs
Fingerprints or stain on the disc may affect the quality of sound
and picture. Gently wipe the surface of disc by clean soft cloth
for cle purpo dilute
dete remove heave dirt or fingerprints if nece
aning
rgent to
se. Moisten a soft cloth with d neutral
ssary.
Do not wipe in a circular motion (concentric scratches
surface tend to cause noise). Gently wipe from the ce
disc to the outer edge as the right figu
on the disc
nter of the
re.

8General Operation
Please read through the instructions bel re opearting o PPDP 370
for the first me.
RNING:
T play poor quality d r it will dam lens.
stigio PPDP 370 to power supply or wall plug via power
adapter provided.
to ON position.
PEN button to open disc tray cover. Place the disc in the disc tray
with printing side face up. Close the disc tray cover.
ow befo Prestigi
ti
WA
Do NO iscs fo age the
8.1 Before Playing
1. Connect Pre
2. Turn on unit by sliding power switch at the left side of unit
3. Press O
4. The device will automatically begin disc playback process.
5. Adjust the volume by scrolling volume control at the right side of unit to an
to OFF position.
8.2 Adjusting Screen Aspect Ratio
appropriate level before playback.
6. Turn off unit by sliding power switch at the left side of unit
Press LCD MODE button to change the brightness
LCD MODE
button
color, and contrast level. Adjust these values with
+and -buttons on the front panel. Press and hold
the LCD MODE button to change the screen
efer
below images for simple illustration.
aspect ratio between 16:9 and 4:3 options. R
Table of contents