Prima Mossa FP-103 Quick start guide

Page 1 of 7
FP-103 Prima Mossa Pedicure Spa
ASSEMBLY INSTRUCTIONS
&
OPERATIONALMANUAL
Thank you very much for purchasing FP-103 Prima Mossa Pedicure Spa.
Please read this assembly instructions thoroughly and follow the step by
step to assemble the chair.
CONTENT
Assembly Instructions …………………………………………… page 2
Fuse Check & Replacement ……………………………………. page 6
Safety Precautions …………………………………………… … page 7

Page 2 of 7
FP-103PrimaMossaPedicureSpa
ASSEMBLY INSTRUCTIONS
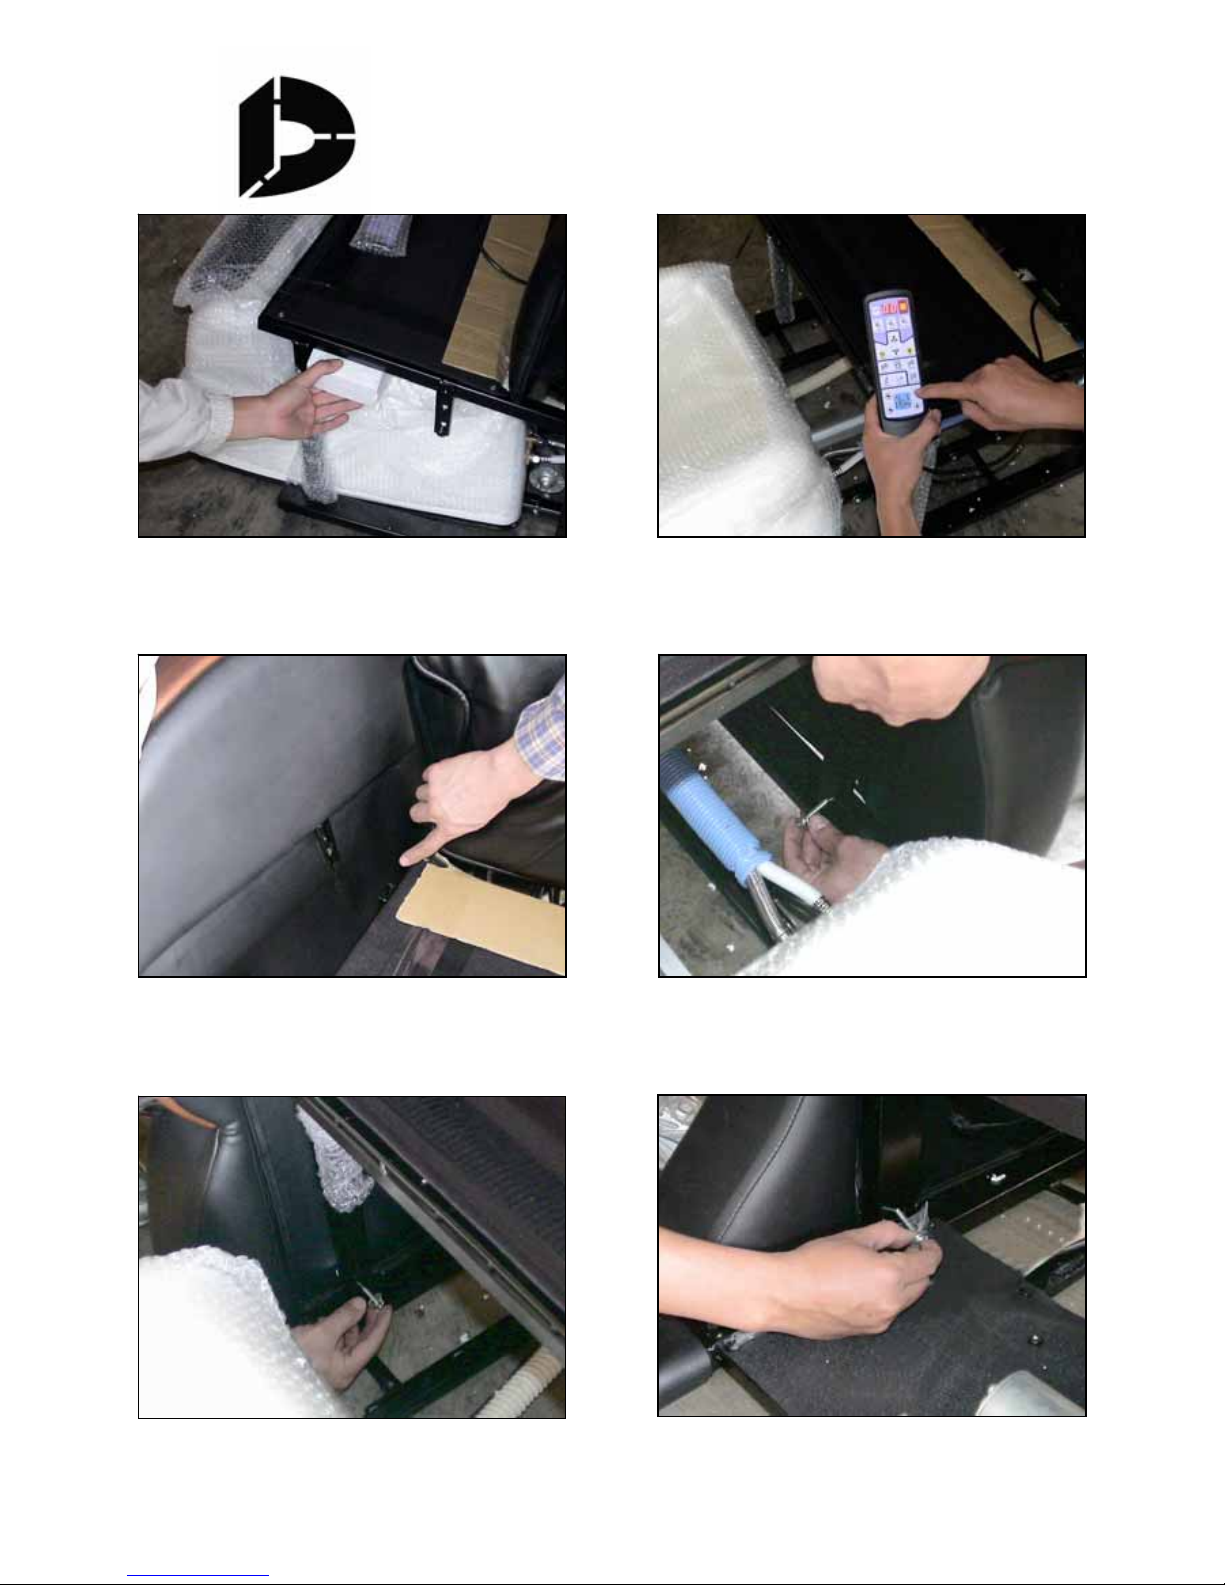
Step 1:
Open the “Base” carton box first, and take out
the “Seat cushion” aside. Then remove all
packing stuff that is attached to the carton box.
Step 2:
Two men are needed to take out the base from
the carton box to the desired position. See
the picture above to hold the areas indicated.
Step 3:
Two men are needed to take out the backrest
from the carton box. Then see next step.
Step 4:
Put the backrest onto the brackets (yellow
arrow) on the base. One person is still needed to
support the backrest until Step 10.
Step 5:
Insert the #1 pin (see page A) into the hole of
the joint on both sides.
Step 6:
Insert an “R” clip into the hole on each #1 pin
to prevent falling.

Page 3 of 7
FP-103PrimaMossaPedicureSpa
ASSEMBLY INSTRUCTIONS
Step 12:
Plug the power cord, one end into the socket on
the back cover, and the other end onto the outlet
on the wall. Then, turn on the switch to “ I ”.
Step 11:
Connect the jacks of electric wires.
Step 10:
Connect the jacks of the wires for reclining
motor and pushing motor. (Red to red; white
to white)
Step 8:
Insert #2 pin into the holes on the “U” and the
reclining motor to join them together.
Step 7:
Insert pipe plugs into both rectangle pipes.
Step 9:
Insert an “R” clip in to the #2 pin to fix it.
Page 4 of 7
FP-103PrimaMossaPedicureSpa
ASSEMBLY INSTRUCTIONS
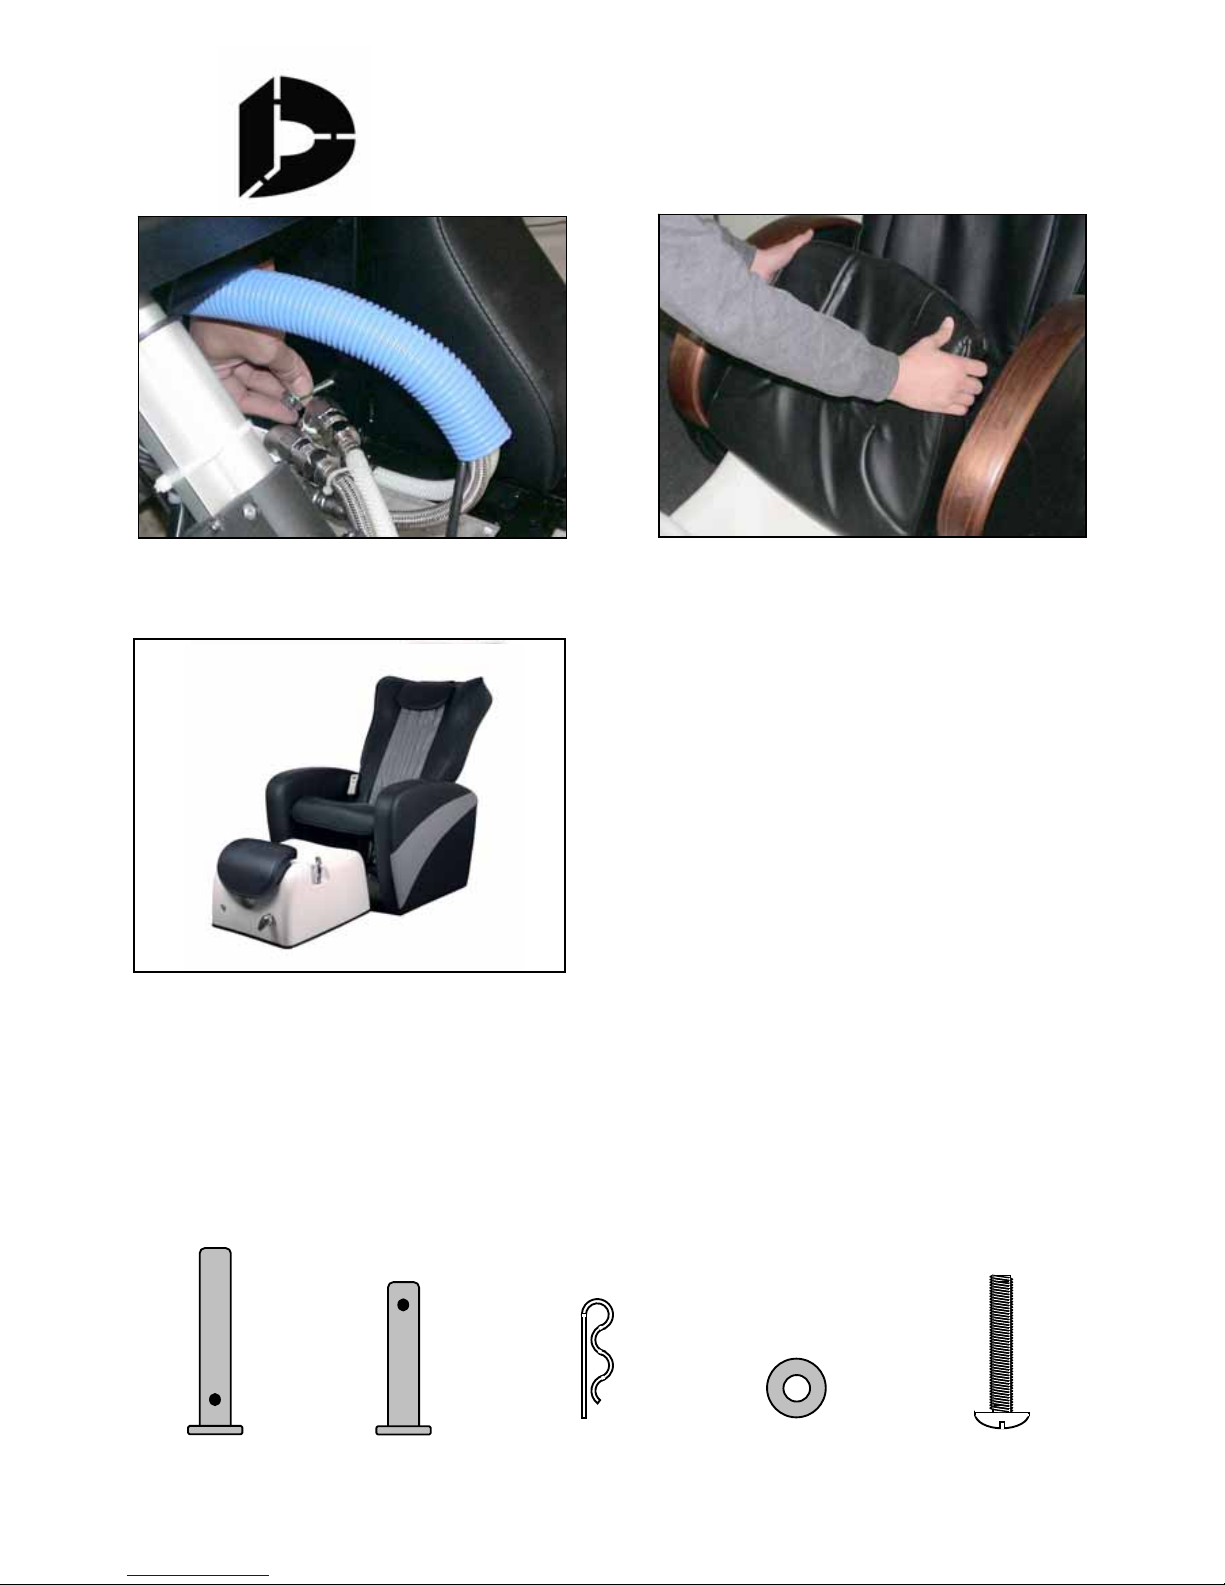
Step 18:
Fix the left armrest by inserting a long #3
screw and a washer into the front hole on the
base frame. See above picture.
Step 16:
Fix the left armrest by inserting a short #3
screw and a washer into the front hole on the
base frame. See above picture.
Step 15:
Mount the right and left armrests by inserting
the metal piece into the bracket on the base.
Then, push the armrests downward.
Step 14:
And then press the button on the remote
controller to push out the SPA tub. See the
picture above.
Step 13:
Remove the packing stuff on both sides, as
shown in the pictures above. Also remove
the packing carton board.
Step 17:
Fix the right armrest by inserting a short #3
screw and a washer into the front hole on the
base frame. See above picture.
Page 5 of 7
FP-103PrimaMossaPedicureSpa
ASSEMBLY INSTRUCTIONS
Step 21:
Unwrap and remove all the packing stuff.
The installation is complete, and the chair is
now ready to serve people.
Step 20:
Connect the wires from the seat cushion and
backrest. Place the seat cushion onto the
base nice and neat.
Step 19:
Fix the left armrest by inserting a long #3
screw and a washer into the front hole on the
base frame. See above picture.
#1 pin #2 pin R Clip Washer #3 Screw
Accessory Parts:
Page 6 of 7
FP-103PrimaMossaPedicureSpa
FUSE CHECK & REPLACEMENT
We wish you a prosperous business.
Thank you!
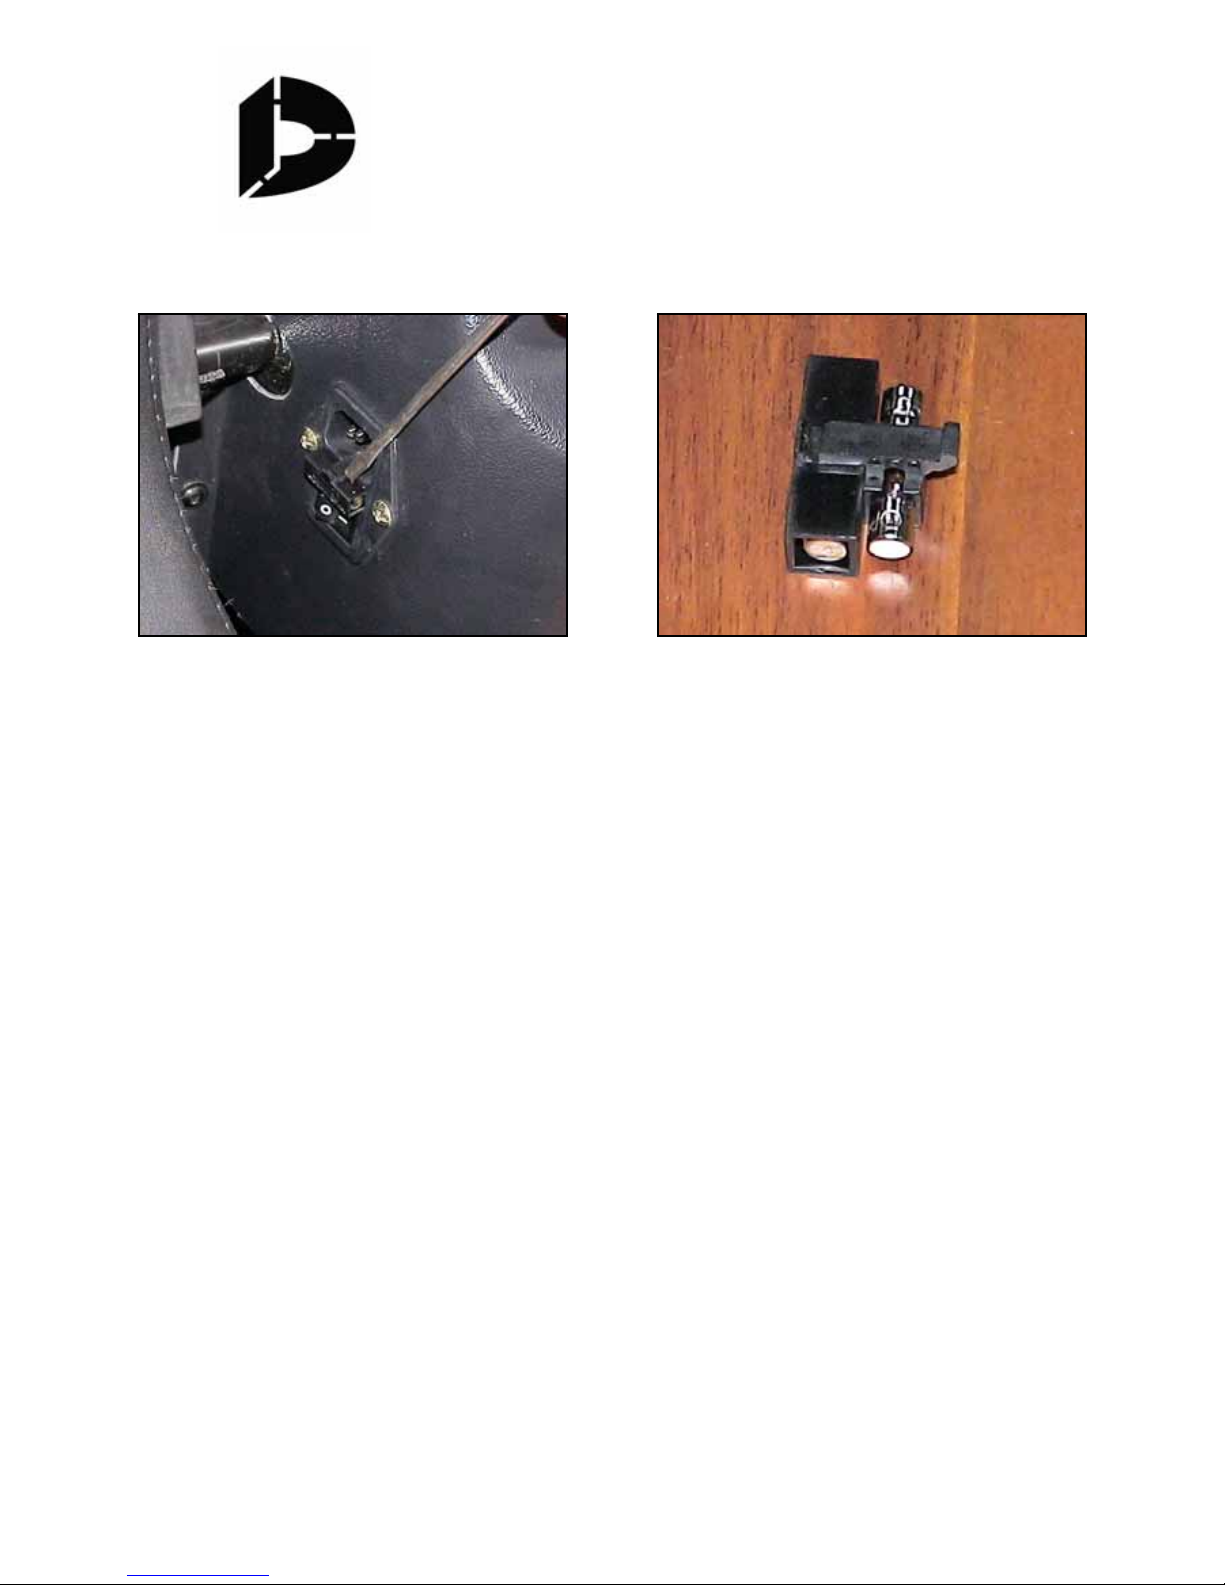
Fuse Check & Replacement:
Step 1:
Use a flat screw driver to take out the “fuse
case” which is located at the middle of the
power box (between the hole and the switch).
Step 2:
The fuse on the right side in above picture
is in use and may blow. The fuse in the
square plastic tube is a spare one.

Page 7 of 7
FP-103PrimaMossaPedicureSpa
SAFTY PRECAUTIONS
Please read this Safety Precautions thoroughly before using the chair.
zDO NOT stand on the SPAtub.
zDO NOT stop or block the SPAtub while it is moving out or in.
zDO NOT retreat the SPA tub back into the chair when it still contains water.
zAlways DRAIN OFF the water when the SPAtub is outside of the chair.
zAlways be aware of the drain pipe under the chair, and check it regularly for leaks or
stock.
zDO NOT place and operate this massage chair outdoors, and keep away from humid,
wet, hot, and dirty environments.
zDO NOT use this massage chair when it is working abnormally, such as the power
switch, cord, or plug is broken, and the back cushion or the upholstery of backrest is
torn. Call the seller’s company for assistance.
zDO NOT attempt to repair or modify this chair without the technician’s advice from the
seller’s company in order to prevent from potential damages and injuries.
zDO NOT let users drink or eat when using this massage chair.
zDO NOT load over-weight on this massage chair. The weight limit is 380 lbs.
zDO NOT touch the power cord when hands are wet.
zDO NOT use volatile cleaning solution or alcohol to clean the upholstery of this chair
in order to prevent from damage of upholstery. Using leather cleaner is fine.
zIt is normal that sometimes slight shacking or knocking sounds occur during massage.
It is not a sign of damage.
zThis machine has a self-
p
rotection device that automatically shuts down the machine if
it is over-loaded or over-used. If that happens, please turn off the power and wait for
about 20 minutes, and then re-start the massage chair again.
Table of contents


