Prism Medical Hammock User manual
HAMMOCK SLING
Description
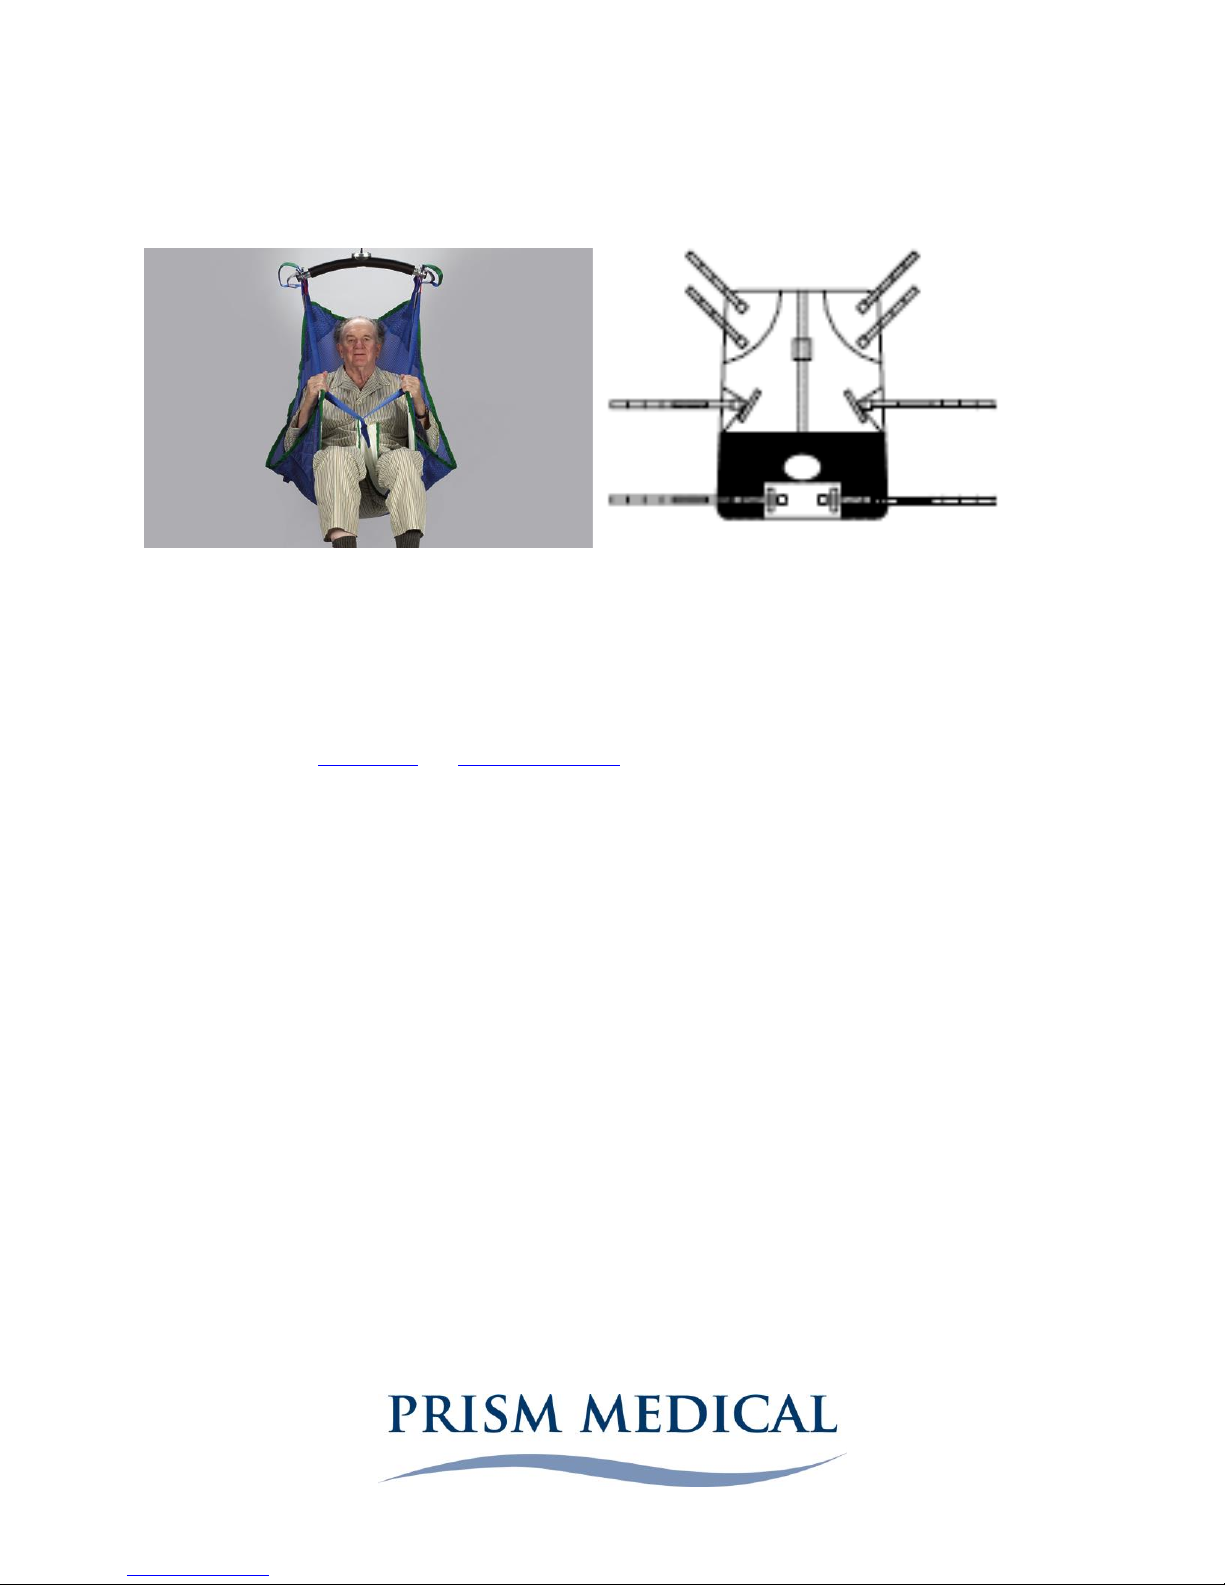
The Hammock Sling design is also known as the “Split Leg Style” sling due small “L-Shaped” leg straps. The
Hammock Sling is acknowledged by professionals as one of the most comfortable and supportive sling for both
home and institutional use. This versatile sling provides full body and optional head support. The sling comes with
head and leg straps and features loops to accommodate various seating positions. The sling is available in a variety
of fabrics. Please see Sling Fabrics and Ordering Guidelines for a complete list.
The Hammock Sling is designed to be used in conjunction with a floor lift or ceiling lift. The sling is used to lift
clients from bed, wheelchair, geriatric chair, or shower chair and on/off the floor.
The Hammock Sling supports each thigh independently and in a neutral position, minimizing the amount of hip
rotation (internal or external). The Hammock Sling provides maximum support to the sacral and upper thigh areas
and is often used in cases when the individual needs more support that the Universal Sling provides.
This sling can be used for clients with limited upper body function and tone. Clients with or without head control
are well served by this sling due to the fact that this sling is available with or without head support in all sizes and
materials. Our hammock slings manufactured in North America all have head support included, however the slings
manufactured in the United Kingdom have head support as optional, and will be seen in the spacer and Slipfit
fabrics. Please confirm with your Prism Medical dealer that you are looking for head support or not at the time of
ordering.
The Hammock Slings’versatility and function are due to the sling design:
The angle of pull of the independent leg straps allows the hips to be maintained in a neutral
position (not internally or externally rotated).
When short shoulder straps and long leg straps are selected the Universal Sling enables the client
to be positioned in an upright seated position (close the 90 degrees with a well fitted/sized sling)
The sling comes with leg and shoulder straps and features loops to accommodate various seated
positions.

The Hammock Sling is appropriate for client’s with unilateral above the knee amputation or
bilateral amputation if applied in the closed leg format
The Hammock Sling is designed with less lateral support than the Universal Sling. Users can order
lateral hip straps to be sewn on at the time of manufacturing. These lateral hip straps will
provide additional support that may be required to meet individual client needs.
Weight Capacity
The Hammock Sling is rated to 600lbs in mesh fabric, 800 lbs in polyester fabric, and 440 lbs in Slipfit and Spacer
fabrics. This is true of all sizes.
Sling Options
Fabrics: Hammock Slings are available in a variety of sling fabrics. Sling fabric is chosen based on comfort and skin
integrity.
Nylon Mesh
Quilted: The leg bands are quilted. The sling body is mesh.
Padded
Polyester
Slip Fit: nylon rip-stop (parachute style)
Poly/slip: a combination of polyester and slip fit
Spacer Fabric: a three dimensional fabric with an internal air gap
Patient Specific (disposable)
Head Support: Head support is incorporated into the design of the sling.
NOTE: The “shoulder straps” are positioned higher on the Hammock Sling, as compared to the Universal
Sling. Thus, the “shoulder straps” control the shoulder and head position for clients using the Hammock
Sling.
Clinical Applications:
Appropriate for a client who:
Due to a progressive condition may require head support at a later date
Requires hips to be supported in a “neutral” position (not internally or externally rotated)
Has unilateral above-the-knee OR bilateral lower limb amputations (special application is required)
Has a kyphotic Posture
Require more support due to high or low tone during the transfer
A different sling type will best meet the needs of a client who:
Requires a sling with independent head control
Require a easy to apply and remove transfer solution
Requires a sling for toileting and pericare

Sling Sizing Guidelines
Sizes: Hammock Slings are available in a variety of sizes.
Junior
Small
Medium
Large
X-Large
XX-Large
Custom
Please refer to the Sling Sizing Chart for the appropriate sling size for your client:
Determining Hammock Sling Fit:
Hammock Slings are designed with the head support integrated into the body of the sling. As a result the sling is
sized slightly differently.
Two points on the sling serve as landmarks in determining proper fit: (1) the center of opening arch. To find the
center of the opening arch, locate the ‘center tab’ on the bottom border of the sling body. Landmark (2) is the
point at which the shoulder strap attaches to the sling body.
Determining appropriate sling length:
The center of the opening arch should be in line with the client’s tailbone (coccyx). The point at which the shoulder
strap attaches to the sling body should fall between the client’s shoulder (deltoid), and the top of the ear. The
Head Support will extend up beyond this point.
Determining appropriate sling width:
When the center of the sling body is in line with the client’s spine, the sling should extend to the anterior crease of
the shoulder (where the deltoid muscle and chest meet). The Hammock Sling typically has a narrower fit than the
Universal Sling and may not extend all the way to the anterior shoulder crease. When the client is in the sling, you
should not be able to have both sides of the sling meet to fully encircle the client. This would signal that the sling
is too big. However you should be able to come across the front of the client slightly, otherwise the sling will be
too small.
If it is noted that the straps or webbing of the sling contacts the skin, the sling is considered too small and should
be exchanged for a larger sized sling.
A sling that is too small with be uncomfortable for the client and may increase the chance of skin irritation. A sling
that is too large will prevent the client from being positioned into an upright/chair-type position, may increase the
difficulty of positioning a client into a chair, and may increase the risk of injury to the client (i.e., fall out of sling).
Hammock Sling Application Instructions
When the client is lying down:
1. Assist the client to roll onto his or her side –have him or her help as much as possible.
2. Position the sling underneath the client:
a. Lay the sling on the bed
b. Fold the sling in half lengthwise with the tag on the outside
c. Place the folded edge 2 inches away from the client’s spine and tuck the top layer under the client’s
back
d. Bottom edge should be at the tailbone and shoulder strap should be in line with the client’s shoulder
(the top edge will extend up and beyond the client’s shoulder due to integrated head support)
e. Ask the client to roll onto his or her back
f. Walk around to the other side of the bed
g. Ask the client to roll away from you just enough that you can pull the tucked flap flat onto the bed
h. Ask the client to roll onto his or her back
3. Tuck the leg bands under and between the upper thighs and crisscross the short straps (the straps without loops).
Thread the long straps located on the outside of the client’s thighs through the short straps that are between the
client’s thighs (the ones you have already threaded). This is the most common leg band configuration.
It is also possible to apply the leg straps in different configurations, if clinical rationale indicates. Please see
Hammock Leg Band Application.
4. Attach the loops on the straps to the carry bar on the lift
a. Make sure you use the same colour loops on both sides of the sling (i.e., if you use blue on the left leg
strap, use blue on the right leg strap)
b. Remember: Short loops for Shoulders, and Long loops for Legs if you want the client to be lifted in an
upright seated position
When the client is sitting in a chair/wheelchair:
1. Ask the client to lean forward. If the client cannot do this by him/herself, gently bring him/her forward using the
sling behind the shoulders to assist you.
2. Apply the sling:
a. Tuck the sling down behind the client’s back with the tag on the outside
b. The bottom edge should fall just below the tailbone
c. Let the rest of the sling slide down between the client’s back and the chair back

3. Tuck the leg bands under the client’s legs in one of the configurations outlined above
4. Bring the shoulder strap in line with the client’s shoulders
5. Attach the loops on the straps to the carry bar on the lift
a. Make sure you use the same colour loops on both sides of the sling
b. Remember: Short loops for Shoulders, and Long loops for Legs if you want the client to be lifted in an
upright seated position
Important note: Once you have reached the point at which there is tension on the straps but the client has not
yet been lifted off of the surface, STOP THE LIFT. Make sure all straps are securely fastened to the carry bar and
that the sling has not shifted position on the client’s body (i.e., it is not slipping up the client’s back and there no
folds or wrinkles in the sling fabric). If you notice anything of concern, stop the lift, and reassess the situation.
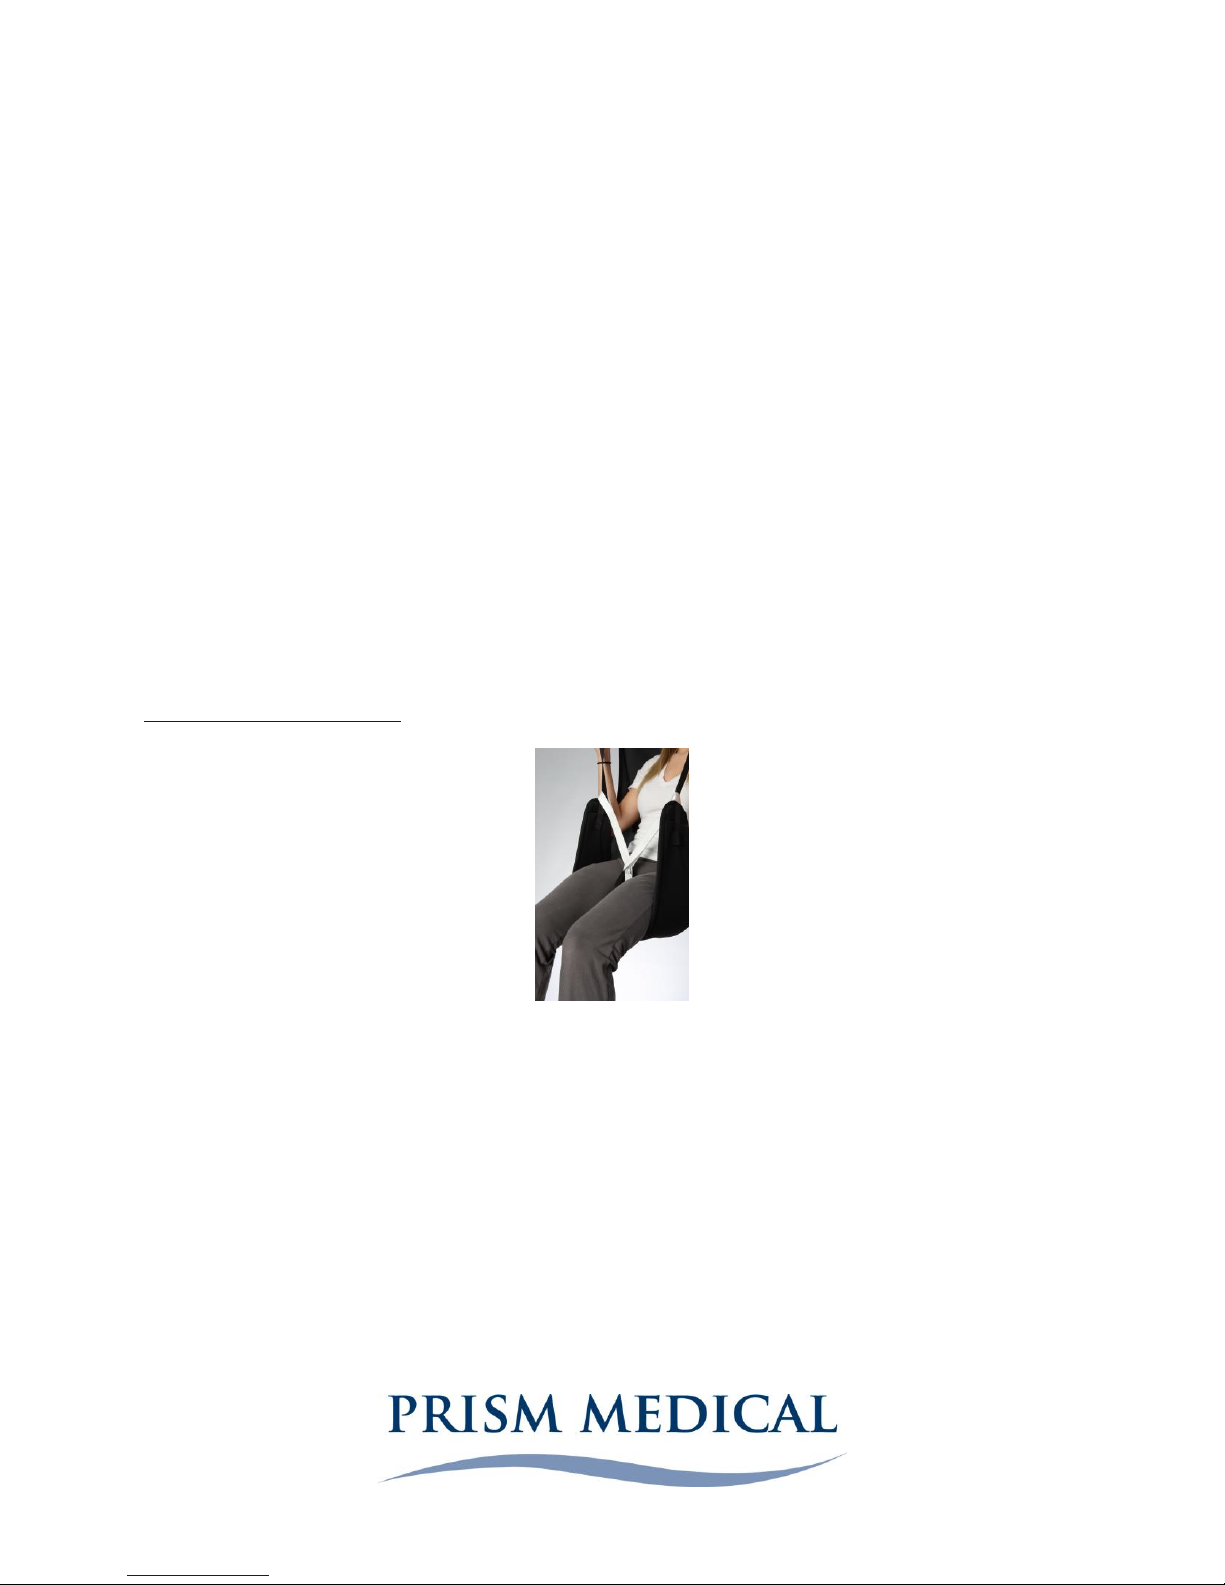
Hammock Leg Band Application
There are three typical leg band configurations;
Divided Leg "Closed/Crossover" - Provides optimum comfort and security. The most commonly used (default)
attachment option and is recommended. The “crossover” is achieved by threading one short midline strap through
the other short midline strap. These straps are designed to create a connection between the two leg bands and are
not designed to attach to the lift or portable motor. Next, thread the leg straps through the midline straps.
Divided Leg "Open" - Provides increased access for personal hygiene. Use extreme caution with this leg band
configuration as external hip rotation may be increased and the opening is larger, increasing the risk to the client.
Closed Leg –Maximum dignity is provided because the client’s legs are held tightly together when lifted. This leg
band configuration is achieved by threading each leg band and strap under both of the client’s thighs. Each long leg
strap is then threaded through the short strap closest to it. This creates a “bucket” effect and provides the smallest
opening under the client. This leg band configuration may be suitable for clients with limited ability to externally
rotate hips (i.e., those with lower extremity contractures, increased tone).
Sling removal
Best practice is to remove the sling after the transfer has occurred and to re-insert the sling prior to the client
being transferred again. In practice, this is not always happening. Caregivers often report that the sling removal
process is time consuming. Encouraging client participation can increase the time efficiency of the task.
Efforts should be made to reduce the potential of friction occurring between the sling and skin.
The following steps are used for removal of the universal, hammock, and deluxe support slings.
When the client is lying down:
1. Remove the leg bands from the client’s legs
b. Assist the client to bend his or her knee to facilitate leg band removal
2. Assist the client to roll onto his or her side –have him or her help as much as possible.
3. Tuck the sling under the client’s back, pushing down into mattress to reduce friction between the sling and the
client’s skin
4. Ask the client to roll onto his or her back
5. Walk around to the other side of the bed

6. Ask the client to roll away from you just enough that you can pull the tucked sling out from under the client
7. Ask the client to roll onto his or her back
When the client is sitting in a chair/wheelchair:
1. Remove the leg bands from the client’s legs
a. Ask the client to lift his or her leg to facilitate leg band removal.
b. If the client is unable to do this independent, assist the client to lift his or her leg, using good body
mechanics.
c. If only partial leg elevation can be achieved, friction can be reduced by folding the leg strap under the leg
band and peeling the leg band back on itself. Removing the leg band in this manner causes the friction to
occur between the two pieces of material rather than between the material and the client’s leg.
2. Remove the sling body from behind the client
a. Ask the client to lean forward and remove the sling from behind the client
b. If the client is unable to do this independently, assist the client to lean forward, using good body
mechanics. Remove the sling from behind the client
Ordering Guidelines
Part Number
Description
517005
Hammock Mesh –Junior
517010
Hammock Mesh –Small
517020
Hammock Mesh –Medium
517030
Hammock Mesh –Large
517040
Hammock Mesh –X Large
517050
Hammock Mesh –XX Large
517105
Hammock Quilted –Junior
517110
Hammock Quilted –Small
517120
Hammock Quilted –Medium
517130
Hammock Quilted –Large
517140
Hammock Quilted –X Large
517150
Hammock Quilted –XX Large
8D1720
Hammock PolySlip with H/S - Child
8D1620
Hammock PolySlip with H/S - JR
8D1520
Hammock PolySlip with H/S - Small
8D1420
Hammock PolySlip with H/S - Medium
8D1320
Hammock PolySlip with H/S - Large
8D1220
Hammock PolySlip with H/S - XL
8D1700
Hammock PolySlip - Child
8D1600
Hammock PolySlip - JR
8D1500
Hammock PolySlip - Small
8D1400
Hammock PolySlip - Medium
8D1300
Hammock PolySlip - Large

8D1200
Hammock PolySlip - XL
8D3700
Hammock SlipFit - Child
8D3600
Hammock SlipFit - JR
8D3500
Hammock SlipFit - Small
8D3400
Hammock SlipFit - Medium
8D3300
Hammock SlipFit - Large
8D3720
Hammock Slip Fit with H/S - Child
8D3620
Hammock Slip Fit with H/S - JR
8D3520
Hammock Slip Fit with H/S - Small
8D3420
Hammock Slip Fit with H/S - Medium
8D3320
Hammock Slip Fit with H/S - Large
8D4700
Hammock Spacer - Child
8D4600
Hammock Spacer - JR
8D4500
Hammock Spacer - Small
8D4400
Hammock Spacer - Medium
8D4300
Hammock Spacer - Large
8D4730
Hammock Spacer with Taped H/S- Child
8D4630
Hammock Spacer with Taped H/S - JR
8D4530
Hammock Spacer with Taped H/S - Small
8D4430
Hammock Spacer with Taped H/S- Medium
8D4330
Hammock Spacer with Taped H/S - Large
8D2700
Hammock Mesh/Poly - Child
8D2600
Hammock Mesh/Poly - JR
8D2500
Hammock Mesh/Poly - Small
8D2400
Hammock Mesh/Poly - Medium
8D2300
Hammock Mesh/Poly - Large
8D2200
Hammock Mesh/Poly - XL
8D2730
Hammock Mesh/Poly w Taped H/S - Child
8D2630
Hammock Mesh/Poly w Taped H/S - Jr.
8D2530
Hammock Mesh/Poly w Taped H/S - Small
8D2430
Hammock Mesh/Poly with Taped H/S - Medium
8D2330
Hammock Mesh/Poly with Taped H/S - Large
8D2230
Hammock Mesh/Poly with Taped H/S - XL


