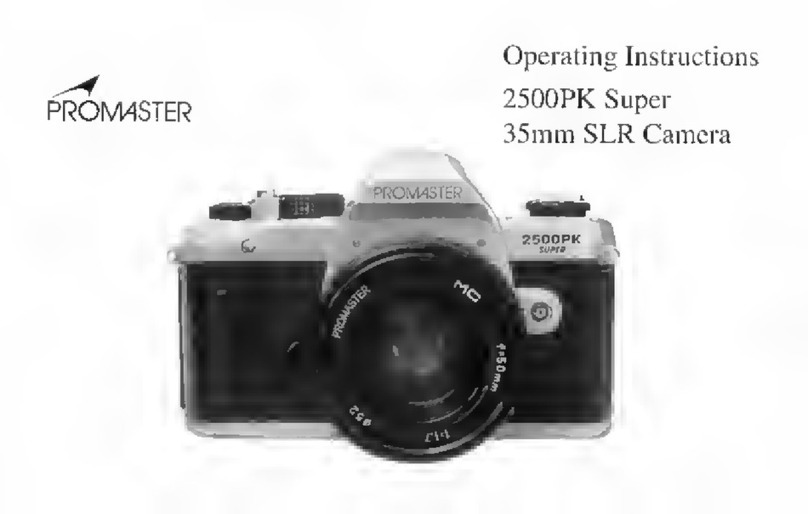
pro master 2500PK Super User manual

Operating
Instructions
2500PK
Super
35mm
SLR
Camera
PROIVMSTER

Contents
Introduction
.
2
Description
of
Parts.3,4
Mounting/Removing
the
Lens.
5
Installing/Checking
the
Batteries.
6
Loading
the
Film.
7
Setting
ISO
Film
Speed.
8
Film
Advance
and
Frame
Counter.
9
Focusing.10,11,12
Setting
Shutter
Speed
and
Aperture.
13
Using
the
Meter.14
Depth
of
Field
Scale.
15
Depth
of
Field
Preview.
16
Taking
Pictures.
17
Self
Timer.
18
Flash
Photography.
19
Multiple
and
Bulb
Exposure
Modes.20
Rewinding
the
Film.21
Caring
for
Your
Camera.22
Specifications
.23

Introduction
The
PROMASTER
2500PK
Super
is
an
easy
to
use
manual
SLR
camera
that
is
perfect
for
the
first
time
SLR
user
or
for
those
who
want
a
manual
SLR
for
complete
creative
control.
The
2500PK
Super
has
many
features
including:
-
A
super
bright
viewfinder
with
split
image
focusing
-
Accurate
center-weighted
TTL
metering
system
with
3
LED
display
-
Vertical
travel
metal
focal
plane
shutter
with
speeds
from
B
to
1/2000
-
Depth
of
field
preview
-
Multiple
exposure
capability
-
Hot
shoe
and
PC
socket
for
flash
photography
with
synchronization
from
1/125
to
1
second
-
Mechanical
10
seconds
self-timer
-
Popular“PK”type
bayonet
mount
lenses

Description
of
Parts
1.
Frame
Coumer
2.
Film
Advance
Lever
3.
Shutcer
Release
Button
4.
Shutter
Speed
Dial
5.
Shutter
Speed
and
ISO
Speed
Ring
6.
Shutter
Speed
Index
Mark
7.
Hot
Shoe
Flash
Contact
8.
Accessor)'
Shoe
9.
Film
Flat
Mark
10.
F'ilm
Rewind
Knob
11.
Film
Rewind
Crank
12.
Multiple
Exposure
Button
13.
Self-Timer
14-
Lens
Release
Button
15.
Aperture
Ring
16-
IDepth
of
Field
Button
17.
PC
Rash
Socket
18.
Focusing
Ring
19.
Depth
of
Field
Scale
Ring
3

Description
of
Parts
20.
Rewind
Shaft
21.
Film
Chamber
22.
Viewfinder
Eyepiece
2.V
Shutter
24.
Battery
Compartment
Cover
25.
Tripod
Socket
26.
Film
Rewind
Release
Button
27.
Sprocket
Wheel
28.
Film
Take-up
Spool
29.
Back
Cover

Mounting/Removing
the
Lens
The
lens
mount
of
the
250CPK
Super
is
the
popular
“PK”
mount.
All
other
lenses
with
a
“PK
”
mount
may
be
used
on
your
camera.
To
mount
the
lens,
match
the
red
mark
on
the
lens
barrel
with
the
red
mark
on
the
lens
mount
of
the
camera
body.
Insert
the
lens
into
the
camera
body
and
turn
the
lens
clockwise
until
it
clicks.
To
remove
the
lens
from
the
camera
body,
press
and
hold
the
Lens
Release
Button
(14).
Turn
the
lens
counterclockwise
until
it
stops
and
then
lift
it
straight
out
from
the
body.
5

Installing
and
Checking
Batteries
It
ihe
battery
level
is
Irtw
or
the
batteries
are
irisened
improperly,
the
meter
on
your
camera
will
give
improper
readings
or
tail
to
operate.
To
install
the
ballvries.
use
a
coin
or
similar
object
to
turn
the
Battery
Compartment
Cover
(24)
counterclockwise
and
remove
it.
In.sert
two
1.5V
LR44
batteries
into
the
battery
holder
with
the
plus
(+)
.side
facing
up.
Insert
the
Battery
Compartment
Cover
back
into
the
camera
and
rotate
it
clockwise.
To
check
the
battery
level,
set
Ihe
shutter
speed
dial
in
any
position.
Press
the
Shutter
Relea.se
Button
(3)
about
one
third
of
the
way
down.
If
any
of
the
LED’s
in
the
viewfinder
light,
the
batteries
are
in
gtxxl
condition,
flclplul
Tips.
1
j
B<
sure
to
rcpljcv
Mh
balicnes
u
Ihe
same
nme
2
JI
r
Ihe
LED
doe^
not
lum
afrer
i
nstall
new
hanefin.
he
sore
Iv
vhevk
(hal
Ihe
haUencs
has
c
been
mailed
corretdy
y)
B
jircry
performance
ilccfcases
lemporonly
ai
km
(cmpcnrareri
Be
sufe
l«
peolcil
your
camera
from
lempennuie
ex(rcmcs.
4)
Be
sure
lo
siure
hancncs
in
a
sale
place
away
from
v^iWivn.
6

To
load
film,
open
ihe
camera’s
Back
Cover
(29)
by
pulling
the
Film
Rewind
Knob
(11)
oul
until
the
back
opens.
Insert
the
film
cartridge
into
the
Film
Chamber
(21)
and
push
down
the
Film
Rewind
Crank
(II)
until
it
returns
to
its
original
position.
Insert
the
film
leader
into
any
of
the
slots
in
the
Film
Take-up
Spool
(28).
Depress
the
film
cartridge
gently
with
your
left
hand,
the
press
the
Shutter
Release
Button
(3)
and
advance
the
Film
Advance
Lever
(2)
completely
with
your
right
hand.
Be
sure
that
the
perforations
of
the
film
engage
the
teeth
of
the
Sprocket
Wheel
(27)
completely.
Close
the
Back
Cover
until
it
locks
with
a
click.
Pull
up
the
Film
Rewind
Crank
and
gently
rotate
it
in
the
direction
of
the
arrow
until
it
feels
stiff.
Press
the
Shutter
Release
Button
and
rotate
the
Film
Advance
Lever
repeatedly
until
the
Frame
Counter
(I)
shows
1.
You
are
now
ready
to
take
pictures.
Do
not
load
film
in
direct
.sunlight.
-
NEVER
touch
the
camera’s
shutter.
7

Setting
the
ISO
Film
Speed
In
order
to
have
properly
exposed
photographs,
it
is
important
to
set
the
film
speed
correctly.
The
speed
of
the
film
you
are
using
should
be
clearly
identified
on
the
film
box.
To
set
the
film
speed,
lift
up
the
ISO
Speed
Ring
(5)
gently
and
turn
it
until
the
desired
ISO
speed
is
opposite
the
index
mark.
Be
sure
that
once
you
have
set
the
proper
film
speed,
the
ISO
Speed
Ring
returns
to
its
original
recessed
position.
8

Film
Advance
and
Frame
Counter
Advancing
the
film
and
cocking
the
shutter
are
accomplished
at
the
same
time
when
you
operate
the
Film
Advance
Lever
(2).
Be
sure
you
always
rotate
the
Film
Advance
Lever
completely
until
it
stops.
When
you
reach
the
end
of
your
roll
of
film
the
Film
Advance
Lever
may
not
rotate
completely
and
will
not
return
to
its
original
position.
DO
NOT
force
the
Film
Advance
Lever.
Press
the
Rewind
Release
Button
(26),
rewind
your
film
and
then
finish
rotating
the
Film
Advance
Lever
until
It
returns
to
its
original
position.
The
Frame
Counter
(1)
is
a
mechanical
counter
that
indicates
the
exposure
number
of
your
film.
The
counter
displays
S“l"4-6.36*.
The
dot
(•)
indicates
one
frame
more
than
the
one
in
front
of
it.
Each
time
you
rotate
the
Film
Advance
Lever
(2).
the
counter
advances
by
1.
When
the
number
1
or
higher
displays
on
the
frame
counter,
you
may
take
pictures.
S
will
appear
In
the
Frame
Counter
window
after
each
time
you
open
the
Back
Cover.

Focusing
The
key
to
getting
sharp
pictures
is
to
make
sure
your
lens
is
properly
focused.
The
viewfinder
of
the
PROMASTER
2500PK
Super
offers
three
methods
of
focusing
including:
Split-image
Prism
(31),
Micro-prism
(32).
and
Matte
screen
(33).
Most
photographers
choose
to
use
split-image
focusing
because
it
is
convenient,
accurate
and
fast
to
use.
10

To
use
Split-Image
Focusing,
center
the
split-image
prism
on
a
main
point
of
your
subject,
e.g.
nose,
sleeve,
etc.
The
image
has
two
segments
divided
by
the
diagonal
line
in
the
prism.
To
focus,
turn
the
Focusing
Ring
(19)
on
your
lens
until
the
two
segments
are
aligned.
When
the
segments
are
aligned,
your
image
is
in
focus.
When
the
upper
and
lower
half
images
are
not
aligned
your
lens
is
out
of
focus.
Note
that
.sometimes
the
split-image
prism
will
appear
dark.
Usually
this
occurs
in
low
light
levels
and
is
normal.
To
correct,
move
the
camera
slightly
to
change
the
viewpoint
of
your
eye.
If
it
still
remains
dark,
there
may
not
be
enough
light
for
the
split-
image
prism
to
work
correctly
so
you
will
need
to
use
the
Micro-prism
or
Matte
Screen
to
focus.
11

To
use
Micro-prism
and
Matte
Screen
Focusing
turn
the
Focusing
Ring
(19)
on
your
lens
until
the
image
appears
sharp,
clear
and
bright
on
the
micro-prism
or
matte
screen.
If
the
image
appears
wavy
on
the
micro-prism
or
blurred
on
the
matte
screen,
your
image
is
not
in
focus.
Correct
Fault
12

Setting
Shutter
Speed
and
Aperture
The
Shutter
Speed
Ring
(5)
allows
you
to
select
a
shutter
speed,
set
the
ISO
of
the
film,
and
.set
the
camera
for
a
long
exposure.
Settings
on
the
Shutter
Speed
Dial
(4)
include
the
following:
Sellings
Description
Function
2(KM)
to
1
Shutter
speed
scale
Selects
exposure
limes
of
1/2000
to
1
second
125
Flash
Sync
When
the
shutter
speed
is
set
to
1/125"'
or
slower
the
camera
has
x-conluci
flush
synchronization.
B
Bulb
exposure
The
shutter
will
remain
open
for
as
long
as
the
shutter
button
is
depressed
allowing
for
long
existing
light
exposures.
I'll
Set
the
Shutter
Speed,
rotate
the
Shutter
Speed
Ring
(S)
until
the
desired
shutter
speed
is
opposite
the
Shutter
Speed
Index
Mark
(6).
The
shutter
controls
the
length
of
exposure.
Because
the
siiuller
speeds
listed
on
the
Slmltcr
Speed
Ring
are
fraelion.s
of
a
second,
the
higher
the
number
the
LESS
the
exposure
lime
and
vice
versa.
I'o
Set
the
Aperture,
turn
the
Aperture
Ring
<I5)
until
the
desired
aperture
is
opposite
the
index
mark
on
the
Xpcrture/Distance
Index.
The
larger
the
aperture
number,
the
smaller
the
aperture
opening
will
be
and
the
less
the
light
that
will
be
transmitted
to
the
film.
3

Using
the
Meter
The
camera’s
meter
allows
you
to
select
a
combination
of
shutter
speed
and
aperture
to
properly
expose
your
photographs.
Select
a
shutter
speed
or
aperture
according
to
your
requirements-
Press
the
Shutter
Release
Button
(3)
about
one
third
of
the
way
to
activate
the
meter.
Correct
Exposure
While
the
meter
is
activated,
rotate
the
shutter
speed
dial
(4)
green
circle
LED
is
lit.
If
the
green
LED
and
the
red
or
-
are
lit
at
the
same
time,
this
indicates
a
slight
over
or
under
exposure
and
you
will
still
get
an
acceptable
picture.
f)ver«xposurc
Only
the
red
+
LED
is
lit.
meaning
your
subject
is
loo
bright.
Change
to
a
higher
shutter
speed
or
aperture
until
the
green
LED
is
lit.
Underexposure
Only
the
red
-LED
is
lit,
meaning
your
subject
is
loo
dark.
Change
to
a
lower
shutter
speed
or
aperture
until
the
green
LED
is
lit.
or
the
aperture
ring
(I
.S)
until
only
the

Depth
of
Field
Scale
When
the
lens
is
focused
on
your
main
subject,
the
zone
of
sharpness
that
extends
over
a
distance
in
front
and
behind
the
main
focus
point
is
known
as
depth
of
field.
Your
camera
to
subject
distance,
focal
length
of
your
lens
and
the
aperture
you
select
all
have
an
effect
on
depth
of
field.
Generally:
I)
The
smaller
the
aperture,
the
greater
the
depth
of
field;
2)
The
farther
the
camera
to
subject
distance,
the
greater
the
depth
of
field;
3)
The
shorter
the
focal
length
of
your
lens,
the
greater
the
depth
of
field;
4)
The
zone
of
sharpness
behind
the
main
focus
point
of
the
lens
is
greater
than
that
in
front
of
it.
You
can
see
the
depth
of
field
range
by
using
the
Depth
of
Field
Scale
(20).
For
example,
using
a
30mm
lens
with
the
distance
set
at
5m
and
an
aperture
of
f/16.
the
Depth
of
Field
Scale
will
show
that
the
zone
of
sharpness
extends
from
about
2.7m
to
infinity.
15

Depth
of
Field
Preview
For
framing
your
subject
and
focusing,
the
aperture
of
your
camera
is
always
set
at
the
widest
setting
allowing
the
most
light.
Because
of
this,
the
zone
of
sharpness
in
front
and
behind
your
main
focus
point
is
not
visible.
To
preview
the
zone
of
sharpne.ss
(Depth
of
Field),
compose
your
picture,
select
the
proper
aperture
and
shutter
speed
using
the
camera’s
meter,
focus
the
lens
and
then
press
the
Depth
of
Field
Preview
Button
(16).
This
will
cause
the
camera
to
stop
down
to
the
actual
shooting
aperture
and
you
will
be
able
to
see
the
actual
zone
of
sharpness
as
it
will
appear
in
your
photograph.
16

Taking
Pictures
To
take
a
picture:
1.
Set
the
aperture
and
shutter
speed.
2.
Focus
the
lens
and
frame
your
subject.
3-
Depress
the
Shutter
Release
Button
part
way
to
activate
the
meter
and
set
the
proper
exposure
4.
When
finished
metering,
press
the
Shutter
Release
Button
completely
to
take
a
picture.
5.
Advance
the
film.
Helpful
tips:
When
your
shutter
speed
is
slower
than
1/30“'
of
a
second,
use
of
a
PROMASTER
Tripod
is
suggested.
Be
sure
that
you
don't
ruin
a
perfect
picture
by
putting
your
fingers
in
front
of
the
lens
while
shooting.

Self-Timer
Your
PROMASTER
2500PK
Super
has
a
mechanical
self-timer
that
delays
the
release
of
the
shutter
by
10
seconds.
This
is
particularly
useful
when
you
would
like
to
get
in
the
picture
yourself
or
for
longer
exposures
when
you
do
not
have
a
tripod
available.
To
Use
the
Self-Timer,
mount
your
camera
on
a
tripod.
Be
sure
that
you
have
advanced
the
film
to
the
next
frame.
You
cannot
set
the
self-timer
until
the
film
has
been
advanced
and
the
shutter
is
cocked.
Set
the
self-timer
by
pushing
the
Self-Timer
Lever
(13)
down
until
it
stops.
Compose
your
picture,
focus
the
lens
and
.set
the
proper
exposure
using
the
camera’s
meter.
When
you
are
ready
to
lake
a
photo,
press
the
Shutter
Release
Button
(3)
completely
to
activate
the
self-timer.
After
10
seconds
the
shutter
will
be
relea.sed.
18

Flash
Photography
Your
PROMASTER
2500PK
Super
has
both
an
X-con-
tact
hot
shoe
and
a
PC
socket
which
allows
(he
use
of
a
PROMASTER
or
olher
brand
electronic
flash.
To
Use
Electronic
Flash,
fit
the
flash
into
the
camera’s
Accessory
Shoe
(8).
If
the
flash
has
a“hot
shoe^no
other
connection
is
required.
If
your
flash
does
not
have
a“hot
shoe”,
connect
the
PC
cord
from
your
flash
to
the
PC
Socket
(18)
on
the
camera.
Select
a
shutter
speed
on
the
camera’s
Shutter
Speed
Dial
(4)
of
125
(recommended)
or
less.
Shutter
speeds
higher
than
1/125'^
of
a
second
WILL
NOT
SYNCHRONIZE
and
will
result
in
partially
exposed
photos.
Follow
the
instructions
of
your
flash
manufacturer
to
select
an
appropriate
aperture
on
your
camera.
When
the
ready
light
on
your
flash
is
lit.
you
may
take
the
picture
by
depressing
the
Shutter
Release
Button
completely.
19
Other manuals for 2500PK Super
1
Table of contents
Other pro master Digital Camera manuals
Popular Digital Camera manuals by other brands
Samsung
Samsung SL310W - Genuine Digital Camera SL420 Quick start manual
Samsung
Samsung TL34HD - Digital Camera - Compact Quick start manual
Cobra Digital
Cobra Digital UW-100 Specifications
Sony
Sony Cyber-shot DSC-N2 instruction manual

Kodak
Kodak EASYSHARE DX3900 user guide
Minolta
Minolta DiMAGE S404 instruction manual

