PROF 502313227 User manual

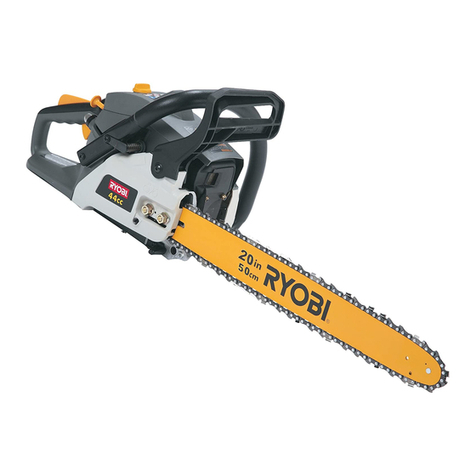
GASOLINE CHAIN SAW 502313227
49cc, 1.6kW, 9500rpm
Instruction manual (Original instructions) GB pg 8-21
Käyttöohje (Alkuperäisten ohjeiden käännös) FI pg 22-37
Bruksanvisning (Översättning av originalinstruktionerna) SE pg 38-52
Bruksanvisning (Oversettelse av de opprinnelige instruksjonene) NO pg 53-67
Kasutusjuhend (Tõlgitud originaal juhendist) EE pg 68-82
Instrukcijas (Tulkojums no oriģinālvalodas) LV pg 83-98
Instaliavimo instrukcijos (Vertimas originali instrukcija) LT pg 99-114

2
(1)
(1A)
6 5 4 3 2 1
11
12
10
17
18
7
8
9
16 15 14
13
1
19 2
20

3
(2) (3)
(4) (5)
(6) (7)
(8) (9)
3
11
B
A
12
C
D
C
D
E
F
21
1
2
11
A
3
12
15

4
(13) (A)
(B) (C)
(10) (11)
(12)
17
10
89
314
6
7
16
4

5
(D) (E)
(F) (G)
(G2) (H)
(I&J) (J)

6
(K) (L)
Cutter side plates
Ruler
Gap Guide bar
NORMAL
(14)
Cutter side plates
Ruler
No
Gap
Guide bar
WORN
(15)
Top plate
Cutting tip
File position
Cutter
length
Depth gauge
Depth gauge
setting 0.025”
(16)
Sharpening angle
25º
Left-hand
cutter
File
direction
Saw chain direction
Outside
Inside
(17)
(18)
GH

7
(19) (20)
(21)
I
J
K
IMPORTANT! Read all safety warnings, instructions, illustrations and specifications provided with this
power tool.
TÄRKEÄÄ! Lue tarkkaavaisesti kaikki tämän työkalun kanssa toimitetut varoitukset, ohjeet ja
spesifikaatiot, ja katso lisäksi kuvat.
VIKTIGT! Läs uppmärksamt alla varningar, instruktioner och specifikationer som bifogas med
detta verktyg och studera bilderna.
VIKTIG! Les nøye gjennom alle advarslene, instruksene og spesifikasjonene som følger med
verktøyet, og se på tegningene.
TÄHTIS! Lugege läbi kõik elektrilise tööriista kohta esitatud ohuhoiatused ning tutvuge
tööriista jooniste ja tehniliste andmetega.
SVARĪGI! Izlasiet visus drošības brīdinājumus, instrukcijas, specifikācijas un apskatiet attēlus šī
elektroinstrumenta dokumentācijā.
SVARBU! Perskaitykite visus saugos įspėjimus, visas instrukcijas, paveikslėlius ir techninius
reikalavimus, pateikiamus su šiuo elektriniu įrankiu.

8
INTRODUCTION
Thank you for purchasing this product which has
passed through our extensive quality assurance
process. Every care has been taken to ensure that it
reaches you in perfect condition.
SAFETY FIRST
Before attempting to operate this power tool the
following basic safety precautions should always be
taken to reduce the risk of fire, electric shock and
personal injury. It is important to read the instruction
manual to understand the application, limitations and
potential hazards associated with this tool.
CERTIFICATE OF GUARANTEE
This product is guaranteed for a period of 2 Years, with
effect from the date of purchase and applies only to the
original purchaser. This guarantee only applies to
defects arising from, defective materials and or faulty
workmanship that become evident during the
guarantee period only and does not include consumable
items.The manufacturer will repair or replace the
product at their discretion subject to the following.That
the product has been used in accordance with the
guide lines as detailed in the product manual and that it
has not been subjected to misuse, abuse or used for a
purpose for which it was not intended. That it has not
been taken apart or tampered with in any way
whatsoever or has been serviced by unauthorised
persons or has been used for hire purposes. Transit
damage is excluded from this guarantee, for such
damage the transport company is responsible. Claims
made under this guarantee must be made in the first
instance, directly to the retailer within the guarantee
period. Only under exceptional circumstances should
the product be returned to the manufacturer. In these
case it shall be the consumer’s responsibility to return
the product at their cost ensuring that the product is
adequately packed to prevent transit damage and must
be accompanied with a brief description of the fault and
a copy of the receipt or other proof of purchase. The
manufacturer shall not be liable for any special,
exemplary, direct, indirect, incidental, or consequential
loss or damage under this guarantee.This guarantee is
in addition to and does not affect any rights, which the
consumer may have by virtue of the Sale of Goods Act
1973 as amended 1975 and 1999.
The power tool is intended for domestic use only. The
power tool is not suitable and is not intended for
commercial or professional use.
The warranty does not cover defects and damage to
power tools resulting from use for purposes other
than domestic use, in particular as a result of
pushing through and abuse.
”Warranty is voided in case the tool is damaged due to
one of the conditions below:
1. Misuse of product or negligence of proper
maintenance of product,
2. Commercial, professional or rental use of product,
3. Repair done by an unauthorized service company.
4. Damages caused by external objects or
substances.”
STATUTORY RIGHTS
This guarantee is in addition to and in no way affects
your statutory rights.
PRODUCT DISPOSAL
When this product reaches the end of it’s life or is
disposed of for any other reason, it must not be
disposed of in household waste.In order to preserve
natural resources, and to minimise adverse
environmental impact, please recycle or dispose of this
product in an environmentally friendly way. It should be
taken to your local waste recycling centre or other
authorised collection and disposal facility.
If in doubt consult your local waste authority for
information regarding available recycling and / or
disposal options.
SAFETY INSTRUCTIONS
These Operating Instructions are intended to facilitate
your becoming acquainted with the machine and using
it in accordance with the regulations. The Operating
Instructions contain important information on how to
use the machine safely, correctly and economically.
Observing this information will help increase the
reliability and working life of the machine. The Operating
Instructions must always be at hand when the machine
is being used.
They must be read and observed by every person
dealing with the machine, whether operating, servicing
or transporting it.
In addition to the Operating Instructions and the
applicable rules of the prevention of accidents valid in
the country of use and on site, the generally recognised
rules on working safely and correctly must be observed
as well as the accident prevention rules of the relevant
professional associations.
INTENDED USE
The chainsaw is designed exclusively for sawing wood.
You may only fell trees if you have received the
appropriate training.
The manufacturer cannot be held liable for damage
caused by improper or incorrect usage.
DO NOT operate a chainsaw whilst working in a tree.
The machine is to be used only for its prescribed
purpose. Any other use is deemed to be a case of
misuse. The user / operator and not the manufacturer
will be liable for any damage or injuries of any kind
caused as a result of this.
Please note that our equipment has been designed for
personal domestic use only and has not been designed
for use in commercial, trade or industrial applications.
Our warranty will be voided if the machine is used in
commercial, trade or industrial businesses or for
equivalent purposes.

9
The operating instructions as supplied by the
manufacturer must be followed at all times to ensure
that the equipment is used properly. Any use which is
not expressly permitted in the manual may result in
damage to the equipment and place the user in serious
danger. Observe the restrictions in the safety
instructions.
DANGER! Cut only wood with this chainsaw. Due to the
high risk of physical injury to the user, the equipment
must not be used for purposes which it was not
intended. For example do not use the chainsaw for
cutting plastic, masonry, or non-wood building materials.
For safety reasons, the equipment is not allowed to be
used as a drive unit for other tools of any kind.
Persons who are not familiar with the operating manual,
children, young people under the age of 16 as well as
persons under the influence of alcohol, drugs or
medication do not operate the unit.
GENERAL SAFETY INSTRUCTIONS
CAUTION!: When working with tools that use fuel, the
following basic rules must be followed in order to
minimise the risk of physical injury and/ or damage to
the machine.
Read these notices before using the saw, and store
them safely.
Do not use the saw when you are tired, ill or under the
influence of alcohol and/or drugs.
Be careful when handling fuel. Use the saw at a
distance of at least 3m from the fuel filling location.
Start cutting only when the working environment has
been tidied, when you have established secure footing
and planned an escape route from the falling tree.
Before starting the chainsaw, make sure it is not in
contact with any objects.
Carry the chainsaw only when the motor has stopped
running, the blade cover is on the chain bar and the
exhaust is facing away from you.
Do not start a chainsaw that is damaged,incorrectly set
up or assembled incompletely or loosely. Ensure that the
chainsaw stops when the chain brake is activated.
Turn off the motor before putting the chainsaw down.
When cutting small bushes and saplings, be particularly
careful because the thin branches can become caught
in the saw and be ejected towards you or unbalance
you.
When cutting a branch under tension, be aware of
potential kickback when the tension is suddenly
released.
Ensure that handles are dry, clean and free from oil or
fuel.
Do not cut trees with this chainsaw unless you have the
relevant training.
The overall maintenance of this chainsaw, apart from
the points specified in this manual and these
maintenance instructions, must be carried out by an
authorised customer service.
For transport and storage of the chainsaw, fit the blade
cover to the chain bar.
Do not work with the chainsaw next to or in the
presence of flammable liquids or gases, neither indoors
nor outdoors. There is a risk of explosion and/or fire.
Do not fill with fuel, oil or lubricant when the chainsaw is
running.
Only cut suitable material: Only cut timber. Do not use
the chainsaw for work for which it is not suitable. Do not
use the chainsaw for cutting plastic, masonry or
building materials which are not made of wood, for
example.
The power tool produces poisonous exhaust fumes as
soon as the motor starts. Never work in closed or badly-
ventilated rooms.
In order to locate significant damage or faults, it is
necessary to inspect the machine before use and after
dropping or other impacts.
If liquid is spilled when filling the oil or fuel tank, the
machine must be cleaned before use.
National regulations may restrict the use of the
appliance.
Petrol is highly flammable! When filling the tank, keep at
a distance from open flames and do not smoke. There is
a risk of fire!
Fill the chain oil only when the engine is switched off
and cooled down.There is a risk of fire!
Only adjust guide-bar and chain with stopped engine.
As a chainsaw user, you must follow several points
in order to carry out your sawing work without
accidents and injuries.
A basic understanding of kickback can reduce or
exclude the element of surprise. Sudden rash reactions
can lead to accidents.
When the motor is running, hold on to the saw tightly
with both hands, with the right hand on the handle at
the back and the left hand on the handle at the front.
Thumbs and fingers must firmly clasp the chainsaw‘s
handles. A secure hold helps you to absorb kickback and
keep the saw under control. Do not let go.
Ensure that the area where you are cutting is free from
obstacles.The tip of the chain bar must not come in
contact with tree trunks, branches and similar when
cutting with the saw.
Use a fast motor speed.
Do not lean too far forwards and do not cut above your
shoulder height.

10
Sharpen and maintain the chainsaw in accordance with
the manufacturer‘s instructions.
If the tool becomes jammed during cutting, it has to be
turned off immediately and freed carefully. Afterwards,
the machine has to be checked for damage (e.g. bent
chain bar) and a test run has to be carried out.
For felling or cross-cutting, the spike bar (claw stop)
must be applied to the wood to be cut. The use of the
spike bar is also recommended when cutting through
thick branches.
Before every cross-cut, firmly position the spike bar and
only then saw into the wood with the chainsaw running.
The saw is then lifted up using the rear grip and guided
using the front handle. The spike bar acts as a pivot
point. Repositioning is done using light pressure on the
front handle. Pull the saw back slightly to do this. Insert
the spike bar deeper and lift up again using the rear grip.
Use only admitted chain saw and chain bar
combination
The cutting equipment supplied is optimally matched to
this chain saw.
When pairing of components do not match, the cutting
attachment can be irreparably damaged after only a
short operating time and cause injury.
NOTE
The following information is mainly for the end user or
the infrequent user.
This chainsaw has been designed for occasional use by
home owners, garden owners and campers, for general
work such as clearing, cutting firewood etc. It is not
intended for longer work. During longer work, because
of vibrations, there is a risk of circulation problems in
the user‘s hands (white-finger-syndrome).
White-finger-syndrome (Raynaud’s Disease) is a
vascular disease where the small blood vessels in
fingers and toes contract seizure-like. The affected
areas are no longer supplied with blood and therefore
look very pale.
Frequent use of vibrating machines can cause nerve
damage in people whose circulation is compromised
(e.g. smokers, people with diabetes).
If you notice unusual impairment, immediately stop the
work and consult a doctor. Observe the following
notices in order to reduce risks:
• Keep your body, and particularly your hands, warm in
cold weather.
• Take regular breaks during which you should move
your hands to promote circulation.
• Ensure the lowest possible vibration of the machine
by regularly maintaining it and keeping components
tight.
PERSONAL SAFETY
Never use only one hand when using the saw!
Otherwise there is a risk that operating staff, helpers or
onlookers may get injured. A chainsaw has been
designed for use with both hands.
Wear your Personal Protective Equipment (PPE),
consisting of:
Cut-resistant and non-slip safety shoes, cut-protection
trousers, highly visible vest or jacket in signal colours,
gloves and a helmet with visor and hearing protection.
When starting the chainsaw or cutting with it, no other
people should be close to you. Ensure onlookers and
animals cannot get into the working environment.
When the motor is running, all body parts must point
away from the chainsaw.
SAFETY NOTICES FOR HANDLING FLAMMABLE FUELS
WARNING!: Petrol is easily flammable!
Store petrol in containers that have been designed
specially for this purpose.
Refill with petrol when you are outdoors, and do not
smoke.
Refill with petrol before starting the motor. Never
remove the fuel tank filler cap or refill with petrol while
the motor is running or when it is still hot.
When fuel has been spilled, do not start the motor but
remove the machine from the area of the spilled fuel
and avoid all ignition sources until all petrol fumes have
dispersed. Put the cap back securely on the fuel tank
and on the canister.
REFUELLING
Turn off the motor before refuelling.
CAUTION! Always open the fuel filler cap carefully so the
existing pressure can be released slowly.
High temperatures are generated on the casing during
work. Before refuelling, allow the machine to cool down
fully.
CAUTION! If the machine has not cooled down
sufficiently, the fuel could ignite during refuelling and
cause severe burns.
Ensure that the tank is not overfilled. If you spill any fuel,
it has to be wiped away immediately and the machine
must be cleaned.
Always close the screw plug on the fuel tank properly,
so loosening is prevented from vibrations during
operation.
DANGER! Never refuel the machine close to an open
flame.
Always close the screw plug on the fuel tank properly,
so loosening is prevented from vibrations during
operation.

11
SPECIAL SAFETY INSTRUCTIONS FOR INTERNAL
COMBUSTION ENGINES
DANGER! Internal combustion engines are a particular
danger during operation and refuelling. Always read and
follow the warnings. Non-compliance can lead to severe
and even lethal injuries.
Do not make any modifications to the machine.
CAUTION! Risk of poisoning! Exhaust fumes, fuel,
lubricating oil vapour, sawdust and lubricants are
poisonous. Exhaust fumes must not be inhaled.
CAUTION! Risk of burns! Do not touch the exhaust
system and the drive motor.
Do not use the machine in unventilated rooms or easily
flammable environments.
Risk of explosion! Never use the machine in rooms
with easily flammable substances.
During transport, secure the tool against sliding and
tilting.
Ensure that no fuel is spilled on the motor or the
exhaust during refuelling.
Repairs and setting work must be carried out by
authorised specialists.
Do not touch mechanically moving or hot parts. Do not
remove protective covers.
The values specified in Technical Data under sound
power level (LwA) and sound pressure level (LpA) are
emission levels and do not necessarily represent safe
working levels.As there is a connection between
emission and immission levels, it cannot be used reliably
to determine potentially required, additional safety
measures. Factors influencing the current employee‘s
immission level include characteristics of the working
environment, other noise sources etc. such as the
number of machines and other nearby processes and
the time frame the user is exposed to the noise.The
reliable immission level can also vary by country.
However, this information will give the machine‘s user
the opportunity to carry out a better risk assessment.
Never put objects into the venting slots. This also
applies when the machine is turned off. Non-compliance
can cause injuries or damage to the machine.
Keep the tool free from oil, dirt and other contaminants.
Ensure that sound absorbers and air filters function
properly. These parts act as flame protection in the
event of misfire.
Turn off the motor:
- Whenever you leave the machine
- Before refuelling.
Never use the choke lever to stop the motor.
SAFETY FUNCTIONS OF THE CHAINSAW (FIG.1)
SAW CHAIN (2) WITH LOW KICKBACK
helps significantly reduce kickback, or the intensity of
kickback, due to specially designed depth gauges and
guard links.
CHAIN BRAKE LEVER / FRONT HAND GUARD (3)
protects the operator’s left hand in the event it slips off
the front handle while saw is running.
CHAIN BRAKE
is a safety feature designed to reduce the possibility of
injury due to kickback by stopping a moving saw chain
in milliseconds. It is activated by the CHAIN BRAKE
LEVER (3).
SAFETY LOCK (6)
prevents accidental acceleration of the engine. Throttle
lever (7) cannot be squeezed unless the safety latch is
depressed.
STOP SWITCH (14)
immediately stops the engine when actuated. Stop
switch must be pushed to position “I” to start or restart
the engine.
CHAIN GUARD (20)
fitted when the engine is stopped, prevents the danger
of cutting injury from the chain teeth.
CHAIN CATCHER (18)
reduces the danger of injury in the event saw chain
breaks or derails during operation.The chain catcher is
designed to intercept a whipping chain.
WARNING NOTICES FOR CHAINSAWS
When the saw is running, keep all body parts away from
the sawchain. Before starting the saw, ensure that
nothing touches the saw-chain. When working with a
chainsaw, a moment of carelessness can cause
clothing or body parts to be caught by the saw-chain.
Do not work with this chainsaw on a tree unless you are
especially trained for this. In the event of improper use
of a chainsaw on a tree, there is a risk of injury.
When cutting a branch under tension, expect it to spring
back. When the tension is released, the branch can hit
the operator and/or take away control of the chainsaw.
Be particularly careful when cutting undergrowth and
young trees.Thin material can get caught in the saw-
chain and be ejected in your direction or make you lose
your balance.
Carry the chainsaw by the front handle with the saw-
chain not moving and the guide bar pointing backwards.
During transport and storage of the chainsaw always
attach the safety cover. Careful handling of the
chainsaw reduces the likelihood of accidentally
touching the running saw-chain.
Follow the instructions for lubrication, chain tension and
replacement of accessories. An improperly tensioned or
lubricated chain can either break or increase the
kickback risk.

12
Keep handles dry, clean and free from oil and grease.
Greasy, oily handles are slippery and cause loss of
control.
CAUSE AND OPERATOR PREVENTION OF KICKBACK
Kickback can occur when the tip of the guide bar
touches an object or when the timber bends and the
saw-chain becomes caught in the cut.
Contact with the guide bar tip can, in some cases, lead
to an unexpected backwards reaction in which the
guide bar is thrown up and in the direction of the
operator.
If the saw-chain becomes caught at the top of the guide
bar, the guide bar can quickly kick back towards the
operator.
Each of these reactions can cause you to lose control
over the saw and potentially to get severely injured. Do
not exclusively trust the safety devices built into the
chainsaw. As the user of a chainsaw, you should take
different measures to work accident and injury free.
Kickback is the consequence of incorrect or erratic use
of the machine. It can be prevented by appropriate
safety measures such as described below:
Hold the saw with both hands, ensuring thumbs and
fingers clasp the handles of the chainsaw. Position your
body and arms in such a way that you can withstand
kickback forces. If appropriate measures are taken, the
operator can control kickback forces. Never let go of the
chainsaw.
Avoid an abnormal body posture and do not saw above
shoulder height.This prevents accidental contact with
the tip of the guide bar and it enables better control of
the chainsaw in unexpected situations.
Always use replacement guide bars and saw-chains
specified by the manufacturer. Incorrect replacement
guide bars and saw-chains can cause breaking of the
chain and/or kickback.
Follow the manufacturer‘s instructions concerning
sharpening and maintenance of the saw-chain. Over-
reduction of depth limiters increases kickback
tendency.
SAFETY NOTICES FROM MAINTENANCE/STORAGE
Have your machine repaired by qualified specialists and
only with original spare parts.This ensures the safety of
the machine. Always follow the maintenance and
servicing hints in this manual to keep the chain saw in
good working conditions.
1. Before use, always visually check the tool for wear
and tear or damage. Replace worn or damaged
components and bolts.Tighten all nuts, bolts and
machine screws to ensure that the equipment is in a
safe operating condition.
2. Regularly check the fuel system for leakage or signs
of abrasion, for example from porous fuel lines, loose or
missing clamps and damage to the tank or the tank lid.
All faults must be resolved before use.
3. Before checking or adjusting the machine or the
motor, remove the spark plug or the ignition cable,
respectively, to prevent accidental start-up.
STORAGE
Before storage, clean and maintain the chainsaw
according to the instructions in the chapters in this
manual.
Always follow the hints of the storage chapter in this
manual.
Never store the equipment with fuel in the tank inside
buildings where the fumes can come into contact with
open fire or sparks.
Before storing the chainsaw in a closed room, allow the
motor to cool down.
In order to reduce the risk of fire, keep the motor sound
absorbers and fuel storage area free from organic
material and excessive lubricant.
LONG-TERM & WINTER STORAGE
If you are storing the machine long-term or for winter,
remove all the fuel.
Fuels are chemical compounds that change their
properties when stored long-term.
Removing the fuel must take place outdoors.
WARNING
Improper maintenance or non-compliance or not
resolving a problem can become a hazard during
operation. Only ever work with machines that have been
serviced regularly and properly.This is the only way you
can ensure that you can run your machine safely,
economically and without problems.
Do not clean, service, adjust or repair the tool when it is
running. Moving parts can cause severe injuries.
Do not use petrol or other flammable solvents to clean
the machine components.
Fumes from fuel and solvents can cause explosions.
After repairs and maintenance work, re-attach the
safety devices to the machine.
Ensure the machine is operational, in particular, check
the fuel system for leak-tightness.
Always clear the motor‘s cooling fins of contamination.
RISK OF INJURY!
Contact with the saw-chain can lead to fatal cutting
injuries. Never put your hands into the running saw-
chain.
RISK OF KICKBACK!
Kickback can lead to fatal cutting injuries.
RISK OF BURNING!
The chain and the guide bar heat up during operation.

13
COMPONENTS & CONTROLS (FIG.1 & 1A)
UNPACKING
Caution! This packaging contains sharp objects. Take
care when unpacking. Remove the machine, together
with the accessories supplied, from the packaging.
Check carefully to ensure that the machine is in good
condition and account for all the accessories listed in
this manual. Also make sure that all the accessories are
complete. If any parts are found to be missing, the
machine and its accessories should be returned
together in their original packaging to the retailer.
Do not throw the packaging away, keep it safe
throughout the guarantee period, then recycle if
possible, otherwise dispose of it by the proper means.
Do not let children play with empty plastic bags due to
the risk of suffocation.
ASSEMBLY
This chainsaw uses a 4 stroke engine and does not
require the mixing of oil with the fuel.
The chainsaw is fitted with ONE lubrication oil tank (15)
and ONE chain oil tank (17) and a SEPARATE fuel tank
(10).
ATTACHING THE CHAIN BAR & CHAIN TO THE ENGINE
UNIT
CAUTION: Do not start the engine until the saw is fully
assembled.
CAUTION: Wear protective gloves at all times when
handling the chain.
REMOVE THE SIDE COVER (FIG.2)
Make sure the chain brake lever / front hand guard (3)
is pulled back into the DISENGAGED position.
Remove the bar mounting nuts (11) with the spark plug
spanner (19).
Pull the whole side cover (A) from the engine.
FIT THE CHAIN BAR (FIG.2 & 3)
To ensure that the bar and the chain are supplied with
oil, USE ONLY THE ORIGINAL BAR.
The oiling hole (C) must be kept clear of dirt and any
build-up of residue.
Make sure the chain brake lever / front hand guard (3)
is pulled back into the DISENGAGED position.
Fit the open end of the chain bar (1) over the bar pins
(D).
INSTALLING THE SAW CHAIN (FIG.2,3 & 4)
Spread the saw chain (2) out in a loop with the cutting
edges pointing CLOCKWISE around the loop.
Slip the saw chain (2) around the sprocket behind the
clutch as shown in figure 3. Make sure the links fit
between the sprocket teeth.
Guide the drive links into the groove and around the end
of the chain bar (1).
NOTE: The saw chain may droop slightly on the lower
part of bar. This is normal.
Pull the chain bar (1) forward until the saw chain (2) is
closely seated. Make sure that all the drive links are in
the groove of the chain bar (1).
Align the projecting pin (F) at the inner side of the side
cover (A) such that the fits into the hole of the chain bar
(E).
Turn the bar fastening pin (B) clockwise with the spark
plug spanner (19). The saw chain (2) is not allowed to
slip off the chain bar (1) when you do this. Only loosely
tighten the bar fastening pin (B) at this stage and then
follow the instructions for adjusting the chain tension
as described in the section ADJUSTING THE CHAIN
TENSION.
ADJUSTING THE CHAIN TENSION
The correct tension of the saw chain is extremely
important and must be checked before starting and
periodically during all sawing work. If you take time to
adjust the saw chain correctly, you will be able to make
better cuts and the life of the chain will be prolonged.
Hold the tip of the chain bar (1) upwards and turn the
bar fastening pin (Fig. 2/ pos. B) with the spark plug
spanner (19) in a CLOCKWISE DIRECTION in order to
increase the chain tension. If you turn the bar fastening
pin (Fig. 2/pos. B) in an ANTI-CLOCKWISE DIRECTION, the
chain tension will be reduced. Check that the chain is
seated around the entire chain bar (Fig. 5/pos. X3).
1. Chain bar
2. Saw chain
3. Chain brake lever / front hand guard
4. Front handle
5. Air filter cover
6. Safety lock
7. Throttle lever
8. Fuel pump ‘primer bubble’
9. Choke (carburettor setting)
10. Fuel tank
11. Bar mounting nuts
12. Spiked bumper
13. Rear handle / bootstrap
14. Stop switch
15. Lubrication oil tank
16. Starter handle
17. Chain oil tank
18. Chain catcher
19. Spark plug spanner
20. Chain guard

14
After making the adjustment and with the tip of the bar
still upwards, tighten the bar fastening pin (Fig. 2/pos.
B). The chain is correctly tensioned when it is closely
seated and can be pulled right around by hand, when
the chain brake lever (3) is released.
WARNING! Wear high-strength gloves at all times when
handling or adjusting the saw chain.
If the chain is hard to turn around the chain bar or
jammed, it is too tightly tensioned.
Make the following small adjustments:
Undo the bar fastening pin (Fig. 2/pos. B) by 1/2 of a turn
ANTI-CLOCKWISE. Then slacken the chain tension by
slowly turning the bar fastening pin (Fig. 2/pos. B) in a
ANTI-CLOCKWISE DIRECTION and then pull the saw
chain (2) back and forth on the chain bar (1) (Fig. 6).
Continue until the chain can be moved smoothly but is
still closely seated (Fig. 5/pos. X2). Increase the tension
by turning the bar fastening pin (Fig. 2/pos. B) in a
CLOCKWISE DIRECTION.
When the saw chain is correctly tensioned, hold the tip
of the bar upwards and completely tighten the bar
fastening pin (Fig. 2/pos. B).
Secure the side cover (A) with the bar mounting nuts
(11), by using the spark plug spanner (19) (Fig. 7).
A new saw chain stretches, requiring adjustment after
as few as 5 cuts. This is normal with a new chain, and
the interval between future adjustments will lengthen
quickly.
If the saw chain is TOO LOOSE or TOO TAUT, the drive
wheel, chain bar, saw chain and crank shaft bearing will
suffer premature wear. Fig. 5/pos. X2 shows the correct
tension (when cold) and Fig. 5/pos. X3 shows the
tension (when warm). Fig. 5/pos. X1 shows a chain that
is too loose.
MECHANICAL CHAIN BRAKE TEST
Your chainsaw is equipped with a chain brake that
reduces the possibility of injury due to kickback.The
chain brake is activated if pressure is applied against
the chain brake lever (3) when, as in the event of
kickback, the operator’s hand strikes the lever. When the
chain brake is actuated, saw chain movement stops
abruptly.
WARNING! The purpose of the chain brake is to reduce
the possibility of injury due to kickback;
however, it cannot provide the intended measure of
protection if the chainsaw is operated carelessly.
Always test the chain brake before using your saw and
periodically while on the job. (See below for details of
how to perform a test of the chain brake).
TESTING THE CHAIN BRAKE (FIG.8)
The chain brake is DISENGAGED (chain can move) when
the CHAIN BRAKE LEVER (3) IS PULLED BACK AND
LOCKED (pos.1).
The chain brake is ENGAGED (the chain is locked) when
the chain brake lever (3) is pulled forward (pos. 2). It
should not be possible to move the saw chain.
WARNING! The chain brake lever (3) should snap into
both positions. If strong resistance is felt, or the lever
does not move into either position, do not use your
chainsaw. Take it immediately to a professional Service
Centre for repair.
FILLING/ CHECKING THE LUBRICATING OIL (FIG.9)
The following oil types are recommended:
Season Temperature Oil Type
Summer 25 °C or higher SAE 10W-30
Spring/Fall 10 - 25 °C SAE 10W-20/30
Winter 10 °C or lower SAE 10W-10
Position the chainsaw in a way that the lubrication oil
tank (15) faces upwards.
Open the cap of the lubrication oil tank (15) and check
the oil level. If the oil level is more than 1-2 cm below the
screw thread, please fill the lubrication oil tank (15).
Do not overfill and leave approximately 5 mm space
between the top of the oil and the inside edge of the
lubrication oil tank (15) to allow for expansion.
Tighten the cap of the lubrication oil tank (15) firmly.
FILLING/ CHECKING THE CHAIN OIL (FIG.10)
Check the level of chain oil in the chain oil tank (17)
before each use of the chainsaw.
It is recommended to use standard chain oil.
Position the chainsaw in a way that the chain oil tank
(17) faces upwards.
Open the cap of the chain oil tank (17) and check the oil
level. If the oil level is more than 1-2 cm below the screw
thread, please fill the chain oil tank (17).
Do not overfill and leave approximately 5 mm space
between the top of the oil and the inside edge of the
chain oil tank (17) to allow for expansion.
Tighten the cap of the chain oil tank (17) firmly.
FILLING/ CHECKING THE FUEL (FIG.11)
CAUTION: Always switch off the engine before fuelling.
Never add fuel to a machine with a running or hot
engine. Only add fuel outdoors. If the engine is hot, allow
to cool for at least five minutes before adding fuel. Move
at least 3m from refuelling site before starting the
engine. Do not smoke and stay away from open flames
and sparks. Failure to follow these instructions could
result in a fire and cause serious personal injury.
Position the unit in a way that the fuel tank (10) faces
upwards.
Remove the fuel tank cap.

15
Refill with unleaded fuel carefully without overfilling.
Leave approx. 5 mm space between the top of the fuel
and the inside edge of the tank to allow for expansion.
Tighten the fuel tank cap firmly.
Wipe up any spilled fuel.
NOTE: It is normal for the engine to emit smoke during
and after the first use.
IDLE SPEED ADJUSTMENT
If the cutting attachment still rotates in idle speed,
contact Authorized Service Centres for correct idle
speed adjustment.
Note: When the engine is idling the cutting attachment
must not rotate under any circumstances!
OPERATION
Please note that the statutory regulations governing
noise abatement may differ from one location to
another.
Each time before use, check the following:
That there are no leaks in the fuel system.
That the equipment is in perfect condition and that the
safety devices and cutting devices are complete.
That all screws are securely fastened.
That all moving parts move smoothly.
STARTING THE ENGINE WHEN COLD (FIG.12 & 13)
1. Activate the chain brake lever (3) before starting.
2. Switch the stop switch (14) to ‘I’ (ON).
3. Pull the choke (9) fully out until it locks.
4. Push the fuel pump ‘primer bubble’ (8) 6-8 times.
5. Place the chainsaw on a firm, flat surface. Hold the
chainsaw firmly as shown. Pull the starter handle
(16) rapidly 2 times. Beware of moving chain!
6. Push in the choke (9) as far as it will go.
7. Hold the saw firmly and pull the starter handle (16)
rapidly 4 times. Engine should start.
CAUTION: Never allow the starter handle (16) to snap
back when it has been pulled out. This may result in
damage.
CAUTION: Always pull the starter handle (16) slowly
(until you feel the initial resistance) before pulling it
quickly to start the engine.
Do not allow the starter handle (16) to whip back of its
own accord.
If the engine does not start up even after several
attempts, read the section ‘Troubleshooting’.
Always pull out the starter handle (16) in a straight line.
If it is pulled out at an angle, friction will occur on the
eyelet.
As a result of this friction, the starter handle (16) will
become frayed and will wear away faster. Always hold
the starter handle (16) when the starter line retracts.
STARTING THE ENGINE WHEN WARM (FIG.12 & 13)
1. Activate the chain brake lever (3) before starting.
2. Make sure the stop switch (14) is in the ‘I’ (ON)
position.
3. Set the chainsaw down on a firm level flat surface.
Hold the saw firmly as shown. Beware of moving
chain!
4. Pull the starter handle (16) rapidly 4 times. The
engine should start. If the chainsaw does not start
after 4 tugs, repeat the steps of the procedure for
starting the engine from cold.
Each time before use, check the following:
- That there are no leaks in the fuel system.
SWITCHING OFF THE ENGINE (FIG.12)
Emergency Stop procedure:
To stop the engine in an emergency, activate the chain
brake lever / front hand guard (3). This will immediately
stop the chain. Then switch the stop switch (14) to ‘0’
Stop.
Normal procedure:
Let go of the throttle lever (7) and wait until the engine
has changed to idling speed.Then set the stop switch
(14) to ‘0’ Stop.
Practice all the work steps with the engine switched off
before you start to use the chainsaw.
CAUTION: When idling, the saw chain (2) should not
move. If the saw chain (2) moves, you need to adjust the
idling speed!
USING THE CHAINSAW SAFELY
IMPORTANT NOTICE
Before attempting to fell or prune a tree check with your
local authority on matters concerning bylaws and
preservation orders. The felling or pruning of trees
protected by local bylaws or preservation orders is an
offence.
WORK AREA
For all chainsaw operations clear the work area of any
obstructions that could interfere with the safe
operation of the chainsaw. When tree felling
consideration must be given to the direction of fall,
safety areas, overhead cables, fences, buildings,
bystanders, animals, ground slope, prevailing weather
conditions i.e. wind direction and surrounding trees.

16
BASIC LOGGING OR CROSSCUTTING
The first time user should practice logging using a saw
horse or similar device which is stable and securely
supports the log Fig.A. Select a suitable manageable
size log
and locate it securely onto the saw horse. Ensure that
there is sufficient overhang to allow the cut to be made
without any part of the chainsaw making contact with
the saw horse Fig.A.Adopt a stable body position with
the left arm almost straight,ensuring that no part of
your body extends beyond an imaginary straight line
drawn through the centre of the guide bar Fig.B. Press
the spiked bumper on the chainsaw against the log
Fig.C1. Only now should the chainsaw be switched on.
Warning! Do not start the chainsaw with the chain in
contact with the timber. Start the cut by increasing the
upwards pressure on the rear handle causing a pivoting
action against the spiked bumper Fig.C2. If the cut
cannot be completed in one pass, reduce the
downwards pressure on the front and apply downwards
pressure on the rear handle to reposition the spiked
bumper lower down on the log Fig.C3. These actions will
result in a rocking action allowing the cut to be
completed in a number of stages. Always keep the
spiked bumper in contact with the log.
If logging is to be carried out on the ground the log to be
cut should be supported on another log Fig.D. If the
ground is sloping the operator should stand uphill of the
piece being cut off.
REMOVING BRANCHES FROM STANDING TIMBER
Only remove branches that are accessible at shoulder
height or below. If the tree is not to be felled the branch
to be removed should be cut off as close to the tree
trunk as is safely possible. To ensure that the branch
falls away cleanly without swinging downwards,
causing possible injury to the operator, the branch
should be first undercut by approximately one third of
its diameter Fig.E1.The cut is then completed with a top
cut Fig.E2.
REMOVING BRANCHES FROM FELLED TIMBER
Start removing the branches from the base of the tree
trunk, adopt a stable stance with both feet firmly on the
ground. Keep the tree trunk between yourself and the
branch being removed. If the tree is on a slope work
from the uphill side of the trunk. Do not walk or stand on
the tree trunk, it could roll causing injury. Cut the
branches as close to the trunk as possible, supporting
the guide bar against tree trunk and the body of the
chainsaw against your right leg. Using the forward
moving part of the chain pull the saw across the trunk
removing the branch. When removing branches next to
you, support the guide bar against tree trunk and the
body of the chainsaw against your right leg. Using the
backward moving part of the chain, pull the saw across
the trunk removing the branch.
FELLING SAPLINGS
Saplings and taller slender trees are very flexible and
are prone to catching the cutting chain which could
whip the sapling towards you and could pull you off
balance. Saplings should be felled as close to the
ground as possible taking care that the saw chain does
not come into contact with the ground.
GENERAL TREE FELLING
This manual only covers basic tree felling techniques.
For more advanced felling techniques the user should
obtain formal practical training.
RISK ASSESSMENT
Before attempting to fell any tree a risk assessment
must be carried out in order to identify all the risks
involved in felling the chosen tree. The risk assessment
should include the following:
Are there any power lines, buildings, walls or fences,
that could be damaged when the tree is felled?
Are there other trees that would prevent the chosen
tree to be felled from falling safely without hanging up?
Is the chosen tree leaning, if it is extra care will be
needed when felling to ensure that the tree fall’s where
you want it to?
Can you drop the tree safely where you want it to?
Make sure that the tree has a clear area in which to fall.
Is the area around the trunk of the tree clear of brush
wood and other obstructions that would prevent a solid
footing and an unobstructed all round view of the
cutting area?
Check the wind strength and direction to see if this will
affect how the tree will fall
The tree should be checked for dead branches, hanging
branches and rot in the trunk.
Check that your safety escape routes are clear. There
should be at least two safety escape route’s Fig.F.
FIG.F
THE FELLING CUTS
Felling a tree requires at least two different cuts, the
face cut and a back cut.The face cut consists of two
cuts which removes a wedge of timber (typically this is
at an angle of between 45° to 90°) from the trunk and
partially determines the initial direction of fall Fig.G.The
wedge cut should be no deeper than 1/3rd of the
diameter of the tree trunk. There are numerous ways in
which to cut this wedge, the inexperienced user should
concentrate on the basic 60° to 70° face cut with a flat
bottom.
Ref. Description
F.1 45° Safety escape route
F.2 45° Safety escape route
F.3 Danger areas
F.4 Line of fall

17
The back cut is made behind the wedge cut
approximately 1 to 2 inches above the notch made by
the wedge cut Fig.H. Make sure that the cut is made
parallel to the notch. Make the cut quickly and smoothly
while watching the cut and the tree. Do not cut all the
way through the tree. You must leave about 1/2 inch of
wood between the back cut and the notch; this is called
the hinge which will control the rate and determine the
final direction of fall Fig.I. If the back cut is not made
parallel to the wedge bottom cut the direction of fall will
be affected. Fig.J. shows how the direction of fall will be
affected if the back cut is not parallel to the bottom
wedge cut.
Warning! If the wedge cut is not made deep enough,
when the back cut is being made the weight of the tree
could pinch the cutting chain. To prevent pinching,
plastic or hardwood wedges can be hammered into the
back cut behind the cutting chain. If wedges are used,
care must be taken when re-inserting the cutting chain
into the partially cut, back cut, that the saw chain does
not come into contact with the wedges.
As soon as the tree begins to fall, remove the saw from
the back cut and switch it off and retreat along one of
the predetermined escape routes, walk don’t run. You
need to clear the area quickly so that if anything goes
wrong you will be at a safe distance avoiding injury.
Only when you hear the tree hit the ground is it safe to
stop and turn around.
WARNING!
If the felled tree becomes ‘hung up’ (the tree becomes
caught up in surrounding trees). The inexperienced user
should not attempt to free the tree from this position. It
will require a skilled and experienced operator to safely
remove the tree. Under no circumstances should a
‘hung up’ tree be left in this position. If it cannot be
removed immediately,warning signs and a safety
barrier must be erected around the area.
PERSONAL PROTECTIVE EQUIPMENT (PPE)
Suitable personal protective equipment should always
be worn – no matter how small the job. European
standards for chainsaw PPE are published as part of EN
381 Protective clothing for users of hand-held
chainsaws.
There are various types of protective clothing designed
specifically for protection against serious injury when
using a chainsaw.This clothing can be purchased from
a reputable power tool supplier or it can be hired from
one of the larger hire shops.
It is strongly recommended that the following protective
clothing is worn when using a chainsaw.
1. HEAD PROTECTION
A safety helmet to EN 397.
Should be worn and adjusted to fit correctly.
2. HEARING PROTECTION
Ear protectors to EN 352-1.
Should be worn at all times when the chainsaw is
running.
3. EYE PROTECTION
A mesh visor to EN1731.
Worn in conjunction with the safety helmet or
safety glasses to EN166 Should be worn at all
times when using a chainsaw.
4. UPPER BODY PROTECTION
A chainsaw jacket to prEN381-10.
Can provide additional protection where
operators are at increased risk and is
recommended especially when using a chainsaw
above waist height.
5. HAND PROTECTION
Gloves to EN 381-7.
Should be worn except where there is a risk of
snagging.
6. LEG PROTECTION
Chainsaw trousers to EN 381-5.
Giving all round leg protection are recommended
for occasional users of chainsaws.
7. FOOT AND ANKLE PROTECTION
Chainsaw boots to EN 345-2.
Bearing a shield depicting a chainsaw to show
compliance with EN 381-3 should be worn. For
occasional users, working on even ground where
there is little risk of tripping or snagging on
undergrowth.
Protective gaiters to EN 381-9 can be worn in
conjunction with steel-toe-capped safety boots.
Note: No protective equipment can ensure 100%
protection against injury from a hand held chainsaw.
MAINTENANCE
WARNING! During maintenance and cleaning ensure
the machine is switched off and disconnected from the
mains power supply.
To ensure long and reliable service, carry out the
following maintenance regularly:
Regularly check for obvious defects such as loose,
dislodged or damaged chain and guide bar, loose fixings
and worn or damaged components.
Check that covers and guards are undamaged and
correctly fitted. Carry out necessary maintenance or
repairs before using the chain saw.
If the chain saw should happen to fail despite the care
taken in manufacturing and testing, repair should be
carried out by an authorized customer service agent.
NOTE: Before returning, ensure all oil in the oil tank has
been emptied.
GENERAL MAINTENANCE
Avoid using solvents when cleaning plastic parts. Most
plastics are susceptible to damage from various types
of commercial solvents and may be damaged by their
use. Use clean cloths to remove dirt, dust, oil, grease,
etc.

18
Do not at any time let brake fluids, gasoline, petroleum-
based products, penetrating oils, etc., come in contact
with plastic parts. Chemicals can damage, weaken, or
destroy plastic, which could result in serious personal
injury.
All chainsaw service, other than the items listed in these
maintenance instructions, should be performed by
competent chainsaw service personnel.
GUIDE BAR
Most guide bar problems can be avoided by keeping the
product well maintained. Incorrect filing and non-uniform
cutter and depth gauge settings cause most guide bar
problems, primarily resulting in uneven bar wear. As the
bar wears unevenly, the rails widen, which may cause
chain clatter and difficulty in making straight cuts.
Insufficient guide bar lubrication and operating the
product with a chain this is too tight will contribute to
rapid bar wear. To help minimise bar wear, the guide bar
maintenance is recommended.
When the guide bar is dismounted, remove any sawdust
from the “GROOVE“ in the guide bar rail.
Disassemble the saw chain and guide bar in reversed
order of assembly.
The circular groove of the guide bar will wear particularly
on the lower edge with time.When replacing the chain
turn the chain bar 180° to allow even wear, thus
extending guide bar life.
Rotate the guide bar occasionally to prevent uneven
wear. The guide bar ‘rail’ should always have a square
edge.
To check the guide bar “RAIL“ for wear: Hold a ruler
(straight edge) against the side of the guide bar and
“CUTTER SIDE PLATES“.
If there is a gap between the ruler and guide bar the
guide bar “RAIL“ is normal. If there is no gap (ruler flush
against the side of the guide bar) the guide bar “RAIL“ is
worn and needs to be replaced.
(See Fig.14 & 15)
Assemble the guide bar and saw chain as described
under “Assembling the guide bar and chain”.
SHARPENING THE CHAIN
WARNING! Only sharpen the saw chain yourself if you are
trained and have experience! Use proper tools to
sharpen the saw chain!
It is highly recommended that, once the chain loses it’s
ability to cut cleanly and safely, it is replaced. It is
possible, however, to sharpen the existing chain if done
carefully.
Have your saw chain sharpened professionally at an
authorised service centre or sharpen the chain yourself
using a proper sharpening kit. Follow the sharpening
instructions supplied with a sharpening kit.
To sharpen the chain proceed as follows:
Tighten the chain tension enough that the chain does
not wobble. Do all of your filing at the midpoint of the bar.
Wear gloves for protection.
Use a round file, whose diameter is 1.1 times the cutting
tooth depth. Make sure 20% of the file diameter is above
the cutter’s top plate.
Afile guide is available from most reputable tool
merchants and is the easiest way to hold the file at the
correct position. (Fig.16)
File at an angle perpendicular to the bar, and at an angle
of 25° to the direction of travel. (Fig.17)
File each tooth from the inside towards outside only.
File one side of the chain first than turn the product
around and repeat the process.
Sharpen each tooth equally by using the same number of
strokes.
Keep all cutter lengths equal.
Check the safety depth gauge height every 5
sharpenings.
If the depth gauges are also trimmed it is essential that
the original profile be restored.
Use a depth gauge measuring instrument to check the
height of the depth gauge.
Depth gauge measuring jigs are available from most
reputable tool merchants.
NOTE: Dull or improperly sharpened chain can cause
excessive motor speed during cutting which may result
in severe motor damage.
AIR FILTER
Never operate the chainsaw without the air filter. Dust
and dirt will be drawn into the engine and damage it.
Keep the air filter clean! The air filter must be cleaned or
replaced after every 20 hours of use.
CLEANING THE AIR FILTER (FIG.18)
1. Ensure the stop switch (Fig. 1/pos. 14) is set to ‘0’
stop.
2. Remove the air filter cover (G) by removing the clip.
3. Open the air filter flap (H).
4. Lift out the air filter
5. Clean the air filter. Wash the filter in clean, warm,
soapy water. Rinse in clear, cool water. Air dry
completely before refitting. It is advisable to have a
supply of spare filters.
6. Insert the air filter.
SPARK PLUG (FIG.19 & 20)
NOTE: To ensure that the saw’s engine retains its power,
the spark plug must be clean and have the correct
electrode gap (0.6-0.7 mm).The spark plug must be
cleaned or replaced after every 20 hours of service.

19
1. Ensure the stop switch (Fig. 1/pos. 14) is set to ‘0’
stop.
2. Disconnect the spark plug boot (I) from the spark
plug by pulling and twisting it simultaneously.
3. Remove the spark plug using the supplied spark plug
spanner (19). DO NOT USE ANY OTHER TOOLS.
4. Clean the spark plug with a copper wire brush and
refit it, or fit a new spark plug.
CHAIN BAR MAINTENANCE
Regular lubrication of the chain bar (guide rail for the
chain and teeth) is essential.
The chain bar needs the maintenance described in the
following section in order for the saw to work at an
optimum level of performance.
NOTE: The sprocket tip on your new saw has been pre-
lubricated at the factory. Failure to lubricate the guide bar
sprocket tip as explained below will result in poor
performance and seizure, voiding the manufacturer’s
warranty.
LUBRICATING THE SPROCKET TIP (FIG.21)
If the saw is used intensively it will be necessary to
lubricate the guide bar sprocket tip (J) regularly (once a
week).To do this, first thoroughly clean the 2 mm hole (K)
at the tip of the guide bar, and then press in a small
amount of multi-purpose grease.
Multi-purpose grease and grease guns are available in
specialty retail trade.
NOTE: The saw chain does not have to be removed in
order to lubricate the sprocket tip of the chain bar.
Lubrication is possible during work, with the engine
switched off.
CAUTION: Wear heavy duty work gloves when handling
the bar and chain.
Most guide bar problems can be prevented merely by
keeping the chainsaw well maintained. Insufficient guide
bar lubrication and operating the saw with a chain that is
TOO TIGHT will contribute to rapid bar wear. To help
minimize bar wear, the following guide bar maintenance
procedures are recommended.
CAUTION: Always wear protective gloves during
maintenance operations.
Do not carry out maintenance when the engine is hot.
STORAGE
CAUTION: Never put the equipment into storage for
longer than 30 days without carrying out the following
steps.
Store the equipment in a secure, dry, frost-free and well-
ventilated location that is protected from the effects of
weather.
Outside storage is not recommended. Secure it against
unauthorised access.
If you intend to store the equipment for longer than 30
days, it must be prepared accordingly. Otherwise the fuel
still remaining in the carburettor will evaporate and leave
arubbery sediment. This can cause problems when
starting up the equipment and may require expensive
repairs.
1. Slowly remove the fuel tank cap to release any
pressure that may have formed in the tank. Carefully
empty the tank of fuel.
2. To remove the fuel from the carburettor, start the
engine and let it run until the equipment stops.
3. Leave the engine to cool (approx. 5 minutes).
TRANSPORT
Clean coarse dirt off the equipment with a brush or hand
brush. Always mount the chain guard (20) to the chain
bar (1).
TECHNICAL SPECIFICATION
Engine displacement 49 CC
Maximum engine capacity 1.6 kW / 9500 min-1
Cutting length 35 cm
Cutter rail type 16”
Chain pitch (3/8”), 9.525 mm
Idling speed 3000 min-1
Maximum cutting speed 18.1 m/s
Fuel tank capacity 400 ml / 0.4 L
Lubricating tank capacity 100 ml / 0.1 L
Chain oil tank capacity 300 ml / 0.3 L
Anti-vibration function Yes
Chain brake Yes
Clutch Yes
Automatic chain lubrication Yes
Low-kickback chain Yes
Net weight without chain and 5.3 kg
chain bar (dry)
Net weight (dry) 6.0 kg
Sound pressure level LpA 109.09dB(A)
k=0.61dB(A
Sound power level LWA 110dB(A)
k=2.5dB(A
Vibration level Front Handle 10.589m/s2
K=1.5m/s2
Vibration level Rear Handle 9.396m/s2
K=1.5m/s2

20
TROUBLESHOOTING
The table below contains a list of fault symptoms and explains what you can do to remedy the problem if your
equipment fails to work properly. If the problem still persists after working through the list, please contact your nearest
service workshop.
TROUBLESHOOTING GUIDE
PROBLEM
Unit won’t start or
starts but will not run.
Unit starts, but engine
has low power.
Engine hesitates.
No power under load.
Runs erratically.
Poor performance when
operated.
Engine dies.
Insufficient chain
lubrication (the cutter
rail and chain get hot)
PROBABLE CAUSE
Incorrect starting procedures.
Incorrect carburettor mixture
adjustment setting.
Fouled spark plug.
Fuel filter plugged.
Dirty air filter.
Incorrect carburettor mixture
adjustment setting.
Incorrect carburettor mixture
adjustment setting.
Incorrectly gapped spark plug.
Incorrect carburettor mixture
adjustment setting.
Blunt chain.
Loose chain.
Empty petrol tank.
Fuel filter in the wrong position in
the tank.
Empty oil tank for the chain.
Oil lubrication openings moved.
CORRECTIVE ACTION
Follow instructions in the User Manual.
Have carburettor adjusted by an Authorized
Service Centre.
Clean / gap or replace plug.
Replace fuel filter.
Remove, clean and reinstall filter.
Have carburettor adjusted by an Authorized
Service Centre.
Have carburettor adjusted by an Authorized
Service Centre.
Clean / gap or replace plug.
Have carburettor adjusted by an Authorized
Service Centre.
Sharpen or replace the chain.
Tension the chain.
Fill up the petrol tank.
Completely fill the petrol tank or re-position the
fuel filter in the petrol tank.
Top up the oil tank for the chain.
Clean the oil lubrication hole in the cutter bar.
Clean the groove in the cutter bar.
ENVIRONMENTAL PROTECTION
Information for (private householders) for the environmentally responsible disposal of Waste Electrical and Electronic
Equipment (WEEE)
This symbol on products and or accompanying documents indicates that used and end of life
electrical and electronic equipment should not be disposed of in household waste. For the proper
disposal, treatment, recovery and recycling, please take these products to designated collection
points, where they will be accepted on a free of charge basis. Alternatively, in some countries you
may be able to return your products to your retailer upon the purchase of an equivalent new
product. Disposing of this product correctly will help to save valuable resources and prevent any
potential adverse effects on human health and the environment which could otherwise arise from
inappropriate waste disposal and handling. Please contact your local authority for further details
of your nearest designated collection point. Penalties may be applicable for incorrect disposal of this waste in
accordance with national legislation.
FOR BUSINESS USERS IN THE EUROPEAN UNION.
If you wish to discard electrical and electronic equipment, please contact your dealer or supplier for further
information.
Inform tion on Dispos l in other Countries outside the Europe n Union.
This Symbol is only valid in the European Union.
If you wish to dispose of this product, please contact your local authorities or dealer and ask for the correct method of
disposal.
Table of contents
Languages:
