ProFlow PFETP-1000 User manual

1
OWNERS MANUAL
Multi-Function Fuel Transfer Pump
PFETP-1000
WARNING: PLEASE READ ALL INSTRUCTIONS BEFORE PROCEEDING. PROFLOW WILL NOT BE
RESPONSIBLE FOR ANY DAMAGE AS A RESULT OF THE INCORRECT INSTALLATION OF THIS
PRODUCT. IT IS RECOMMENDED THAT A QUALIFIED AUTOMOTIVE TECHNICIAN PERFORMS THIS
INSTALLATION.
WARNING: THE INSTALLATION OF THIS PRODUCT REQUIRES THE HANDLING OF FUEL. IT IS
RECOMMENDED TO WORK IN A WELL-VENTILATED AREA AND WEAR APPROPRIATE PERSONAL
PROTECTION. KEEP ALL IGNITION SOURCES AND FLAMES AWAY FROM WORKSPACE AT ALL TIMES.
Included Items
QTY
PFETP-1000 Transfer Pump
1
22” Length Intake Hose
1
51” Length Discharge Hose
1
Utility (Race Jug) Adaptor
1
Fuel Jug Adaptors
3
v

2
SPECIFICATIONS
IMPORTANT SAFETY INFORMATION
1. Do not use with corrosive liquids. Not for use with drinking water.
2. When pumping gasoline and flammable liquids, be alert to possible explosion
hazards. Flammable fluid fumes and gasoline vapours can be an explosive hazard.
Avoid sparks and use only with adequate ventilation.
3. Wear ANSI-approved safety goggles and heavy-duty, chemical resistant work
gloves during use.
4. This product is not a toy. Do not allow children to play with or near this item.
5. Use as intended only. Only use pump for transferring gasoline, water, oil, and other
non-corrosive liquids.
6. Do not use if pump is hot.
7. Verify that all connections are tight before using to eliminate leaking.
8. Do not pump used, dirty oil.
9. Do not use near open flame or heat sources.
10. Do not turn pump upside down after use.
11. Remove batteries when not in use.
12. Know and obey city and state laws for proper disposal of oil and gasoline. Dispose
of properly in accordance with all local laws and regulations.
13. Follow all guidelines regarding materials being pumped, including SDS instructions
and EPA regulations.
14. Do not mix up old and new batteries. Do not mix alkaline, standard (carbon-zinc),
or rechargeable (nickel-cadmium) batteries. Position batteries in proper polarity.
Do not use swollen or leaking batteries.
15. Do not operate when tired or when under the influence of drugs or medication.
16. Inspect before every usage; do not use if parts are loose or damaged.
17. Maintain product labels and nameplates. These carry important information.
Power
Requires 4x “AA” Batteries (NOT Included)
Delivery Volume
12 Litres Per Minute
Auto-Stop
Built In Auto - Stop System
Applications
Gasoline, diesel, kerosene, light oils, non-drinking water

3
1
Control Box
2
On Button
3
Off Button
4
LED Light
5
Battery Case Cover
6
Female Terminal
7
Discharge Nozzle Compartment
8
Adaptor
9
Intake Hose
10
Nut
11
Liquid Intake
12
Motor Inside
13
Discharge Hose
14
Sensor Inlet
15
Clip
OPERATING INSTRUCTIONS
Battery Operation
1. Open battery cover by placing thumb on grooves and sliding off in direction of
arrow.
2. Insert 4 AA batteries according to “+” and “-“ symbols. Replace all four batteries
at the same time and use the same type/brand of batteries.
Replace the batteries when motor does not operate, even after pressing ON switch or
if transfer rate becomes slower than normal. Batteries can begin to discharge if they
are stored for a long period of time. Check the expiration dates of batteries.
Emergency Use with Two Batteries
It is recommended to use all 4 AA batteries when you are able, but it is possible to
operate with 2 AA batteries during emergencies.
When using 4 batteries you can pump out approximately 50 x 22 litre fuel cans. When
usings 2 batteries you can pump out approximately 25 x 11 litre fuel cans.
PUMP DIAGRAM
1
2
3
4
5
6
7
8
9
10
11
12
10
10
13
10
15
14

4
PUMP OPERATION
Do not run unit dry. Make sure suction tube is fully submerged in liquid before turning
on. When the transfer is complete, turn the switch off. After use, do not turn pump upside
down.
Clean unit with cotton cloth and wipe dry. Remove batteries and store in a clean, dry
location, out of reach of children.
1. Find the adaptor that is the best fit for your can and make sure it is fastened tightly
to your supply tank.
2. Insert intake hose through the adaptor and fasten the pump’s joint nut tightly.
CAUTION: DO NOT LIFT UP OR PUSH DOWN THE PUMP WHILE IT IS ATTACHED TO THE FUEL
TANK.
3. Attach the discharge hose to your receiving tank using the clip. Make sure the
discharge nozzle is in a vertical position as per Figure 1.
Make sure that the supplying tank and receiving tank are on the same level when
pump is operating.
For tanks which do not fit with the clip, make sure discharge nozzle is in a vertical
position.
4. Start the flow of fuel by pressing the “On” button. Pump will automatically stop
when the fuel reaches the stop line.
CAUTION: MAKE SURE THE PUMP IS USED ON AN EVEN SURFACE. IF THE TANK FALLS OVER
DURING USE, LIQUID MAY LEAK CAUSING A FIRE RISK.
MAKE SURE THE PUMP IS TIGHTLY SECURED TO THE TANK BEFORE TURNING ON.
ENSURE THE SENSOR ON THE DISCHARGE NOZZLE IS VERTICAL, OTHERWISE PUMP MAY
NOT AUTOMATICALLY STOP, CAUSING FUEL TO OVERFLOW.
Figure 1
Figure 2

5
5. Once pump has automatically stopped, bring the discharge hose up above the tank
to drain excess liquid back into the supply tank as per Figure 2.
CAUTION: MAKE SURE TO REMOVE ANY LEFT-OVER FUEL IN THE PUMP AFTER EACH USE. IF
FUEL REMAINS AROUND SENSOR, IT MAY CAUSE PUMP FAILURE.
6. Put the discharge nozzle in the discharge nozzle compartment and lock into place
with clip as shown in Figure 3.
CAUTION: PLACE THE DISCHARGE NOZZLE INTO DISCHARGE NOZZLE COMPARTMENT
PROPERLY AFTER USE. IN THE EVENT THE FUEL TANK FALLS OVER, AND THE DISCHARGE
HOSE IS NOT STORED CORRECTLY, LIQUID CAN LEAK OUT.
DETACH THE TANK FROM THE PUMP WHEN MOVING.
PUMP STORAGE
When the pump is not being used for long periods of time, take the pump out of the tank,
make sure there is no remaining fuel in the hose, and wipe down with cloth before storing.
Make sure to remove batteries before storage. Do not store the pump in an enclosed
airtight container.
CAUTION
•Do not transfer fuel while the vehicle or the vehicle’s heater is on (may cause fire).
•Do not leave the pump unattended.
•Do not alter or disassemble the pump.
•Do not place the pump in a wet area.
•Do not use deteriorated or aged fuels.
•Do not use for drinkable liquids, or with thinners, solvents, hot liquid, aceton,
Benzen, Creoso, Ethy, Pheno, Methy, ethy concentrated caustic soda liquid, nitric
acid, hydrochloric acid, sulphuric acid, etc.
•Do not shock the pump.
•Do not run the pump ‘dry’ or let the pump idle without transferring.
•Do not close the hole of sensor inlet transparent vessel under direct sunlight (pump
may not stop automatically and overflow liquid).
•Do not put the product in a vehicle with all windows close, direct sunlight area, or
next to any heating appliances.
•Do not allow children to operate the product without adult supervision.
Figure 3
6
•Do not use the product on carpet, wood floor or combustible area (may cause fire).
Be careful not to damage the floor surface and or carpet by fuel leakage.
•Do not store the pump in an enclosed airtight container.
TROUBLESHOOTING
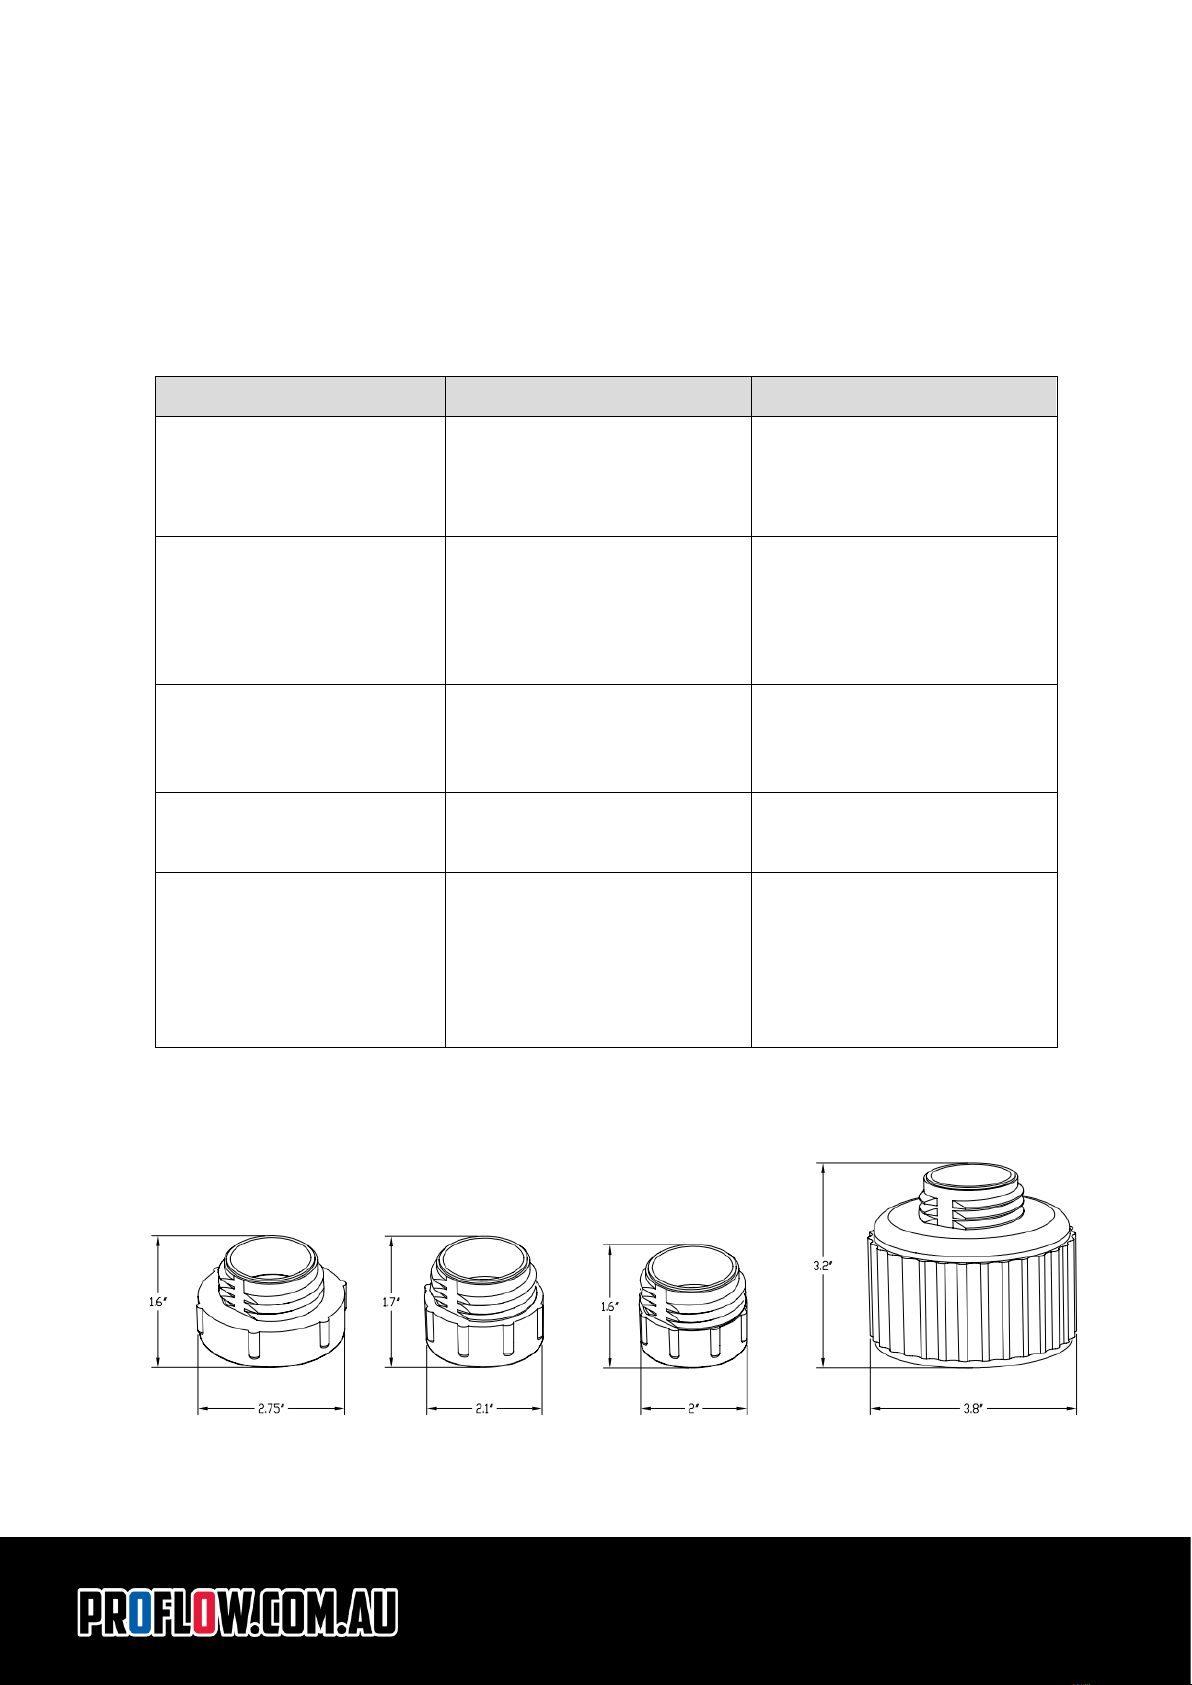
Included Adaptors
Fault
Possible Causes
Solution
Pump does not operate
even after pressing “On”
A: Batteries incorrectly
placed
B: Batteries are depleted
A: Ensure batteries are
placed correctly
B: Replace the batteries
Pumps performance is
low
A: Batteries are depleted
B: Elevation of tank is
higher than supplying tank
A: Replace the batteries
B: Make sure the receiving
tank is not elevated above
supply tank
Pump starts after
pressing “On” but then
stops unexpectedly
Filter of receiving tank may
be blocked with foreign
material
Clean foreign material from
the filter
Pump immediately stops
after pressing “On”
Batteries are depleted
Replace the batteries
Motor stops before
receptacle tank is full
A: Batteries are depleted
B: Sensor is too low and is
touching the liquid
A: Replace the batteries
B: Adjust the discharge
nozzle up so that the
sensor is closer to the top
of the supply tank
PROFLOW LIMITED WARRANTY
This product is warranted to be free from defects in materials and
workmanship for a period of one year from the original date of purchase.
EMAIL: sales@proflow.com.au PHONE: 1300 879 879
Table of contents
Other ProFlow Water Pump manuals

Popular Water Pump manuals by other brands

Pentair
Pentair Lincoln E Series owner's manual

Hi-Force
Hi-Force HP110 Operating instructions manual

Jesco
Jesco MIDIDOS E Series Operation & maintenance instructions

IWAKI PUMPS
IWAKI PUMPS EWN Series instruction manual

Sotera
Sotera 400B Series Owner’s Operation and Safety Manual

DAB
DAB K 36/200 Instruction for installation and maintenance


Ryobi
Ryobi RPTP196 owner's manual

Kamoer
Kamoer KSP-F01A user manual

Ingersoll-Rand
Ingersoll-Rand ARO LM2350E-B Series Operator's manual

Wheeler-Rex
Wheeler-Rex 39300 operating instructions

Alcatel
Alcatel Drytel 100 instruction manual

Stuart Turner
Stuart Turner PH 35 TS Installation, operation & maintenance instructions