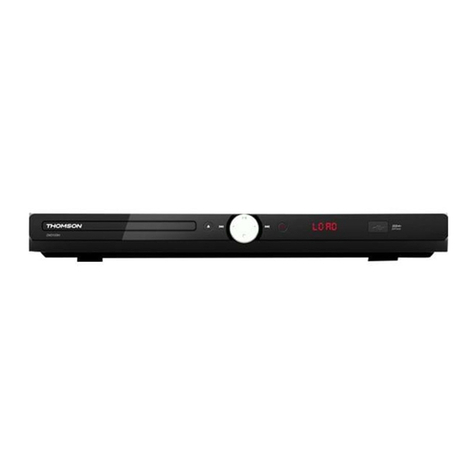
Proline DVDP292WX User manual

Downloaded from www.vandenborre.beDownloaded from www.vandenborre.be
GB OPERATING INSTRUCTIONS
I ISTRUZIONI OPERATIVE CZ NÁVOD K OBSLUZE
E MANUAL DE INSTRUCCIONES
SK NÁVOD NA OBSLUHU
F MANUEL D'UTILISATION NL HANDLEIDING
DVDP292WX
9” ŠIROKOÚHLÝ PŘENOSNÝ DVD PŘEHRÁVAČSE DVĚMA OBRAZOVKAMI A DivX®VIDEO
9” ŠIROKOUHLÝ PRENOSNÝ DVD PREHRÁVAČS DVOMA DISPLEJMI A PODPOROU DivX®VIDEO
9" WIDESCREEN PORTABLE DVD PLAYER WITH DivX®VIDEO - TWIN SCREEN
LETTORE DVD PORTATILE CON SCHERMO WIDESCREEN 9"
CON DivX®VIDEO - DOPPIA IMMAGINE
9"BREEDBEELD PORTABLE DVD SPELER MET DivX® VIDEO
-
TWIN SCREEN
DVD PORTATIL 9"PANORAMICO DivX® VIDEO
-
DOBLE PANTALLA
LECTEUR DE DVD PORTABLE 16/9 COMPATIBLE DivX® VIDEO
AVEC 2 ECRANS DE 22.7cm

Downloaded from www.vandenborre.beDownloaded from www.vandenborre.be
1
Table of Contents
SAFETY INFORMATION ..................................................2
IDENTIFICATION OF CONTROLS.................................6
MAIN UNIT
MONITOR
.................................................................................................................6
................................................................................................................7
REMOTE CONTROL.....................................................................................................8
GETTING STARTED ..........................................................9
INSTALLING DVD PLAYER TO CAR SEATS..................................................................9
CONNECTING POWER .................................................................................................9
CONNECTING AUDIO/VIDEO CABLE ........................................................................10
INSTALL REMOTE CONTROL BATTERY.....................................................................10
BASIC OPERATION..........................................................10
PLAYING A DVD.......................................................................................................10
PLAYING AN AUDIO CD OR MP3..............................................................................12
PLAYING A JPEG DISC ............................................................................................13
DIGITAL CARD AND USB PLAY ................................................................................14
SETUP MENU SETTING ..................................................14
GENERAL SETUP PAGE ............................................................................................14
VIDEO QUALITY SETUP .....................................................................................16
PASSWORD SETUP PAGE ..........................................................................................16
PREFERENCE PAGE ...........................................................................................17
PARAMETERS AND MAINTENANCE .........................18
TROUBLESHOOTING......................................................19
IMPORTANT DISPOSAL INSTRUCTIONS .................20

Downloaded from www.vandenborre.beDownloaded from www.vandenborre.be
Safety Information
Mains supply
This equipment is designed to operate from a 100-240 Volt, 50/60Hz AC mains supply.
Other power sources may damage it.
Mains adapter
The power adapter supplied is compatible with a standard mains socket.
yIf the power adapter or its lead gets damaged it must be replaced by a qualified
service agent with an approved adapter of the same type and rating.
Symbols
2
This equipment is double
insulated and an earth
connectionisnot
required.
Dangerous voltage constituting
a risk of electric shock is
present inside this equipment.
This mark is applied to show
the equipment conforms to
European safety and
electro-magnetic compatibility
standards.
There are important operating
and maintenance instructions
in the literature accompanying
this equipment.
TO REDUCE THE RISK OF BURNS, ELECTRIC SHOCK, FIRE OR INJURY TO PERSONS,
PLEASE CAREFULLY READ ALL SAFETY INSTRUCTIONS.
TO PREVENT ELECTRIC SHOCK, DO NOT REMOVE ANY
COVER.
Save these instructions for future reference.
We have designed and made this product to meet European safety standards, but as
with any electronic equipment you must take care.
Here is some good advice to help you stay safe and get the best results.
Install or locate this product only in accordance with the installation instructions.
Use this product only for its intended purpose as described in the operating
instructions.
Children and the infirm must be closely supervised by a competent person. If the
product includes small parts, do not let children play with it.
Examine the product thoroughly: if it is damaged in any way notify the retail store

Downloaded from www.vandenborre.beDownloaded from www.vandenborre.be
3
where you purchased it.
To save power: switch off mains power or pull out the power adapter when you are
not using the equipment.
The plug shall be the main disconnect device and should remain operable at all times.
Avoid harsh conditions such as wet or damp places, high humidity, strong vibration,
extremely high or low temperatures, strong sunlight and places that are very dusty.
Protect the power lead. You must ensure the power adapter lead cannot be walked
on, crushed, chafed or cut and routed in a way that reduces the risk of a tripping
hazard.
Never let anyone push objects into holes and ventilation slots.
Don’t continue to use this equipment if you have split liquids in it, if it is damaged in
any way or if it does not work as expected. Immediately unplug the equipment and get
expert advice.
Protect the screens from fingerprints and dirt.
This product is designed for domestic use only. Any other use may invalidate
the guarantee and might be dangerous.
DO NOT store this product outdoors or expose to rain or moisture.
DO NOT use this product near water, for example near a kitchen sink, in a bathroom or
near a swimming pool.
DO NOT remove outer panels or covers from the product. Repairs must only be
undertaken by a qualified service person.
DO NOT place the product or mains lead near a hot surface such as a gas or electric
cooker or fire.
DO NOT operate the product when room humidity is excessive.
Ventilation
Place the equipment on a hard flat surface away from direct sunlight and heat sources.
If it is in a cabinet, allow at least a 10cm gap all around. Don’t obstruct the ventilation
slots, including those underneath, with soft furnishings. Overheating will shorten the life
of the equipment and increase the risk of fire.
Cleaning
Disconnect the mains supply and use only a lightly dampened soft cloth. Do not use
chemical solvents or strong detergents as these may damage the cosmetic finish. Do
not leave any liquid drops on the screens.
Battery
Remove battery when the remote is not to be used for a long time. Battery left in the
remote may cause damage through deterioration and corrosive leakage, invalidating
the guarantee. To protect the environment please use local recycling facilities for
battery disposal. Do not dispose of the battery in a fire, danger of explosion!
Battery handling and usage
WARNING: Only adults should handle battery. Do not allow a child to use this product
unless the Battery Compartment Cover is securely attached to the
Battery Compartment in accordance with all product usage instructions.
• Follow the battery manufacturer’s safety and usage instructions.

Downloaded from www.vandenborre.beDownloaded from www.vandenborre.be
• Keep battery away from children and pets.
• Insert the battery observing the proper polarity (+/-) as indicated inside the battery
compartment. Failure to properly align the battery polarity can cause personal injury
and/or damage. The battery compartment is located on the bottom of the remote.
Important Safety Warnings
yIf anything goes wrong, don't try and fix it yourself, get a qualified service agent to
carry out any repairs or maintenance.
yDo not expose this equipment to dripping or splashing or place any objects filled
with liquids, such as vases, on the product.
yNever put a naked flame source such as lighted candles on or near the product.
ySmall parts. Do not let young children play with the equipment.
yDo not use the equipment for any purpose other than its intended use.
yDo not let the cord on the adapter hang over the edge of a table or counter top.
yDo not let the cord on the adapter touch any hot surface.
yDo not operate the equipment with a damaged adapter or after the equipment has
been dropped or damaged in any way.
yDo not immerse the equipment in water or any other liquid.
yNever operate the equipment and try to view video while driving a vehicle.
yTo prevent injury, this equipment must be securely attached to the car seats as in
accordance with the installation instructions.
• Remove the battery when not using the remote for an extended period.
Class 1 laser product
This product contains a low power laser device. Invisible laser radiation
when open and interlocks defeated.
Avoid exposure to beam.
Warning: This digital video disc player employs a laser system. Use of
controls, adjustments, or the performance of procedures other than those
specified herein may result in hazardous radiation Exposure.
Warning: To prevent direct exposure to laser beam, do not open the
enclosure. Invisible laser radiation when opening.
Warning: Never stare directly into the laser beam.
Caution: Do not install this product in a confined space such as a book case
or similar unit.
4

Downloaded from www.vandenborre.beDownloaded from www.vandenborre.be
Notes on Copyrights:
zIt is forbidden by law to copy, broadcast, show, broadcast via cable, play in public,
or rent copyrighted material without permission.
zThis product features the copy protection function developed by Macrovision.
Copy protection signals are recorded on some discs. When recording and playing
the pictures of these discs picture noise will appear. This product incorporates
copyright protection technology that is protected by method claims of certain U.S.
Patents and other intellectual property rights owned by Macrovision Corporation
and other rights owners. Use of this copyright protection technology must be
authorised by Macrovision Corporation, and is intended for home and other
limited viewing uses only unless otherwise authorised by Macrovision Corporation.
Reverse engineering or disassembly is prohibited.
Notes on Discs
Handling Discs
Do not touch the play side of the disc. Hold the disc by the edges so that fingerprints
do not get on the surface. Never stick paper or tape on the disc.
Storing Discs
After playing, store the disc in its case. Do not expose the disc to direct sunlight or
source of heat and never leave it in a parked car exposed to direct sunlight.
Cleaning Discs
Fingerprints and dust on the disc can cause poor picture quality and sound distortion.
Before playing, clean the disc with a clean cloth. Wipe the disc from the centre out.
Do not use strong solvents such as alcohol, benzine, thinner, commercially available
cleaners, or anti-static spray intended for older vinyl records.
5

Downloaded from www.vandenborre.beDownloaded from www.vandenborre.be
Identification of Controls
Main Unit
1. Earphone Socket
2. Remote Sensor
3.
Press to go to the root menu of DVD,CD.
4.
5.
6.
Press to skip to the next chapter, track or scene during playback.
7. Stop
8. USB Slot
9. Power Indicator
10. Power ON/OFF Switch
11. SD/ MMC Card Slot
12. AV OUT Jack
Use this jack to connect the AV and DC cable to connect the main unit
to the display.
13. DC OUT Jack
MENU button
Press to skip to the previous chapter, track or scene during playback.
/OK/up/down/left/right
Navigation controls
6
10
11
12
13
VOL
14
15
9
8

Downloaded from www.vandenborre.beDownloaded from www.vandenborre.be
Connect to the display via the AV and CD cable.
14. Volume Button
15. DC IN Jack
Connect to the AC adapter or car cigarette lighter adapter.
16. Eject Button
Open the unit to insert a disc onto the tray.
Monitor
1. Power ON/OFF Switch
2. Brightness +/-
3. Volume +/-
4. Headphone Socket
5. AV IN Jack
Use this jack to connect the AV and DC cable to connect the display to
the main unit.
6. DC 9-12V Jack
Headphones: Insert a standard 3.5mm headphone into the headphone socket.
The speakers will be muted.
HEADPHONE VOLUME WARNING
Connect headphones with volume set low and
increase it if required. Prolonged listening
through some headphones at high volume
settings can result in hearing damage.
Earphones or headphones must comply with
EN 50332-1 / EN 50332-2 to ensure continued
protection from excessive sound presure.
7
At full power, prolonged listening to
the player can damage the ear of the
user.
WARNING: To protect your hearing, it is
important that any headphones or earphones
used in conjunction with this product are
compliant with French Decree of 8 November
2005 implementing Article L.5232-1.
This ensures that the sound level does not
exceed 100 dB SPL. The prolonged listening
at high volume for more than five hours a
week can damage your hearing.

Downloaded from www.vandenborre.beDownloaded from www.vandenborre.be
Remote Control
1. SETUP
yEnter or exit setup menu.
2. DISPLAY
yAccesses On-Screen display.
3. DVD / SD-USB
4. SUB
ySelect a subtitle language (DVD).
5. AUDIO
ySelect an audio language (DVD).
6. MENU
yAccess menu on a DVD disc.
7. A-B
yRepeat play of a specific section.
8. REPEAT
yRepeat chapter, track or title.
9. ZOOM
yPress to zoom in an image.
10.
ySkip to previous chapter, track or
title.
11.
yNavigate the cursor up on the
screen.
12.
ySkip to the next chapter, track or
title.
13. /
yNavigate the cursor left on the
screen or fast backward.
14. PLAY/PAUSE ( )
yStart / pause / resume play.
15. /
yNavigate the cursor right on the
screen or fast forward.
16.
yNavigate the cursor down on the
screen.
8

Downloaded from www.vandenborre.beDownloaded from www.vandenborre.be
17. STOP ( )
yStop play.
18. NUM
yPress to activate or deactivate the
0-9 numeric buttons.
Getting Started
Installing DVD player to Car Seats
Use the supplied straps to fit the DVD player and the display tightly around the
headrests.
Connecting Power
yTo connect power from inside a car, connect the supplied car power cord to the
DC IN jack of the main unit and to the car cigarette lighter socket.
yTo connect power from household power sources: Connect the supplied adaptor
cable to the DC IN jack of the main unit and to the mains socket.
Caution!
yCheck that the voltage marked on the adapter rating plate matches your local
supply.
yWhen you unplug the adaptor, always pull the plug from the mains socket. Never
pull the cord.
9

Downloaded from www.vandenborre.beDownloaded from www.vandenborre.be
Connecting Audio/Video Cable
Install Remote Control Battery
Before using the remote control, remove the plastic protective
spacer tab.
To replace the battery, remove the battery clip from the remote
control and insert one 3V CR2025 lithium battery in the battery
holder with the print face up, then replace the battery holder.
CAUTION:
yIf the battery is placed incorrectly the remote control will not
work.
yDanger of damage or injury if the battery is replaced incorrectly.
yReplace only with the same or equivalent type.
Basic Operation
Playing a DVD
1. Slide the power switch on the DVD player to the ON position.
2. Press the eject button on the top of the main unit to open the
disc tray and insert your chosen disc in the tray, with the label
side facing up.
3. Close the tray. Play starts automatically.
4. Turn the Volume knob to adjust the desired volume.
5. To interrupt playing, press . To resume playing, press again.
6. To stop playing, press .
7. Press MENU to return to the menu screen. Some discs do not support menus and
start to play automatically.
10
AV OUTON OFF
DC IN DC OUT
USB
SD/ MMS
POWER

Downloaded from www.vandenborre.beDownloaded from www.vandenborre.be
Notes:
1. If parental control is set and the disc isn’t fit for the rating setting you must input the
password. (See “Parental”).
2. DVDs may have a region code. Your player does not play discs that have a region
code different from your player.
ƽMoving to another CHAPTER/TRACK DVD
When a title on a disc has more than one chapter or a disc has more than one track,
you can move to another chapter/track as follows:
1. Press or briefly during play to select the next or previous chapter/track.
2. To go directly to any chapter / track during DVD playback, press NUM to activate the
0-9 numeric buttons then input the chapter/track number.
ƽRepeat A-B
To repeat a sequence,
1. Press A-B at the chosen starting point. “ ” appears on the screen.
2. Press A-B again at the chosen end point. “ ” appears on the screen and the
repeat sequence begins.
3. Press A-B again to cancel.
ƽRepeat
Press REPEAT during play to select a desired repeat mode.
“Repeat chapter / title / all”
CHAPTER: repeats the current chapter.
TITLE: repeats the current title.
ALL: repeats all the tracks on a disc.
ƽZoom
You can zoom in for video images or pictures.
Press ZOOM repeatedly to change the size in the following sequence.
2X size ė3X size ė4X size ėnormal size
ƽMENU
1. Press MENU. If the current title has a menu, the menu appears on the screen.
Otherwise, the disc menu will not appear.
2. The MENU offers features such as language, subtitle options and chapters for the
title.
ƽSelecting the Audio Language
For DVDs that contain two or more audio languages, during play press AUDIO
repeatedly until the desired language is selected.
11
A
AB

Downloaded from www.vandenborre.beDownloaded from www.vandenborre.be
ƽSelecting the Subtitle Language
For DVDs that contain two or more subtitle languages, during play press SUBTITLE
repeatedly until the desired language is selected.
ƽDisplay Feature
a. When playing a DVD disc, press DISPLAY to display the following information.
1. Current Title Number
2. Total Number of Titles
3. Current Chapter Number
4. Total Number of Chapters
5. Elapsed Playing Time
b. Press DISPLAY repeatedly to cycle through the following options:
Title Elapsed: The elapsed time of the title.
Title Remain: The remaining time of the title.
Chapter Elapsed: The elapsed time of the chapter.
Chapter Remain: The remaining time of the chapter.
Display Off: The DVD time information will not be displayed.
Playing an Audio CD or MP3
ƽPause
1. Press during play.
2. To return to play, press again.
ƽMoving to another Track
1. For audio CD, Press or during play to go to the next or previous track or
move to the beginning of the current track.
For MP3, press ,,Ʒand during play to select the track you want to
play and then press to play.
2. You can play any track by inputting its number.
ƽRepeat
For audio CD, when REPEAT is pressed the repeat mode icon appears on the screen.
Track: repeats the current track.
All: repeats all the tracks on a disc.
12

Downloaded from www.vandenborre.beDownloaded from www.vandenborre.be
Off (No display): normal play.
For MP3, when REPEAT is pressed the repeat mode icon briefly appears on the
screen. Select the desired mode in the following modes.
REPEAT ONEėREPEAT FOLDERėREPEAT OFF
ƽRepeat A-B
1. To repeat a sequence during disc play press A-B at your chosen starting point.
“” appears on the screen.
2. Press A-B again at your chosen end point. “ ” appears on the screen and the
sequence begins to play repeatedly.
3. To exit the sequence and return to normal play, press A-B again. “ ” disappears
on the screen.
ƽDisplay Feature
When playing an audio CD, press DISPLAY repeatedly to view the following
information.
Single Elapsed: The current playing track and playing time of the track.
Single Remain: The current playing track and the amount of remaining time.
Total Remain: The current playing track and the amount of total remaining time on the
CD.
Display Off: The CD time information will not be displayed.
Playing a JPEG Disc
ƽViewing a JPEG Disc
1. Insert a JPEG disc and close the tray. The file menu appears on the screen.
2. Use to highlight the file you want to play and press .
Slide show starts from the selected file.
3. During playing JPEG disc, press MENU to enter the digest view.
4. During playing JPEG disc, press to move to the next page, press to return
to previous page, and press to return to the folder menu.
ƽStill Picture
1. Press during slide show. The player will now go into PAUSE mode.
2. To return to the slide show, press again.
ƽZoom
1. Press ZOOM repeatedly to zoom in and out.
2. When the picture is enlarged, press ,,Ʒand to pan through it.
13
A
AB
AB

Downloaded from www.vandenborre.beDownloaded from www.vandenborre.be
ƽTo rotate a picture
Press during play to rotate the picture clockwise.
Digital Card and USB Play
Digital cards (MMC/SD card) and USB with mp3&pictures (.jpg) may be played and
displayed through the main unit. MMC/SD cards may be directly inserted through
the card reader slot. The USB socket can be used to supply signals to the main unit
from USB sources.
Select digital USB/CARD to play
1. Turn the main unit on.
2. Insert a USB cable into the USB port or a card into the card reader slot on the unit’s
right.
3. Press DVD/SD-USB on the remote the units would automatically detect the
USB/CARD.
4. If USB/CARD is selected, the unit will begin to read the card or USB connected to it.
SETUP Menu Setting
General Setup Page
ƽGeneral Operation
1. Press SETUP to enter the setup menu.
2. Press or to enter the submenu or return to the previous menu.
3. Press Ÿź to highlight the desired menu.
4. Press to enter the next level of submenu or confirm your selection.
To exit from the menu
Press SETUP ĺThe settings will be stored in the player’s memory.
ƽGeneral Setup Page
The options included in General Setup page are:”TV Display”, “Angle Mark”, “OSD
language”, “Screen Saver”, “Last Memory” and "DivX(R) VOD".
1. Press SETUP to enter the setup menu.
2. Press or to select the “General Setup Page”.
ƽTV Display
Set the aspect ratio of the DVD Player according to the TV you have connected.
1. Press Ʒto highlight “TV Display”.
2. Enter its submenu by pressing .
14

Downloaded from www.vandenborre.beDownloaded from www.vandenborre.be
3. Press Ʒto highlight the selected item.
4. Press to confirm.
Normal/PS
ėIf you have a normal TV and want both sides of the picture to be trimmed or
formatted to fit your TV screen.
Normal/LB
ėIf you have a normal TV. In this case, a wide picture with black bands on the upper
and lower portions of the TV screen will be displayed.
Wide
ėIf you have a wide-screen TV.
ƽAngle Mark
1. Press Ʒto highlight “Angle Mark”.
2. Enter its submenu by pressing .
3. Press Ʒto highlight the selected item.
ėOn: Enable Angle Mark.
ėOff: Disable the current angle setting display.
4. Press to confirm.
ƽOSD Lang
You can select your own preferred language settings. This DVD system will
automatically switch to the selected language whenever you load a disc. If the
language selected is not available on the disc, the disc’s default language will be used
instead. The OSD language in the system menu will remain once selected.
1. Press Ʒto highlight “OSD Lang”.
2. Enter its submenu by pressing .
3. Press Ʒto highlight the selected language.
4. Press to confirm.
ƽScreen Saver
This function is used to turn the screen saver On or Off.
1. Press Ʒto highlight “Screen Saver”.
2. Enter its submenu by pressing .
3. Press Ʒto highlight the selected item.
ėOn:In STOP, PAUSE or No DISC mode, if no actions are performed about 5
minutes, the Screen Saver will be activated.
ėOff: Screen Saver is disabled.
15

Downloaded from www.vandenborre.beDownloaded from www.vandenborre.be
4. Press to confirm.
ƽLast Memory (Effective only when opening the disc tray during playing)
1. Press Ʒto highlight "Last Memory".
2. Enter its submenu by pressing .
3. Press Ʒto highlight the selected item.
ėOn:The player resumes playing from the last location memorised on the disc.
ėOff: The player won't resume the last location memorised on the disc.
4. Press to confirm.
ƽDivX(R) VOD
Choose it to display the DivX Video On Demand.
Video Quality Setup
The options included in Video Quality Setup are "Brightness", "Contrast", "Hue" and
"Saturation".
1. Press Ʒto highlight one option.
2. Enter its submenu by pressing .
3. Press or to select the desired value.
4. Press to confirm.
Password Setup Page
This feature is used for Parental Control. Enter your four digit password when a hint is
displayed on the screen. The default password is 3308.
1. Press Ʒto highlight “Password “
2. Enter its submenu by pressing .
3. Press to open the “Password Change” page.
4. Press NUM to switch the function buttons to 0-9 numeric buttons.
5. Enter the default password 4-digitcode.
6. Enter the new 4-digit code.
7. Enter the new 4-digit code again to confirm.
ėThe new 4 digit code will take effect.
8. Press OK to exit.
Helpful Hints:
- If the password has been changed, the parental and disc lock code will also be
changed.
- The default password (3308) is always active even though the password has been
16

Downloaded from www.vandenborre.beDownloaded from www.vandenborre.be
changed.
Preference Page (accessible when no disc is inserted)
ƽPreference Page
The options included in Preference page are: “Audio”, “Subtitle”, “Disc Menu”,
“Parental” and “Default”.
ƽAudio, Subtitle and Disc menu
These options set the Audio, Subtitle and Disc menu language for you
- “Audio” (disc’s soundtrack)
- “Subtitle” (disc’s subtitles)
- “Disc Menu” (disc’s menu)
1. Press Ʒto highlight “Audio”.
2. Enter its submenu by pressing .
3. Press Ʒto highlight a selected language and press to confirm.
4. Repeat steps 1~3 for Subtitle and Disc menu language settings.
ƽParental
Some DVDs may have a parental level assigned to the complete disc or to certain
scenes on the disc. This feature lets you set a play limitation level. The rating levels are
from 1 to 8 and are country dependent. You can prohibit the playing of certain discs
that are not suitable for your children or have certain discs played with alternative
scenes.
1. PressƷto highlight “Parental” .
2. Enter its submenu by pressing .
3. Use Ʒto highlight a rating level for the disc inserted.
4. Press to confirm.
ėDVDs that are rated above the level you selected will not play unless you enter your
four-digit password or choose a higher level rating.
Helpful Hint:
Some DVDs are not encoded with a rating though the movie rating may be printed on
the Disc cover. The rating level feature does not work for such Discs.
Rating explanations
1. KID SAF
Kids material; recommended especially for children and viewers of all ages.
2. G
General Audience; recommended as acceptable for viewers of all ages.
17

Downloaded from www.vandenborre.beDownloaded from www.vandenborre.be
3. PG
Parental Guidance suggested.
4. PG13
Material is unsuitable for children under age 13.
5. PGR 6. R
Parental Guidance-Restricted; recommended that parents restrict children under 17
from viewing or allow to view only when supervised by a parent or adult guardian.
7. NC17
No children under age 17; not recommended viewing for children under age 17.
8. ADULT
Mature material; should be viewed only by adults due to graphic sexual material,
violence or language.
ƽDefault
Setting the “Default” function will reset all options and your personal settings to the
factory defaults and all your personal settings will be erased.
1. Press Ʒto highlight “Default”.
2. Highlight “Reset” by pressing .
3. Press to confirm selection.
Caution!
When this function is activated, all settings will be reset to factory defaults
except the parental setting.
Parameters and Maintenance
18
Power supply 100-240V~ 50-60Hz
Screen size 9inches
Frequency response 20Hz to 20 kHz (1dB)
Signal-to-noise ratio More than 60 dB
Dynamic range More than 85 dB
Operating temperature 5~35ć
Weight 1.36 kg
Dimensions(W x D x H) main unit: 230 x 192 x 39.5 mm
monitor: 230x 192 x 26 mm
Compatible disc formats DVD, CD, MP3 and DivX
Note: Design and specifications are subject to change without prior notice.
Maintenance and Service
ƽRefer to the information in this chapter before contacting a service technician.

Downloaded from www.vandenborre.beDownloaded from www.vandenborre.be
19
ƽWhen shipping the unit
Please save the original shipping carton and packing materials. If you need to ship the
unit, for maximum protection, re-pack the unit as it was originally packed at the factory.
ƽKeeping the exterior surfaces clean
Do not use volatile liquids such as insecticide spray near the unit. Do not leave rubber
or plastic products in contact with the unit for a long period of time since they leave
marks on the surface.
ƽCleaning the unit
To clean the player, use a soft, dry cloth. If the surfaces are extremely dirty, use a soft
cloth lightly moistened with a mild detergent solution. Do not use strong solvents such
as alcohol, benzine or thinner, as these might damage the surface of the unit.
ƽMaintaining the unit
The DVD player is a high-tech, precision device. If the optical pick-up lens and disc
drive parts are dirty or worn, the picture quality could be diminished. Depending on the
operating environment, regular inspection and maintenance are recommended after
every 1,000 hours of use. For details, please contact your nearest authorized service
center.
Troubleshooting
Before calling for service, you can check the following items on symptoms and
solutions.
No sound or distorted sound:
Ensure that the equipment is connected properly.
Ensure that the input settings for the TV and stereo system are proper.
No picture:
Ensure that the equipment is connected properly.
Ensure that the LCD is on.
No play:
Condensation has formed: wait about 1 to 2 hours to allow the player to dry out. This
player can’t play discs other than DVDs, MP3s and CDs.
The disc may be dirty and require cleaning.
Ensure that the disc is installed with the label side up.
No remote control:
Check the batteries are installed with the correct polarities (+&-).
The batteries are depleted: replace them with new ones.
Point the remote control at the remote control sensor and operate.
Remove the obstacles between the remote control and the remote control sensor.
Operate the remote control at a distance of not more than 8 meters from the remote
Table of contents
Languages:


