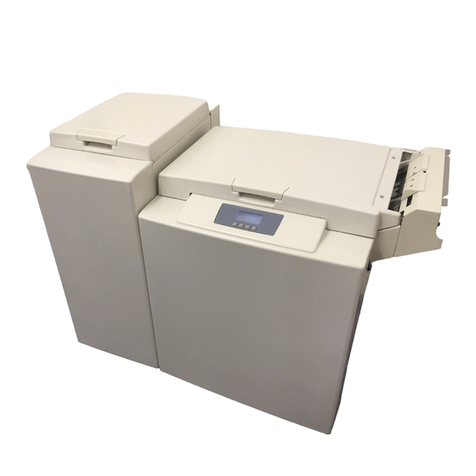
ProMaxX Clixx'Pixx DoublePageMaker User manual

Operating instructions Bedienungsanleitung
Package content Packungsinhalt
C
A
D
B
Clixx’Pixx DoublePageMaker
StudioAlbums
PhotoBooks
Tape replacement Klebeband Tausch
Replace tape
Lift tape cover as shown and pull out tape cardridge. Replace it by a new one and close cover
again. Hint: When using a new tape, the rst inch or so might stay without glue. Repeat gluing
process
Ersetzen des Klebebandes
Önen Sie die Abdeckung wie gezeigt und entnehmen Sie die Klebeband-Kassette. Setzen Sie eine neue
ein und schließen Sie die Abdeckung wieder. Hinweis: Beim erstmaligen Benutzen eines neuen Klebe-
bandes, bleiben möglicherweise die ersten Zentimeter ohne Kleber. Wiederholen Sie den Klebevorgang
entsprechend.
last update: 17.11.2014 12:24
DoublePakeMaker Instructions
Order accessory
Zubehör bestellen
This is legal information to potential licensees and business partners and not intended to be an
advertising message: PROMAXX® reserves all rights to the design, function and materials of these
photo systems to the extent international patent laws allow. German utility models have been ap-
plied in DE covering the binding ring system, the double page maker and the clear box construc-
tion to allow for worldwide patent protection of these proprietary technologies. PROMAXX® and
Clixx´Pixx® are registered trademarks of PROMAXX® Innovative PC Print Media GmbH, Dietersheim
/ Munich, Germany.
Potential business partner‘s contacts welcome.
All statements, technical Information and recommendations about PROMAXX® products are based
upon tests believed to be reliable but do not constitute a guarantee or warranty. In no event shall
PROMAXX® be responsible for claims beyond the replacement value of the defective product or
in any way liable or responsible for consequential or incidental damages. All marks and product
names may be trademarks of their respective owners.
PROMAXX® all rights reserved.
PROMAXX® Innovative PC Print Media GmbH
Hauptstr.1e • 85386 Dietersheim / Munich • Germany
Fon +49 89 3075 8698 • Fax +49 89 9595 9712
e-mail [email protected]
www.promaxx.de www.clixxpixx.com
Order accessory for your
DrillPunch 2 and material for
your PhotoBooks via email
or phone:
Bestellen Sie Zubehör für Ihr
Drill Punch2 Gerät und Photo-
Book Verbrauchsmaterialien
direkt bei uns per Email oder
per Telefon:
Phone: +49 89 3075 8698
Art.Nr. 56-2220
20+1 Tapes (8mm)
for DoublePageMaker
21 x 14m length, lasts for appr. 1.450 double pages of 8” paper height.
21 x 14m Länge, reicht für ca. 1.450 Doppelseiten mit 8” Papierhöhe.
Art.Nr. 56-2221 (only for /nur für DoublePageMaker 56-2200)
Positioning magnet “Third Hand”
Positionier-Magnet “Third Hand”
E
F
2
4
1
1 DoublePageMaker or -XL
Unit
1 Hexagon socket screw-
driver
1 TapeLiftBar
1 Positioning Magnet (only
with XL)
1 Binding Tape 14m
1 DoublePageMaker oder -XL
Gerät
1 Innensechskant Schrauben-
schlüssel
1 TapeLiftBar
1 Positionier Magnet (nur mit
XL Gerät)
1 Spezialklebeband 14m
A
B
C
D
E
The TapeLiftBar stops the
application of adhesive
just before the end of the
print is reached. Insert it
according to the height of
the print. The positions are
marked accordingly. (XL
only)
Der TapeLiftBar beendet den
Klebevorgang rechtzeitig vor
Bildende. Setzten Sie ihn ent-
sprechend der Höhe der Prints
in das vorgesehene Loch. Die
Positionen sind entsprechend
beschriftet.
(Nur bei XL)
To avoid adhesive residues
sticking to front side of
album pages, clean tape
path regularly, with ap-
propriate cleaning agent.
Recommended: Alcohol or
spirit (ethyl alcohol).
Um Klebereste auf der Vorder-
seite von Albumseiten zu ver-
meiden, reinigen Sie bitte die
Anschlagplatte im Bereich des
Klebebandes regelmäßig mit
geeignetem Reinigungsmit-
tel. Empfohlen: Alkohol oder
Spiritus (Ethyl alcohol).
When its supply is used up,
the cassette will not dispense
any adhesive. Lift cover as
shown, remove old cassette
and replace it.
After 20 cassettes, please
replace the DRIVE (F) in the
adhesive housing. Every
pack of replacement tape
from PROMAXX includes
a free new drive and a de-
tailed instruction. Please use
Hexagon socket screwdriver
(B) for this task.
Wenn der Tape Vorrat aufge-
braucht ist, stoppt die Kassette.
Bitte Deckel des Tape Schlittens
nach hinten klappen und Kas-
sette wechseln.
Nach 20 Kassetten bitte
den Antrieb (F) im Gehäuse
tauschen. Jeder Packung
mit Ersatzkassetten von
PROMAXX liegt kostenlos
ein neuer Antrieb sowie eine
detaillierte Anleitung bei. Für
den Wechsel den Innensechs-
kant Schraubenschlüssel (B)
benutzen.
Clixx’Pixx DoublePageMaker XL
Your Minilab is supposed to cut
the rolls in an exact angle of 90
degree. If this is the case, you will
get perfect parallel edges when
double paging. If you see a result
like on this Illustration (while
working carefully with the double
page maker) this is a strong indica-
tion, that the knife in your minilab
is slightly out of angle – meaning
not adjusted to exactly 90 degree.
Please ask your minilab service
technician to check and readjust
the cutting knife.
Ihr Minilab sollte die Papier-
Rollen in einem exakten
Winkel von 90 Grad schneiden.
Wenn dem so ist, erhalten
Sie auch perfekt ausgeführte
Doppelseiten. Ein Ergebnis
wie auf der nebenstehenden
Darstellung ist ein Indikator
dafür, dass das Messer nicht
korrekt eingestellt ist. Sprech-
en Sie Ihren Service Techniker
darauf an.
3
56-2200
56-2211
1
2
Check if your prints are cut perfectly square
Prüfen Sie, ob Ihre Prints rechtwinkelig zugeschnitten sind.
Take 2 prints, turn one of them around.
Nehmen Sie 2 Prints, drehen Sie einen davon um.
Align either top or bottom edge – it must become a parallel border line.
Legen Sie die obere oder untere Ecke genau zueinander; es muss eine parallele
Kante entstehen.
VERY
IMPORTANT!
SEHR
WICHTIG!

A
B
1
5
4
2
3
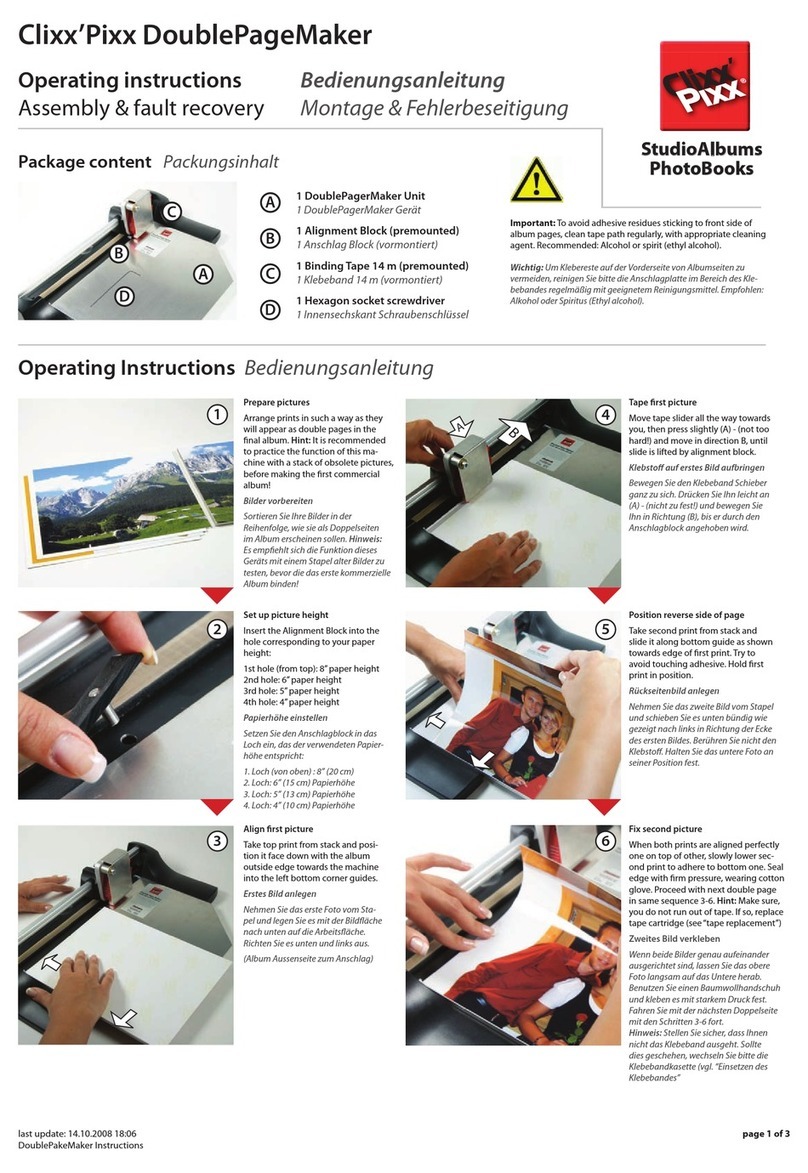
Prepare pictures
Arrange prints in such a
way as they will appear as
double pages in the nal
album. Hint: It is recom-
mended to practice the
function of this machine
with a stack of obsolete
pictures, before mak-
ing the rst commercial
album!
Bilder vorbereiten
Sortieren Sie Ihre Bilder in der
Reihenfolge, wie sie als Dop-
pelseiten im Album erscheinen
sollen. Hinweis: Es empehlt
sich die Funktion dieses Geräts
mit einem Stapel alter Bilder
zu testen, bevor Sie das erste
kommerzielle Album binden!
Set up picture height
Insert the Alignment Block
into the hole correspond-
ing to your paper height:
(56-2200 only, from top)
1st hole: 8” paper height
2nd hole: 6” paper height
3rd hole: 5” paper height
4th hole: 4” paper height
On DoublePage
Maker XL:
See marking next to hole
Papierhöhe einstellen
Setzen Sie den Anschlagblock in
das Loch ein, das der verwende-
ten Papierhöhe entspricht:
(Nur 56-2200, von oben)
1. Loch: 8” (20 cm)
2. Loch: 6” (15 cm) Papierhöhe
3. Loch: 5” (13 cm) Papierhöhe
4. Loch: 4” (10 cm) Papierhöhe
Beim DoublePageMaker XL:
Die Löcher sind entsprechnd
markiert
Align rst picture
Take top print from stack
and position it face down
with the album outside
edge towards the machine
into the left bottom corner
guides.
Erstes Bild anlegen
Nehmen Sie das erste Foto
vom Stapel und legen Sie es
mit der Bildäche nach unten
auf die Arbeitsäche. Richten
Sie es unten und links aus.
(Album Aussenseite zum
Anschlag)
Tape rst picture
Move tape slider all the
way towards you, then
press slightly (A) - (not too
hard!) and move in direc-
tion B, until slide is lifted
by TapeLiftBar.
Klebsto auf erstes Bild
aufbringen
Bewegen Sie den Klebeband-
Schlitten ganz zu sich. Drück-
en Sie Ihn leicht an (A) - (nicht
zu fest!) und bewegen Sie Ihn
in Richtung B, bis er durch die
TapeLiftBar angehoben wird.
Position reverse side of
page
Take second print from
stack and slide it along
bottom guide as shown
towards edge of rst print.
Try to avoid touching
adhesive. Hold rst print in
position.
Rückseitenbild anlegen
Nehmen Sie das zweite Bild
vom Stapel und schieben Sie
es unten bündig wie gezeigt
nach links in Richtung der Ecke
des ersten Bildes. Berühren
Sie nicht den Klebsto. Halten
Sie das untere Foto an seiner
Position fest.
6
Fix second picture
When both prints are
aligned perfectly one on
top of other, slowly lower
second print to adhere
to bottom one. Seal edge
with rm pressure, wearing
cotton glove. Proceed with
next double page in same
sequence 3-6.
Zweites Bild verkleben
Wenn beide Bilder genau
aufeinander ausgerichtet
sind, lassen Sie das obere Foto
langsam auf das Untere herab.
Benutzen Sie einen Baumwoll-
handschuh und kleben es mit
starkem Druck fest. Fahren Sie
mit der nächsten Doppelseite
mit den Schritten 3-6 fort.
When using the position-
ing magnet, rst position
print as shown in picture
3, then move magnet right
up to the edge of the print
as shown. This helps to
hold the picture in place
correctly while applying
adhesive. However, hold
down print by hand as well
while applying adhesive.
Wenn Sie mit dem Positionier-
Magneten arbeiten, erst Print
wie in Bild 3 gezeigt, anle-
gen. Dann Magnet bis zur
Bildkante heranführen. Dies
verhindert ein Verrutschen
während Sie Klebsto auftra-
gen. Dennoch Print nahe an
der Tapespur zusätzlich mit
der Hand festhalten.
When working with prints
larger than 20x30cm
(8x12“) we recommend to
position the magnet
half way on to the picture,
as illustrated. This helps
the print to stay at.
Bei Prints größer als 20x30cm
empfehlen wir, den Magneten
wie gezeigt, zur Hälfte auf den
Print zu platzieren. Er bleibt
dadurch ach liegen.
If you have to handle prints that do not lay at, it may help to apply a short line
(about 5-8mm) of tape right under the top end of the picture onto the base plate
of the machine. To accomplish this, position a print as usual and mark with a felt
pen where you want to apply the adhesive onto the base plate of the machine.
Then operate the gluing mechanism just at this section.
Now, when you place the print, you can actually “lock” it additionally with this
little spot of glue. Apply adhesive as usual. When removing the double paged
sheet, you will hear a little “blipp” but the surface of the picture should be un-
damaged.
You may remove the adhesive any time by using ethyl alcohol or other appropri-
ate cleaning agent.
Wenn Sie Prints verarbeiten, die nicht
plan liegen, kann es hilfreich sein,
eine kleine Fläche (5-8mm) des Tapes
auf die Bodenplatte des Gerätes zu
applizieren. Dazu ein Bild gewünschter
Größe positionieren und mit einem
Filzstift auf der Platte markieren, wo
Sie den Klebsto auftragen wollen.
Dann mit dem Klebeband-Schlitten
nur diese Fläche abfahren.
Jetzt können Sie nach der
Positionierung des Prints diesen durch
leichtes Andrücken zusätzlich „sichern“.
Dann weiter mit dem normalen
Arbeitsschritt. Wenn Sie die verklebte
Doppelseite abheben, hören Sie ein
leichtes „Blipp“, aber die Oberäche
Ihres Prints müsste aufgrund der
kurzen Kontaktzeit völlig unbeschädigt
sein.
Diesen oder anderen ungewollt
applizierten Klebsto können Sie mit
Ethyl Alkohol oder einem anderen
geeigneten Reinigungsmittel
entfernen.
How to double the pictures Wie Sie die Seiten verdoppeln
This manual suits for next models
3
Other ProMaxX Booklet Maker manuals
Popular Booklet Maker manuals by other brands
Plockmatic
Plockmatic Bm 2000 Service manual
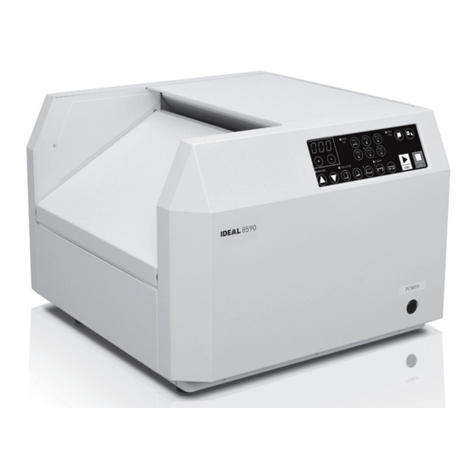
KRUG+PRIESTER
KRUG+PRIESTER IDEAL 8590 operating instructions
DeLuxe Stitcher
DeLuxe Stitcher M27 Series Operation and maintenance manual

DeLuxe Stitcher
DeLuxe Stitcher 7AW Operation and maintenance manual
Formax
Formax FD 160 Operator and maintenance manual
MyBinding
MyBinding Plockmatic BM 200 installation manual
