ProMeister PT5354 User manual

User Guide
Handheld Refractometer
Handrefraktometer
Handhållen Refraktometer
Håndholdt Refraktometer
Kädessä Pidettävä Refraktometri
Produced in Taiwan for Bileko
Bileko
P.O. Box 542
S-645 25 Strängnäs,
Sweden
Tel: +46 771 72 00 00
www.promeister.com Art. Nr: PT5354 RVNR-01
1. Open daylight plate, and place
2-3 drops of distilled water on the
main prism. Close the daylight
plate so the water spreads across
the entire surface of the prism
without air bubbles or dry spots.
Allow the sample to rest on the
prism for approximately 30
seconds before going to step #2.
(This allows the sample to adjust
to The ambient temperature of The
refractometer)
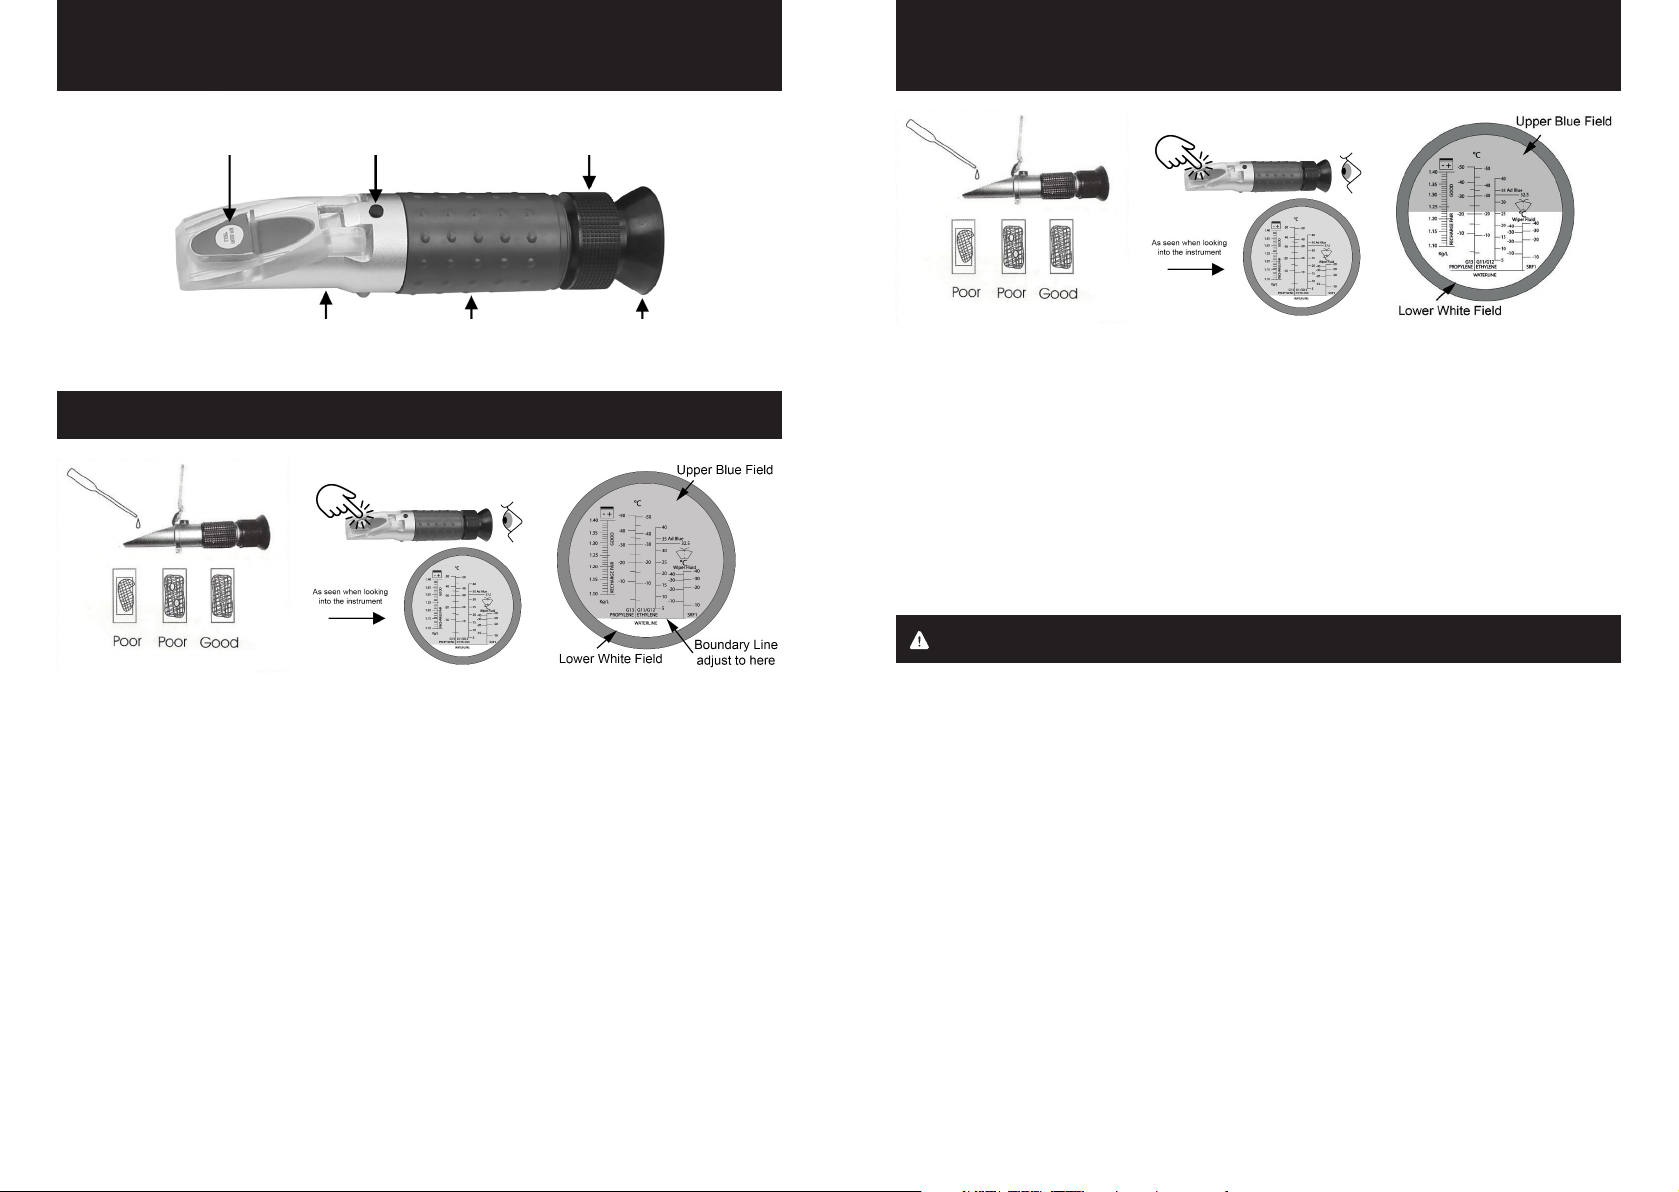
2. Press and hold switch button of
LED light source and look into
the eyepiece. You will see a
circular field with graduations
down the center (you may have
to rotate eyepiece lens to focus
the eyepiece, and to see the
graduations clearly). The upper
portion of the field should be blue,
while the lower portion should be
white.
3. While looking into the eyepiece,
turn the Calibration Screw until
the boundary line between the
upper blue field and the lower
white field meet exactly on 0°C.
Once complete, the instrument
is calibrated for your current
ambient room temperature. When
working temperature of the room
or environment (not the sample)
changes by more than 2°C,
we recommend recalibrating to
maintain accuracy.
1. Operation is done in essentially
the same manner as calibration.
Open daylight plate, and place
2-3 drops of the Liquid sample on
the main prism. Close the daylight
plate so the sample spreads
across The entire surface of the
prism without air bubbles or dry
spots, Allow the sample to rest on
the prism for approximately 30
seconds before going to step #2.
(This allows the sample to adjust
to the ambient temperature of the
refractometer.)
2. Press and hold switch button of
LED light source and look into
the eyepiece. You will see a
circular field with graduations
down the center (you may have
to rotate eyepiece lens to focus
the eyepiece, and to see the
graduations clearly). The upper
portion of the field should be blue,
while the lower portion should be
white.
3. Take the reading where the
boundary line of blue and white
cross the graduated scale. Clean
the prism carefully using a damp
soft cloth. Do NOT immerse in
water, as it is not waterproof.
Read warnings below carefully
before use.
Parts Diagram Basic Operation
Calibration Procedure
Warnings - Maintenance
LED Lighting Plate
Main Prism Assembly Rubber Grip Eyepiece
Calibration Screw Focus Adjustment
1. Accurate measurement depends on careful calibration. Follow the instructions above closely. NOTE: Shifts in
ambient room temperature will necessitate recalibration and the sample must be given ample time to adjust to
the temperature of the prism prior to measurement. The prism and sample MUST be at the same temperature for
accurate results.
2. Do NOT expose the instrument to damp working conditions, and do NOT immerse the Instrument In water. If the
instrument becomes foggy. Water has entered the body. Call a qualified service technician or contact your dealer.
3. Clean the instrument between each measurement using a soft damp cloth. Failure to clean the prism on a regular
basis will lead to inaccurate results and damage to the prism’s coating.
4. Do NOT measure abrasive or corrosive chemicals with this instrument. They can damage the prism’s coating.
5. This is on optical instrument. It requires careful handling and storage. Failure to do so can result in damage to the
optical components and its basic structure. With care, this instrument will provide years of reliable service.
Popular Measuring Instrument manuals by other brands


INTEGRA Metering
INTEGRA Metering RUBIN SONIC installation guide

Photon Systems Instruments
Photon Systems Instruments AquaPen-C AP 110-P Manual and user guide

Gossen MetraWatt
Gossen MetraWatt METRISO G1000 operating instructions

IFM
IFM LX Series operating instructions

Chauvin Arnoux
Chauvin Arnoux F 62 user manual

Vogtlin
Vogtlin red-y GCR instruction manual