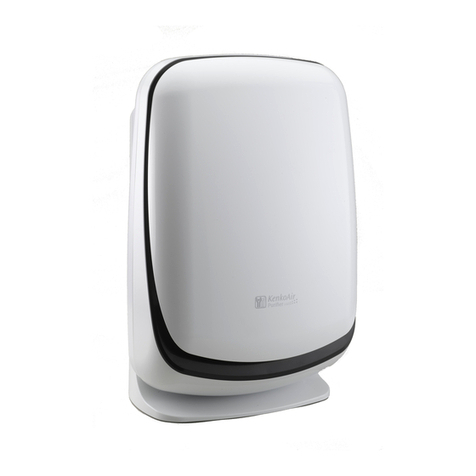
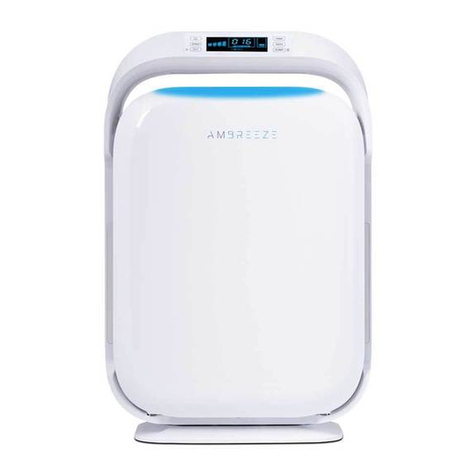
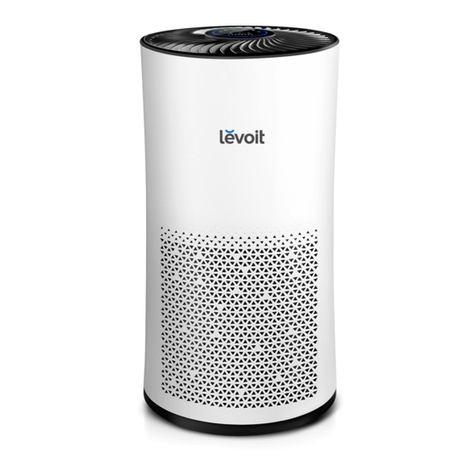
Proscenic A9 User manual

A9
User Manual
Proscenic Technology Co., Ltd.
Service support
Web:www.proscenic.com
E-mail:[email protected]
V8.02


EN
SAFETY PRECAUTIONS . . . . . . . . . . . . . . . . 1
PRODUCT INFORMATION . . . . . . . . . . . . . . . 3
BEFORE USE . . . . . . . . . . . . . . . . . . . . . . . . 5
TRUE HEPA PURIFICATION: 4 LAYER . . . . . . 7
HOW TO USE . . . . . . . . . . . . . . . . . . . . . . . . 8
MAINTENANCE AND CLEANING . . . . . . . . . . 9
FAQ . . . . . . . . . . . . . . . . . . . . . . . . . . . . . . . 10
DE
Sicherheitsvorkehrungen . . . . . . . . . . . . . . . 12
Informationen zum produkt . . . . . . . . . . . . . 14
Vor gebrauch . . . . . . . . . . . . . . . . . . . . . . . . 16
Wahre HEPA-Reinigung: 4 Schritte . . . . . . . 18
Wie zu benutzen . . . . . . . . . . . . . . . . . . . . . 19
Wartung und Reinigung . . . . . . . . . . . . . . . . 20
Allgemeine fragen . . . . . . . . . . . . . . . . . . . . 21
ES
Precauciones de seguridad . . . . . . . . . . . . . 23
Información del producto . . . . . . . . . . . . . . . 25
Antes de usar . . . . . . . . . . . . . . . . . . . . . . . 27
Purificación auténtica por capas: 4 pasos . . 29
Cómo usar . . . . . . . . . . . . . . . . . . . . . . . . . 30
Mantenimiento y limpieza . . . . . . . . . . . . . . 31
Preguntas comunes . . . . . . . . . . . . . . . . . . . 32
FR
Mesures de sécurité . . . . . . . . . . . . . . . . . . 34
Information du produit . . . . . . . . . . . . . . . . . 36
Avant l’utilisation . . . . . . . . . . . . . . . . . . . . . 38
Véritable purifi cation de masse : 4 étapes . . 40
Comment uliliser . . . . . . . . . . . . . . . . . . . . . 41
Entretien et nettoyage . . . . . . . . . . . . . . . . . 42
Questions courantes . . . . . . . . . . . . . . . . . . 43
IT
Precauzioni di sicurezza . . . . . . . . . . . . . . . 45
Informazioni sul prodotto . . . . . . . . . . . . . . . 47
Prima dell'utilizzo . . . . . . . . . . . . . . . . . . . . . 49
Vera e propria purifi cazione del mucchio . . . 51
Come utilizzare il purifi catore . . . . . . . . . . . 52
Manutenzione e pulizia . . . . . . . . . . . . . . . . 53
Problemi comuni . . . . . . . . . . . . . . . . . . . . . 54
JP
安全上の注意 . . . . . . . . . . . . . . . . . . . . . . . . 56
製品情報 . . . . . . . . . . . . . . . . . . . . . . . . . . . 58
使用前に . . . . . . . . . . . . . . . . . . . . . . . . . . . 60
真の清浄構造:4 ステップ . . . . . . . . . . . . . . 62
使用方法 . . . . . . . . . . . . . . . . . . . . . . . . . . . 63
メンテナンスとお手入れ . . . . . . . . . . . . . . . 64
よくあるご質問 . . . . . . . . . . . . . . . . . . . . . . 65
CONTENTS


1
To avoid possible damage to you, others, or property, make sure
to pay attention to the following safety precautions.
If the machine power chord is broken or unit is out of order;
Please contact customer service to ensure personal safety.
WARNING
Do NOT touch power plug with
wet hands. Operating with wet
hands can easily cause electric
shock.
Power off before cleaning
the machine.
Unplug before cleaning to avoid
electric shock or unit turning on
accidentally.
Do NOT disassemble or modify
the unit without authorisation.
Disassembling or modifying
without authorisation may
cause physical injuries or unit
malfunctions.
Do NOT place bars or metal
parts near air outlet or openings.
Inserting metal bars inside of
the machine can cause electric
shock.
Do NOT damage the power cord
and socket.
Do not bend wires when you use
the unit. It may cause electric
shock, short circuit, or fi re if you
use broken wires. Never cut,
scratch, refit, distort, twist, or
stretch power chords. Do NOT
put any heavy substances on top
of wires or sockets.
Regularly clean power plug.
Do not accumulate dust on the
power plug. This can damage
insulation and cause a fire
accident. Clean power plug with
dry cloth (do not use wet cloth).
If the machine is not used for an
extended period of time, unplug
it for safety reasons.
Abnormal electric voltage is
strictly prohibited. Non-standard
voltage may permanently
damage the circuit board.
Please insert the plug completely
into the power socket before
starting the air purifi er. If not, it
may cause electric shock and
Overheat, even fi re accident.
Do not use damaged plug or
loose socket.
SAFETY PRECAUTIONS
EN

2
READ AND SAVE THESE SAFETY INSTRUCTIONS.
• WARNING -TO REDUCE THE RISK OF FIRE OR ELECTRIC SHOCK, DO NOT USE THIS AIR
PURIFIER WITH ANY SOLID-STATE SPEED CONTROL DEVICE.
• WARNING - UNPLUG OR DISCONNECT THIS AIR PURIFIER FROM THE POWER SUPPLY
BEFORE SERVICING.
• WARNING -THIS APPLIANCE HAS A POLARIZED PLUG (ONE BLADE IS WIDER THAN
OTHER). TO REDUCE THE RISK OF ELECTRIC SHOCK, THIS PLUG IS INTENDED TO FIT IN A
POLARIZED OUTLET ONLY ONE WAY. IF THE PLUG DOES NOT FIT FULLY IN THE OUTLET
REVERSE THE PLUG. IF IT STILL DOES NOT FIT, CONTACT A QUALIFIED ELECTRICIAN. DO
NOT ATTEMPT TO DEFECT THIS SAFETY FEATURE.
WARNING
Keep the machine dry.
Otherwise it may cause electric
shock or fi re accident.
Keep machine away from
volatile substances or fl ammable
items. In case of fi re caused.
Do not use an air purifier in a
greasy area.
This machine should not be used
as ventilating or air evacuating
equipment
Do not use air purifier in
high temperature or humid
conditions. These situations may
cause current damage, electric
shock ,or fi re accident.
Do not use the air purifier in
the room with fumigation type
pesticides.
The chemical residue could be
accumulated inside the machine
and then released, causing
harm. The room should keep
ventilated thoroughly after you
use insecticide and then start to
use air purifi er.
Please do NOT use Air Purifier
in a room of carbon monoxide,
Air Purifi er cannot purify carbon
monoxide.
Do not use solvents like
benzene, diluent, etc. to clean
the air purifi er.
This can cause the air purifi er to
be broken, to become damaged,
or short circuit which can lead to
electric shock or fi re accidents.
Be careful when removing the
plug from the power socket. Do
not pull wires which may cause
short circuit or damage to wires,
to avoid possible fire accident
or electric shock.

3
PRODUCT INFORMATION
Display screen
Touch Panel
Air Outlet
Body of unit
Filter Filter Cover

4
Child Lock
Press and hold the child lock button for 5 seconds to
lock/unlock the machine.
Other buttons will be dysfunctional in "Child Lock" mode.
Power ON/OFF Press to turn unit on/off .
WiFi Control
Long press the "fan speed" & "Auto" buttons at the same
time for 5 seconds to turn on WiFi Indicator.
WiFi indicator will fl ashes slowly while searching.
Timer Mode
Press to set timer at 1, 2, 4,8 hours.
The C light will only appear when the time is set
longer than 8 hours. And this operation can only be done
on App.
Filter Indicator When fi lter lifetime has run out, the indicator will light up.
(The fi lter life cycle is 3000 hours or 4 months)
Fan Speed
: Hibernate Mode
1 : Speed 1
2 : Speed 2
3 : Speed 3
4 : Speed 4
Auto mode Auto and SMART mode
Description of Control Panel Functions

5
BEFORE USE
Learning About Air Quality Indicator Light
Air Quality Indicator Light Index
NOTE: PM2.5 air index monitoring will be more accurate after 60 seconds of the turn-on.
PM2.5 Air Quality Indicator Light Fan Speed
0~50 Good Green 1
51 ~ 100 Moderate Yellow 2
101 ~ 150 Unhealthy for Sensitive
Groups orange 3
≥ 151 Unhealthy red 4

6
Filter installation steps
Installing Multi-layered Integrated Filter After Removing PE
Bag.
1. Open the fi lter cover. 2. Remove PE bag from fi lter.
3. Place the filter into machine after
removing PE bag.
4. Close the fi lter cover.

7
TRUE HEPA PURIFICATION: 4 LAYER
First layer: Pre-fi lter
Second layer: Nano-Silver Ion Coating
Third layer: H13 HEPA filter
Layer Four:Activated carbon filter
Removes larger particles including hair,
fi bers, dander, and others.
HEPA H13 is a medical-grade filter. This
removes 99.97% of particles down to 0.3
microns as well as PM2.5 particles such as
smoke, pollen, dust mites and others.
Used to neutralize harmful bacteria and
prevent mold regeneration in the fi lter.
Absorbs odors, harmful VOCs, and other
toxic substances such as formaldehyde.
1. Pre-Filter
3. HEPA H13 Filter
2. Nano-silver ion coating
4. Activated Carbon Filter
1 2 3 4

8
HOW TO USE
Keys Key Description
Power switch button
Child lock function switch button
1H, 2H, 4H, 8H shutdown timer function
Fan speed adjustment button. HiberMode, 1, 2, 3, 4 levels
Turn on auto mode
(smart mode)
Filter lifetime reset button
(both buttons be pressed and held simultaneously for 5 seconds)
Wifi pairing button
(both buttons be pressed and held simultaneously for 5 seconds)
TIME
PM2.5 index
Air quality indicator bar
Filter lifetime alarm
WIFI
Child lock

9
The unit will remind users to
replace fi lters when needed.
To replace the filter, follow
same steps as User Manual.
Long press the buttons
simultaneously for 5 seconds. The LED will
turn off when you hear a beep sound. When
the reset is completed, the unit will once
again calculate from start
MAINTENANCE AND CLEANING
Please make sure to unplug the device before cleaning. Do not
immerse machine in water or any other liquid substances. Do
not use abrasive, corrosive or fl ammable substances to clean
any parts of the unit.
*Filters can NOT be washed with water.*
Clean the air purifi er regularly to prevent the
dust accumulation.
1. Use soft and dry cloths to remove the
dust from the air purifi er.
2. Use soft and dry cloth to clean the
outlet and intake of air purifi er.
Clean air quality sensor every two-month to
ensure the best performance.
Clean frequently if machine works in dusty
environment.
1. Use soft brush to clean intake and
outlet of air quality sensor.
2. Disassemble the cover of the air quality
sensor.
3. Use a dry swab to clean the air quality
sensor, air intake and air outlet.
4. Reinstall the cover of the air quality
sensor.
Clean the Air Purifi er
Change Filter
Clean the Air Quality Sensor
Technical Data
Voltage 120V AC 60 Hz
Rated power 50 W
Filter life 3000 hours or 4 month
Applicable area 55 ㎡ (5 times per hour air purifi cation)
Noise level < 55 dB
Dimension 520mm H x 260mm W x 260mm D

10
FAQ
The following table lists possible questions and steps to
address them. Please contact Customer service if you cannot
fi nd an answer to your question below.
Issue Possible Reason Possible Solution
Unit does
not work
Filter cover not installed cor-
rectly Remove bottom cover and re-install
Bottom cover not locked in
place
Check that bottom cover is turned into locked posi-
tion
Power supply for plug Pull out plug and plug it back into unit
Deformed power plug or wire Contact customer service
Fan does
not work
The machine doesn’t turn on Plug it in and turn on
Motor is not working Contact customer service
Unit on uneven ground Move to fl at surface
Loose or foreign particles in-
side Contact customer service
Filter packaging not removed Remove plastic bag from fi lter
The motor is loose Contact customer service
Perfor-
mance
Issues
Filters need to be replaced Replace with an original Proscenic A9 fi lter for bet-
ter performance
Air intake/outlet blocked Contact customer service
Filter packaging not removed Remove plastic bag from fi lter
Not enough space surrounding
unit
Ensure 10 in. distance between sides of air intake
and that distance to air outlet is not less than 8 in.
Lack of fi lter or fi lter is not
properly installed
Make sure all fi lters are placed in order in accor-
dance to instructions
Coverage area questions Check whether room area surpasses coverage area
estimates

11
Service
If you have any additional questions, please contact customer
service.
All names and trademarks are property of Proscenic. Our
company reserves the rights to change the product at any
time, without prior notice, and the company has no obligation
to adjust products distributed earlier.
Do not leave unit plugged in for an extended
period of time when not in use.
Place machine in a dry and well- ventilated
place when not in use for extended period of
time.
If you want to change parts or purchase
additional parts, please contact customer
service.
Long-time IdlingOrder Parts or Accessories
Issue Possible Reason Possible Solution
The App
cannot
connect
No Internet Connection Please check if the router is correctly confi gured.
Incorrect WiFi Password Re-connect the app after entering the correct WiFi
password.
Whether the phone has con-
nected to 5GHz WiFi
Please select a 2.4GHz WiFi signal in phone set-
tings before pairing on App.

12
Um mögliche Schäden an Ihnen, anderen oder jeglichem
Eigentum zu vermeiden, beachten Sie unbedingt die folgenden
Sicherheitsvorkehrungen.
Wenn das Stromkabel kaputt oder das Gerät außer Betrieb ist,
wenden Sie sich sicherheitshalber an den Kundendienst.
WARNUNG
Netzstecker nicht mit nassen Händen
berühren.
Nasse Hände können einen
elektrischen Schlag verursachen.
Niemals mit nassen Händen berühren.
Schalten Sie das Gerät vor der
Reinigung aus.
Ziehen Sie vor der Reinigung den
Netzstecker, um einen Stromschlag
oder ein versehentliches Einschalten
des Geräts zu vermeiden.
Das Gerät nicht ohne Erlaubnis
zerlegen oder modifi zieren.
Das Zerlegen oder die
Modifikation ohne Erlaubnis
kann zu Verletzungen oder
Fehlfunktionen des Geräts
führen.
Legen Sie keine Stangen oder
Metallprodukte in die Nähe
des Luftaugangs oder der
Öff nungen.
Wenn Metallstangen das Innere
der Maschine berühren, kann
dies einen elektrischen Schlag
verursachen.
Stromleitung und Steckdose nicht
beschädigen.
Binden Sie keine Drähte zusammen, wenn
Sie das Gerät verwenden. Kaputte Drähte
können zu Stromschlägen, Kurzschluss oder
Feuer führen. Stromleitungen sollten weder
zerschnitten, zerkratzt, umgebaut, verzerrt,
verdreht oder gezogen werden. Legen Sie
keine schweren Produkte auf Drähte oder
Steckdosen.
Netzstecker regelmäßig reinigen.
Lassen Sie nicht zu, dass sich Staub auf
dem Netzstecker ansammelt. Dies kann
die Isolierung beschädigen und einen
Brandunfall verursachen. Ziehen Sie
den Netzstecker aus der Steckdose und
reinigen Sie ihn mit einem trockenen Tuch
(kein feuchtes Tuch verwenden). Wenn
das Gerät über einen längeren Zeitraum
nicht benutzt werden soll, ziehen Sie aus
Sicherheitsgründen den Netzstecker.
Unzulässige Nutzung von
anderen Stromspannungen.
Nur bei angegebener Spannung
verwenden. Bei Verwendung
anderer Spannungen kann die
Leiterplatte beschädigt oder
zerstört werden.
Bitte stecken Sie den Stecker
vollständig in die Steckdose,
bevor Sie den Luftreiniger
starten. Andernfalls kann es zu
Stromschlägen und Überhitzung
oder sogar zu einem Brandunfall
kommen.
Verwenden Sie keine
beschädigten Stecker oder lose
Steckdosen.
Sicherheitsvorkehrungen
DE

13
LESEN UND SPEICHERN SIE DIESE ANWEISUNGEN.
• WARNUNG - UM DAS RISIKO EINES BRANDES ODER ELEKTRISCHEN SCHLAGES ZU VERRINGERN,
VERWENDEN SIE DIESEN LUFTREINIGER NICHT MIT EINEM ELEKTRONISCHEN DREHZAHLREGLER.
• WARNUNG - ZIEHEN SIE VOR WARTUNGSARBEITEN DEN STECKER DIESES LUFTREINIGERS AUS DER
STECKDOSE ODER TRENNEN SIE SIE VON DER STROMVERSORGUNG.
• WARNUNG - DIESES GERÄT HAT EINEN GEPOLTEN STECKER (EIN KONTAKT IST BREITER ALS
DIE ANDERE). UM DAS RISIKO EINES STROMSCHLAGS ZU VERRINGERN, IST DIESER STECKER SO
KONZIPIERT, DASS ER NUR IN EINER RICHTUNG IN EINE GEPOLTE STECKDOSE PASST. WENN DER
STECKER NICHT VOLLSTÄNDIG IN DIE STECKDOSE PASST, DREHEN SIE DEN STECKER UM. WENN ER
IMMER NOCH NICHT PASST, WENDEN SIE SICH AN EINEN QUALIFIZIERTEN ELEKTRIKER. VERSUCHEN SIE
NICHT, DIESE SICHERHEITSFUNKTION ZU MANIPULIEREN.
WARNUNG
Maschine trocken halten.
Andernfalls kann es zu einem
elektrischen Schlag oder
Brandunfällen kommen.
Halten Sie die Maschine von
flüchtigen Substanzen oder
brennbaren Gegenständen
fern. Dies könnte einen Brand
verursachen.
Verwenden Sie den Luftreiniger
nicht in schmutzigen Bereichen.
Diese Maschine sollte nicht
als Be- oder Entlüftungsgerät
verwendet werden.
Verwenden Sie den
Luftreiniger nicht bei hohen
Temperaturen oder Feuchte.
Diese Situationen können zu
Schäden, Stromschlägen oder
Brandunfällen führen.
Verwenden Sie den Luftreiniger nicht
in Räumen während einer Begasung
zur Schädlingsbekämpfung.
Chemische Rückstände könnten sich
im Inneren der Maschine ansammeln
und dann freigesetzt werden und
Schaden anrichten. Der Raum sollte
nach dem Einsatz von Insektiziden
gründlich gelüftet werden, bevor ein
Luftreiniger benutzt wird.
Verwenden Sie keinen Luftreiniger in
einem Raum, in dem Kohlenmonoxid
entstehen kann. Denn der Luftreiniger
kann Kohlenmonoxid nicht entfernen.
Verwenden Sie keine
Lösungsmittel wie Benzol,
Verdünnungsmittel usw. zur
Reinigung des Luftreinigers.
Dies kann dazu führen, dass
der Luftreiniger kaputt geht,
beschädigt wird oder einen
Kurzschluss verursacht, der
zu einem Stromschlag oder
Brandunfällen führen kann.
Seien Sie vorsichtig, wenn Sie
den Stecker aus der Steckdose
ziehen. Ziehen Sie nicht an
Kabeln, die einen Kurzschluss
oder eine Beschädigung der
Kabel verursachen können, um
mögliche Brandunfälle oder
Stromschläge zu vermeiden.

14
Informationen zum produkt
Anzeigebildschirm
Touch-Panel
Luftauslass
Körper der Einheit
Filter Filterabdeckung

15
Funktion
Kindersicherung
Halten Sie die Kindersicherungstaste 5 Sekunden
lang gedrückt, um die Maschine zu sperren oder zu
entsperren.
Im Kindersicherungsmodus sind andere Tasten nicht
verfügbar.
Strom EIN/AUS Drücken Sie auf , um das Gerät ein-/auszuschalten.
WiFi-Steuerung
Halten Sie die Taste für die Lüftergeschwindigkeit und
die automatische Taste gleichzeitig 5 Sekunden lang
gedrückt, um die WLAN-Anzeige einzuschalten. Die WiFi-
Anzeige blinkt langsam bei der Suche.
Timer-Modus
Drücken Sie, um den Timer auf 1, 2, 4 bis 8 Stunden
einzustellen.Das C-Licht leuchtet nur auf, wenn die Zeit
länger als 8 Stunden ist. Und dieser Vorgang kann nur
auf der APP eingestellt werden.
Filter-Anzeige
Die Anzeige leuchtet auf, wenn die Filterlebensdauer
abgelaufen ist. (Der Filterlebenszyklus beträgt 3000
Stunden oder 4 Monate.)
Lüfterdrehzahl
: Schlafmodus
1 : Geschwindigkeit 1
2 : Geschwindigkeit 2
3 : Geschwindigkeit 3
4 : Geschwindigkeit 4
Automatischer Modus Auto-und SMART-Modus

16
Vor gebrauch
Informationen über den Luftqualitätsindikator
Lichtindex des Luftqualitätsindikators
Warme Erinnerung: 60 Sekunden nach dem Start ist die PM2.5-Luftindexüberwachung genauer.
PM2.5 Luftqualitätsanzeige Luftgeschwindigkeit
0~50 Gut Grün 1
51 ~ 100 Mäßig Gelb 2
101 ~ 150 Ungesund für sensible
Gruppen Orange 3
≥ 151 Ungesund Rot 4
Table of contents
Languages:
