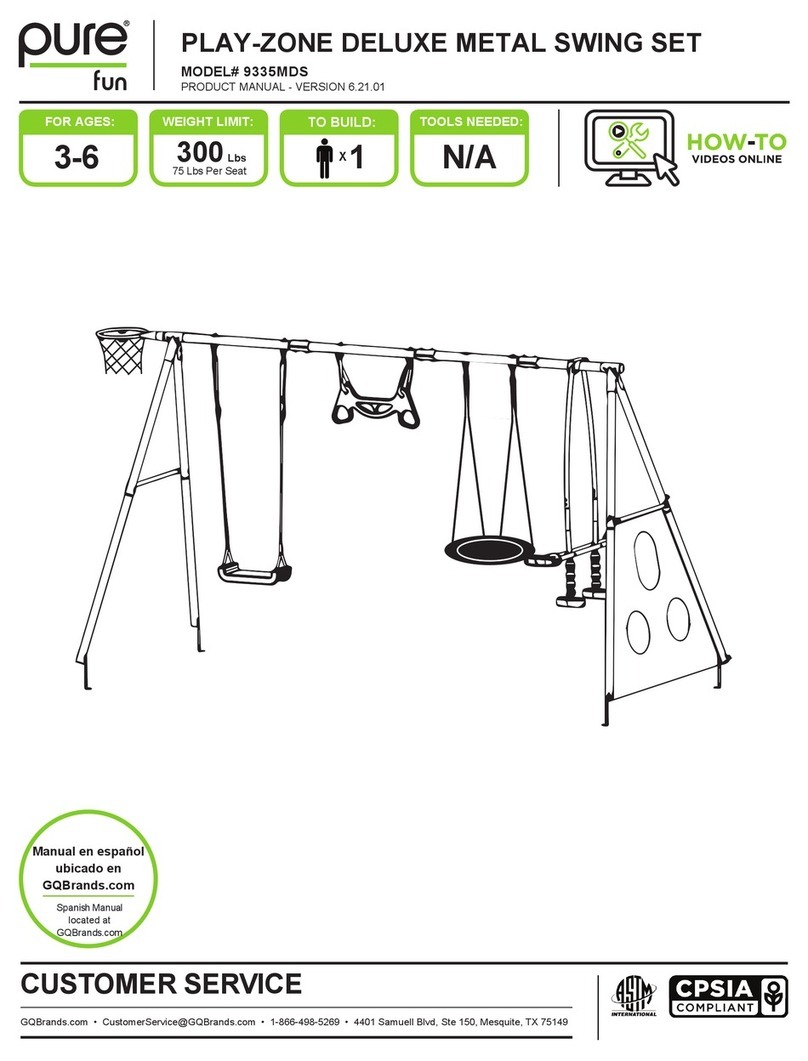
Pure Fun 9335MSS User manual

FOR AGES: WEIGHT LIMIT:
3-6 300Lbs
75Lbs per seat
Manual en español
ubicado en
GQBrands.com
Spanish Manual
located at
GQBrands.com
PLAY-ZONE METAL SWING SET
MODEL# 9335MSS
PRODUCT MANUAL - VERSION 6.21.01
TO BUILD:
XX22
TOOLS NEEDED
Quick Set Concrete
GQBrands.com • CustomerService@GQBrands.com • 1-866-498-5269 • 4401 Samuell Blvd, Ste 150, Mesquite, TX 75149
CUSTOMER SERVICE

CUSTOMER SERVICE INFORMATION
Thank you for purchasing:
PLAY-ZONE METAL
SWING SET
MODEL# 9335MSS
If you have an issue with your item, do not return. Please report
items that are damaged or missing parts to the manufacturer
GQ Brands within three days of delivery. Contact customer
service at [email protected] to open a ticket.
At GQBrands®, we want all of our customers to be completely
satisfied with their purchase. Take time to review the contents of the
product you have just received to make sure that all of the parts are
included. If you find that any parts are missing or damaged, we will
provide replacement parts at no charge within 30 days of purchase.
Please keep in mind that for select damaged part replacement
requests, we will require a photo for submission.
Please be sure to include the following information when you contact Customer Service:
YOUR NAME: _________________________________________
YOUR MAILING ADDRESS: _______________________________
YOUR EMAIL ADDRESS: ________________________________
PRODUCT NAME: _____________________________________
PRODUCT MODEL#: ___________________________________
PART NUMBER _______________________________________
LIMITED WARRANTY
RETAILER WHERE PURCHASED:_________________________
DATE OF PURCHASE: __________________________________
ORDER NUMBER: (If Available) ____________________________
QUANTITY NEEDED: __________________________________
SERIAL NUMBER:
To order these parts, or if you have any other questions or
concerns about this GQBrands product, please contact us at
PureFun.Net
GQBrands®
Phone: 1-866-498-5269
Email: CustomerService@GQBrands.com
4401 Samuell Blvd, Ste 150, Mesquite, TX 75149
To register you product please visit:
www.globalqualitybrands.com/product-registration
or Scan code
Please Note: In the interest of better quality and value, we are constantly
improving and updating our product information. Most up to date manuals,
warnings and product information can be found at:
https://www.globalqualitybrands.com/warnings
2 [email protected]GQBrands.com 1-866-498-5269
Global Quality Brands® warrants this product to be free from defects in
workmanship and materials under normal use and conditions for a period
of:
6 Months - Steel
90 Days - All other Parts
This Limited Warranty is not transferable and is available only for the
original purchaser of the Product. The Company’s obligation under this
warranty is limited to replacing or repairing the Product, at the discretion
of the company.
All warranty coverage extends only to the original retail purchaser from
the date of purchase, GQ Brands obligation under this warranty is limited
to replacing or repairing, at Global Quality Brands® option. All products
for which a warranty claim is made must be received by Global Quality
Brands® and accompanied by sufficient proof of purchase (photocopy of
the original store receipt, indicating the date of purchase). All freight and
handling fees are the responsibility of the consumer to pay, both to and
from Global Quality Brands®. All warranty claims must be pre-authorized
by Global Quality Brands® pre-authorization can be obtained by calling
866-498-5269.
This warranty does not cover ordinary wear and tear, weathering, failure
to follow directions, improper installation, improper maintenance, or acts
of nature, (such as damage caused by wind, lightning, snow, water, or
ice) weather damage, damage caused by unauthorized repair work or
damage caused by improper use of the products are not covered by the
product warranty. No other warranty beyond that specifically set forth
above is authorized by GQ Brands®.
GLOBAL QUALITY BRANDS® IS NOT RESPONSIBLE OR LIABLE FOR
INDIRECT, SPECIAL OR CONSEQUENTIAL DAMAGES ARISING OUT OF
OR IN CONNECTION WITH THE USE OR PERFORMANCE OF THE
PRODUCT OR OTHER DAMAGES WITH RESPECT TO ANY ECONOMIC
LOSS, LOSS OF PROPERTY, LOSS OF REVENUE OR PROFITS, LOSS OF
ENJOYMENT OR USE, COST OF REMOVAL, INSTALLATION OR OTHER
CONSEQUENTIAL DAMAGES. SOME STATES DO NOT ALLOW THE
EXCLUSION OR LIMITATION OF INCIDENTAL OR CONSEQUENTIAL
DAMAGES. ACCORDINGLY,
THE ABOVE LIMITATION MAY NOT APPLY TO YOU. THE WARRANTY
EXTENDED HEREUNDER IS IN LIEU OF ALL OTHER WARRANTIES AND
GLOBAL QUALITY BRANDS®, SPECIFICALLY DISCLAIMS ANY IMPLIED
WARRANTY OF MERCHANTABILITY OR FITNESS FOR A PARTICULAR
PURPOSE IS LIMITED IN ITS SCOPE AND DURATION TO THE TERMS SET
FORTH HEREIN. SOME STATES DO NOT ALLOW LIMITATION ON HOW
LONG AN IMPLIED WARRANTY LASTS. ACCORDINGLY, THE ABOVE
LIMITATION MAY NO APPLY TO YOU. THIS WARRANTY GIVES YOU
SPECIFIC LEGAL RIGHTS. YOU MAY ALSO HAVE OTHER RIGHTS, WHICH
VARY FROM STATE TO STATE.
WHILE EVERY ATTEMPT IS MADE TO ENSURE THE HIGHEST DEGREE
OF PROTECTION IN ALL EQUIPMENT, WE CANNOT GUARANTEE
FREEDOM OF INJURY. THE USER ASSUMES ALL RISK OF INJURY DUE
TO USE. ALL MERCHANDISE IS SOLD ON THIS CONDITION, WHICH NO
REPRESENTATIVE OF GQBRANDS® CAN WAIVE OR CHANGE.

3
MODEL# 9335MSS
WARNINGS
IMPORTANT MESSAGE
Please read all of the warnings and directions below prior to assembly.
This product comes equipped with warnings and instructions for the
assembly, care, maintenance and use of the product. This information
must be read by all product supervisors and users before any person
is allowed to use this product.
ADULT ASSEMBLY REQUIRED
CHOKING HAZARD - Small Parts
NOT for children under 3 years of age.
WARNING:
While every attempt is made to ensure the highest degree of protection in all equipment,
we cannot guarantee freedom from injury. The user assumes all risks of injury due to use
and installation. All merchandise is sold on this condition, which no representative of the
company can waive or change.
THIS PRODUCT CAN POSSIBLY EXPOSE YOU TO CHEMICALS INCLUDING Dl(2-ETHYLHEXYL)
PHTHALATE (DEHP). WHICH IS KNOWN TO THE STATE OF CALIFORNIA TO CAUSE CANCER AND BIRTH
DEFECTS OR OTHER REPRODUCTIVE HARM. FOR MORE INFORMATION GO TO
WWW.P65WARNINGS.CA.GOV.
PROPOSITION 65

WARNING LABEL LOCATIONS
4 [email protected]GQBrands.com 1-866-498-5269
CAUTION
300 LBS
75lbs per seat
MODEL# 9335MSS Global Quality Brands - PureFun.net
4401 Samuell Blvd, Ste 150 Mesquite, TX 75149
MADE IN CHINA
Global Quality Brands - PureFun.net
4401 Samuell Blvd, Ste 150 Mesquite, TX 75149
The labels shown on this page
have been attached to the METAL SWING SET
in the indicated location
Note: The labels are not shown actual size.

Please read these warnings and the information in this manual in its entirety.
Failure to comply with the following instructions may increase the risk of serious injury and/or death:
WARNINGS & SAFETY INFORMATION
5
Model# 9335MSS
Please read these warnings and the information in this manual in its entirety.
Failure to comply with the following instructions may increase the risk of serious injury and/or death:
•This unit must be assembled and
disassembled by ADULTS ONLY.
•Keep a copy of your assembly
instructions for future reference. This
can be particularly helpful for
identification of parts.
•This Swing Set is suitable for use by
most children 3 to 6 years of age.
•This unit has a maximum fall weight
maximum fall height of 71”
•This Swing Set is NOT for adult use.
•The Swing Set should always be
installed over an appropriate, stable
grass surface and secured with
concrete.
•This swing set must be embedded
firmly into the ground. Please follow
the instructions carefully for doing so.
•Only use this product when concrete is
completely dry.
•Children must be supervised at all
times when using this equipment. DO
NOT leave children unattended at any
time.
•DO NOT exceed the MAXIMUM
WEIGHT limit of 300 Lbs for entire set
or (75 Lbs per seat) regardless of age.
•DO NOT install this equipment over
concrete, asphalt, or any other hard or
rough surface.
•DO NOT attach items to the Swing Set
not specifically designed for this
purpose. Especially in the case of jump
ropes, chains, clotheslines, pet
leashes and cables. These may cause
a strangulation or physical hazard.
•DO NOT allow children to stand on the
seesaw or swings.
•DO NOT place objects on or under the
swing set or allow people and pets to
stand or sit on, near or under the swing
set when in use.
•DO NOT allow children to stand on the
swings or hang from the steel tubing –
this can cause serious injury.
•DO NOT use liquid lubricant as it will
run down the fixings and parts.
•DO NOT use in adverse weather
conditions, while the seats are wet, or
in poorly lit conditions.
•
•
•
This Swing Set is only designed for
family residential use. NOT intended
for commercial applications and/or use
in public areas such as schools, parks,
nurseries, and will VOID the warranty.
Never use this product in any manner
other than its intended use.
Children must ALWAYS remain
securely seated, in the forward facing
position when swinging.
•Instruct children to always be sure that
the area is clear of any persons, pets
or obstructions before swinging.
•ALWAYS secure the Swing Set
against unauthorized and
unsupervised use. ALWAYS wear the
appropriate footwear (i.e. closed toe
shoes) when using the Swing Set.
•If the swing set develops a squeaky
noise, apply a suitable oil/gel lubricant
made specifically for metal.
•Immediately discontinue use if any
breakage to the frame or other parts of
this product are found. Failure to do
this may result injury and/or further
damage to the product.
•Rake and check depth of loose fill
protective surfacing materials to
prevent compaction and maintain
appropriate depth. Replace as
necessary.
•Misuse and abuse of this product is
dangerous and can cause serious
injuries.
•Before each use of this product and
twice per month, inspect and re-place
any worn, loose, defective or missing
parts and/or bolts.
•It is important to check the entire
Swing Set to ensure it is in good
condition. If any loose, cracked,
missing, or otherwise damaged
components are found, cease use of
this item immediately.
•Check metal parts for rust. If rust is
found, sand and repaint using a non-
lead based paint.
•If removed for winter storage, reinstall
any plastic parts before allowing use.
•Keep this product away from all heat
sources and fire sources.
•The frame of this product is made of
steel and it will conduct electricity. No
electrical equipment (lights, heaters,
etc.) should be permitted on or around
the product under any circumstance.
•No modification should be carried out
to this product or any of its
components unless specified in this
manual. Any modification could lead to
damage to the product or result in a
personal injury.
•Owners shall be responsible for
maintaining the legibility of the warning
labels. Use Owners shall be
responsible for maintaining the
legibility of the warning labels.
•Please read and refer to other
warnings and use information in the
product instructions before use.
•At the time of disposal, this item must
be completely disassembled and
separated into its component types
(metals, plastics) for recycling or pick-
up according to local ordinances for
sanitation pickup.
•Keep this manual and safety
instructions for future reference.
PARTS LIST
6
YC40 - Swing Seat
YC52 - Foot Rest
YD1 - Bracket
x2
YC50 - Seesaw Seat
x2
x2
x2
YC51 - Stem Cover
x2
x4
YD3 - Swing Hook
x4
x1
YB2 - Top Beam Fem ale
YB1 - Top Beam Male
YBB4 - Upper Leg Pole
x1
x4
YB22 - Seat Beam x2
B211 - Lower Leg Pole x4
YB19 - Upper Seesaw Pole x2
YB20 - Lower Seesaw Pole
x2
x2
YBB5 - Cross Beam
8x50/M6
x4
8x45/M6
x10
8x40/M6
x4
8x20/M6
x4
8x50
x2
6x25
x8
6x35
x2
8x78
x2
6x40
x8
6x20
x34
6
x2
8
x8
6
x8
8
x26
10
x2
8
x26
6
x8
8x50/M6
x8
YD2 - Leg Bracket
YN1 YN2 YN3 YN4 YF2 YF11
YE1 YE5 YE12 YG13 YG1 YG2
YD10 YD11 YD12 YL1 YL2 YC3

ASSEMBLY INSTRUCTIONS
STEP 1-4
Step 1:
Assemble the frame by
connecting the 2 Top Beams,
part YB2 (Top Beam Female)
and YB1 (Top Beam Male)
together. Make sure to check
the holes are facing the right
direction and that the open
ends of the swing bracket on
beam YB2 is facing downward.
Step 2:
Secure using the YN2, YL1,
D11 and YG13 nuts and bolts
and tighten with provided allen
key as shown in diagram.
Step 3:
Connect the YD1 (Bracket) to
the end of beam YB2. Secure
using YN1, YL1, YD11 and
YG13 nut and bolt parts in
diagram shown. Then repeat
on other side of beam and
tighten nuts and bolts.
Step 4:
Slide part YBB4 (Upper Leg
Pole) into YD1 Bracket.
Secure using YN2, YL1, YD11
and YG13 nuts and bolts and
tighten with allen key as
shown in diagram. Repeat this
for other three upper leg poles.
Turn the frame over and stand
upright once all 4 upper leg
poles are attached.
Should look like diagram to the
left once complete.
YBB4 x4
YD1 1 x14
YL1 x14
YD1 x2
YB1 x1
YB2 x1
YN1 x4
YN2 x10
YG13 x14
7
Model# 9335MSS

ASSEMBLY INSTRUCTIONS
STEP 5-7
Step 5:
Attach the B211 (Lower
Leg Pole) into B210
Upper Leg Pole. Repeat
on all 4 legs.
Step 6:
Locate part B5 (Cross
Beam) and attach the
green end caps. Next
attach the B5 Cross
Beam to the B211 Upper
Leg Poles using E12, L2,
D10 and G13 nuts and
bolts. Secure with allen
key and repeat on other
side.
Step 7:
Locate Part C40 (Swing)
Connect the D3 (Swing
Hook) through the swing
bracket. Slide the hook
through the double holes
on the top frame as
shown in diagram with
hook facing down. Attach
the G2 washer and bolt
cap and tighten with
wrench provided. Repeat
for other swing strap and
then the entire other
swing. End results should
look like diagram shown.
*Note: you can adjust the
height of the swings
accordingly with built in
adjustable clamp.
YL2 x4
YB211 x4
YBB5 x2
YG13 x4
YE12 x4
YD10 x4
YC40 x2
YD3 x4
YG2 x4
8

MODEL#9335MSS 9
ASSEMBLY INSTRUCTIONS
STEP 8-10
Step 8: Assembling the
Seesaw
Attach part C3 nylon washers
into the holes of the top of B19
(Upper Seesaw Pole) and
place the D12 metal washer
onto one side. Slide the B19
upper pole into the bracket and
attach with the F2 bolt and
washer and G2 parts as shown.
Tighten the G2 nut until the
inner spacing is about 1.25
inches apart. Repeat for other
pole.
Step 9:
Insert B20 (Lower Seesaw
Pole) into previously secured
B19 upper pole. Align the holes
and secure using N4, D11, L1
and G13 nuts and bolts as
shown in diagram. Secure and
tighten with allen key. Repeat
this for the other lower pole.
Step 10:
Locate part B22 (Seat Beam)
and E5, G2 and C3 Parts and
attach to into the holes of the
B22 Seat Beam. Start by
inserting E5 Bolt with C3 nylon
washer then add another C3
nylon washer before adding the
second B22 Beam. Secure the
other B22 beam with parts G2
washer and nut and tighten.
Repeat this step on the other
pole. Tighten screws securely
with allen key and wrench.
*Be careful not to overtighten
YD11 x4
YG2 x4
YF2 x2
YD12 x2
YC3 x8
YG13 x4
YL1 x4
YB19 x2
YB20 x2
YB22 x2
YN4 x4
YE5 x2

ASSEMBLY INSTRUCTIONS
STEP 11-12
Step 11:
Place the C50 (Seesaw Seat)
on top of the beams and
secure with Parts F11, D11, L1
and G13 like diagram shown.
Each seat has 4 sets and
need to be tightened with allen
key
Step 12:
Slide the C51 (Green Stem
Cover) and C52 (Foot Rest)
over the B20 Beam. Secure
with Nut, washer and bolt parts
G1 and E1. Repeat on other
B20 pole so each has a stem
cover and foot rest tightened
securely.
YD11 x8
YL1 x8
YF11 x8
YC50 x2
YG13 x8
YC51 x2
YC52 x2
YG1 x2
YE1 x2
10

MODEL#9335MSS 11
ASSEMBLY INSTRUCTIONS
STEP 13-15
Step 13:
We recommend setting this
playground set in concrete
for safety and security
purposes. Locate and mark
the position for the legs.
Check the dimensions
shown on diagram on page
9. Dig square holes of
14x14x14 inches deep and
wide and fill with quick set
concrete. (Not Included)
The top of the concrete
should not exceed ground
level.
Step 14:
While concrete is wet.
Insert the Hook end of the
supplied (D2) Leg Bracket
into the concrete. Make
sure it is positioned
properly with just the hole
about 2 inches above the
surface to bolt to playset
before drying.
Step 15:
Allow concrete to dry for 24
hours, then attach each D2
Leg Bracket to the leg
poles with E12, D10, L2,
D2 and G13 bolts and nuts
like diagram shown.
*Note: Ensure the concrete
is completely dry before
using the swing set. Cover
the concrete with soil. We
strongly advise checking
the anchoring periodically.
YL2 x4
YD10 x4
YE12 x4
YD2 x4
YG13 x4

12
Dimensions
ASSEMBLY INSTRUCTIONS
Warning: Maximum fall height is 71" (180 cm)

MODEL#9335MSS 13
FREQUENTLY ASKED QUESTIONS
Question: “How should I clean my
swings and seesaw?”
Answer: you should clean the
product with a solution of warm
water and Non- Corrosive/Abrasive
soap. Dampen a rag with this
solution and wipe completely dry
before using.
Question: “A seat seems loose,
what should I do?”
Answer: Make sure the Bolts/Nuts
under the plastic seat are secure.
CARE & MAINTENANCE
•Before each use of this product, inspect the entire assembly
and replace any worn, defective or missing parts.
•The following conditions could represent potential hazards:
Missing, improperly positioned, or insecurely attached seats;
A bent or broken frame; Cracked or broken seats. Cease
using seesaw immediately and secure it against unauthorized
use if any of these conditions are present.
•Regularly check to see if the steel tubes, seats, backrests and
other parts are tightened and completely secure. Replace
worn & damaged parts if found and if necessary, secure from
use until replacement parts can be obtained.
•If the paint is chipped, we recommend you lightly rub the
damaged area and cover using a non-toxic enamel paint.
•High touch surfaces made of plastic or metal, such as grab
bars and railings should be cleaned routinely.
•Do NOT use bleach as it may cause colors to fade.
•Use wet towel or cloth with mild soap and water solution to
wipe down metal parts, seats and handlebar. Dry
Immediately and do not allow children to use until
completely dry.
•To disinfect surfaces - use a 70% / 30% Rubbing Alcohol
to Water mix to clean seat and handlebar surfaces. The
surface must remain visibly wet for at least 4 minutes,
allowing it to dry on its own. After 4 minutes, the surface
may be rinsed thoroughly and wiped dry to eliminate water
marks. This solution will lose its effectiveness in about 24
hours, so a new batch must be made each day.
Question: “Something was missing
from the packaging,” “I need to
purchase a replacement part” or “I
discovered a damaged piece. What
should I do?”
Answer: Contact customer service.
You must have proof of purchase
and/or order confirmation available to
be considered for warranty
replacement. You must report
missing pieces within 30 days of
purchase.
Thank You Coupon!
As a way of saying thank you for purchasing one of our products, here is a 10% OFF coupon for
your next purchase at
www.PureFun.net
Use Code: GQBRANDS10 at Checkout
Cleaning your Playground Equipment
Table of contents
Other Pure Fun Swing Set manuals
Popular Swing Set manuals by other brands

Lifetime
Lifetime BIG STUFF DELUXE Assembly instructions

Backyard Discovery
Backyard Discovery Highlander 6010 owner's manual

Backyard Discovery
Backyard Discovery MONTICELLO 35015 owner's manual

SportsPlay Equipment
SportsPlay Equipment 581-367 instructions

e. Beckmann
e. Beckmann 203331 Assembly instructions

PLAYNETIC
PLAYNETIC KineticSwing user manual

Wayfair
Wayfair PULE1028 Assembly and operation

NI Climbing Frames
NI Climbing Frames Double Mississippi instruction manual

HAMPTON BAY
HAMPTON BAY GSS00224BW Use and care guide

HAGS
HAGS Lillie w Katja installation guide

Big Backyard
Big Backyard F23100 Installation and operating instructions

gartenpirat
gartenpirat Single Kiefer KDI Assembly instruction