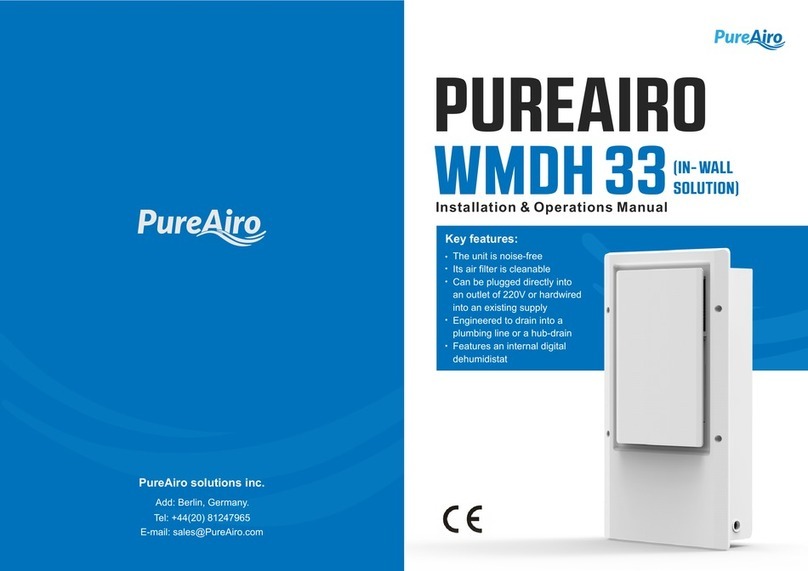
PureAiro ULTRA FAN 10S-S1 User manual

ULTRA FAN 10S-S1 (INTAKE)
ULTRA FAN 10S-S2 (EXHAUST)
PUREAIRO
Installation & Operations Manual
CRAWLSPACE &
BASEMENT VENTILATION FAN


Thank you for choosing PureAiro. We are committed to product quality and
friendly customer service.
If you have any questions or suggestions, please don't
hesitate to contactus.
EMAIL WEB LOCATION
WELCOME
Visit www.pureairo.com and click contact for our contact information.

MANUAL INDEX
Key Features
Product Contents
Installation Steps
Activating The Fan
Programming
Page 1
Page 1
Page 2
Page 4
Page 5
...............................................................................................
.....................................................................................
.......................................................................................
....................................................................................
.............................................................................................
Warranty Page 11
.........................................................................................................

1
KEY FEATURES
STRUCTURE
PWM MOTOR
It features a fan made of
galvanized stainless steel.
It comes with a low energy
efficient low noise multi-gear
operation DC motor.
FAN
SYSTEM(X1)
THERMAL
PROBE(X1)
POWER
ADAPTER(X1) ANCHORS(X4)
WALL MACHINE
SCREWS(X4)
BALL BEARINGS
The unit comes with two ball
bearings that don’t age fast.
Thus, it guarantees a long
service with a life span of
more than 65,000 hours.
PRODUCT CONTENTS

2
INSTALLATION STEPS
Start by removing the fitted grilles and vents.
Install the fan using the cover on the vent.
Consider the direction of airflow when
installing the fan. It should be installed above
the vent.
STEP 1
STEP 2

3
INSTALLATION STEPS
STEP 4 (Mounting It On The Wall Surface)
STEP 3 (Base Brick)
VentirPro-S1/S2 Illustration shown above.
The device should be installed on a block or
a base brick. You will need to utilize
mounting holes in all the four corners of the
mounting panel. Use a drill bit to drill whole 5
/16 inches and install the anchor on the wall
and use screwdrivers to fix the unit to the
wall.
If you will be mounting the unit on the cabinet
wall edge, mesh with wood head or grill, you
will need to use a machine to determine its
location.

4
ACTIVATING THE FAN
Set the desired humidity and temperature.
You should then insert the humidity probe
and the temperature into one of the ports as
specified.
Connect it to power by inserting the power
adapter in the socket.
STEP 1
STEP 2

5
PROGRAMMING
23
6
9
7
54
1
10
11
8
(VentirPro-S1/VentirPro-S2 Screen Display)
The area displays the
controller alerts, loop mode,
screen lock.
7.THE ICON
3.LEAF-SHAPED BUTTON
Press the button to exit thec
urrent interface and return t
o the"HOME"interface,
then press the button to
turn it off.
Adjust the setting mode using
the up and down button. Press
the up button to increase and
the down button to decrease.
2.SELECT USING THE UP
AND DOWN BUTTON
You have the ALARM, HUMID
SETTING, TIMER, TEMP,
SPEED, HOME to choose from.
1.CHOOSE THE BUTTON
FROM THE SETTING MENU
It displays the humidity of
the air as detected by the
detector. It should give the
humidity % when no probe
is inserted.
4.DETECT HUMIDITY
Select the loop through the
modules to help display the
current mode of the
controller.
6.THE CONTROLLER MODE
9.TEMPERATURE SETTING
DISPLAY
Displays the temperature
detected. If no probe is
inserted, it will display the
temperature in °C or °F.
5.DETECT TEMPERATURE
It displays the current speed
of the fan.
8.SPEED
10.HUMIDITY SETTING
AND DISPLAY
11.DISPLAY TIME SETTING
The area displays the high
and the low temperatures if
any temperature is not
selected.
The area displays both the
high and the low humidity if
the % humidity is not set.
It displays the time the fan has
been running and the time the
fan was on standby.

6
PROGRAMMING
CHOOSE THE BUTTON FROM THE
SETTING MENU
Select button the ALARM, SETTING, HUMID,
TEMP, TIMER, SPEED, OFF, HOME.
HOME
It allows the fan to operate according to the
setting selected in the other menus.
OFF
When the fan is in this menu, it stops working
irrespective of the humidity or the timer is chosen.
SPEED
To set it in this menu, all you need to do is to choose
the speed at which the fan will operate.

7
PROGRAMMING
TIMER
When in this menu, the first thing you need to do is
to enter the working options. You should then
press the up or down button to set the fan’s
running time. Ensure to turn off the timer when
setting it to the “--: --” position.
Press the menu when you want to set it to
STANDBY. Scroll up/down to set it in the standby
state. When you select the“--: --”setting, the timer
will be OFF.
TEMP
While in this menu, you should go to the high-
temperature option. Scroll up and down to set your
high trigger temperatures. If the probe detects
temperatures above those that have been set, it
activates the fan. It will increase the speed slowly
until it reaches the desired speed. When the
temperature falls below the set low, the speed of
the fan reduces. It will continue reducing until it
stops.
Press the menu to escape from the low-temperature option. You can then scroll up or down and set
your low-temperature trigger. If the temperature measured by the trigger is lower, it activates the fan
to start running. It does so until it reaches the desired set speed. Also, when the measured temperature
increases more than the set low temperature, it makes the speed to reduce. It will continue to reduce
until the fan stops running.
Press the menu key once again to activate it. If no operation is chosen in 10 seconds, it returns to NO
HOME page. The fan will then run as per the settings selected previously. Press up/down to the chosen
percentage. It will turn off the existing functions.
When it is in STANDBY or WORKING, the fan gets into the cycle mode.
Press the menu once again to bring it up. If nothing happens to it in 10 seconds it returns to
HOME page. This will make the fan to run according to the earlier specified settings.

8
PROGRAMMING
HUMID
The menu allows you to go to high humidity
option. You will need to press up/down so that
you select the high humidity trigger. If the probe
measures a humidity option that is above the set
option, it triggers the fan to start running. The
fan’s speed increases slowly until the set speed
is attained. If the measured humidity is lower than
the set speed, the fan’s speed starts declining. It
will reduce until the fan stops running.
Once more, press the menu key and skip the low wet option. Scroll up or down to set your
selected low trigger.
If the humidity measured by the probe is low, the fan starts running. It slowly gathers speed
until the set humidity is attained. When the measured humidity is higher than the set low
humidity, the speed of the fan will slow down. It will continue to slow down until the fan
stops.
Press the menu key once again to activate it. If nothing happens to it in 10 seconds it returns
to the HOME page. While in this mode, the fan runs according to the previously selected
settings.
SETTING
While in this menu, you can scroll up and down to
make the screen bright. You can also scroll up and
down and chose to convert °F to °C.

9
PROGRAMMING
ALARM
THE CONTROLLER LOCK
While in the HOME, press the menu button and up button for at least 5 seconds to make the fan to
enter the lock mode. You will need to long-press the button and up button once again to release the
lock mode. It will also hide the lock icon. Note that at this point, you cannot change the parameters by
pressing any other key. But the lock enters the standby mode if it lasts for more than 3 minutes. The
screen will shut itself but the fan will continue operating at the background. It will operate as per the
previous settings.
While in this mode, the first thing you need to do is
to get into the humidity option. You will do this by
scrolling up and down to select a high-temperature
trigger.
Press the menu key once again to move you to the low-temperature option. You will then scroll up or
down to enable you to choose the low-temperature trigger. If the values of the humidity or temperature
fall below the trigger point, the fan ignores the settings. Thus, it triggers the alarm. Turning to the
10th gear.
Press the menu key again to activate it. If you don’t issue commands within 10 seconds, it returns to
the HOME page. While in this mode, the fan runs according to the earlier specified settings.
Press the second menu key to move to the high-
temperature option. Scroll up and down and select
your high-temperature trigger.
To skip the low wet option, press the menu key
and press the up/down to enable you to set the low
wet trigger.

10
PROGRAMMING
WARNING ICON
The alarm icon will flash when
the controller wants to inform
you that a pending alarm is
about to be triggered.
Display lock alarm
The icon will be displayed if the screen is locked. If the icon is in the sleep
mode and it gets pressed it will make the screen to flicker. But when you
exit the lock mode, the icon disappears.
Humidity Alarm icon
It beeps or flashes when the low or the high alarm is triggered. To turn off
the sound, it will require that you press any key.
Temperature alarm icon
It flashes when the lowest or the highest temperature is triggered. To turn
the buzz or the sound off, it requires you to press any key.
2,1 Icon of host
The icon lights up when it is inserted. It corresponds to 2 interfaces.
Loop icon
It is a standby icon that will be displayed on the home page when enabled.
It is normally set up in the TEMP.

11
WARRANTY
It is our commitment that PureAiro sells its products free from any manufacturing defects for two
years. The period starts from the date you make the purchase. However, if defects are found in
the workmanship or the material used to make the product, PureAiro will take appropriate steps as
stipulated in this warranty to resolve the issue. The warranty applies to products purchased, sold
or received from PureAiro authorized dealers. The warranty covers products that have malfunctioned
or become defective. The plan takes effect from the date it was purchased. It expires two years
from the date it was purchased. If the product becomes defective during this period, you will get a
full refund. Alternatively, PureAiro may choose to replace the product. However, the warranty does
not cover misuse or abuse of the product. Misuse and abuse includes physical damage to the
product and immersing it into water. It also includes incorrect installation, incorrect voltage input
and deploying it to any other purpose other than what it is intended. PureAiro will not be responsible
for collateral or indirect loss caused by the product. Also, we do not offer any guarantee of
damage caused to the property by the normal wear and tear. Such damage includes scratches or
normal wear and tear. For detail about our distributors or dealers contact our customer service
[email protected]. Our working time is 8:00 am until 5:00 pm monday to friday PST.
If you are not 100% satisfied with this product, we will be happy to replace
it or issue you a full refund. Please contact us!
OUR
This manual suits for next models
1
Table of contents
Other PureAiro Fan manuals
Popular Fan manuals by other brands

Swegon
Swegon PELICAN Ceiling quick start guide

Delta Electronics
Delta Electronics Exhaust Fan AFB Series specification

Middle Atlantic Products
Middle Atlantic Products Essex FANPNL-2DC instruction sheet

Midea
Midea FS40-18ARC Service manual

Argo
Argo IPNO operating instructions

Casablanca
Casablanca Heathridge 55051 owner's manual