Puro Helo F1 Series User manual

POWERED BY VIOLET DEFENSE®TECHNOLOGY
FOR MORE INFORMATION VISIT PUROLIGHTING.COM
UV
UV
10'
UV
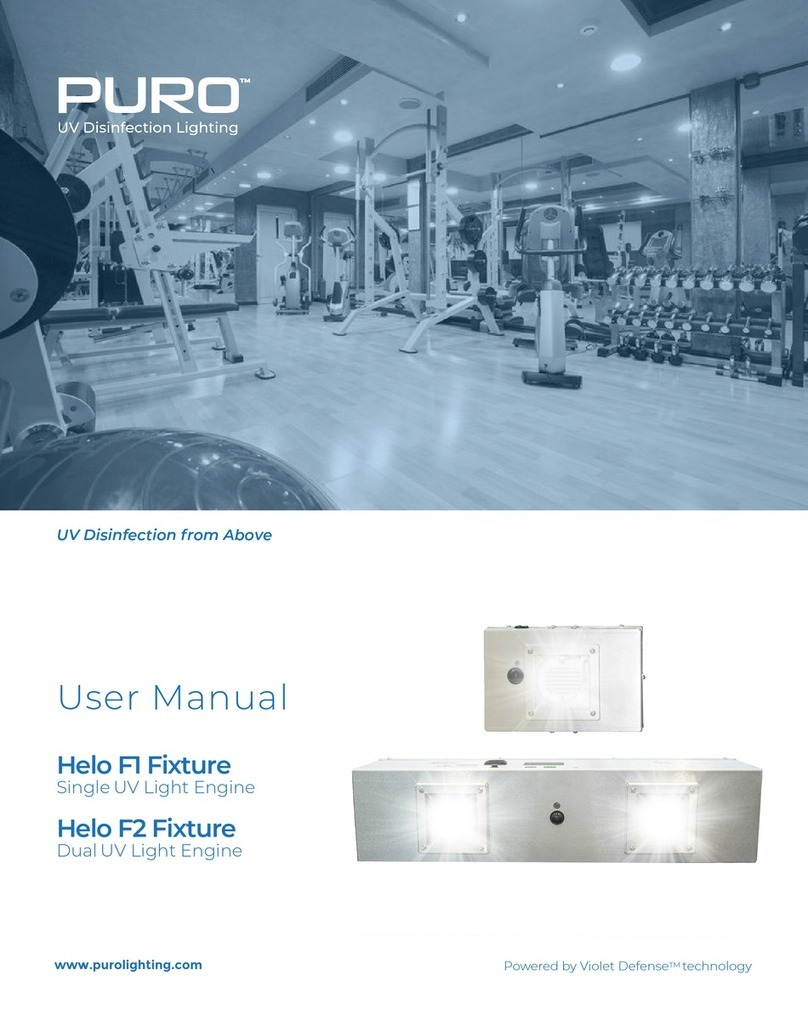
Helo F1 & F2 UV DISINFECTION FROM ABOVE
These compact units with Single or Dual UV Light Engines can be ordered for scheduled
commissioning or integration into the facility Building Automation System (BAS).
Scheduled commissioning can be done by a PURO Lighting representative using a Setup
Wizard. Units integrated into BACnet are programmed through the BAS dashboard.
User Manual

24"
5.75"
5.125"
2 OF 14
WHICH PRODUCTS ARE COVERED BY THIS USER MANUAL
Helo F1 & F2 User Manual
Helo F1
Single UV Light Engine
The Helo F1 is a UV disinfection fixture with a single UV Light Engine. It can be installed in configurations for
drop-in ceilings, recessed hard ceilings, or wall/surface mount and portable/tabletop use. All variants operate
identically and have a 10' x 10' coverage area. This document will refer to this family as Helo F1.
This fixture can be integrated with a Building Automation System through BACnet or manually commissioned.
Other ordering configurations include:
• Helo F1 for wall mount, surface mount or portable/table top use
• Helo F1 with a 12"x12" flange for recessed hard ceiling installations
• Helo F1 with a 24"x24" flange for drop-in grid ceilings
Helo F2 Fixture
Dual UV Light Engines
The Helo F2 is a UV disinfection fixture with dual UV Light Engines. It can be installed in ceilings,
suspended as a pendant, or wall mounted and has a 12' x 12' coverage area.
Like the Helo F1, this fixture can be integrated with a Building Automation System through
BACnet or manually commissioned.
12"
12"
12"
.6"
23.8"
23.8"
23.8"
1.00"
8.6"
5.6"
2.9"
12"
12"
12"
.6"
23.8"
23.8"
23.8"
1.00"
8.6"
5.6"
2.9"

3 OF 14
SAFETY WARNINGS
WARNING: TO REDUCE THE RISK OF FIRE OR ELECTRIC SHOCK,
DO NOT EXPOSE THIS UNIT TO RAIN OR MOISTURE.
CAUTION: TO REDUCE THE RISK OF ELECTRIC SHOCK, DO NOT REMOVE COVER. NO
USER-SEVICEABLE PARTS INSIDE. REFER SERVICING TO QUALIFIED SERVICE PERSONNEL.
The lightning flash with arrowhead symbol, within an equilateral triangle is intended to alert the user
to the presence of uninsulated “dangerous voltage” within the product’s enclosure that may be of
sufficient magnitude to constitute a risk of electric shock to persons.
This device complies with Part 15 of the FCC Rules. Operation is subject to the following two conditions:
(1) this device may not cause harmful interference, and (2) this device must accept any interference
received, including interference that may cause undesired operation.
NOTE: This equipment has been tested and found to comply with the limits for a Class A digital device,
pursuant to part 15 of the FCC Rules. These limits are designed to provide reasonable protection against
harmful interference when the equipment is operated in a commercial environment. This equipment
generates, uses, and can radiate radio frequency energy and, if not installed and used in accordance
with the instruction manual, may cause harmful interference to radio communications. Operation of
this equipment in a residential area is likely to cause harmful interference in which case the user will be
required to correct the interference at his own expense.
IMPORTANT SAFETY NOTES
Read these instructions prior to operating the fixture. Keep and follow all instructions.
• Heed all warnings. Failure to use the equipment in the manner specified may impair the fixture from
providing the desired protection.
• Plug unit into a grounded outlet. Ensure proper conditions for operation. The unit is designed to operate
under normal conditions indoors (temperature 5-40 degrees Celsius, RH less than 80% (non-condensing),
at an altitude <2000m and main supply fluctuations +/- 10% of nominal voltage, over voltage Category II.
• Allow unit to complete pre-programmed cycles prior to unplugging or shutting off power. This
allows it to enter safe mode.
• Do not allow the unit to get wet or use in or near water.
• Do not block any ventilation openings. Use in accordance with these instructions.
• Do not attempt to open or tamper with the unit.
• Do not place or store the unit near any flammable materials or liquids.
• Do not defeat the safety purpose of the polarized or grounding-type plug. A polarized plug has two
blades and a third grounding prong. The wide blade or the third prong are provided for your safety. If the
provided plug does not fit into your outlet, consult an electrician for replacement of the obsolete outlet.
• Protect the power cord from being walked on or pinched particularly at plugs, convenience
receptacles, and the point where they exit from the unit.
• Unplug this unit during lightning storms or when unused for long periods of time.
• Refer all servicing to the manufacturer if there is any damage to the unit or it is not operating correctly.
• The fixture is designed to operate only when the room is unoccupied. There are redundant safety
systems to ensure the unit does not activate while the room is occupied as the UV light is not
recommended for excessive exposure. If the sensor in the system fails, the system will shut down.
• Do not look directly at the unit due to the brightness of the light. UV light does not significantly
penetrate standard glass, therefore, incidental exposure on the other side of a window or wall does
not present any significant risk.
• KEEP AWAY FROM CHILDREN
Helo F1 & F2 User Manual

UV SAFETY OVERVIEW
Given the correct combination of user protocols and the built-in safety features of the unit, there are
minimal risks of any harmful effects from using the Helo fixtures.
Recommendations
If in the vicinity of the Helo fixtures during operation, do not look directly at the light. This is similar to how
one would avoid harmful effects from the sun by not looking directly at it.
• Germicidal UV light does not significantly penetrate standard glass.
• Per the built-in safety features described below, the unit is designed to not operate while a room is
occupied. However, operators are instructed in the user manual to have all persons vacate a space
before operation. Further optional protocols, such as signage indicating the UV unit is in operation
may be desired.
Safety Features
The Helo fixtures have four primary aspects to their built-in safety features to ensure the safety of anyone
operating or in the vicinity of a unit.
Limited Exposure Risk
Due to the nature of the programming on the Helo fixtures, over a 30-minute cycle time for the fixture, the
actual exposure to UV (if there were no other safety systems in place) would be no more than two seconds
of exposure.
Redundant Safety Systems
Each Helo fixture has a built-in passive infrared (PIR) sensor used to detect motion in a space. The sensor is
programmed to detect individuals walking into the deployment space. The unit will not resume operation
of the cleaning cycle until it has successfully detected the space is free of motion.
Safe Stop
The third layer of protection built into the Helo fixtures is to ensure that if the motion sensor or other
components experience technical issues, the unit will safe stop by cycling the unit off. The unit will flash red
indicating that one should contact PURO Lighting for technical support. The unit will not resume operation
until the issue detected has been resolved. If unit is non-responsive (i.e. non-operational or no indicator
light), contact PURO Lighting for technical support.
Frequency of Flashes
The Helo fixtures will flash every 6 seconds during operation. Violet Defense, PURO Lighting’s technology
partner, collaborated with the Epilepsy Foundation when designing the product to ensure that the
frequency of flashes will not cause any issues for someone with photosensitive epilepsy.
Disclaimer: The Helo fixtures are not intended for use as a medical device and people should not be directly
exposed to the light generated by the unit. The actual disinfection rates on a specific space will vary.
4 OF 14
Helo F1 & F2 User Manual

GOVERNMENTAL GUIDELINES FOR UV LIGHT SAFETY
Occupational Safety and Health Administration (OSHA)
The Occupational Safety and Health Administration (OSHA) does not have any mandated exposure limits
to ultraviolet light. OSHA only provides technical guidance regarding protecting employees from ultraviolet
laser exposure. While general information about ultraviolet contained in that guidance is described below,
it is important to note that PURO Lighting does not currently deploy ultraviolet lasers. For more information
on OSHA’s guidelines, visit: https://www.osha.gov/laws-regs/standardinterpretations/2003-02-26.
Ultraviolet radiation is divided into three regions: UV-A: 315-400 nanometers (nm), UV-B: 280-315 nm,
and UV-C: 200-280 nm. UV can be associated with adverse health effects due to prolonged exposure and
the wavelength of light.
According to OSHA’s guidelines, “exposure in the shorter UV-C and longer UV-A ranges seems less
harmful to human skin. The shorter wavelengths are absorbed in the outer dead layers of the epidermis
and the longer wavelengths have an initial pigment-darkening effect followed by erythema if there is
exposure to excessive levels.”
“The hazards associated with skin exposure are of less importance than eye hazards.” Exposure to light
may cause photokeratitis or cataracts.
National Institute for Occupational Safety and Health (NIOSH)
The National Institute for Occupational Safety and Health (NIOSH) recommends limits to exposure
determined by the wavelength of UV light and intensity. NIOSH recommends that the time of
exposure to an intensity of 100 microwatts per square centimeter at wavelength 254 nm not exceed
1 minute. Per the programming, UV exposure from Helo fixtures for a 30-minute cycle is less
than two seconds. For more information, view the recommended standards from NIOSH at:
https://www.cdc.gov/niosh/docs/73-11009/pdf/73-11009A.pdf.
Environmental Protection Agency (EPA)
The Environmental Protection Agency (EPA) is the governmental agency responsible for regulating
ultraviolet light products. It regulates chemical disinfectants along with devices, such as equipment
that generates UV light, used to control pests like bacteria and making antimicrobial claims. For more
information about EPA guidelines, visit:
https://www.epa.gov/safepestcontrol/pesticide-devices-guide-consumers.
Food and Drug Administration (FDA)
The Food and Drug Administration (FDA) only regulates devices that are classified as medical
instruments, machines, and devices used to treat diagnosed medical conditions. Therefore, PURO
Lighting does not fall under FDA guidelines.
5 OF 14
Helo F1 & F2 User Manual

COMMISSIONED HELO FIXTURES
Commissioning
Helo fixtures come pre-commissioned but if commissioning adjustments are needed in the future, please
contact your PURO Lighting representative for assistance.
OPERATIONAL MODES FOR COMMISSIONED FIXTURES
Fixtures ordered for commissioning have three primary modes available to users. Fixtures must be
programmed before initial use.
Autonomous Mode: In this mode, once plugged in, the fixtures will automatically activate once the space is
unoccupied and continue disinfection on a regular schedule, adjusting frequency based on level of activity
in the space based on the motion sensor. Users may select the timeout time, which determines how long
the fixture will wait until resuming operation after motion is detected.
Scheduled Mode: In this mode, the fixture will activate at the selected time(s) of day during each 24-hour
period. Users may schedule up to 8 start times each day to operate for a specified run time (i.e. 30, 60, 90,
or 120 minutes). Users may select the motion timeout, which determines how long the fixture will wait
until resuming operation after motion is detected. The fixture may also be configured to activate a disin-
fection cycle immediately when it is powered and then continue with the scheduled operational time(s).
Single Cycle Mode: In this method, users will manually activate the fixture to start a disinfection cycle. The
fixture will then run its pre-programmed cycle (i.e. 10, 15, 20, 25 or 30 minutes) one time before entering
safe mode until power is cycled on and off again. Users may select the timeout time, which determines
how long the fixture will wait until resuming operation after motion is detected.
GENERAL OPERATION OF COMMISSIONED HELO FIXTURES
1. The PURO Lighting Helo F1 and F2 fixtures are designed to be installed approximately 2 meters (~6 1/2
feet) away from priority areas. See page 12 for additional information on installation methods. Helo fixtures
have been tested to kill E. coli, S. enterica, and S. auereus at distances of up to 4 meters (~13 feet) away, but
the length of time necessary to run the fixture increases proportionately to the distance from targeted
area. Reflective surfaces, including standard glass, will enhance the effectiveness of the fixture as the UV
light will reflect off of these surfaces.
2. The fixtures operate at 120V AC at 60 Hz. Once powered on, the fixtures will draw up to peak current for 4
second intervals (3.5 amps for Helo F1 and 7 amps for Helo F2). Ensure the breaker has available amperage
during operation.
3. The space should be unoccupied during cleaning cycles. Exit the space within 60 seconds for optimal
functioning of the fixture.
4. The fixtures’ redundant safety systems will stop the fixture from operating if motion is detected in the
space. The fixtures will resume operation approximately 60 seconds (unless alternate motion timeout was
selected) after room is unoccupied and no additional motion is detected.
5. The fixtures will run a safety test to ensure proper functioning and that there is no motion detected in
the space. If successful, fixtures will run their pre-programmed operational cycle. See guidelines for more
information on operational modes.
6. Allow the fixtures to complete its entire cycle before unplugging or turning off power to the fixture. This
allows the fixtures to enter safe mode. If necessary to cease operation prior to completion of cleaning cycle,
be sure to keep fixture away from water for optimal safety.
*It is recommended that after every 30-minute run that you allow the unit to cool down for a 15-minute
period of time, in order to maximize the life expectancy of your PURO Lighting Helo Fixture.
6 OF 14
Helo F1 & F2 User Manual

BACNET INTEGRATED HELO FIXTURES
With the building automation system integration capabilities of the Helo fixtures, users have the ability to
adjust the following:
• Operational Modes & Settings: Select operating modes, including type of disinfection cycle and related
selections, such as start time, run time, and motion timeout length, which indicates how long the
fixture will wait to attempt re-activation after motion has been detected
• System Monitoring: Monitor current status of fixtures remotely and troubleshoot operating
• Network Settings: Configure network settings and/or troubleshoot any networking issues
• Metrics: Access data on the fixtures, including number of successful cleaning cycles and runtime
over specified period of time or lifetime of fixture
Helo fixtures integrated to BACnet for Building Automation Systems have 5 operating modes available
to users that may be enabled and/or adjusted from your building automation control system (see pages
8-9 for additional information).
• AI Mode: The fixture will automatically activate once the space is unoccupied and continue
disinfection on a regular schedule, adjusting frequency based on level of activity in the space
based on the motion sensor.
• Manual Mode: User will manually activate the fixture to start a disinfection cycle. The fixture will then
run its pre-programmed cycle length one time before entering safe mode until power is cycled on
and off again.
• Overnight Mode: The fixture will activate a 30-minute disinfection cycle, turn off for 30 minutes,
and then activate a second 30-minute disinfection cycle.
• Four Hour Mode: The fixture will run alternating 1-hour cycles of 2 minutes of cleaning, 8-minute
breaks, followed by 30-minute break over the course of 4 hours. The cumulative cleaning time will
be 36 minutes, but is intended to extend the life of the product.
• BMS Mode: The fixture will operate disinfection cycles similar to that of manual mode. However,
the fixture will have to be activated from within your building automation system software.
NOTE: By default, this mode will have safety features deactivated, however the safety feature can be
enabled in BACnet.
*Modes and settings are subject to change. Please contact the team at PURO Lighting if you have any questions.
Helo F1 & F2 User Manual
7 OF 14

OPERATIONAL MODES AND SETTINGS
SYSTEM MONITORING
Helo F1 & F2 User Manual
BACnet Variable
Operating Mode CMD
Cleaning Internal Runtime STPT
Motion Timeout STPT
Enable Cleaning CMD
Enable Safeties CMD
Cleaning Schedule
Reboot Device CNFG
RTC Daylight Saving Rule CNFG
RTC Time Zone
BACnet Variable
Real-Time Clean STS
Motion Detected STS
UV Cleaning STS
Description
Set operating mode for the fixture.
See descriptions on page 6.
Set the amount of time (in
minutes) the fixture cleans for in
manual mode.
Sets the number of seconds for
which the fixture will pause when
it detects motion.
Manually turn the fixture on/off.
When safeties are enabled,
fixture pauses cleaning when
PIR detects motion.
Fixture will start cleaning on any
schedules set here. Synchronization
of BACnet time with on-board
clock is recommended. The
schedule will repeat each week
on the specified day and time.
Reboots device
If this field is blank, automatic
daylight saving time changes
are disabled. To enable DST, you
must set rules for the start and
end dates using specific
grammar.
This user-defined string has no
functional impact on the unit,
but is intended to be used as a
note describing which time zone
the unit is in.
Description
Indication of fixture’s cleaning
cycle status
Indication of status of PIR sensor
Indication of fixture’s current
operational status
Options
AI; Manual; Overnight;
Four Hour; BMS
Range 10 minutes to 120 minutes
Range 15 seconds to
1,800 seconds
0 = fixture is off
1 = fixture is on
0 = Safeties are disabled
1 = Safeties are enabled
Each day supports a maximum
of 8 scheduled times.
Options
1= fixture finished a cleaning cycle
0 = fixture has not yet completed
its current cleaning cycle
1 = fixture has detected motion
0 = No motion detected
1 = fixture is running/cleaning
0 = fixture is not cleaning
See “Automatic Daylight Saving
Grammar” section on page 10
User-defined time zone string
8 OF 14

UV Cleaning STS
Self Test STS
RTC Device Time STS
NETWORK SETTINGS
Helo F1 & F2 User Manual
9 OF 14
BACnet Variable
DHCP CNFG
MSTP Baud Rate CNFG
IP Address CNFG
Subnet Mask CNFG
Gateway CNFG
Device MAC Address CNFG
UDP Port CNFG
MSTP MAC Address CNFG
Description
When DHCP is enabled, ethernet
settings are acquired automatically.
If the fixture fails to acquire a
DHCP IP address, it will default
to 192.168.1.5. When disabled,
enter your custom settings via
the IP Address, Subnet Mask, and
Gateway Objects. Then reboot the
device to apply network changes.
Sets all network settings back
to their factory defaults. Sets the
MSTP baud rate back to the
default (38400) and the MSTP
MAC address to the default (55).
If DHCP is disabled, a static IP
address can be set here.
If DHCP is disabled, a static
subnet mask can be set here.
If DHCP is disabled, a static
gateway can be set here.
The ethernet’s MAC address
The UDP port that BACnet uses
Use this to set the MSTP MAC
address. Each device on the net-
work must have a unique MAC
address.
Options
Enabled/Disabled
Supported device baud rates:
9600; 19200; 38400; 57600;
76800; 115200
Default value: 47808
Default value: 55
Remaining time (in seconds)
until the fixture is finished its
current cleaning cycle
Reports any issues with the
fixture that can be detected by
on-board diagnostics
Displays the time currently stored
on the device. Note: Read-only.
Time must be synchronized
using your BACnet client’s time
sync function.
(Year-Month-Day)
(24-Hour:Minute:Second)

10 OF 14
Helo F1 & F2 User Manual
METRICS
BACnet Variable
Successful Cleanings In
Last 24 Hour
Runtime for Past 7 Days
Runtime for Past 30 Days
Total Runtime (Lifetime Hours)
Description
The number of cleaning cycles that were completed in the most
recent 24-hour period
Total run time (in hours) of the fixture over the past 7 days
Total run time (in hours) of the fixture over the past 30 days
Total run time (in hours) of the fixture over the product’s life
AUTOMATIC DAYLIGHT SAVING GRAMMAR
To set the rules associated with daylight savings time, please follow the instructions below.
The rules are case sensitive. The time must be synchronized after changing the rule.
(First/Second/Third/Fourth/Last)(First 3 letters of weekday: Mon/Tue/Wed/Thu/Fri/Sat/Sun)(First 3 letters of
month: Jan/Feb/Mar/Apr/May/Jun/Jul/Aug/Sep/Oct/Nov/Dec)(Hour when time changes in 24-hour format)
A dash (-) separator must be used between the start rule and end rule.
For example, in the United States, DST starts on the Second Sunday of March at 02:00AM and ends on the
First Sunday of November at 02:00AM. The DST rule would therefore be: SecondSunMar02-FirstSunNov02
The DST rule for Germany would be: LastSunMar01-LastSunOct01
SENSOR INDICATORS
Each unit has an indicator light that helps you determine
the status of the unit.
Color of Light
Flashing Green
Solid Green
Solid Red
Flashing Red
Meaning
Unit is ready to begin cleaning when
room becomes unoccupied.
Unit has successfully completed
its cleaning cycle.
Unit was interrupted during the cleaning
cycle. Cleaning will resume when room
becomes unoccupied again during the
programmed times for operation.
One of the safety sensors has detected
an issue. Please see troubleshooting
section for further information.

11 OF 14
Helo F1 & F2 User Manual
GUIDELINES FOR CLEANING THE FIXTURE
• To clean the unit, wipe down the metal plates with stainless steel polish using a microfiber cloth.
• Do not use abrasive cleaners to clean the unit.
For most situations, the general operation instructions can be used to disinfect a room. However, there are
special instructions recommended for blood spills, or when certain organisms, such as C. diff are known or
suspected to be present.
GENERAL DISINFECTION GUIDELINES
1. Complete standard cleaning procedures to remove any visible dirt, grease, or other debris from space.
2. Activate unit per operational instructions on page 6.
3. Upon returning to space, look at indicator light. Solid green light indicates cleaning cycle completed. If
motion was detected prior to observing the indicator light, the indicator light will turn red. If users want to
determine if the unit completed the last cycle, prior to powering off, stand out of range of the motion sensor
for 60 seconds. The light will resume solid green if cycle was completed. Otherwise, it will resume operation.
CLEANING WHEN BLOOD OR BODILY FLUIDS ARE PRESENT
UV light has the ability to penetrate liquid blood, which has not formed a dried crust, or bodily fluids up to a
1/16” thickness as long as there is no tissue or solid material present. Therefore, UV light may be used to help
protect staff before and after traditional cleaning protocols for your facility.
1. Activate the fixture prior to commencing any cleaning procedures. If the blood has already dried, apply
hydrogen peroxide solution prior to running the unit.
2. Utilize normal procedures, including appropriate safety protocols to clean the space, including removal of
blood and bodily fluids.
3. Activate a second cycle of the fixture to target any remaining bacteria and viruses.
CLEANING WHEN C. DIFF IS OF CONCERN
Clostridium difficile (C. diff) is a bacteria that is extremely difficult to kill as it is able to survive in
unfavorable conditions. Furthermore, it is an anaerobic, endosporic organism, which means it can survive
without oxygen and form dormant spores to survive harsh conditions. With the risk of severe illness
associated with C. diff, it is recommended that you use a combination of approaches to reduce the risk of
contracting C. diff in your facility.
1. Utilize your facility’s adopted environmental cleaning and disinfection strategy for dealing with C. diff.
2. Activate the fixture for two consecutive 30-minute cycles at a range of less than one meter for best results,
or up to 2 hours for ceiling mounted units (must have a 30-minute break between two 60-minute cycles).
TROUBLESHOOTING
1. If unit is flashing red, then an issue was detected by the safety sensors. Unplug the unit.
2. Plug the unit back into the wall. Exit the room within 60 seconds.
3. When you return to the room, identify the color of light on the sensor indicator. If unit is green or solid red,
the unit is working properly. If unit is still flashing red, contact PURO Lighting technical support.
4. If unit is non-responsive (i.e. no indicator light showing), please contact PURO Lighting technical support.

INSTALLATION INSTRUCTIONS
Drop Ceiling (Helo F1 with H1-GA-24 flange and Helo F2)
The Helo fixtures can be installed in 24"x24" or 24"x48" grid drop ceiling. The Helo F1 fixture is shipped
with a 24"x24" flange kit when ordering the Helo F1 with a H1-GA-24 flange. The Helo F2 fixture is 24" x 6"
making it easy to cut into a ceiling tile. Ensure there is sufficient plenum space for airflow and fixture
clearance.
To install the Helo F1 with the H1-GA-24 flange*:
You’ll need a ladder, a nut driver, and we recommend safety glasses and gloves.
1. Place the unit face down so the light engine and occupancy sensor fits within the flange cutout.
2. Unscrew the four nuts from the threaded studs.
3. Place the bracket over the end of the unit opposite the power port, and align the holes of the bracket to
fit over the threaded studs.
4. Screw the four nuts back onto the threaded studs.
5. Next, place the fixture into the ceiling grid.
6. Make sure you have your tie wires and outlets ready to support your newly installed PURO
fixture. And please make sure you follow your local electrical code when installing PURO units.
7. Now, attach the supporting tie wires to the flange.
8. Attach the power cable to the unit, and plug the other side into any standard 120V grounded outlet.
*If installing in a 24" x 24" Grid, no cuts are required. If installing in a 24" x 48" Grid, cut the ceiling tile to fit using a box cutter
or appropriate tool.
To install the Helo F2:
You’ll need a ladder, sharp blade, 2-foot t-grid, and we recommend safety glasses and gloves.
1. First, remove a ceiling tile, but be sure to keep the ceiling tile for later.
2. Place the 2-foot piece of t-grid securely into the grid.
3. Measure the size of the space from the vertical portion of the t-grid to the vertical portion of the opposite
end.*
4. Cut the tile you’ve removed with a sharp blade to the dimensions you just measured.
5. Using the included hand screws, attach the L brackets to the holes on the back of unit making sure the
brackets are located on opposite corners.
6. Now, place the Helo F2 unit into the cavity.
7. Thread tie wires through the L bracket and twist-tie the wires around itself a minimum of three times.
8. Attach the power cable to the unit, and plug the other side into any standard 120V grounded outlet.
9. Finally, place the cut tile back into the drop ceiling.
*Whether installing in a 24" x 24" or 24" x 48" grid, measure and mark a 5 3/4" section to fit on the ceiling tile. Use a box cutter
or other appropriate tool to cut off the 5 3/4" section of the tile.
Please refer to our installation videos at www.purolighting.com/safety-and-product-videos/
12 OF 14
Helo F1 & F2 User Manual

INSTALLATION INSTRUCTIONS
Hard Ceiling (Helo F1 with H1-DA-12 flange and Helo F2)
Here are the tools you need for installation: A dry wall saw, nut driver, a Phillips head screwdriver (we
recommend a drill with Phillips tip), and we recommend safety glasses and gloves.
1. Make sure your installation area is free of studs.
2. Use the metal adapter plate as a template to trace the cut-out area where you’ll install your unit.
3. Use a dry wall saw to cut along the lines of the stencil you drew. Then, drill the anchor holes from the
template.
4. Thread all four dry wall anchors through the adapter plate.
5. Now, put the adapter plate in the ceiling, making sure the anchors match up to the holes.
6. Tighten the toggle bolt anchors.
7. Place the unit face down making sure that the light engine and occupancy sensor fits within the flange
cutout.
8. Unscrew the four nuts from the threaded studs.
9. And place the bracket over the end of the unit opposite the power port, aligning the holes of the bracket
to fit over the threaded studs.
10. Screw the four nuts back onto the threaded studs.
11. Plug the cord into the power port and plug the other end into a standard 120V grounded outlet.
12. Finally, using the four screws included, attach the flange to the ceiling adapter plate by simply screwing
them in.
Please refer to our installation videos at www.purolighting.com/safety-and-product-videos/
Wall Mount (Helo F1 and Helo F2)
These are the tools you’ll need to use to install your Helo F1 or F2 units: A ladder, a level, a drill with the drill
bit sized for anchor holes, Phillips head screwdriver, pencil, stud finder to make installation easier, and we
recommend safety glasses and gloves.
The Helo F1 and Helo F2 fixtures are equipped with attach points for a standard 100mmx100mm
VESA wall mount hardware.
1. First, unscrew the mount from the bracket.
2. If you can, mount with a stud finder. Otherwise, use the anchors that are included to attach to the drywall.
Note that you can use a stud finder and use masonry or concrete anchors to mount the bracket, or you can
use the toggle bolt anchors that are included to mount the bracket and fixture to any location along your
wall, wherever there’s a stud cavity.
3. Making sure the bracket is level, use the bracket as a template and mark the four holes on the wall.
4. Drill the holes at the marked positions.
5. Then, put the toggle bolt anchors through the holes of the wall plate.
6. Thread all toggle bolt anchors through the holes.
13 OF 14
Helo F1 & F2 User Manual

INSTALLATION INSTRUCTIONS
14 OF 14
Helo F1 & F2 User Manual
7. Align the wall plate with the toggle bolt anchors to the holes on the wall. Tighten each anchor a little bit
at a time, screwing them in all the way around, making sure you’re level as you go.
8. Now, attach the VESA plate to your PURO unit using the hand screws.
9. Attach the PURO unit to your mounted VESA wall plate, and tighten the set screw on top.
10. Finally, attach the power cable to the unit, and plug the other side into any standard 120V grounded
outlet. (Both Helo F1 and Helo F2)
11. Make sure the wall outlet is on its own circuit so you can turn the power on or off.
Please refer to our installation videos at www.purolighting.com/safety-and-product-videos/
Suspended Pendant (Helo F2)
The Helo F2 fixture can be suspended from the ceiling to an appropriate height using standard lighting
suspension wire. Ensure the ceiling or grid ceiling can support the weight of the Helo fixture.
1. Determine the placement in the room for optimal coverage to suspend the fixture at the desired height.
2. Ensure there is a power drop to connect the fixture. This may include:
• A grounded non-GFI outlet/15 Amp
• A switched outlet
• An outlet with a WiFi or Bluetooth-enabled Smartplug (App required)
• Approved wiring to the fixture from the power panel of the junction box (permit may be required)
3. Attach the Helo fixture to the suspension cables.
4. Turn on power to the device.
Portable/Tabletop Use (Helo F1)
The Helo F1 can also be used as a portable or tabletop disinfecting UV light unit.
1. Determine the placement in the room for optimal coverage and ensure the surface is dry and stable.
2. Plug in the unit into a non-GFI 110V outlet/15Amp.
3. Turn on power to the device.
© Copyright 2020 PURO Lighting. All Rights Reserved. PURO, the PURO logo, Helo and Sentry are trademarks of PURO. All other
trademarks are the property of their respective owners. Specifications are subject to change without notice. This document is for
informational purposes only.
TECHNICAL SUPPORT
Other manuals for Helo F1 Series
1
This manual suits for next models
1
Other Puro Light Fixture manuals
Popular Light Fixture manuals by other brands

C-LOGIC
C-LOGIC 655-MD instruction manual

Future light
Future light dj-scan 260 user manual

Isolite
Isolite RL Series Installation instruction

Cooper Lighting
Cooper Lighting Corelite 2T8 Specifications

Home Accents Holiday
Home Accents Holiday TY732-1614-1 quick start guide

Chauvet
Chauvet DL-LEDW user manual