Owner's manual
© 2017 Quality Hi-Fi Works Audio, S. L. Puerto Serrano, 12. 28045 Madrid. Tel: +34 912794129
email: info@qhwaudio.com
THE BOX - Owner's manual - ver. 1.1 EN – 092017 - Specifications subject to change without prior
notice.
2
Index
This manual has the following sections:
Safety warnings
Welcome
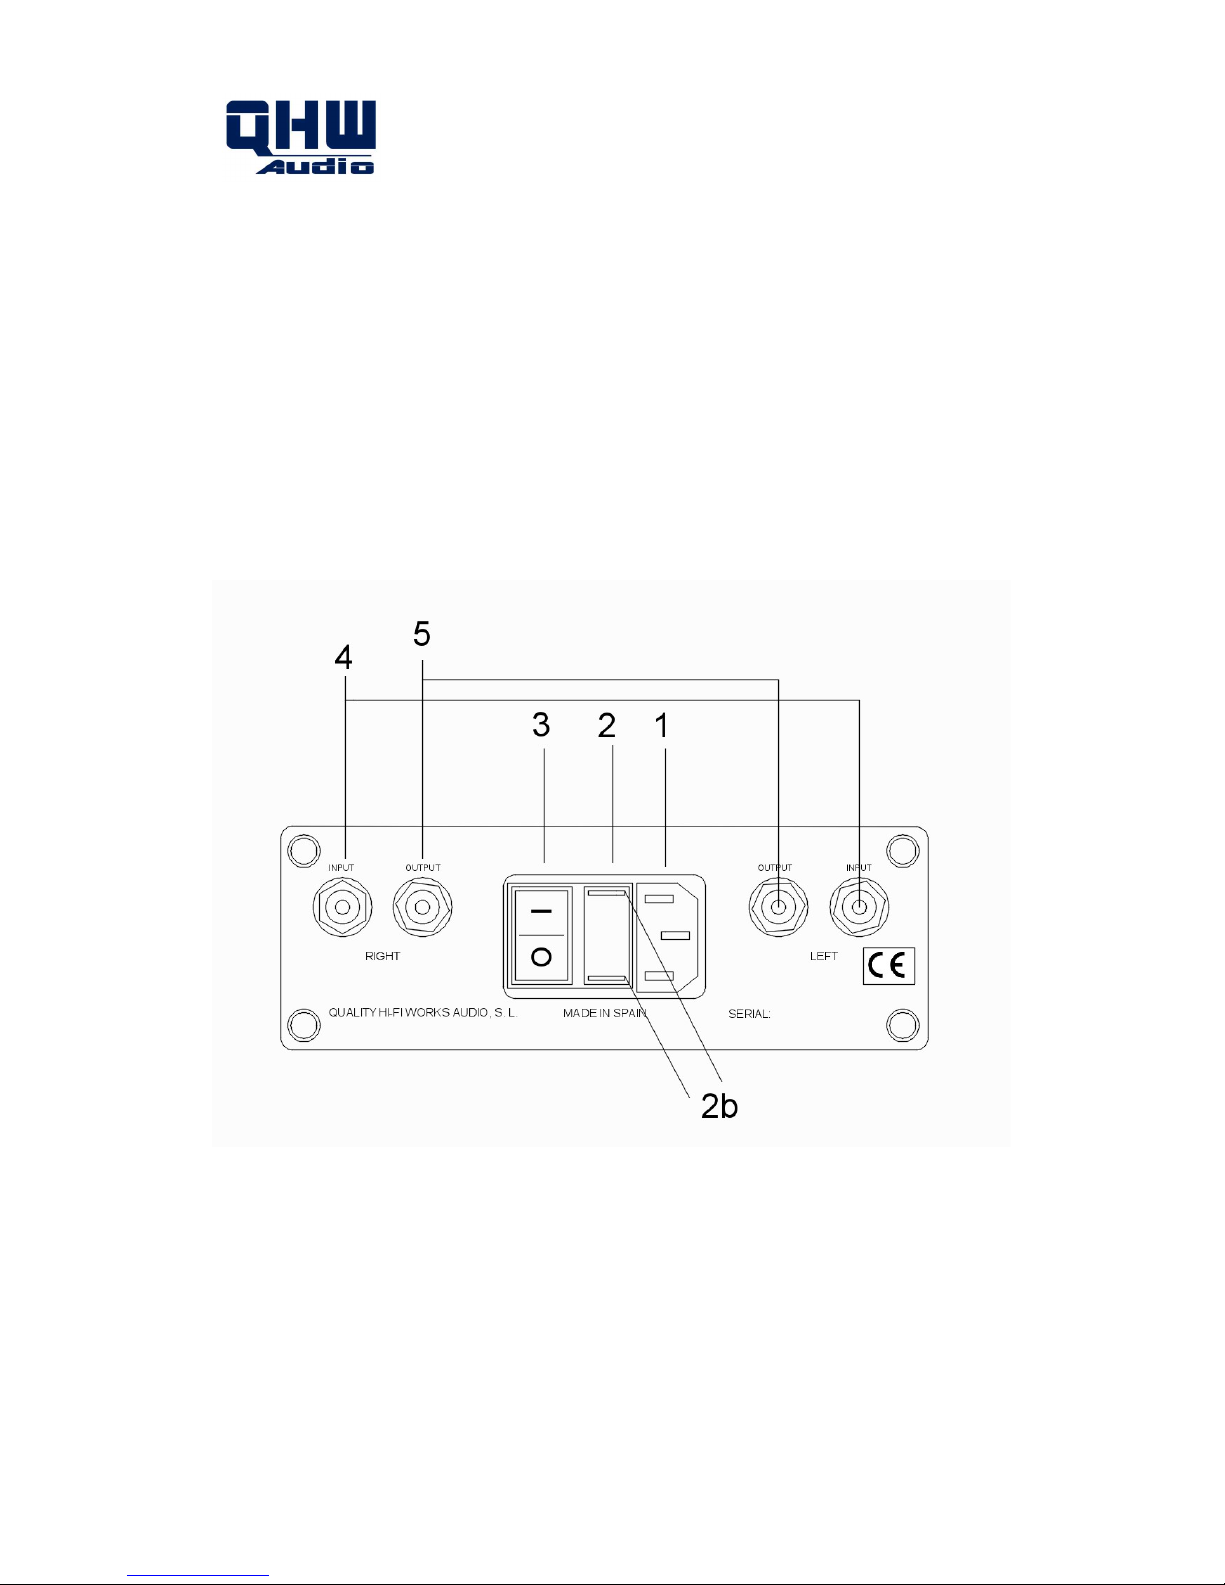
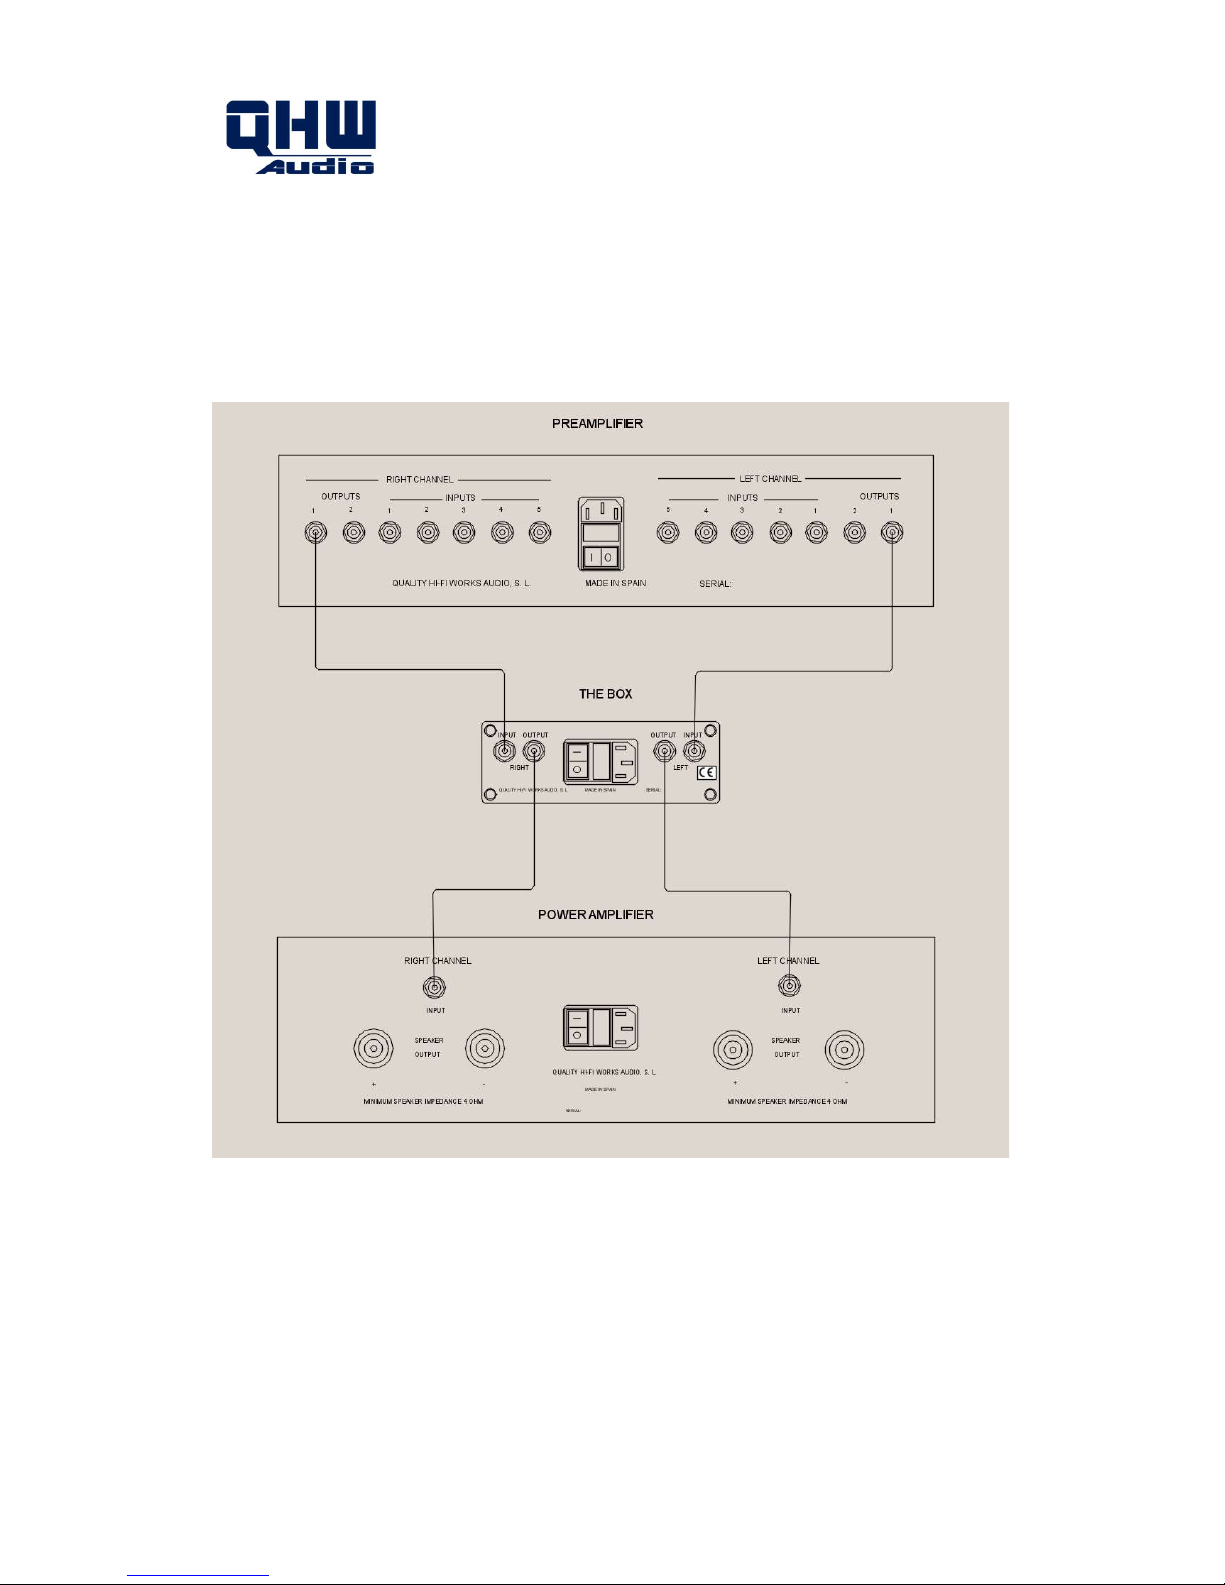
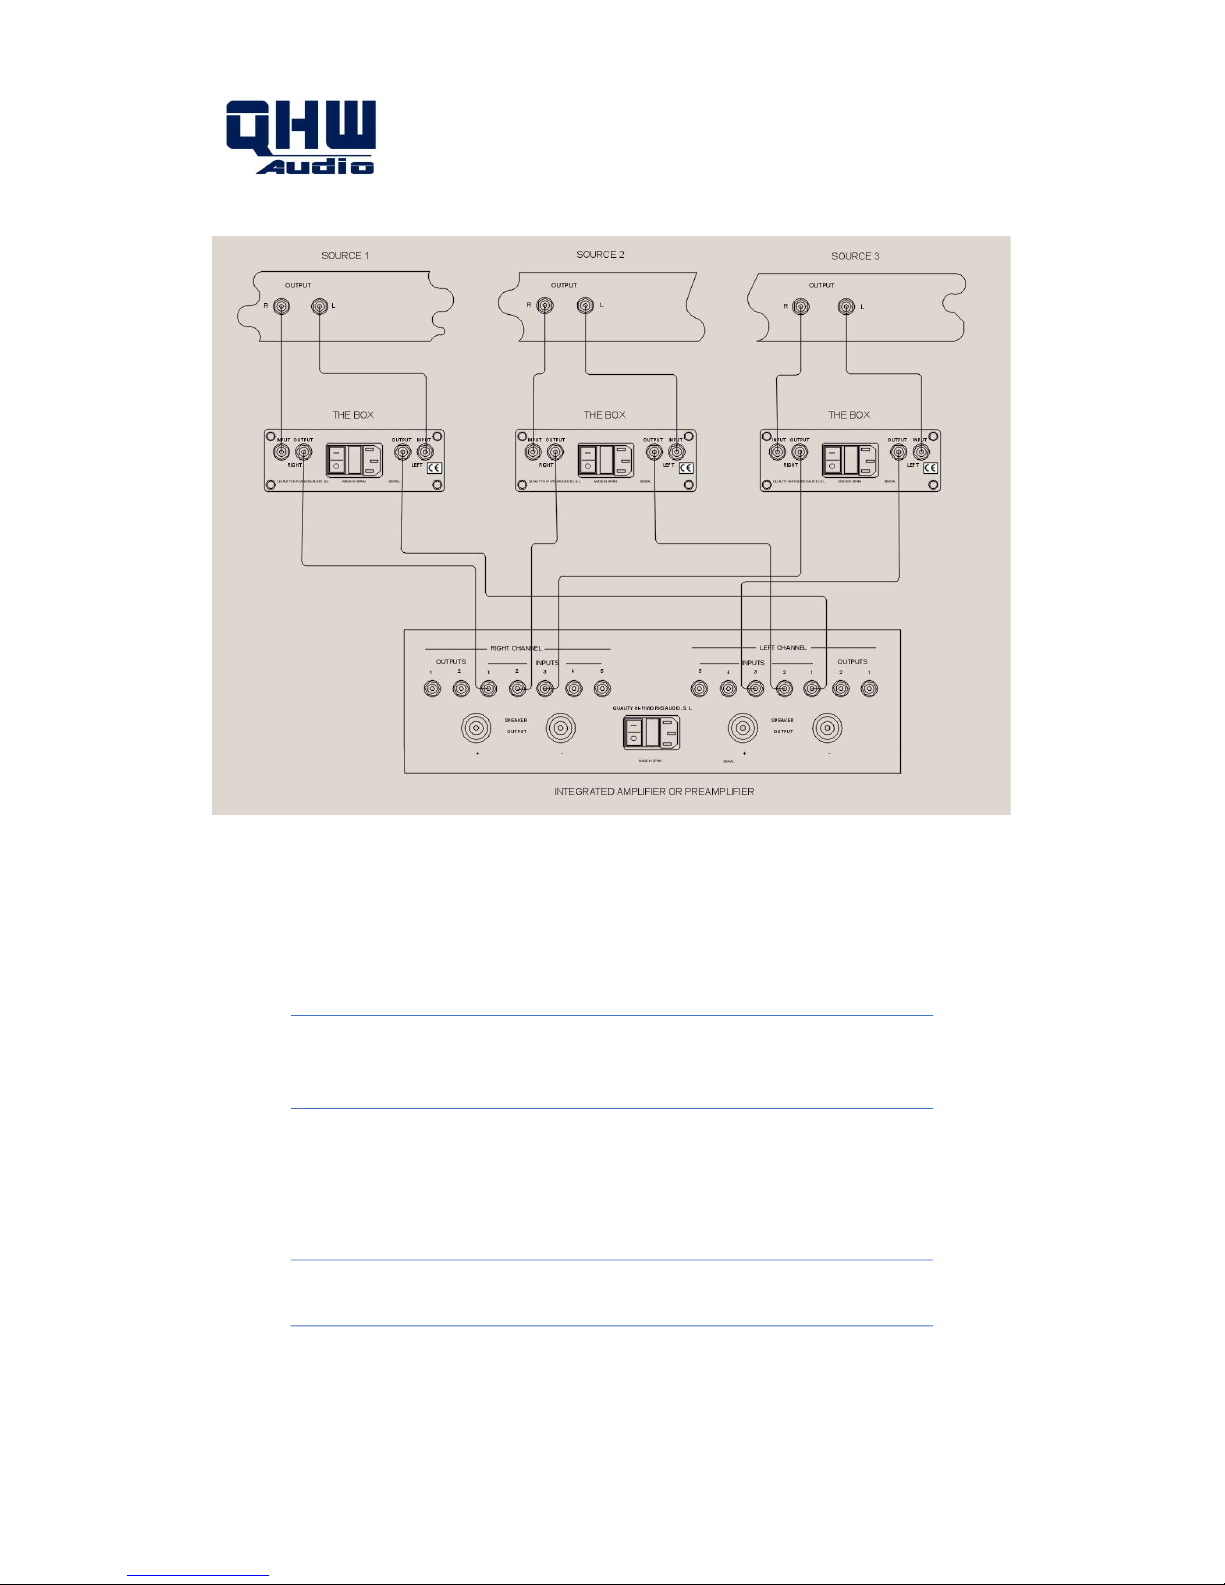
Rear panel description
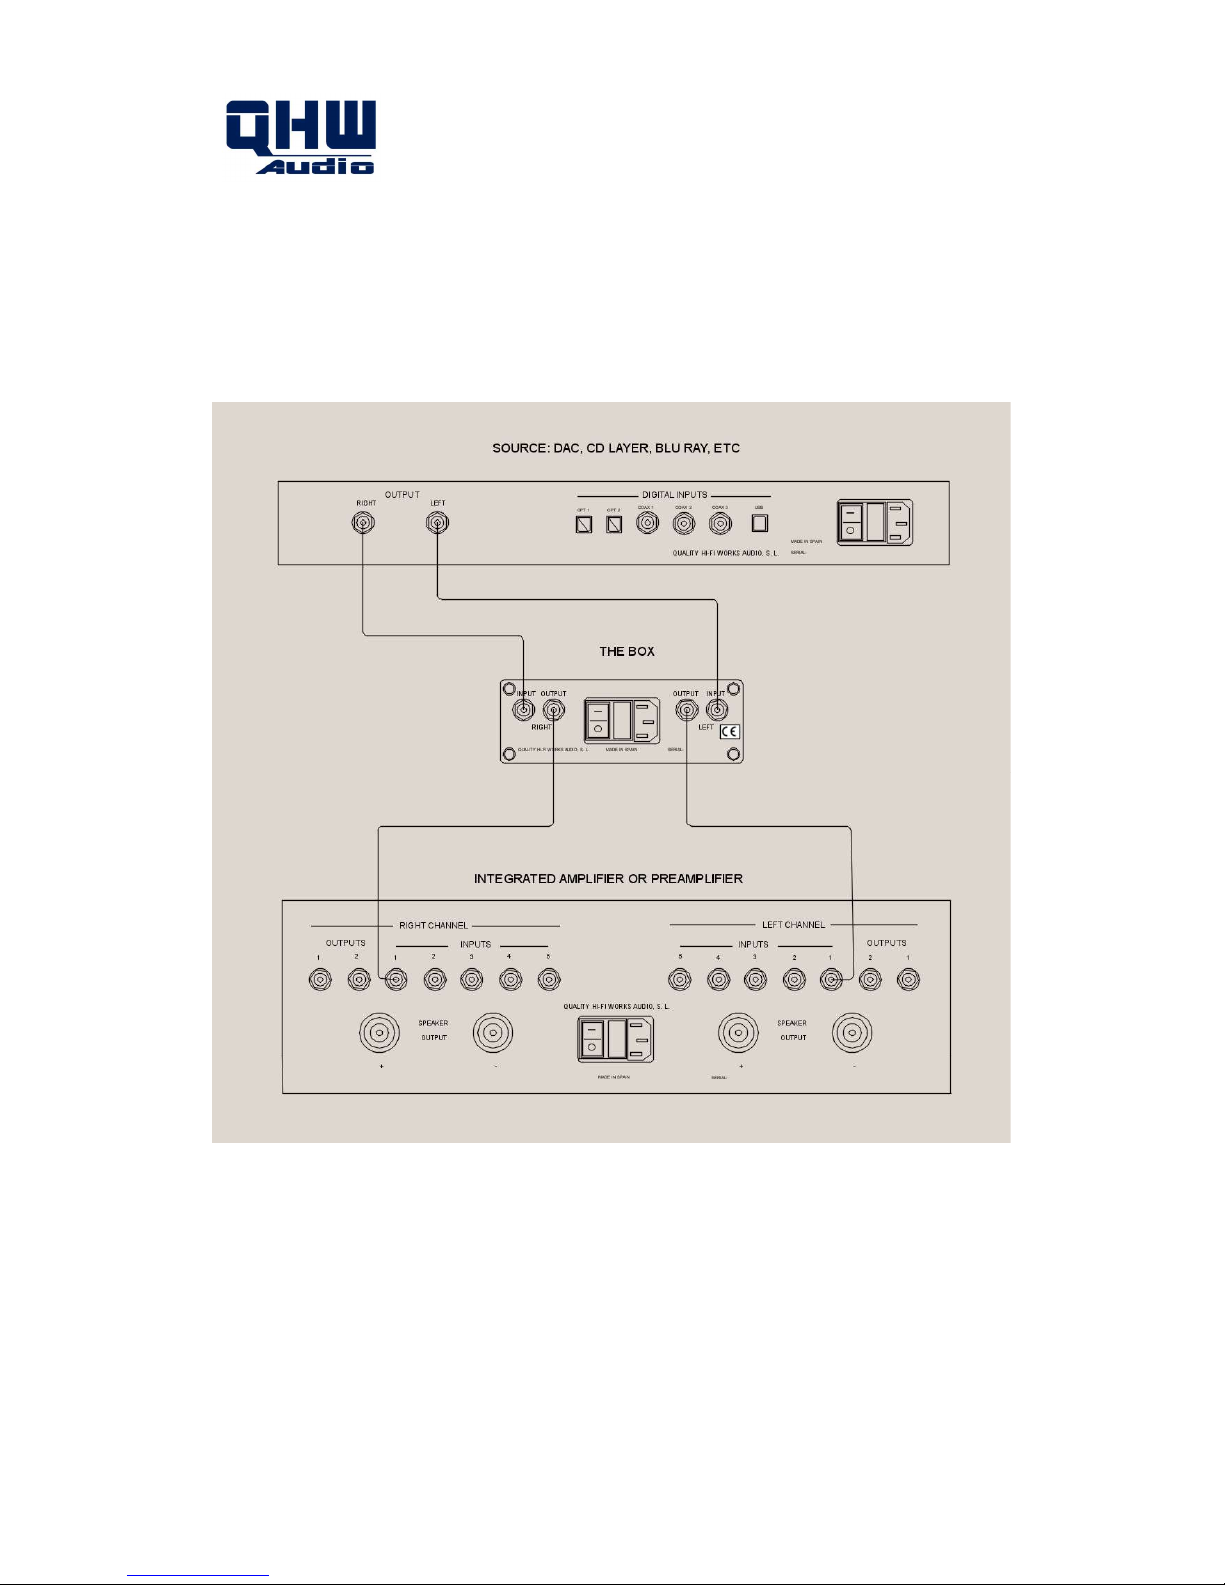
Installation and connections
Operation
Troubleshooting
Checking and replacing the fuse
Safety warnings
NEVER OPEN THE EQUIPMENT: There is a risk of electric shock inside. Only qualified
personnel should open the device. There is not user serviceable parts inside.
DO NOT EXPOSE THE EQUIPMENT TO MOISTURE OR WATER: Exposing the equipment
to moisture or water can lead to a risk of electric shock or fire. If, due to any
circumstance, the device gets wet in such way that water could reach the interior, take
it to a technician before connecting it again in order to verify it didn't suffered damage
which can lead to danger.
DO NOT USE THE EQUIPMENT NEAR WATER: This equipment must not be used near
water, bathtubs, wash tubs, swimming pools or any other you can imagine. If the
equipment get wet or water it should lead to a risk of electric shock and/or fire, and
get permanently damaged.
DO NOT PLACE THE EQUIPMENT NEAR HEAT SOURCES: Keep a reasonable distance
between the equipment and heat sources for it not getting direct heat from heaters,
candles, fireplaces, air conditioners or any other appliances which can send out heat,
as computers or power amplifiers. Don't place the equipment blocking ventilation
outlets from other equipment.
CLEANING: Disconnect the appliance from mains before cleaning it. Use a clean and
dry cloth. Don't use aggressive cleaning chemicals, as glass cleaners, because it could
damage painting.
This apparatus meets the requirements found in European Council directives
2006/95/EC, 2004/108/EC, 2009/125/EC y 2002/95/EC.