Introduction
ank you for purchasing the QUALIA INDIGO Series Preamplier.
Please read this Owner's Manual thoroughly before using the product so
that its high-quality audio can be enjoyed for years to come.
If you have any questions, please contact the dealer where you purchased
the product or QUALIA & Co. directly.
info@qualia-international.com
OWarranty registration card and product warranty
Please ll out the warranty registration card packaged with the product
and send it to QUALIA & Co.
1. If a product failure occurs aer following the instructions in the
Owner's Manual under normal conditions of use within a period of
one (1) year from the date of purchase, QUALIA & Co. will repair
the product free of charge. Users are responsible for the cost of
shipping the product to the dealer or QUALIA & Co. When warranty
requirements are satised, QUALIA & Co. will be responsible for the
cost of sending the repaired product back to the user.
2. Failures caused by the following are excluded from the warranty, even
if they occur during the warranty period:
Failures or damage caused by incorrect use or improper repairs or
modications
Failures or damage caused by transporting, moving, or dropping the
product aer purchase
Failures or damage caused by a natural disaster, such as a re,
earthquake, ood, or lightning strike, pollution, or abnormal voltage
Failures or damage caused by using the product for purposes other
than home use (for example, extended use for business purposes)
Registration for warranty is not led
OProduct carton and packing
Keep the product carton and packing if possible. When transporting
or shipping the product to the dealer or QUALIA & Co. for adjustment
or maintenance, be sure to use the original carton. QUALIA & Co.
will take no responsibility for problems occurring during transport or
shipment of the product if the product is not packed in the original
carton and packing.
OPackaged contents
First of all, please conrm that the items listed below are all present.
INDIGO Preamplier x 1
Power cable x 2
Owner’s Manual x 1
Warranty registration card x 1
1
CONTENTS
1. Introduction . . . . . . . . . . . . . . . . . . . . .
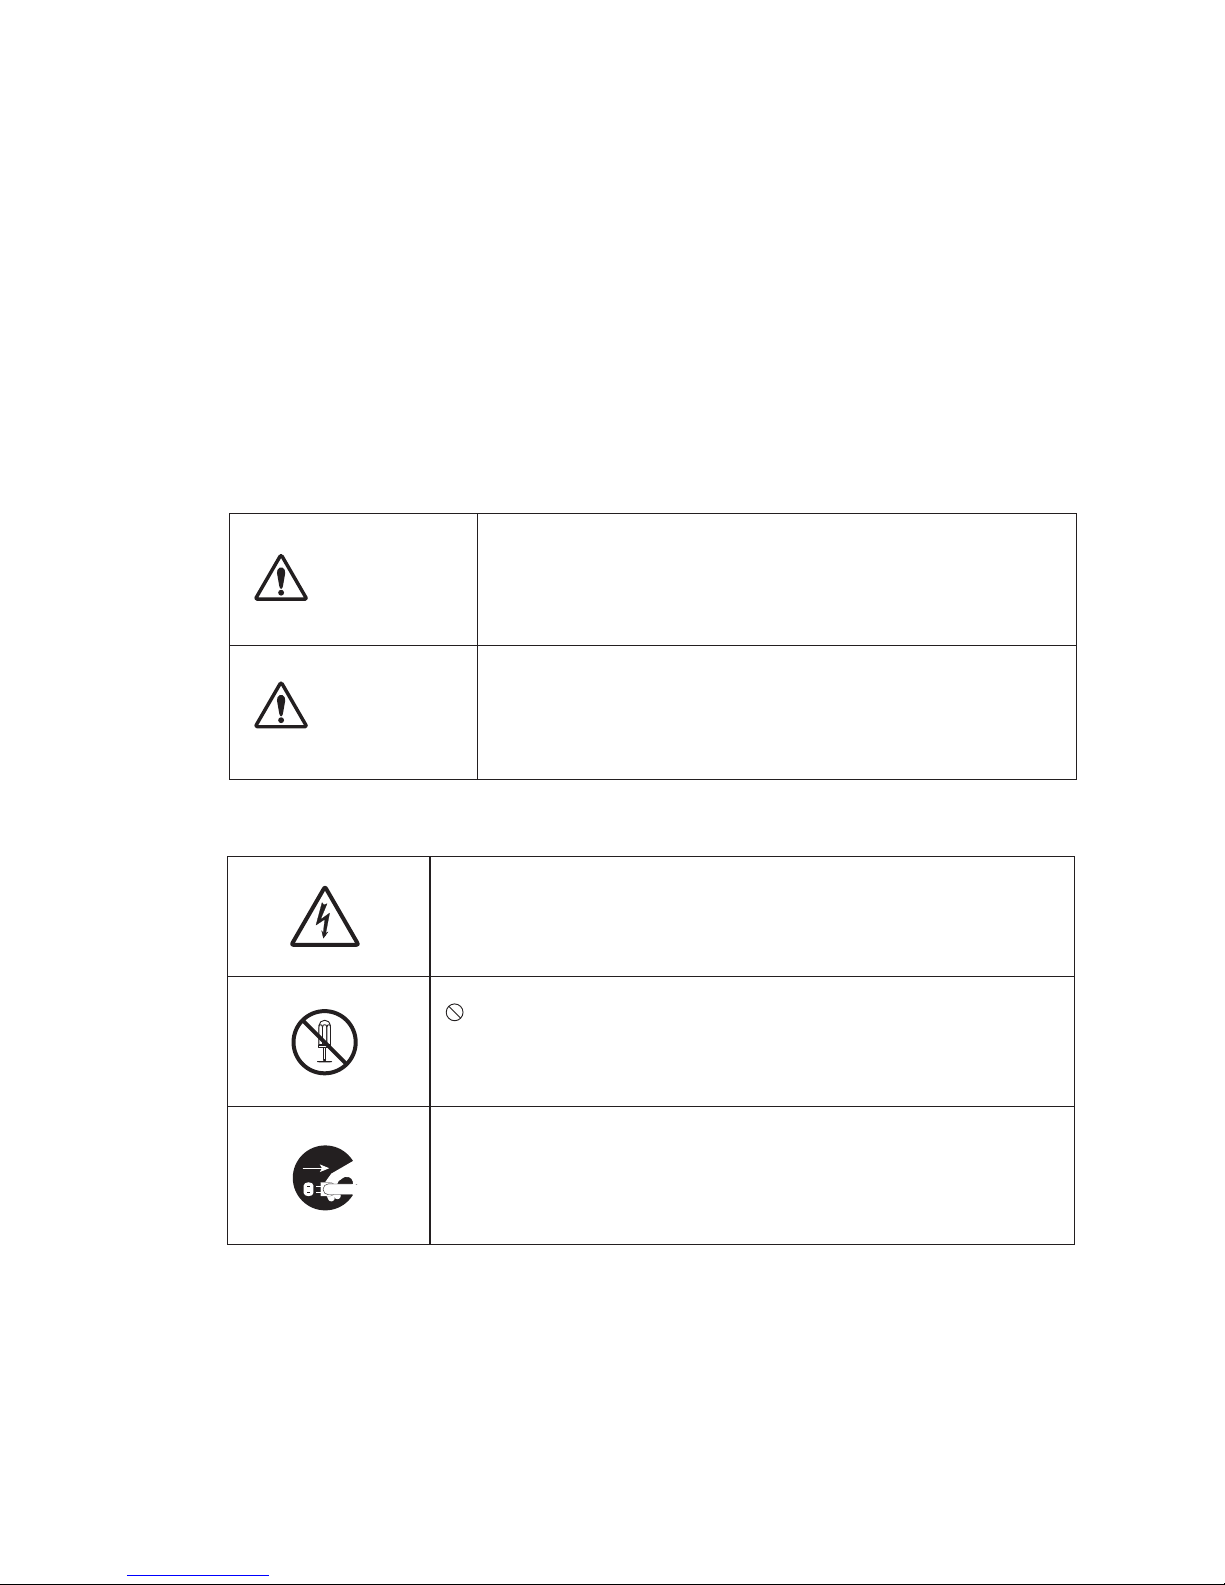
2. Safety Precautions . . . . . . . . . . . . . . .
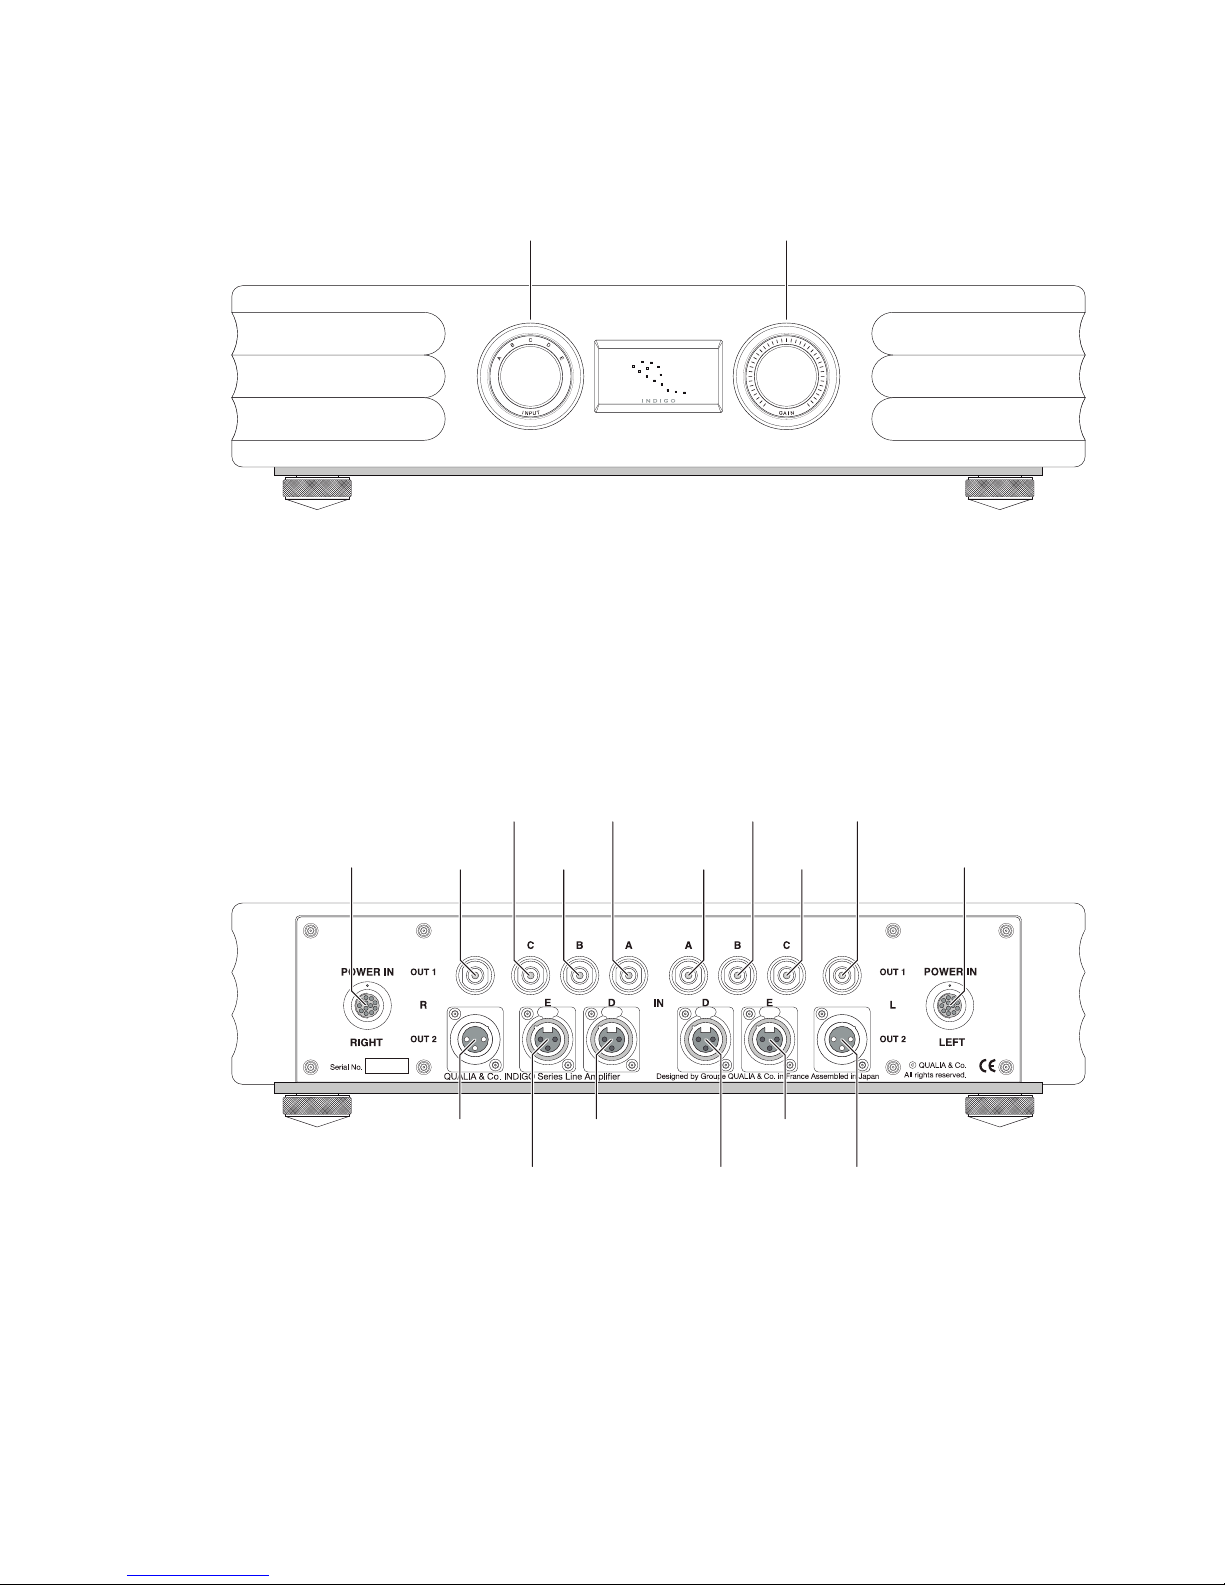
3. Part Names (Main Unit). . . . . . . . .
4. Part Names (Power Supply). . . . . . .
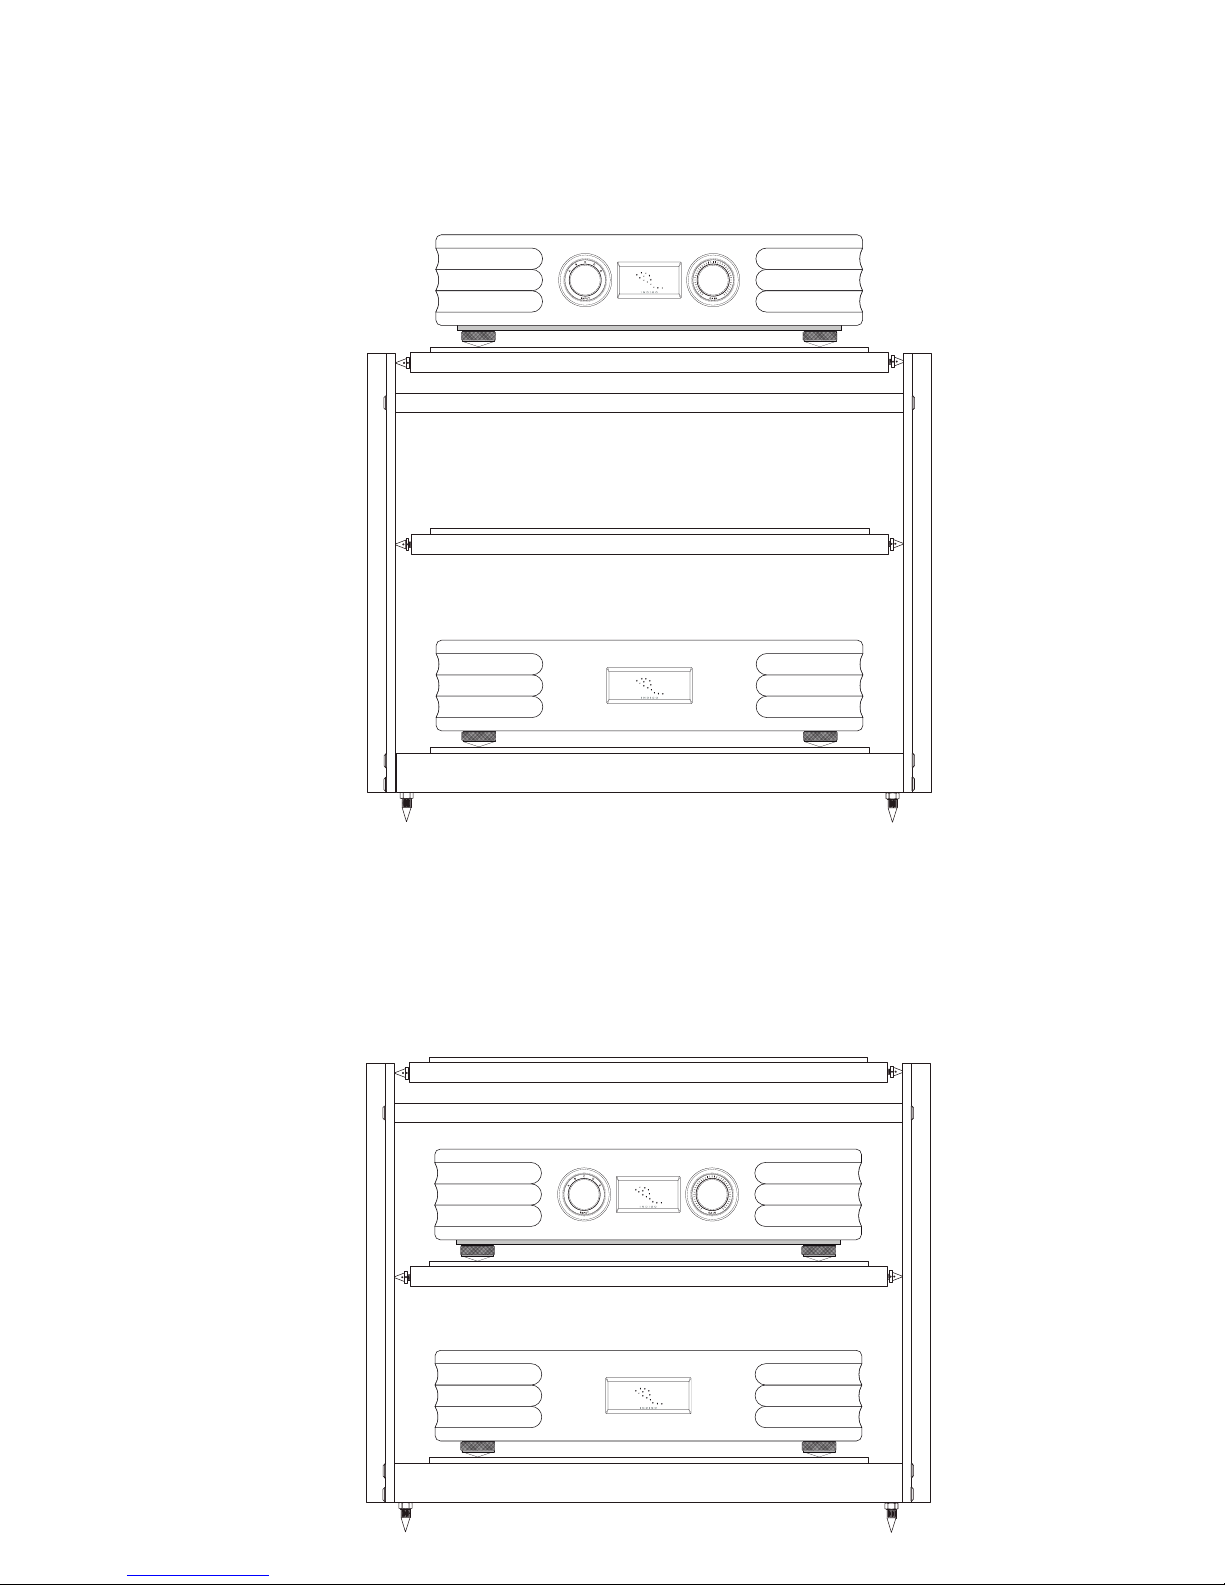
5. Positioning and Location of the Units . .
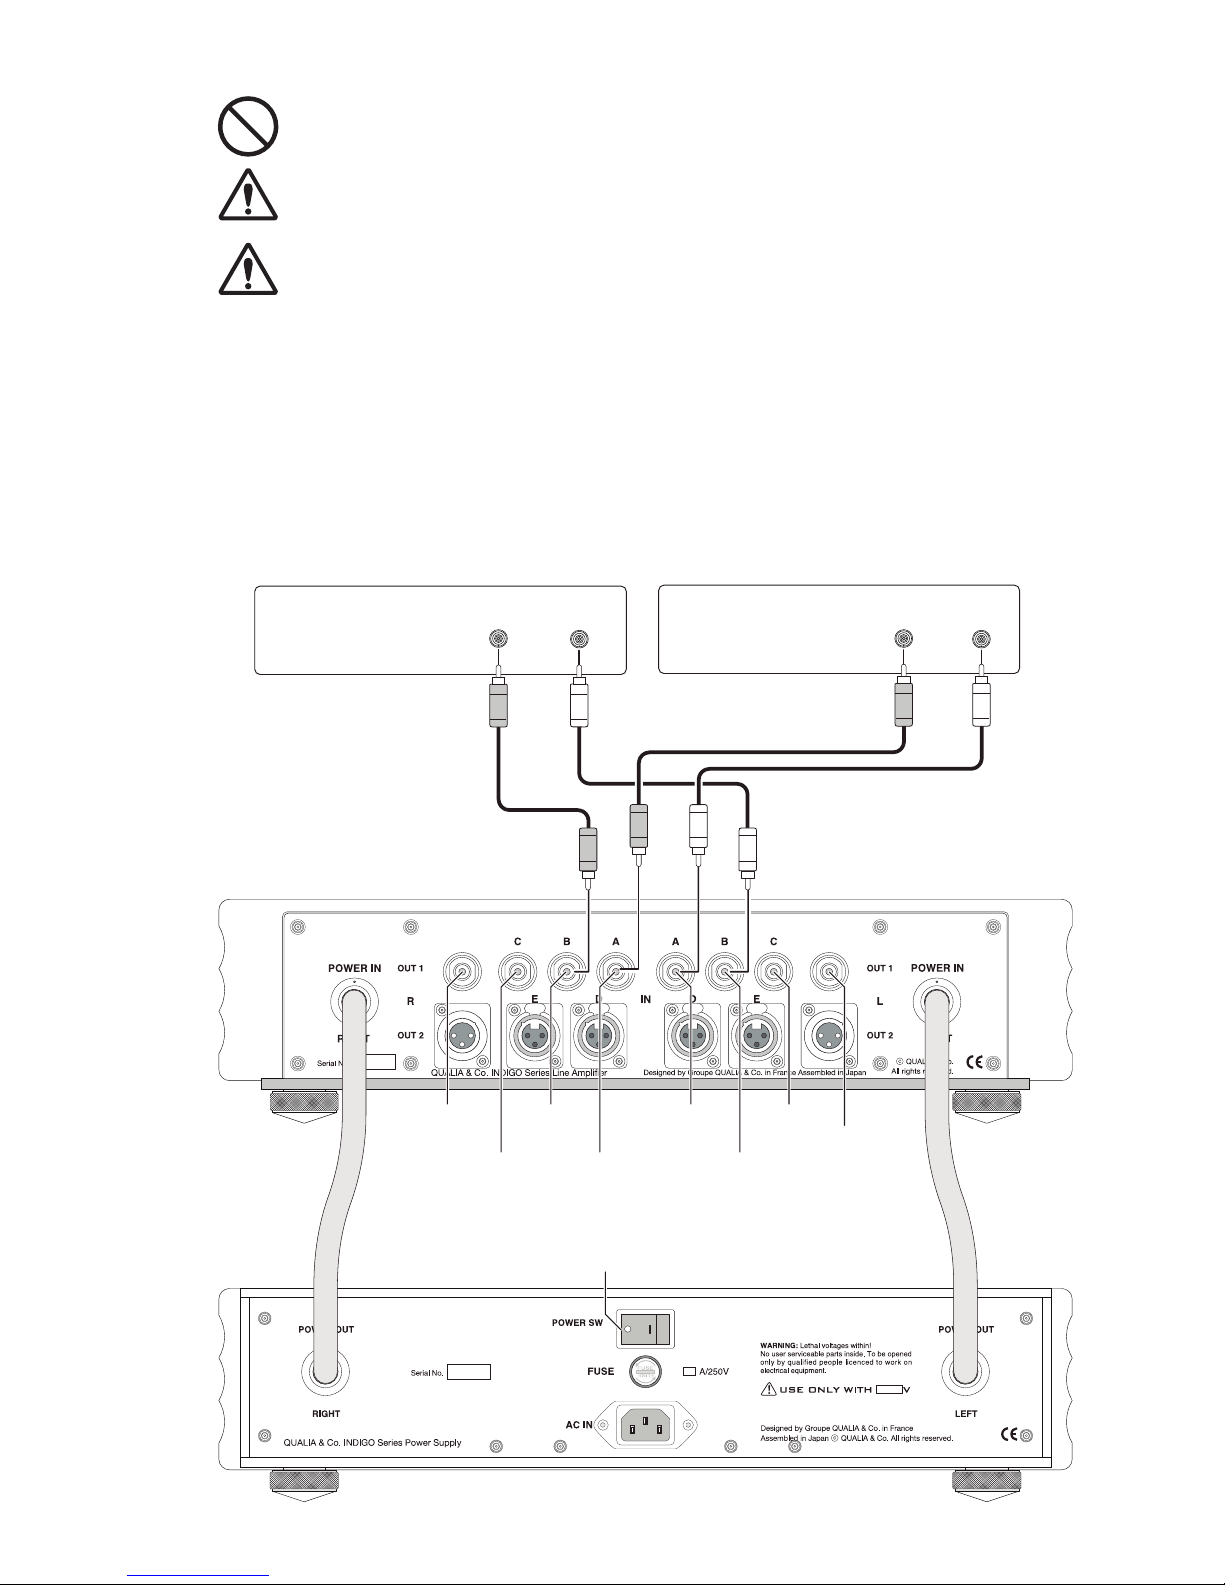
5. Connections
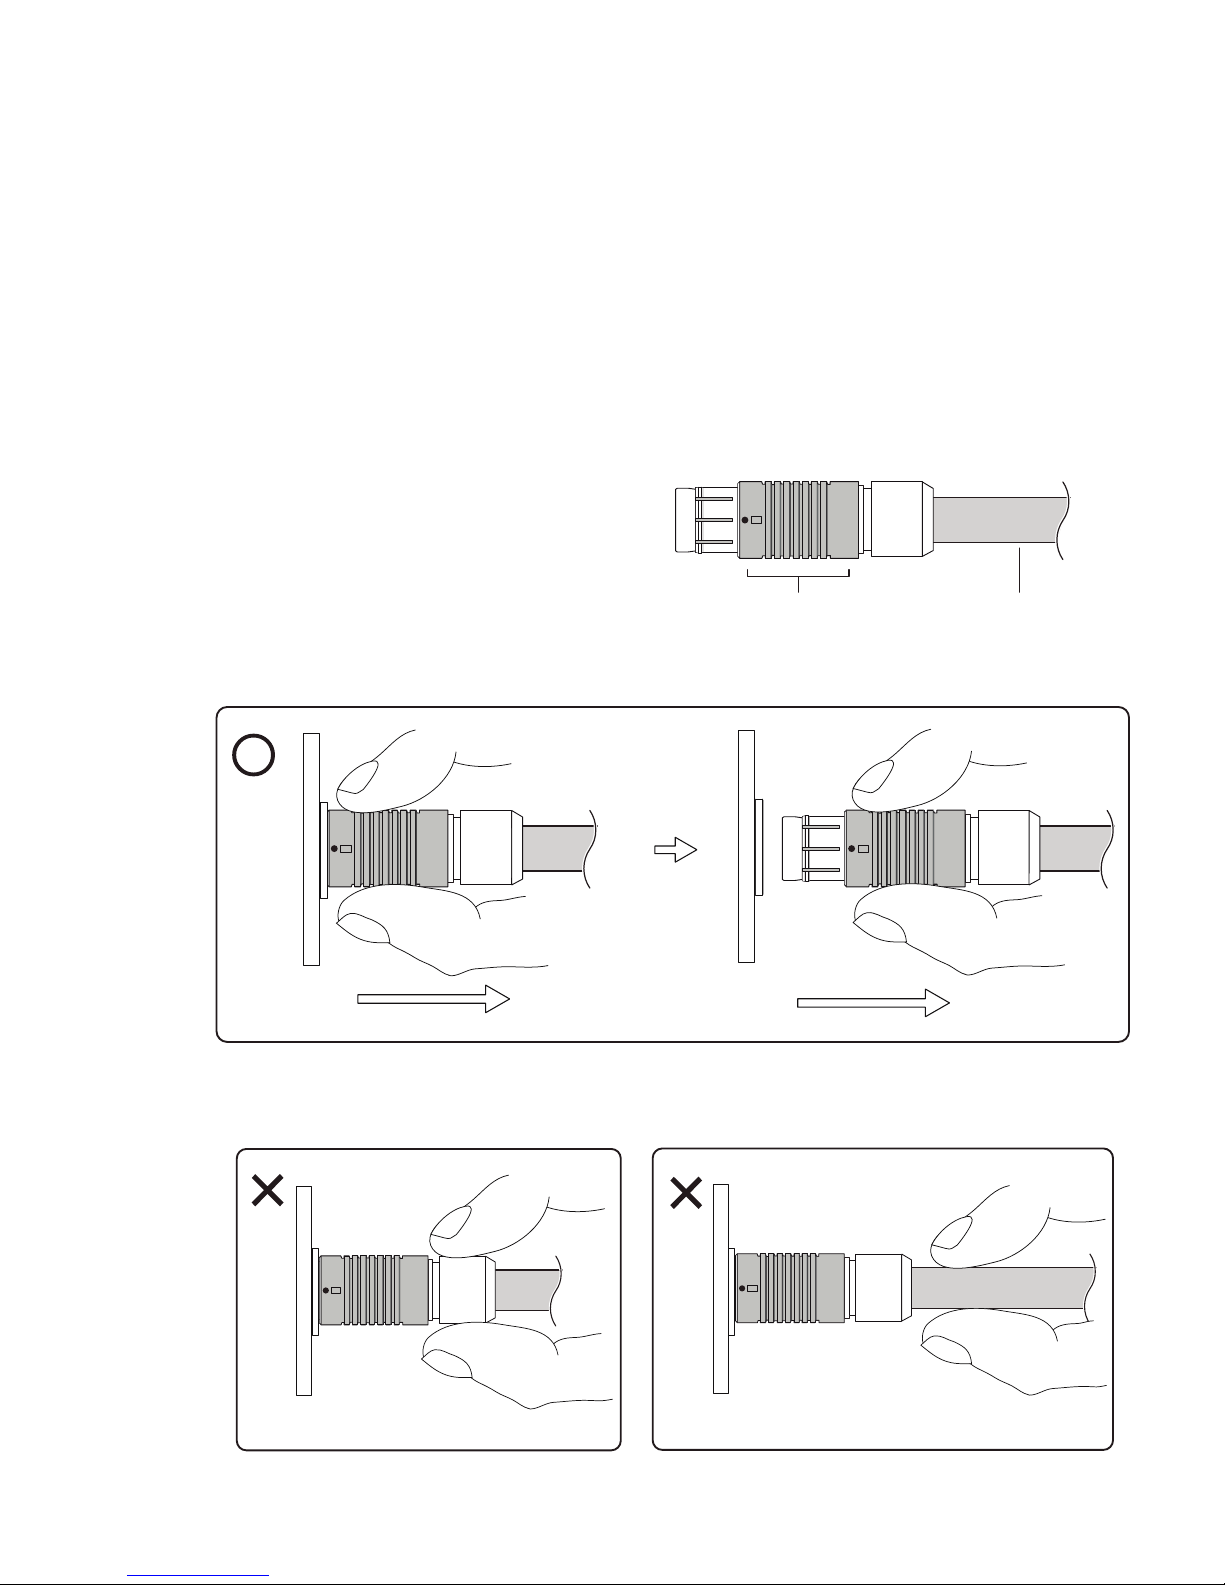
*Connection of Power Cable
*Disconnection of Power Cable
*RCA Input Jacks (A, B, C INPUTS)
*Balanced XLR Input Jacks (D,E INPUTS)
*RCA Output Jacks (OUTPUTS 1)
*Balanced XLR Output Jacks (OUTPUTS 2)
*Connection of ACPower Cord
6. Basic Operation
*Turning on the power
*Playback
*Turning othe power
7. How to Replace Fuse
8. Maintenance/Specications
1
2
3
4
5
7
8
9
10
11
12
13
14
15
16
17
18