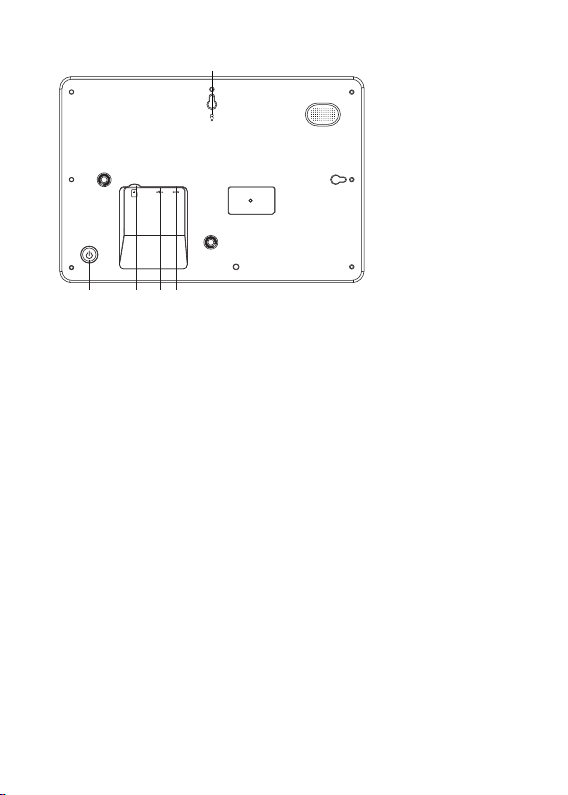
1. POWER
After connecting the power adapter, press and hold the power button for approximately 5
seconds (until screen turns on).
When the screen is on, press and hold the power button for approximately 3 seconds to access
reboot or power off menu. Short pressing the power button will turn the screen on/off (the photo
frame will still remain on).
Note: To avaoid possible damage to the photo frame, do not unplup the power
adapter. Instead press the power button for 3 seconds and then tap “power” off
on the screen.
2. USB
Connect a Micro USB flash drive. This feature is for uploading of photos only and not for
connecting to computers/ mobile devices.
Note: The USB flash drive is recognized as a “SD Card” when inserted into the frame
3. RESET
Use a needle or Small paper clip to reset the unit.
4. MicroSD card
The Photos on the SD CARD must be uploaded/ Imported to the frame to be viewed.
To Backup photos from the photo frame onto a SD CARD follow the below steps: -Step
1: Insert an SD Card (maximum size of 32GB) and insert it into the Micro SD Slot. -
Step 2: On the Photo Frame, navigate to “Settings”
-Step 3: Go to “Backup and Restore”
-Step 4: Tick “Automatic Backup”
-Step 5: Tap “Backup frame to SD CARD”
5. DC
Connect DC adapter to power on the device.
1 4
25
3
TF
2