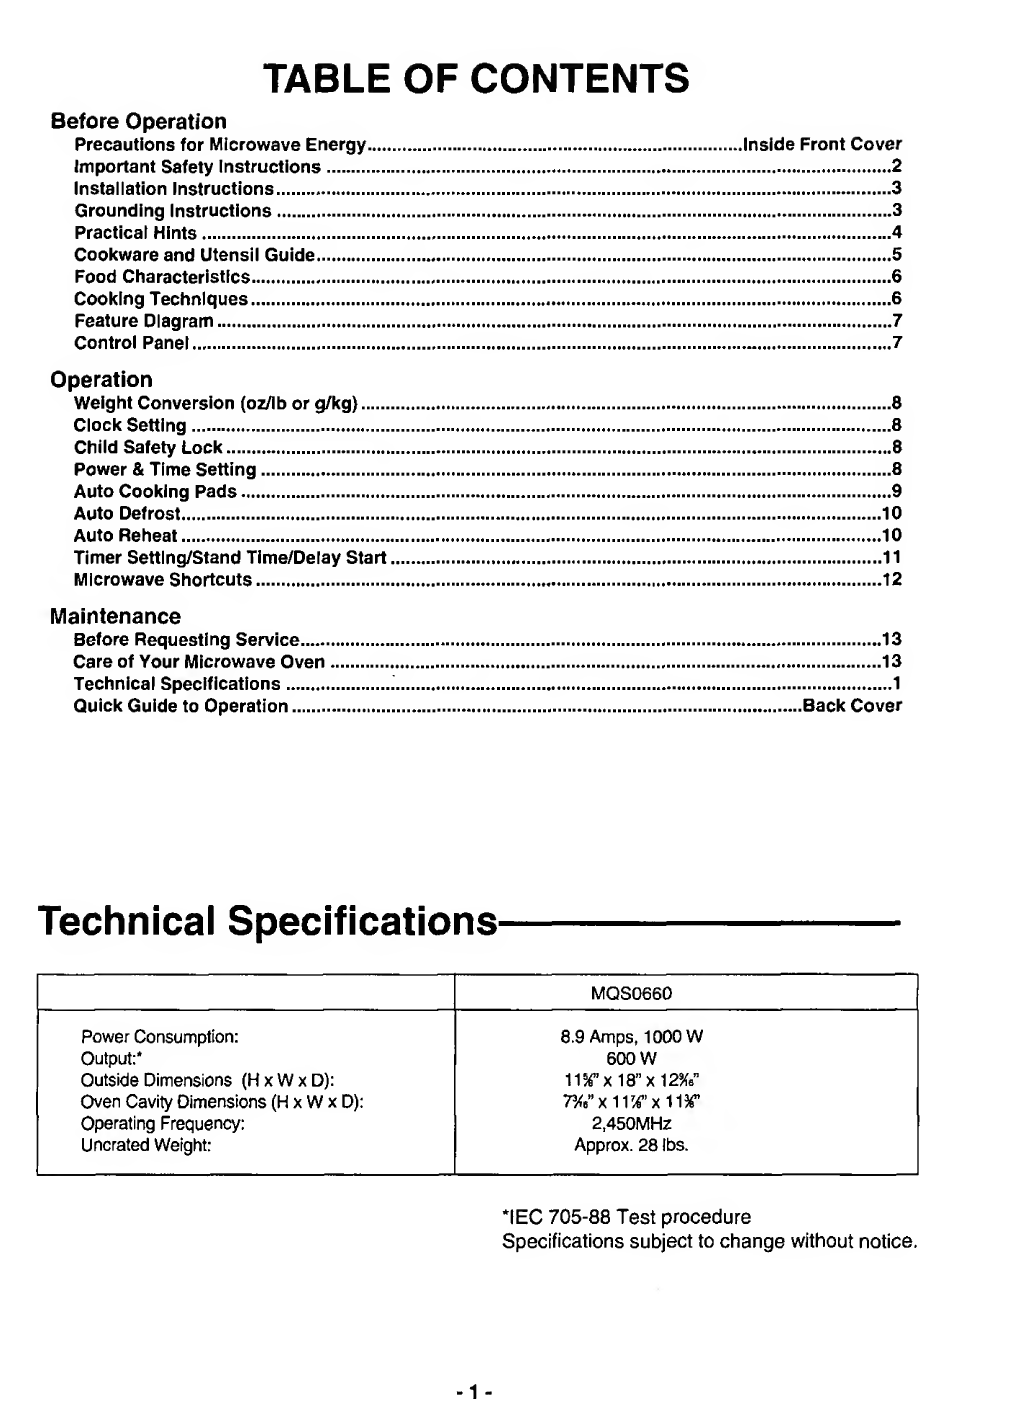
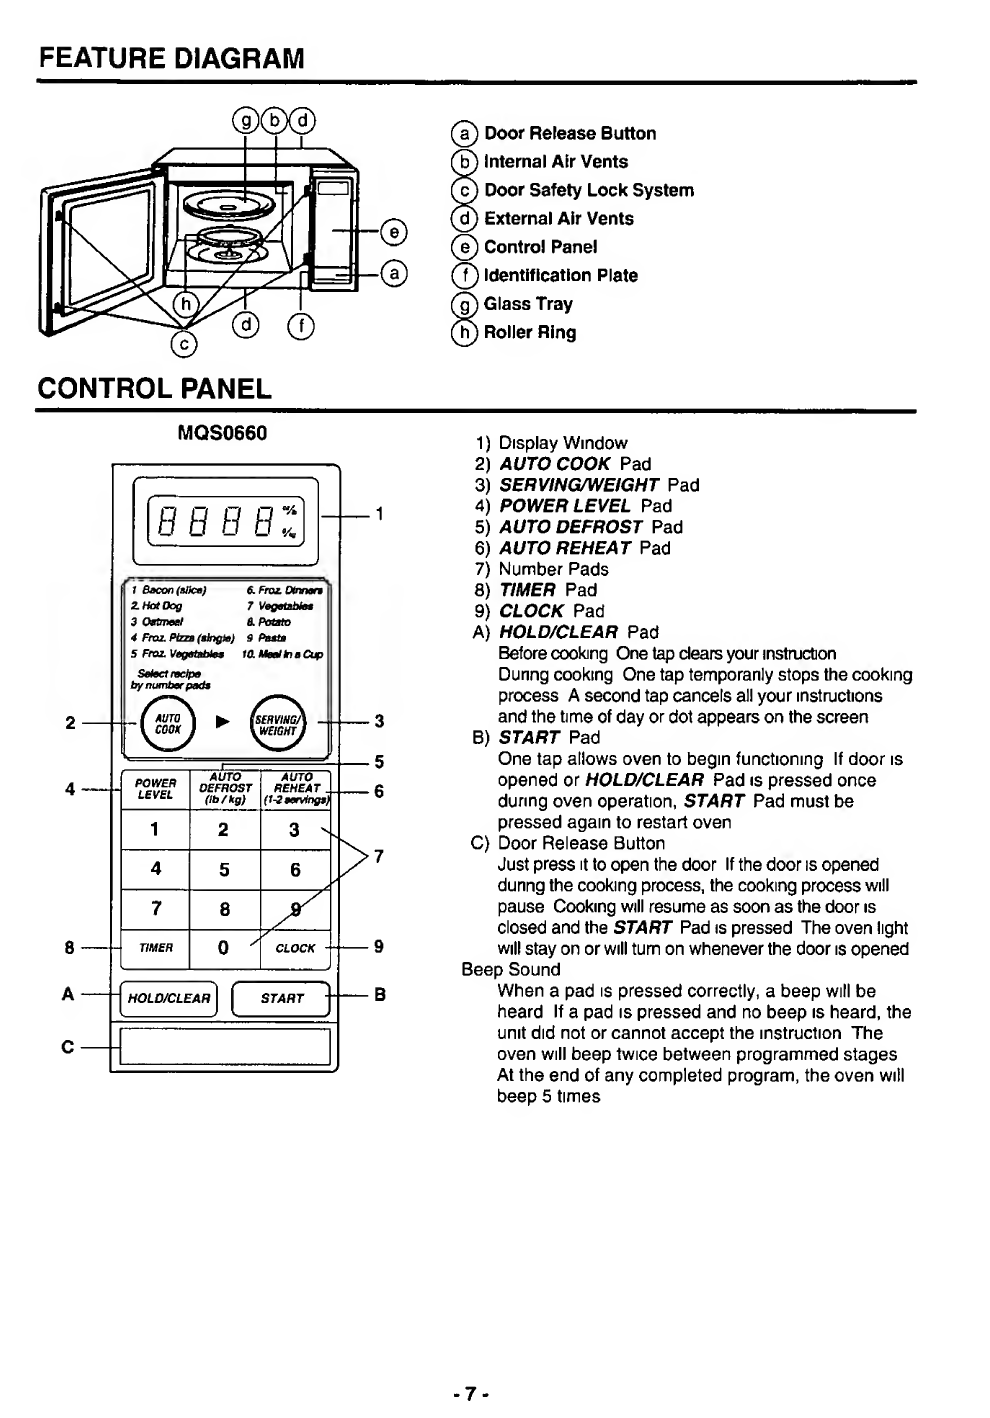
Quasar MQS0660 - MICROWAVE User manual
Other Quasar Microwave Oven manuals

Quasar
Quasar MQS1085 User manual

Quasar
Quasar MQS1087 User manual

Quasar
Quasar MQS1063EV User manual

Quasar
Quasar MQS1075 - MICROWAVE User manual

Quasar
Quasar MQS0660 - MICROWAVE User manual

Quasar
Quasar MQS1095 User manual

Quasar
Quasar MQS0660 - MICROWAVE User manual

Quasar
Quasar MQS1063EV User manual

Quasar
Quasar MQS0963 User manual


M Service manual")