CONNECUONS
iia
diia
7
e
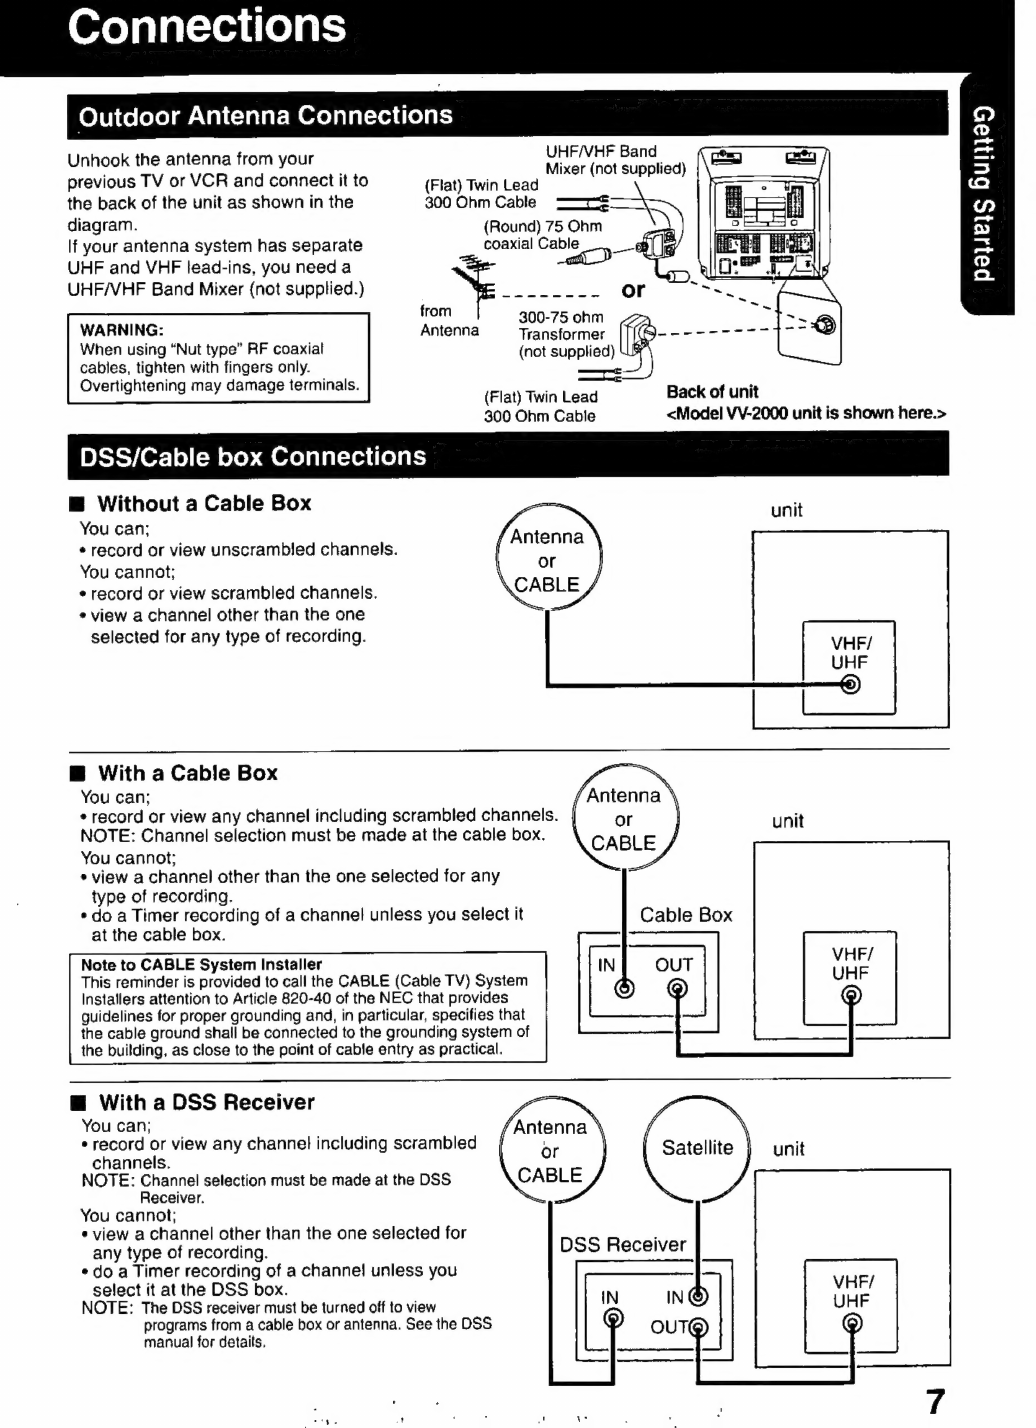
Outdoor
Antenna
Connections
......
7
-
¢
DSS/Cable
box
Connections
.........
7
One
Time
Setup
citadas
ranas
8-9
(Language,
Channel,
Clock)
-
Playback
a
Tape...
riii
sar
aoo
buon
Curie
erri
as
ausis
(Main
Operation,
Forward
or
Reverse
Search,
Still
Picture,
Slow
Motion,
Frame
by
Frame
Advance,
Features
for
a
Quality
Picture)
Record
On
a
Tape
tii
io
nai
iii
(Main
Operation,
One
Touch
Recording
(OTR),
Selecting
Input
Mode)
Special
VCR
Features......................................
24
-
28
e
Channel
Caption
....................
24,25
*Weak
Signal
Display
ON/OFF
.........
28
e
Time
Stamp
cette
26,
27
VOR
LOCK
i0uoiossee
rica
28
Copy
Your
Tapes
(Dubbing)
....................................
29
V-Chip
Control
Feature
............................
ee
30
-
33
*
Enter
Secret
Code
.......................
30
«Setup
US
TV
PROGRAMS
Ratings
..
32
e
Setup
US
MOVIES
Ratings
.........
31
*Blocking
Message
........................
33
Before
Requesting
Service
.....................................
40
Service
Center
List
.............................
eee
eere
nnn
41
Location
of
Controls..............................
eere
42
-
43
WALI
ista
tas
Back
Cover
9
payieys
umag
uoljeiadgQ
sIseg
uoieiado
paduenpy
UOIJBUIJOJU|
ANOA
104