3
Table
Table
Table
Table of
of
of
of contents
contents
contents
contents
Inhoud
Inhoud
Inhoud
Inhoud
I.
I.
I.
I. IMPORTANT
IMPORTANT
IMPORTANT
IMPORTANT WARNINGS
WARNINGS
WARNINGS
WARNINGS
_________________________________________________________
_________________________________________________________
_________________________________________________________
_________________________________________________________
4
4
4
4
II.
II.
II.
II. INTRODUCING
INTRODUCING
INTRODUCING
INTRODUCING YOUR
YOUR
YOUR
YOUR NEW
NEW
NEW
NEW MINI
MINI
MINI
MINI TABBY
TABBY
TABBY
TABBY
_____________________________________________
_____________________________________________
_____________________________________________
_____________________________________________
5
5
5
5
III.
III.
III.
III. KEY
KEY
KEY
KEY FEATURES
FEATURES
FEATURES
FEATURES
_________________________________________________________________
_________________________________________________________________
_________________________________________________________________
_________________________________________________________________
6
6
6
6
IV.
IV.
IV.
IV.
PACKAGING
PACKAGING
PACKAGING
PACKAGING CONTENTS
CONTENTS
CONTENTS
CONTENTS
__________________________________________________________
__________________________________________________________
__________________________________________________________
__________________________________________________________
7
7
7
7
V.
V.
V.
V.
PRODUCT
PRODUCT
PRODUCT
PRODUCT LAYOUT
LAYOUT
LAYOUT
LAYOUT
_____________________________________________________________
_____________________________________________________________
_____________________________________________________________
_____________________________________________________________
8
8
8
8
VI.
VI.
VI.
VI. HARDWARE
HARDWARE
HARDWARE
HARDWARE SPECIFICATION
SPECIFICATION
SPECIFICATION
SPECIFICATION
____________________________________________________
____________________________________________________
____________________________________________________
____________________________________________________
9
9
9
9
VII.
VII.
VII.
VII. STARTUP
STARTUP
STARTUP
STARTUP AND
AND
AND
AND SHUTDOWN
SHUTDOWN
SHUTDOWN
SHUTDOWN
___________________________________________________
___________________________________________________
___________________________________________________
___________________________________________________
10
10
10
10
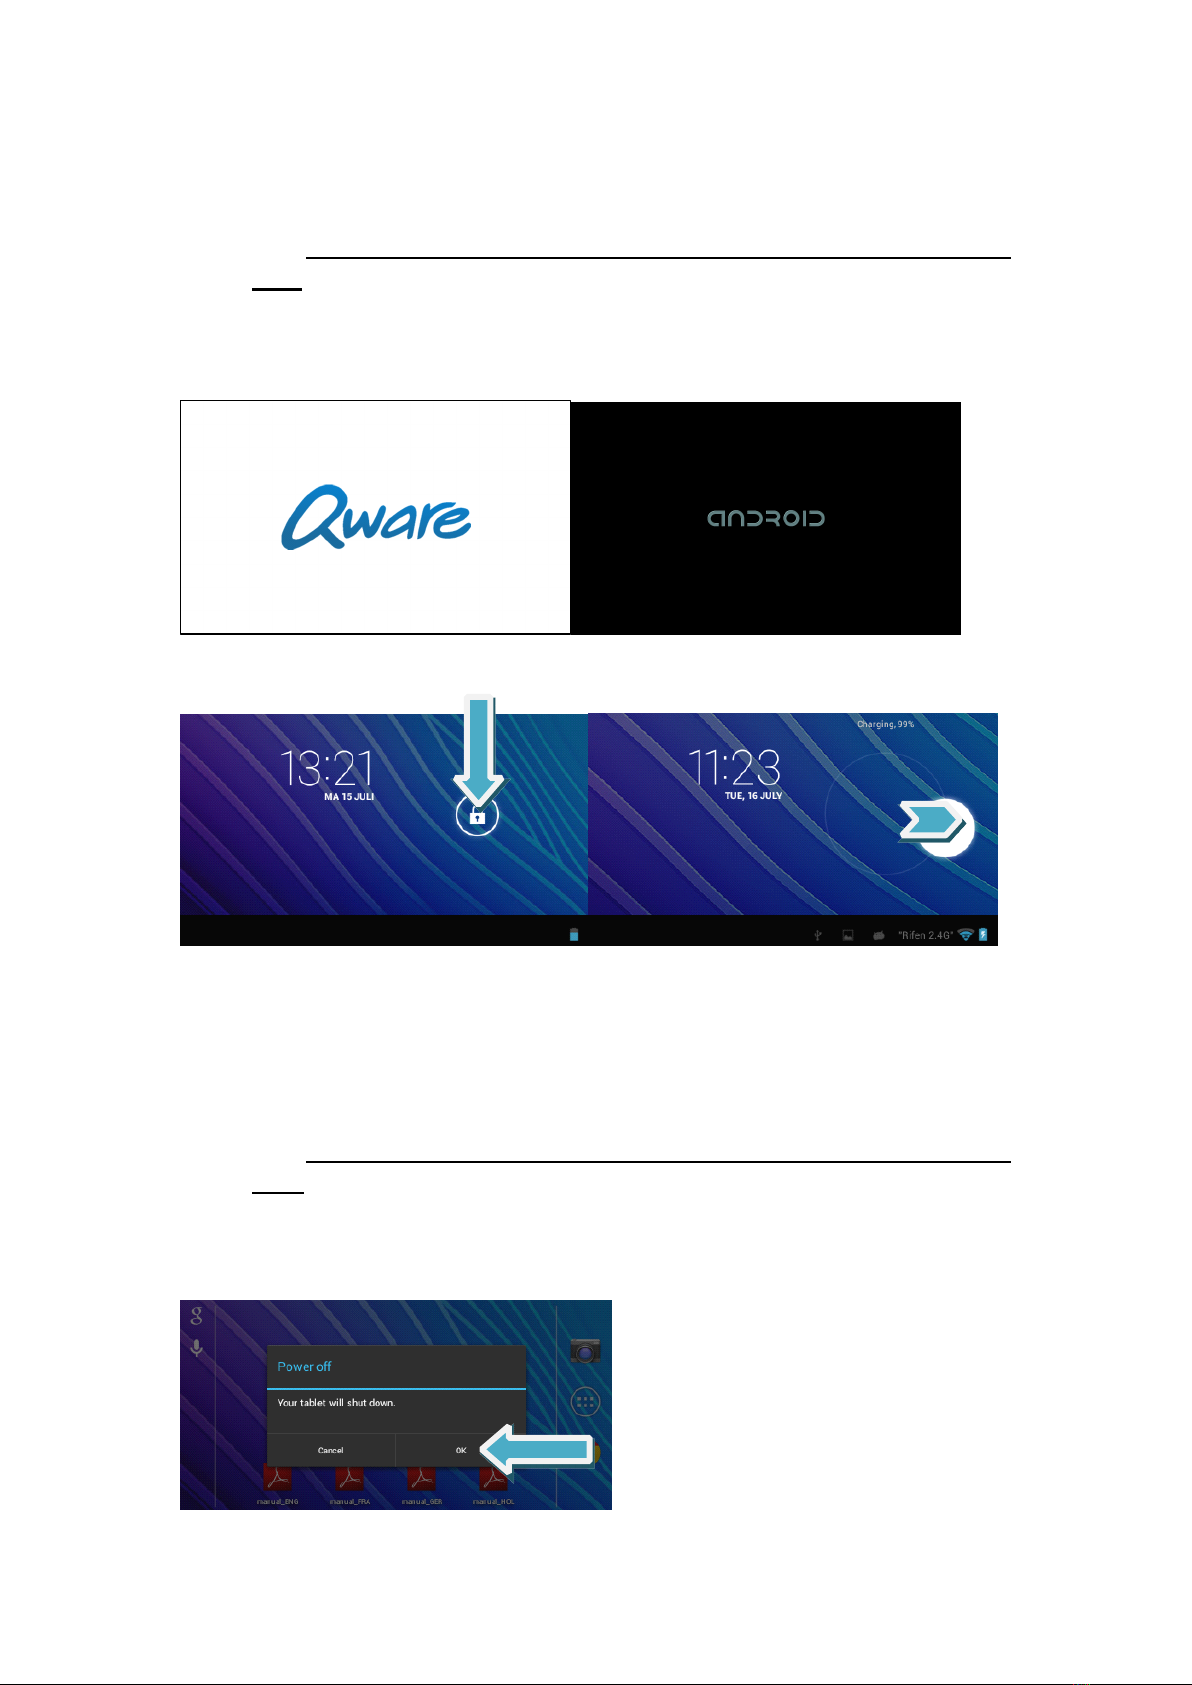
A. W HEN THE MINI
T
ABBY IS POWERED OFF AND YOU WOULD LIKE
TO
TURN IT ON
____________________
10
B. W HEN THE MINI
T
ABBY IS POWERED ON AND YOU WOULD LIKE
TO
TURN IT OFF
____________________
10
VIII.
VIII.
VIII.
VIII. HOME
HOME
HOME
HOME SCREEN
SCREEN
SCREEN
SCREEN
_____________________________________________________________
_____________________________________________________________
_____________________________________________________________
_____________________________________________________________
11
11
11
11
IX.
IX.
IX.
IX. APPLICATIONS/WIDGETS
APPLICATIONS/WIDGETS
APPLICATIONS/WIDGETS
APPLICATIONS/WIDGETS SCREEN
SCREEN
SCREEN
SCREEN
________________________________________________
________________________________________________
________________________________________________
________________________________________________
13
13
13
13
A. R EMOVING APPS /WIDGETS
_______________________________________________________
13
X.
X.
X.
X. SYSTEM
SYSTEM
SYSTEM
SYSTEM SETTINGS
SETTINGS
SETTINGS
SETTINGS
_____________________________________________________________
_____________________________________________________________
_____________________________________________________________
_____________________________________________________________
14
14
14
14
A. W IRELESS NETWORK CONNECTION
TO
INTERNET
__________________________________________
14
B. D ISPLAY
____________________________________________________________________
15
C. D
ATE
AND TIME SETTINGS
________________________________________________________
16
XI.
XI.
XI.
XI. INTERNET
INTERNET
INTERNET
INTERNET
___________________________________________________________________
___________________________________________________________________
___________________________________________________________________
___________________________________________________________________
17
17
17
17
XII.
XII.
XII.
XII. MUSIC
MUSIC
MUSIC
MUSIC
____________________________________________________________________
____________________________________________________________________
____________________________________________________________________
____________________________________________________________________
17
17
17
17
XIII.
XIII.
XIII.
XIII. GALLERY
GALLERY
GALLERY
GALLERY WITH
WITH
WITH
WITH VIDEOS
VIDEOS
VIDEOS
VIDEOS AND
AND
AND
AND PHOTOS
PHOTOS
PHOTOS
PHOTOS
___________________________________________
___________________________________________
___________________________________________
___________________________________________
18
18
18
18
XIV.
XIV.
XIV.
XIV.
WALLPAPER
WALLPAPER
WALLPAPER
WALLPAPER ON
ON
ON
ON HOME
HOME
HOME
HOME SCREEN
SCREEN
SCREEN
SCREEN BACKGROUND
BACKGROUND
BACKGROUND
BACKGROUND
___________________________________
___________________________________
___________________________________
___________________________________
18
18
18
18
XV.
XV.
XV.
XV.
SOUND
SOUND
SOUND
SOUND RECORDING
RECORDING
RECORDING
RECORDING
_________________________________________________________
_________________________________________________________
_________________________________________________________
_________________________________________________________
19
19
19
19
XVI.
XVI.
XVI.
XVI. CAMERA
CAMERA
CAMERA
CAMERA
__________________________________________________________________
__________________________________________________________________
__________________________________________________________________
__________________________________________________________________
20
20
20
20
XVII.
XVII.
XVII.
XVII. GOOGLE
GOOGLE
GOOGLE
GOOGLE PLAY
PLAY
PLAY
PLAY
______________________________________________________________
______________________________________________________________
______________________________________________________________
______________________________________________________________
21
21
21
21
XVIII.
XVIII.
XVIII.
XVIII. E-MAIL
E-MAIL
E-MAIL
E-MAIL
_________________________________________________________________
_________________________________________________________________
_________________________________________________________________
_________________________________________________________________
25
25
25
25
XIX.
XIX.
XIX.
XIX. USB
USB
USB
USB PORT
PORT
PORT
PORT OPTIONS
OPTIONS
OPTIONS
OPTIONS
_________________________________________________________
_________________________________________________________
_________________________________________________________
_________________________________________________________
28
28
28
28
A. C ONNECT
TO
APC
_____________________________________________________________
28
B. USB KEYBOARD AND MOUSE
______________________________________________________
29
XX.
XX.
XX.
XX. FIRMWARE
FIRMWARE
FIRMWARE
FIRMWARE UPGRADE
UPGRADE
UPGRADE
UPGRADE
_______________________________________________________
_______________________________________________________
_______________________________________________________
_______________________________________________________
30
30
30
30