RWH-FL01 Float Switch www.RainWaterHarvesting.co.uk ©2010 2
A) WIRING Pump turns OFF when float rises
This use of the float switch is
typically
i) keeping a header tank full
by pumping from a storage tank
ii) filling a storage tank, or
backing up its rainwater supply,
from a well, bore-hole, stream or
spring, or
iii) mains backup (in this case
the float switch can be used to
control a solenoid valve admitting
mains water to a rainwater storage
tank when rain runs out).
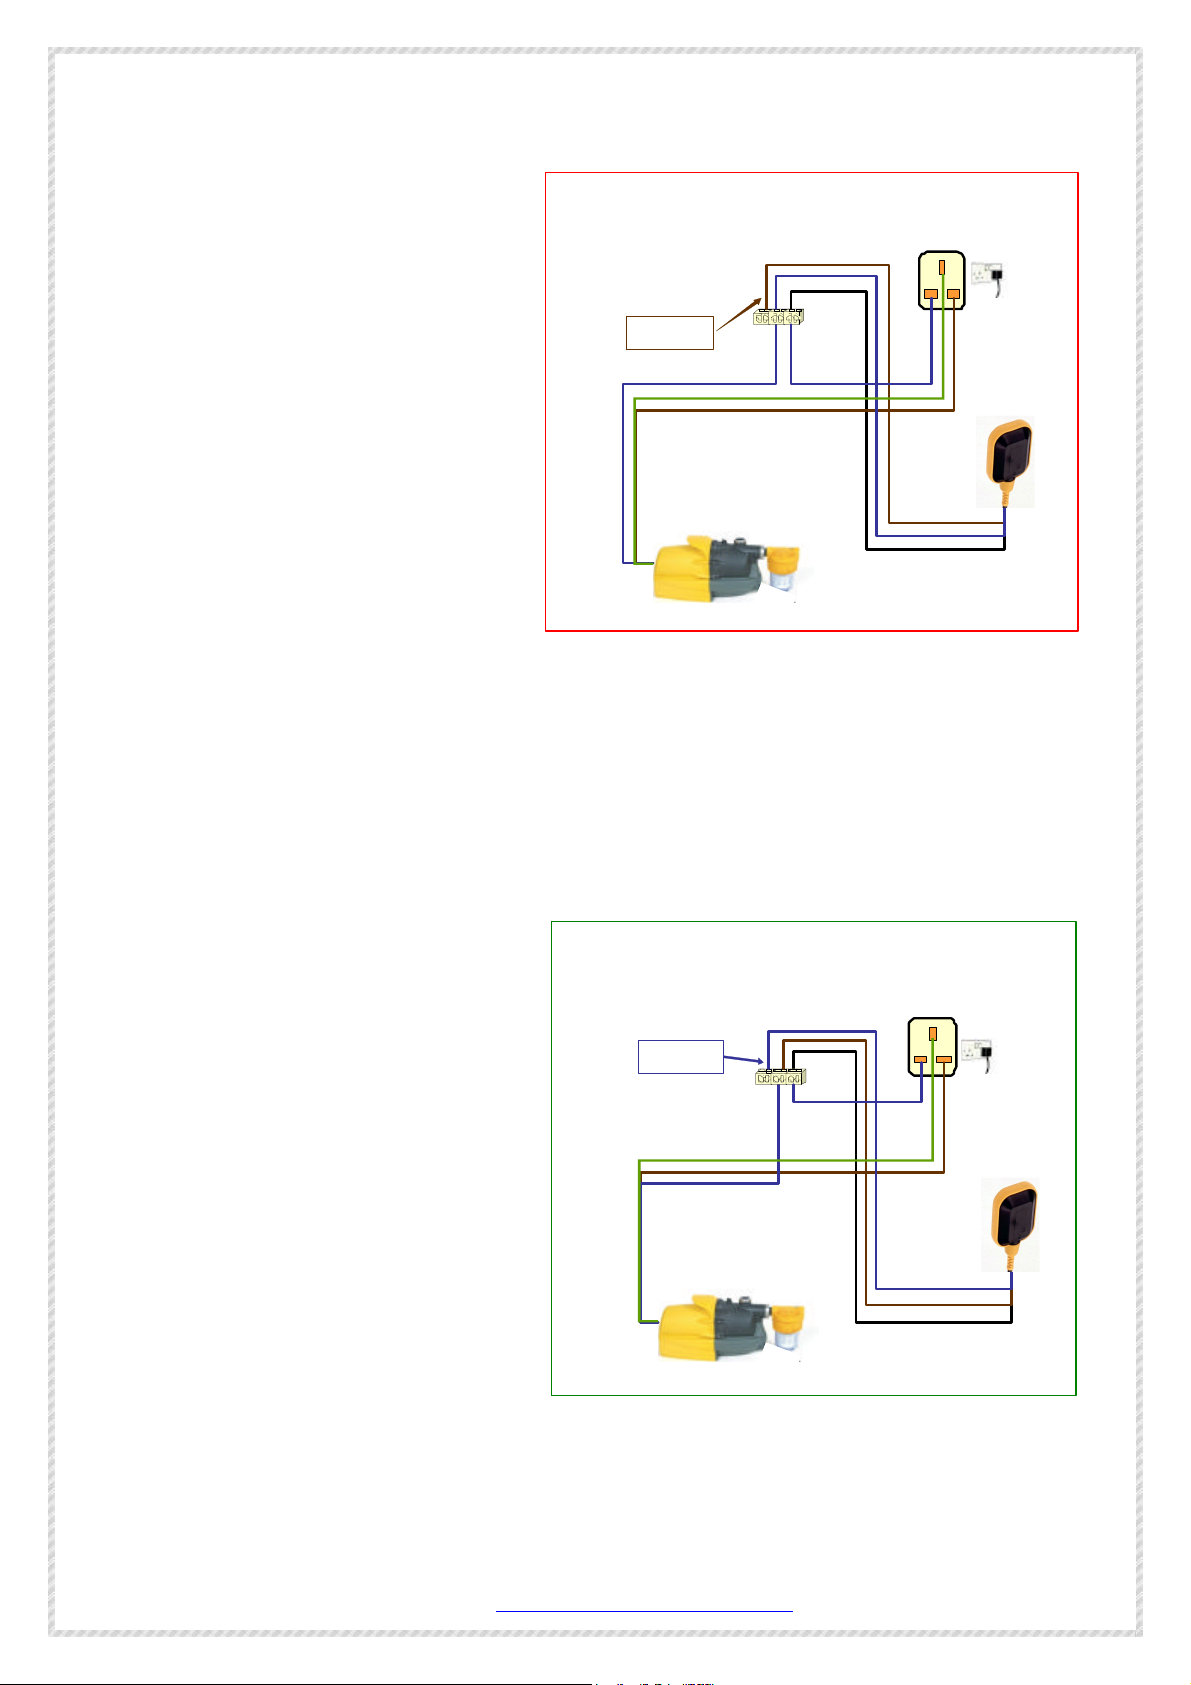
Wiring: if connecting a 230 Volts
AC pump to turn OFF when the
float rises, refer to the figure
(right) and proceed as follows:
a) identify the black lead from
the float switch and connect it to
the N (neutral) pin of the three pin mains plug,
b) identify the blue lead from the float switch and connect it via a waterproof
connector to the N (neutral) pin of the pump,
c) Identify the brown lead from the float switch, which will not be used, and ensure
it is well insulated in a dry place, and
d) Connect the L (live or lead) pin of the three pin mains plug to the L pin of the
pump. If the pump’s cable is not identified by N or L then the polarity is not important.
B) WIRING Pump turns ON when float rises
This use of the float switch is
typically
i)to prevent a tank from
overflowing
ii) to run a scavenge pump
when all water must be pumped
out, or
iii) to protect a pump from dry
running
Wiring: if connecting a 230 Volts
AC pump to turn ON when the float
rises, refer to the figure (right) and
proceed as follows:
a) identify the black lead from
the float switch and connect it to
the N (neutral) pin of the three pin
mains plug,
b) identify the brown lead
from the float switch and connect it
via a waterproof connector to the N (neutral) pin of the pump,
c) identify the blue lead from the float switch, which will not be used, and ensure it
is well insulated in a dry place, and
d) Connect the L (live or lead) pin of the three pin mains plug to the L pin of the
pump. If the pump’s cable is not identified by N or L then the polarity is not important.
L
N
230 Volts AC
Mains Plug
Pump
Float switch
Damp resistant
connector
Pump turns ON when float rises
Bluelead
insulated
E
LN
230 Volts AC
Mains Plug
Pump
Float switch
Damp resistant
connector
Pump turns OFF when float rises
Brown lead
insulated
E


