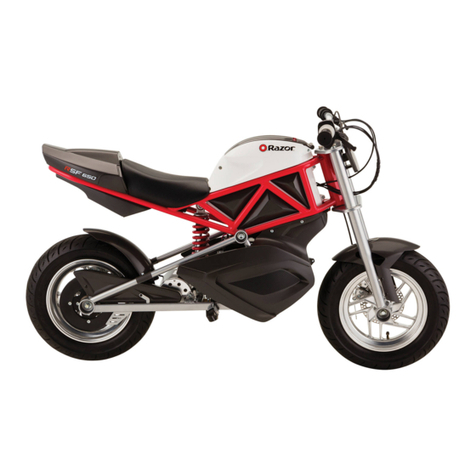
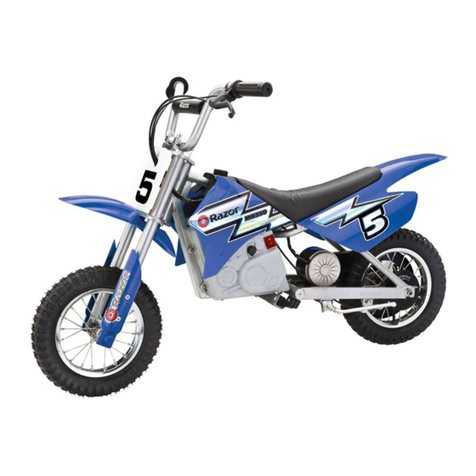
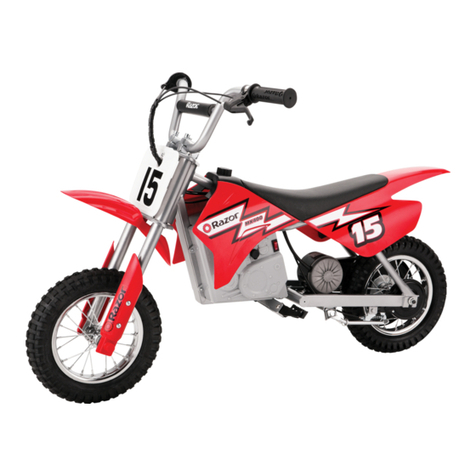
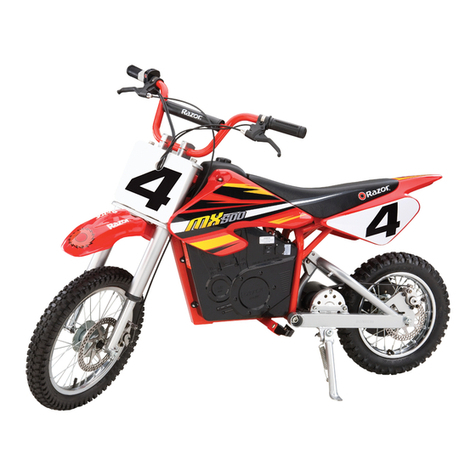
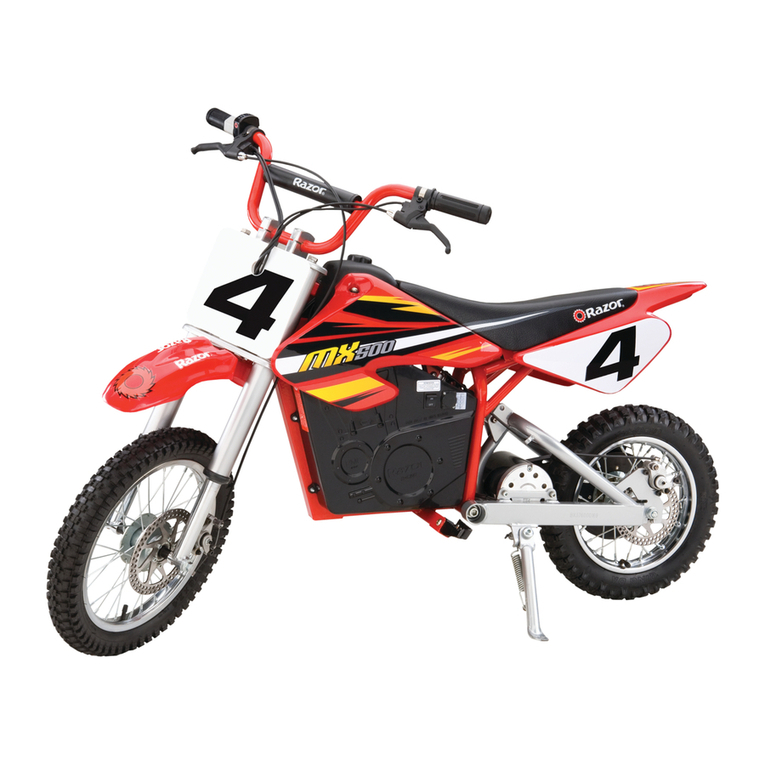
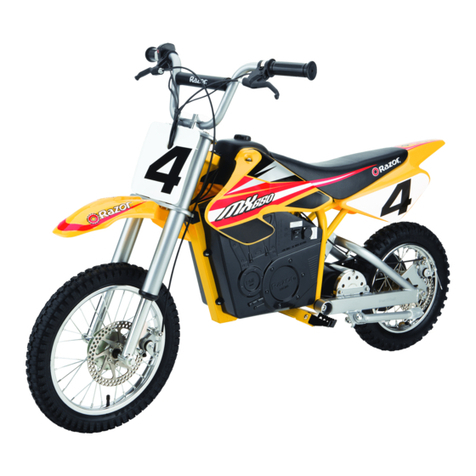
Razor Dirt Rocket SX500 User manual

OWNER’S MANUAL
Read and understand this entire manual before allowing
child to use this product!
NOTE: Manual illustrations are for demonstration purposes only.
Illustrations may not reflect exact appearance of actual product.
Specifications subject to change without notice.
Dirt Rocket™SX500, MX500 and MX650


1
Safety Warnings......................................................................................................... 1-2
Before You Begin ............................................................................................................3
Assembly and Set-Up ................................................................................................ 4-6
Charging the Battery ......................................................................................................7
Pre-Ride Checklist...........................................................................................................7
Repair and Maintenance ......................................................................................... 8-11
Troubleshooting Guide ...........................................................................................11-12
Contact Information......................................................................................................26
WARNING: Riding an electric motor bike does present potential risks
and caution is required. Like any riding product, an electric motor bike has inherent
hazards associated with its use (for example, falling off or riding it into a hazardous
situation). Like any riding product, electric motor bikes can and are intended to
move and it is therefore, of course, possible to lose control or otherwise get into
dangerous situations. Both children, and adults responsible for supervising them,
must recognize that if such things occur, a rider can be seriously injured or die even
when using safety equipment and other precautions. USE EXTREME CAUTION.
WARNING: PARENTAL AND ADULT RESPONSIBILITY AND
SUPERVISION NECESSARY: This manual contains important safety
information. It is your responsibility to review this information and make sure that
all riders understand all warnings, cautions, instructions and safety topics, and
assure that young riders are able to safely and responsibly use these products.
Razor recommends that you periodically review and reinforce the information in
this manual with younger riders, and that you inspect and maintain your children’s
product to insure their safety.
WARNING: THE SX500/MX500 IS NOT FOR CHILDREN UNDER
AGE 14 OR HEAVIER THAN 175 LB (79 KG). THE MX650 IS NOT FOR
CHILDREN UNDER AGE 16 OR HEAVIER THAN 220 LB (100 KG).
Because products, like electric motor bikes, can and do present potential hazards
plainly associated with their use, it is well recognized THE NEED FOR EXERCISE
OF PARENTAL RESPONSIBILITY IN SELECTING RIDING PRODUCTS APPROPRIATE
TO THE AGE OF A CHILD, OR PARENTAL SUPERVISION IN SITUATIONS IN WHICH
CHILDREN OF VARIOUS AGES MAY HAVE ACCESS TO THE SAME RIDING
PRODUCTS, IS IMPORTANT. Not every product is appropriate for every age or
size of child, and different age recommendations are found within this category of
product which are intended to reflect the nature of the hazards and the expected
mental or physical ability, or both, of a rider to cope with the hazards.
Razor recommends that children under the age of 14 not be permitted to use the
SX500/MX500 and that children under the age of 16 not be permitted to use the
MX650. This recommendation is based not just on age or weight or height – it
reflects consideration of expected maturity and skills as well as physical size. The
recommended rider age of 14 years or older for SX500/MX500 and rider age of
16 years or older for MX650 are only estimates and can be affected by the rider’s
size, weight or skills – not every child 14 years old will be suited to the SX500/
MX500 and not every child 16 years old will be suite to the MX650. Certainly, any
rider unable to fit comfortably on the SX500/MX500/MX650 should not attempt
to ride it, but a parent’s decision to allow his or her child to ride these
products should be based on the child’s maturity, skill, and ability to
follow rules. Razor emphasizes that adults are strongly advised not
to disregard Razor’s recommendations or permit younger children to
ride the SX500/MX500/MX650.
DO NOT EXCEED THE WEIGHT LIMIT OF 175 lb (79 kg) for SX500/MX500 and
220 lb (100 kg) for MX650. Rider weight alone also does not necessarily mean
a person’s size is appropriate to fit or maintain control of the SX500/MX500/
MX650. Keep these products away from small children and remember that
these products are intended for use only by persons who are, at a minimum,
completely comfortable and competent while operating these products.
Persons with any mental or physical conditions that may make them
susceptible to injury, impair their physical dexterity or mental capabilities
to recognize, understand, and follow safety instructions and to be able to
understand the hazards inherent in a product’s use, should not use or be
permitted to use products inappropriate for their abilities. Persons with heart
conditions, head, back or neck ailments (or prior surgeries to these areas of the
body), or pregnant women, should be cautioned not to operate these products.
CHECK AND MAINTAIN MOTOR BIKE CONDITIONS
Before use, check to confirm that any and all chain guards or other covers and
guards are in place and in serviceable condition. Check that the brakes are
functioning properly, and that tires are inflated properly and have sufficient tread
remaining. The motor bike should be maintained and repaired in accordance
with the manufacturer’s specifications, using only the manufacturer’s authorized
replacement parts, and should not be modified from the manufacturer’s original
design and configuration.
ACCEPTABLE RIDING PRACTICES AND CONDITIONS
Always check and obey any local laws or regulations, which may
affect the locations where the electric motor bike may be used. Keep
safely away from cars and motor vehicle traffic at all times, and only
use where allowed and with caution.
Do not activate the speed control on the hand grip unless you are on the motor bike
and in a safe, outdoor environment suitable for riding.
The normal powered top speed of these motor bikes will be approximately 15
mph (24 km/h) for SX500/MX500 and 17 mph (27 km/h) for MX650, which can
be affected by conditions, such as rider weight, inclines, tire inflation and battery
charge level. Avoid excessive speeds that can be associated with downhill rides.
Maintain a hold on the handlebars at all times. Do not touch the brakes or motor
on your motor bike when in use or immediately after riding, as these parts can
become very hot.
Ride defensively. Watch out for potential obstacles that could catch your wheel
or force you to swerve suddenly or lose control. Be careful to avoid pedestrians,
skaters, skateboards, scooters, bikes, children or animals who may enter your path,
and respect the rights and property of others.
These electric motor bikes are intended for use on flat, dry surfaces, such as
pavement or level ground, without loose debris, such as sand, leaves, rocks or
gravel. Wet, slick, bumpy, uneven or rough surfaces may impair traction and
contribute to possible accidents. Do not ride your motor bike in mud, ice, puddles
or water. Watch out for potential obstacles that could catch your wheel or force
you to swerve suddenly or lose control. Avoid sharp bumps, drainage grates, and
sudden surface changes.
Do not attempt or do stunts or tricks on your electric motor bike. These motor bikes
are not made to withstand abuse from misuse, such as jumping, curb grinding or
any other type of stunts. Racing, stunt riding, or other maneuvers also enhance risk
of loss of control, or may cause uncontrolled rider actions or reactions.
Never allow more than one person at a time to ride the motor bike.
Do not ride at night or when visibility is limited.
Never use near steps or swimming pools.
Do not allow hands, feet, hair, body parts, clothing, or similar articles to
come in contact with moving parts, wheels, or drive train chain while the
motor is running.
SAFETY WARNINGS
CONTENTS

2
SAFETY WARNINGS
Never use headphones, a cell phone or text when riding.
Never hitch a ride with a vehicle.
Do not ride your motor bike in wet or icy weather and never immerse the motor
bike in water, as the electrical and drive components could be damaged by water
or create other possibly unsafe conditions. Never risk damaging surfaces, such as
carpet or flooring, by use of an electric motor bike indoors.
This product can only be used in private areas or enclosed venues. Do not use in
public roads, sidewalks or near traffic.
PROPER RIDING ATTIRE
Always wear proper protective equipment, such as an approved safety helmet (with
chin strap securely buckled), elbow pads and kneepads. A helmet may be legally
required by local law or regulation in your area. A long-sleeved shirt, long pants, and
gloves are recommended. Always wear athletic shoes (lace-up shoes with rubber
soles) and keep shoelaces tied and out of the way of the wheels, motor and drive
system. Never ride barefooted or in sandals.
USING THE CHARGER
The charger supplied with the electric motor bike should be regularly examined
for damage to the cord, plug, enclosure and other parts. In the event of such
damage, the motor bike must not be charged until the charger has been repaired
or replaced.
Use only with the recommended charger.
Use caution when charging.
The charger is not a toy. Charger should be operated by an adult.
Do not operate charger near flammable materials.
Unplug charger and disconnect from motor bike when not in use.
Always disconnect from the charger prior to wiping down and cleaning your motor
bike with damp cloth.
USE WITH EXTREME CAUTION.

3
Speed Control
Drive
Chain
Front Fork
Brake Lever
Brake Lever
Brake Lever
Remove contents from box. Remove the separators that protect the components from damage during shipping. Inspect the
contents of the box for scratches in the paint, dents or kinked cables that may have occurred during shipping. Because the motor
bike was 95 percent assembled and packed at the factory, there should not be any problems, even if the box has a few scars or
dents.
MAKE SURE POWER SWITCH IS TURNED “OFF” BEFORE CONDUCTING ANY ASSEMBLY OR
MAINTENANCE PROCEDURES.
Estimated Assembly and Set-Up Time
Razor recommends assembly by an adult with experience in bicycle mechanics.
Allow up to 30 minutes for assembly, not including initial charge time.
Allow up to 12 hours for charge (see page 7 for charging information).
WARNING: DO NOT USE
NON-RAZOR PRODUCTS WITH
YOUR RAZOR ELECTRIC MOTOR
BIKE. The motor bike has been built
to certain Razor design specifications.
The original equipment supplied at
the time of sale was selected on the
basis of its compatibility with the
frame, fork and all other parts. Certain
aftermarket products may not be
compatible and will void the warranty.
Required Tools
5 mm and 6 mm
Allen wrenches
10 mm, 14 mm and 17 mm
wrenches
(MX500/MX650 Models)
10 mm, 17 mm and 19 mm
wrenches
(SX500 Model)
Phillips screwdriver Spoke tightener
Charger
(Note: Charger design may vary from
one shown)
Product ID Locations:
See locations to the left
1. Battery cover
2. Frame (underneath unit)
3. Charger
4. Box - side of UPC (not shown)
Plastic Bag Contents:
• Charger
• Handlebar Clamps
• Front Axle Bolt
• Tools
• Owner’s Manual
1.2.
3.
BEFORE YOU BEGIN

4
ASSEMBLY AND SET-UP
Bolt Tightening Torsion Value Reference Chart
Please refer to chart below to ensure the bolt you have tightened corresponds to below torsion value according to its relevant diameter.
Bolt Diameter Recommended Torsion Value
Normal Bolt Torsion Value(N-M)
5mm 5
6mm 10
8mm 21
10mm 34
12mm 53

5
1Place the handlebars in the
handlebar clamps with tools and
manual.
Note: Handlebar clamps are
located in the plastic bag.
2Align parallel to the fork and
tighten the bolts using a 6 mm Allen
wrench. When properly tightened,
the handlebars should not move
forward or backward.
3Adjust the brake lever adjuster to
the proper place and tighten it with
the 5 mm Allen wrench.
1Align fender with the hole in
the fork and insert the bolt. Tighten
securely using a 10 mm wrench
and 5 mm Allen wrench.
MX500/MX650 Models
Remove screw from front fork. Align
the number plate with the hole in
the fork and tighten with a Phillips
screwdriver.
SX500 Model
Slip the cables through the slit on the
top of the number plate. Align the
number plate with the holes on the
fork and snap on the number plate.
Attaching the Handlebars
Tools required: 6 mm Allen wrench
Attaching the Front Fender
Tools required: 10 mm wrench and 5 mm Allen wrench
Attaching the Number Plate
Tools required: Phillips screwdriver
ASSEMBLY AND SET-UP
Note: Front fender design may vary.

SX500 Model
3With a 17 mm and 19 mm
wrench, tighten the front wheel.
6
2Slide axle through fork, spacer and wheel hub. When axle passes through the
other side of the wheel hub, add the other spacer, and slide though the fork. Secure
with washer and nut.
Note: Front axle is installed with the spacer between the fork and wheel for all Dirt
Rockets.
1Position wheel in front fork and
slide disk brake into caliper.
MX500/MX650 Models
3With a 14 mm and 17 mm
wrench, tighten the front wheel.
Installing the Front Wheel
Tools required: 14 mm wrench and 17 mm wrench (MX500/MX650 Models)
17 mm wrench and 19 mm wrench (SX500 Model)
Inflating the Tires
Tires are inflated when shipped, but they invariably lose some pressure between the point of manufacturing and your
purchase.
WARNING: Failing to
properly adjust and tighten the nuts
and bolts that affix the fork can cause
you to lose control and fall.
WARNING:
Do not over inflate, as this could
damage tire or wheel.
Note: The pressurized air supplies
found at gasoline stations are
designed to inflate high-volume
automobile tires. If you decide to use
such an air supply to inflate your motor
bike tires, first make sure the pressure
gauge is working, then use very
short bursts to inflate to the correct
PSI. If you inadvertently over-inflate
the tire, release the excess pressure
immediately.
1 Using a bicycle-style tire pump
equipped for a Schrader-type valve,
inflate the front tire to the correct PSI
indicated on the sidewall of the tire.
ASSEMBLY AND SET-UP
Axle Blot
Fork Fork
Spacer Spacer
Washer
Washer Nut
Nut

7
2 Maker sure power switch is in
the OFF position. Plug the charger
into the charger port. The light on
the charger should turn red during
charging then back to green when
charging is complete.
WARNING: Use ONLY
with the recommended charger.
Batteries are only to be charged
under adult supervision. The
charger is not a toy. Always
disconnect the charger before
wiping down and/or cleaning the
motor bike with a damp cloth.
The charger supplied with the motor
bike should be regularly examined for
damage to the cord, plug, enclosure
and other parts. In the event of such
damage, the electric motor bike
must not be charged until it has been
repaired or replaced.
Chargers have built-in overcharge
protection to prevent battery from
being overcharged.
Note: If the charger gets warm during
regular use, this is a normal response
and is no cause for concern. If your
charger does not get warm during use,
it does not mean that it is not working
properly.
Wall outlet - Green
Wall outlet and unit - Red (charging)
Wall outlet and unit - Green (charged)
Note: Continue charging unit even if
light turns green prior to 12 hours.
WARNING: Failure to
recharge the battery at least once a
month may result in a battery that will
no longer accept a charge.
1Plug the charger into a wall
outlet. The light on the charger
should be green.
Note: If green light (LED) does not
light up, try a different outlet.
Your electric motor bike may not have a fully charged battery; therefore you must charge the battery prior to use.
• Initial charge time: 12 hours.
• Recharge time: up to 12 hours, even if the light
turns green. Recommended maximum charging time
is 24 hours.
• Always charge the battery immediately after riding.
• Fully charge battery before storing for extended periods
of time.
• Unplug charger from the wall outlet when not in use.
• Failure to recharge battery periodically may result in a
battery that will not accept a charge.
• Make sure the power switch is turned OFF when unit is
not in use. If the power switch is left on for an extended
period of time, the battery may reach a stage at which it
will no longer hold a charge.
• To ensure long battery life, never store the product in
freezing or below freezing temperatures! Freezing will
permanently damage the battery.
• Run time: Up to 40 minutes of continuous ride time.
Run time may vary depending on riding conditions, rider
weight, climate, and/or proper maintenance.
• Battery life can vary depending on proper maintenance
and usage of the unit.
Note: Make sure power is turned
OFF when unit is not in use. If
the power switch is left on for an
extended period of time, the battery
may reach a stage at which it will no
longer hold a charge.
PRE-RIDE CHECKLIST
Brake
Check the brakes for proper function. When you squeeze the lever,
the brake should provide positive braking action. Make sure that
brakes are not rubbing when the lever is released.
Tires
Periodically inspect the tires for excess wear and regularly check the
tire pressure. Reinflate as necessary.
Frame, Fork and Handlebars
Check for cracks or broken connections. Although broken frames are
rare, it is possible for an aggressive rider to run into a curb or object,
and wreck and bend or break a frame. Get in the habit of inspecting
your motor bike on a regular basis.
Hardware/Loose Parts
Before every ride, check all parts, such as nuts, bolts, cables,
fasteners, etc., to ensure they are secure and assembled
correctly. There should not be any unusual rattles or sounds
from loose parts or broken components. If the unit is damaged,
do not ride. Reference “Safety Warnings” on page 1 of
this manual.
Safety Gear
Always wear proper protective gear, such as an approved safety helmet.
Elbow pads and kneepads are recommended. Always wear athletic
shoes (lace-up shoes with rubber soles) and keep shoelaces tied and
out of the way of the wheels, motor and drive system. NEVER RIDE
BAREFOOTED OR IN SANDALS.
Laws and Regulations
Always check and obey any local laws or regulations.
CHARGING THE BATTERY
Charger

3 Fuse boxes Amperage
number
8
2If the brake has too much
slack, loosen the rear anchor
bolt with a 5 mm Allen wrench
and pull the brake wire tighter.
The distance of the brake wire
between the end of the cable and
the anchor bolt should be between
37 mm and 44 mm.
3If the brake rotor is dragging on
the brake pads, use your fingers to
twist the caliper adjuster in either
direction until rotor is centered
between pads.
1To adjust brake cable play, thread
the brake lever adjuster in or out
1/4 to 1/2 turn until the desired
brake adjustment is attained. Most
adjustments are complete at this
step. If brake still needs further
adjustment, proceed to step 2.
WARNING: The brake is
capable of causing the electric motor
bike to skid the tire throwing an
unsuspecting rider. Practice in an open
area free from obstacles until you are
familiar with the brake function. Avoid
skidding to a stop as this can cause
you to lose control or damage the rear
tire.
Testing the Brakes. To use the
brakes, squeeze the levers to increase
the pressure on the brake. The brake
levers are fitted with a cable adjuster
to compensate for cable stretch and/
or to fine-tune the lever movement to
brake engagement. If brakes are not
engaging properly, follow instructions
for adjusting the brakes.
Adjusting the Brakes
Tools required: 5 mm Allen wrench
Turn power switch “OFF” before beginning repair or maintenance:
• Read the instructions
• Remove charger plug
• Turn the power switch off
• Secure the unit under repair
• Exercise caution around
exposed parts
• Contact customer service if unsure
about any repair or maintenance
1Remove the seat fairing and
battery cover to locate the 3 fuse
boxes attached to the batteries.
2Check all 3 fuses to see if the
fuse(s) have burnt out. Remove
any fuse that is damaged or burnt
out and replace with a new one of
equal amperage.
Note: Amperage is located on top
of fuse.
3Close the fuse cover and reattach
the seat fairing.
Replacing the Fuse WARNING: To prevent
shock, please follow the instructions
accordingly and do not skip any steps.
REPAIR AND MAINTENANCE

9
2Using two 19 mm wrenches,
loosen both axle nuts.
5 Reattach the chain guard. Test
ride and check. Readjust as needed.
3Push the chain tensioner down
to loosen the chain and remove the
chain from the wheel sprocket and
motor sprocket. Push and remove the
wheel downward.
Note: Your hands will get greasy
doing this.
1Loosen screws and remove chain
guard.
4Install the new chain or wheel
by slipping the chain around the
axle. Slide the axle into the slots on
the frame. Slide the chain tensioner
down and maneuver the chain onto
the rear sprocket and motor sprocket.
Replacing the Chain and Tire
Tools required: Phillips screwdriver and two (2) 19 mm wrenches.
Note: the arrangement of the
hardware sequence:
Right Side (Throttle)
16-1 Nut
16-2 Washer
Frame
16-3 Spacer
Left Side (Brake)
16-1 Nut
16-2 Washer
Frame
16-3 Spacer
16-1
16-3
16-2
16-2
16-3
16-1
REPAIR AND MAINTENANCE

Spoke
Flange
Spoke
Nipple
Hub
Flange
Spoke
Flange
Rim
Nipple
1
2
3
4
28
27
10
Need Help? Visit our web site for replacement parts, product support, a list of authorized service centers in the US and customer service contact information at www.
razor.com. Please have the product I.D. code (located on the white label of your product) available for better assistance. Additional Customer Service contact information is
listed at the back of this manual.
1Verify the spoke tension by shaking each spoke with your fingers. Spoke should
not be loose from hub. Look for any play between where the spoke flanges attach to
the hub. Try to turn the nipple using your fingers. You should not be able to spin any
nipple by hand. If one or more spokes is loose, all spokes must be checked and need
to be tightened with a spoke wrench.
2Start with spoke closest to the
tire valve stem and tighten each
nipple, in sequence, exactly 1/4 to
1/2 turn. A single 1/4 to 1/2 turn
may not be enough to bring the
spokes into proper tension. Continue
tightening all spokes, no more than
1/2 turn, in sequence until all spokes
are tight.
Note: More than a 1/2 turn each
can cause the wheel to become
distorted and wobbly, thus
permanently damaging the wheel.
Spoke Tension
Chain and Sprocket
Proper chain alignment must be maintained. The wheel must not be skewed. If the chain is noisy or running rough, check the
lubrication, tension and alignment of the sprockets, in that order.
WARNING: Regularly check
the spoke tension and retighten
the spokes whenever loose. If you
have any doubt, ask an experienced
motorcycle or bicycle mechanic to
inspect your spokes to determine if the
spokes need tightening or adjusting.
WARNING: To avoid a pinch
or injury, keep fingers away from
moving sprockets and chain.
REPAIR AND MAINTENANCE

11
WARNING: If a battery leak
develops, avoid contact with the
leaking acid and place the damaged
battery in a plastic bag. Refer to the
disposal instructions at left. If acid
comes into contact with skin or eyes,
flush with cool water for at least 15
minutes and contact a physician.
WARNING: Battery posts,
terminals and related accessories
contain lead and lead compounds.
Wash your hands after handling.
REPAIR AND MAINTENANCE
Battery Care and Disposal
Never store the product in freezing or below freezing temperatures! Freezing will permanently damage the battery. Failure to
recharge the battery at least once a month may result in a battery that will no longer accept a charge.
Pb
CONTAINS SEALED LEAD ACID BATTERIES. BATTERIES MUST BE RECYCLED.
Disposal: Your Razor product uses sealed lead-acid batteries which must be recycled or disposed of in an environmentally
safe manner. Do not dispose of a lead-acid battery in a fire; the battery may explode or leak. Do not dispose of a lead-acid
battery in your regular household trash.
Charger
The charger supplied with the electric motor bike should be regularly examined for damage to the cord, plug, enclosure and
other parts, and in the event of such damage, the product must not be charged until it has been repaired or replaced.
Use ONLY with the recommended charger.
Wheels
Wheels and drive system are subject to normal wear and tear. It is the responsibility of the user to periodically inspect wheels
for excess wear and adjust and replace drive train components as required.
TROUBLESHOOTING GUIDE
Unit should be fully charged prior to doing any troubleshooting and must be done by an adult ONLY.
Problem Possible Cause Solution
Does not work Battery not fully charged
Loose connection(s)
Charge unit for a full 12 hours.
Check for loose connections/wires.
Check power to wall outlet and/or try a different outlet.
No longer works Burnt-out fuse
Motor or electrical switch damage
Loose connection(s)
Charger not working
Battery will not hold a charge
The fuse will burn out and automatically shut off the power if the motor is
overloaded.
An excessive overload, such as too heavy a rider or too steep a hill, could
cause the motor to overheat. Replace the fuse(s) with a new one of equal
amperage. Correct the conditions that caused the fuse to burn out and avoid
repeatedly burning out fuse.
Contact customer service.
Check for loose connections/wires.
Check power to wall outlet and/or try a different outlet.
Check lights on charger:
Plugged into wall - Green
Plugged into wall & unit - Red (charging)
Plugged into wall & unit - Green (charging complete)
No lights/Blinking lights - Replace Charger
Secure unit, turn power ON with no weight on the unit, carefully lift up back
end and apply the throttle to engage the motor. If motor engages - replace
battery.
If motor does not engage, but makes a clicking sound - Replace Battery. If
motor does not engage, no clicking sound - Replace Control Module.

12
TROUBLESHOOTING GUIDE
Short run time/runs slow Rider weight
Battery not fully charged
Old/damaged battery
Improper battery maintenance
Tire is not properly inflated
Brakes are not adjusted properly
Do not exceed the weight limit of 175 lb (79 kg) for SX500/MX500 and 220 lb
(100 kg) for MX650.
Charge unit for a full 12 hours.
Check all connectors. Make sure the charger connector is tightly plugged into
the charging port, and that the charger is plugged into the wall.
Secure unit, turn power ON with no weight on the unit, carefully lift up back
end and apply the throttle to engage the motor. If motor engages - replace
battery.
Charge battery periodically when not in use.
Do not store unit in freezing or below freezing temperatures. Freezing will
permanently damage the battery and greatly reduce ride time. Refer to page 7
“Charging the Battery”.
Tire will lose some pressure over time. Verify correct tire pressure.
Refer to “Adjusting the Brakes” on page 8.
Problem Possible Cause Solution
Runs intermittently Loose connection(s)
Motor or electrical switch damage
Check for loose connections/wires.
Contact customer service.
Motor bike does not stop when applying
the brake
Brakes are not adjusted properly Refer to “Adjusting the Brakes” on page 8
Motor bike makes loud noises or grinding
sounds
Chain is too dry Apply a lubricant, such as 3 in 1TM or Tri-FlowTM to the chain.
使用说明书

Dirt Rocket™SX500, MX500, MX650
使用说明书
在您的孩子使用本产品前,请先阅读并理解本说明书中的全部内容!
注:本说明书中的插图仅用于信息阐述。插图所展示信息仅供参考,
实际产品请以实物为准。规范如有变更,恕不另行通知。

14
警告:驾驶电动摩托车可能会带来风险,请务必小心和其他电
气产品一样,电动摩托车的使用本身就存在危险(例如,摔倒或驶
入危险区域)。和其他乘骑产品一样,电动摩托车的设计初衷就是移
动,因此,理所当然存在失控或导致危险情形的可能性。孩子和负责
监督的成人都必须认识到,如果上述不愉快事情发生,即便是在使用
了安全防护和其他防护措施的情况下,骑行者也有可能会受到严重
伤害甚至死亡。请谨慎使用本产品。
警告:家长和成人责任人必须进行监督:本说明书包含重要的
信息。用户有责任了解这些信息,并确保骑行者理解所有的警告、注
意事项、指导和安全方面的内容,保证儿童骑行者能够做到安全、合
理地使用这些产品。Razor推荐用户定期与青少年骑行者一起回顾
本说明书,巩固对说明书内容的理解,用户还应经常检查和维护本产
品 ,以 确 保 您 孩 子 的 安 全 。
警告:SX500/MX500不适合14岁以下的儿童,且骑行者的
体重不宜超过175磅(79公斤)。MX650不适合16岁以下的儿童,
且骑行者的体重不宜超过220磅(100公斤)。
因为像电动摩托车这样的产品可能导致与使用本产品直接相关的危
险,所以必须明确:家长应履行监护职责,选择适合孩子年龄的乘骑
产品,或在很多不同年龄段的孩子都在接触同一款乘骑产品的时候,
家长应对此情况进行监督,这一点非常重要。不是每件产品都适合各
个年龄段和身材的孩子,在本产品的分类中可以找到针对不同年龄
段孩子的推荐项目,这些推荐项目都反应了产品的危险性,并说明了
孩子所应具备何种心理素质和/或身体素质才能应对类似危险。
Razor不建议14岁以下孩子使用SX500/MX500产品以及16岁以
下孩子使用MX650产品.该建议并不只是基于年龄、体重或者身高
方面的考虑,同样考虑到了其成熟度以及技巧和实际的身高。建议
14岁以上的孩子骑行SX500/MX500,建议16岁以上孩子骑行
MX650,当然这是只建议,具体要根据骑行者的具体身高、体重或
技术而定,因为并非所有14岁以上的孩子都适合于SX500/MX500
,或者所有16岁以上的孩子都适合于MX650. 当然,不能轻松驾驶
SX500/MX500/MX650的人是不应该使用这类产品。家长应根据
孩子的成熟度、技能和遵守规则的能力决定是否允许他或她骑乘本
产品。 Razor强烈建议成人务必重视Razor的建议,切勿允许幼儿
驾驶SX500/MX500/MX650。
SX500/MX500骑行者的体重不可超过175磅(79公斤),MX650
骑行者的体重不可超过220磅(100公斤)。骑行者的体重未超标
并不一定意味着其体型大小适合、或能保持对SX500/MX500/
MX650的控制。本产品应远离幼儿,切记本产品只适用于至少可以
舒适驾驶本产品并且可以游刃有余地进行操作的孩子。
患有精神疾病,或容易受伤体质、协调性差或者精神失常,缺乏理解
能力和遵守安全规则的能力,这些孩子并不能理解使用本产品可能
存在的内在风险,所以不允许这类人使用本产品,因为他们的能力
满足不了本产品的使用要求。心脏病患者、头部、背部和颈部疾病患
者(或者之前做过上述部位手术的人),以及孕妇都不能使用这些
产品。
检查并维护电动摩托车状态。
使用前,检查并确认所有护链罩或盖板和罩壳都已安装就位,并处于
可用状态。检查刹车的功能是否正常,车胎的充气情况,轮胎表面的
花纹是否还在。本电动摩托车的修理和维护必须按照制造商的说明
进行,并只能使用制造商的零部件进行更换,不得对制造商的原先设
计和设定进行改装。
可接受的驾驶操作和情况
检查并遵守任何地方法规中关于本电动摩托车可用区域范围的规
定。始终与汽车和机动车道保持安全距离,只在许可的地方骑行,并
谨慎驾驶。
除非骑坐在本电动摩托车上,并且处于安全、适合骑行的室外环境
中,否则不要启动把手上的速度控制器。
SX500/MX500电动摩托车正常电力下的最高速度约为15英里/小
时(24公里/小时),MX650电动摩托车正常电力下的最高速度为17
英里/小时(27公里/小时),但受很多因素的影响,如骑行者体重、坡
度、轮胎充气和电池充电情况。下坡时请不要超速驾驶。
骑行时双手应始终保持紧握车把。在使用中或刚骑行完毕时,不要
触摸电动摩托车的刹车装置和电机,这些零部件的温度此时通常会
很高。
驾驶时应注意保护自己。小心可能会卡住车轮并导致突然转向或失
控的障碍物。应小心避开可能阻挡路线的行人、溜冰者、轮滑者、小
型 摩 托 车 、自 行 车 、儿 童 或 动 物 ,并 尊 重 他 人 的 权 利 和 财 产 。
这些电动摩托车适合行驶在平坦、干燥的地面上,如无沙土、落叶、碎
石的路面或平地等。潮湿、光滑、崎岖不平或有碎沙石的地面可减弱
动力,还有引发潜在事故的可能。禁止在泥路、冰雪路、水坑或者水
里骑行电动摩托车。小心可能会卡住车轮并导致突然转向或失控的
障碍物。避开尖锐的突起、排水格栅,避免突然的地表面变化。
切勿在您的电动摩托车上尝试、或做出特技、花样技巧。这些电动摩
托车的设计目的不支持非正常使用,如跳跃、路沿磨碾或其他特技
等。竞速、特技骑行或其他花式技巧也可增加失控风险,导致骑行者
出现无法控制的动作或反应。
本电动摩托车每次限乘一人,不可带人行驶。
不要在夜间能见度受限的情况下驾驶本品。
不要在靠近台阶或游泳池的位置驾驶。
电机运行的时候,请不要将手、脚、头发、身体各个部位、衣服或类似
物件接触到活动件,车轮、或传动系链。
驾驶期间请不要使用耳机或手机通话或发短信。
请不要使用本产品拖拽其他车辆。
请勿在阴雨天或冰雪天驾驶电动摩托车,亦不可将电动摩托车浸入
水中,否则它的电气和传动部件可能因水而损坏,或导致其它潜在的
安全隐患。请不要在室内使用电动摩托车产品,以免损坏地毯或划
伤地板。
目录
安全警告 ................................................................................................14-15
使用本品之前的注意事项 ........................................................................ 16
装配&组合 .............................................................................................17-19
电池充电 ....................................................................................................... 20
骑行前的检查项 ..........................................................................................20
维修保养 ................................................................................................21-24
检修指南 ................................................................................................24-25
联系信息 ....................................................................................................... 26
安全警告

15
妥善选择骑行服装
请务必佩戴适当的护具,如经审批合格的头盔(请系紧下巴处的
松紧带)、护肘和护膝。当地法律或法规或许要求必须佩戴头盔。
推荐穿戴长袖T恤、长裤和骑行手套。请穿运动鞋(应为橡胶鞋底,
请系紧鞋带),确保将鞋带系紧状态,请勿让鞋带碰到车轮、
电机或传动系统。不要赤脚或穿拖鞋驾驶。
本产品只能在私人场所或封闭场地内使用。不得在公共马路、人行
道或靠近交通路段使用。
充电器的使用
应及时进行检查随本电动摩托车提供的充电器是否存在电线、
插头、外壳或其他零部件受损的情况。如发现本产品存在该等损伤,
请务必先行对电动摩托车进行修理或替换,否则请勿使用充电器。
只能使用本说明中推荐的充电器。
充电时应注意安全。
充电器不是玩具。只有成人才能进行充电器充电操作。
不要在易燃材料周围使用充电器。
在不使用电动摩托车的情况下,请将充电器插座拔下,并断开电源。
使用湿布擦洗电动摩托车之前,应先切断充电器的电源。
不当使用或忽略以上警示内容使用本产品,可能导致受伤甚至死亡
的风险。请谨慎使用本产品。
安全警告

16
速度控制器
传动链
前车叉
制动杆
制动杆
制动杆
所需工具
5 mm and 6 mm
Allen wrenches
10mm、14mm
和17mm的扳手
(MX500/MX650)
10mm、17mm和19mm
的扳手(SX500)
十字螺丝刀 辐条紧轮
充电器
(注意:充电器设计可能与图示存在不同)
1.2.
3.
使用本品之前注意事项
从箱中取出内容物。将用于防护运输损伤的护垫拿开。检查箱中内容物,查看运输期间是否曾导致油漆
划痕、凹陷或纠缠在一起的闸线。 由于电动摩托车的95%已在出厂前装配、包装完毕,所以即便箱体
存在一些划痕或凹陷,产品本身也应该不会出现任何问题。
在进行任何装配和维护之前,请确保电源开关是处在“关闭”状态。
预计装配&组合时间
Razor建议由懂自行车结构的成人进行装配。
装配需要30分钟,不含初始充电时间。
充电需要12个小时(见第20页的充电相关信息)。
警告:
切勿在RAZOR电动摩托车
上使用非由RAZOR所产零部
件。本电动摩托车的制造依据
Razor的设计要求进行。销售
时最初提供的产品根据其与车
叉车架及其他零部件的兼容性
选 定 。零 件 市 场 上 所 销 售 的 产
品可能无法与本产品兼容,使
用这些产品将导致保修承诺
失效。
产品识别号
见左侧
1. 电池盖
2. 车 架( 下 侧 单 元 )
3. 充电器
4. 箱体—通用产品代码侧
(未显示)
塑料袋内 有:
• 充电器
• 车把夹具
• 前轴螺栓
• 工具
• 使用说明书

17
装配和组合
螺栓锁紧扭力参考表
请按照不同螺栓的直径来参考下表并按照其相对应的扭矩锁紧螺栓
螺栓直径 推荐扭矩
一般螺栓 扭矩 (牛/米)
5mm 5
6mm 10
8mm 21
10mm 34
12mm 53

18
1借助工具和本说明书同时
手动将车把放入车把夹
注意:车把夹放置在塑料
袋中。
2与 车 叉 对 齐 ,然 后 使 用
6mm内六角扳手上紧螺丝。
上 紧 后 ,将 车 把 固 定 ,确 保 其
不会前后移动。
3将制动杆调整器调整到合
适位置,然后使用5mm内六
角扳手上紧螺丝。
1 前挡泥板对准车叉上的洞
眼 ,插 入 螺 栓 。用 1 0 m m 扳 手
和5mm内六角扳手拧紧。
MX500/MX650模型
将 前 车 叉 上 的 螺 丝 拧 下。将 车
号牌对准车叉上的洞眼,用十
字螺丝刀将其拧紧。
SX500模型
将闸线从号牌顶部的车号牌
中穿过。
将车号牌对准车叉上的洞眼,
将其固定。
安装前护盖
所需工具:10mm扳手以及5mm内六角扳手
安装车号牌
所需工具:十字螺丝刀
警告:
前护盖的设计可能不同。
装配和组合
安装车把
所需工具:6mm内六角扳手
Other manuals for Dirt Rocket SX500
1
This manual suits for next models
2
Table of contents
Other Razor Motorcycle manuals

Razor
Razor Rebellion Electric Chopper 15130760 User manual

Razor
Razor Dirt Rocket MX350 15128040 User manual

Razor
Razor Indian eFTR Mini 2021 User manual

Razor
Razor RSF650 User manual

Razor
Razor Dirt Rocket MX350 User manual

Razor
Razor Indian eFTR Mini 2021 User manual

Razor
Razor Crazy Cart XL Guide

Razor
Razor POCKET ROCKET 155001 User manual

Razor
Razor Dirt Rocket SX500 User manual

Razor
Razor Dirt Rocket MX350 User manual