RecorderGear HC100 User manual

www.recordergear.com
RecorderGear™ and respective logos are trademarks of
Teton Webstores LLC ©2017 ALL RIGHTS RESERVED
USER MANUAL

1 Year Warranty
All RecorderGear™ brand products are backed by our
1 Year Warranty. For full details visit
www.recordergear.com
MID: CAP-1060
In order to comply with 18 U.S. Code § 2512 federal law,
the audio recording function has been removed from the
HC100. You can rest assured that this device is 100% legal to
use in the USA. Please be familiar with your country and state
surveillance laws before using this product. RecorderGear
products are sold NOT for illegal use and are sold for their
intended legal use only.
This Device is Compliant with
USA Surveillance Laws

4
Table of Contents
1 Charging
2 Insert / Eject Micro SD Card
3 Power On/Off
4 Continuous Video Recording Mode
5 Photo Taking Mode
6 Playback
7 Set Time and Date
8 Reset
9 Specs
10 Indicator Lights
5
6
7
8
9
10
12
13
14
15

5
1Charging
The HC100 takes approximately 1 hour to
charge. Before first time use, we recommend
fully charging the HC100. To charge the HC100,
connect it to a wall outlet or PC using the micro
USB cable provided.
NOTE:
While the HC100 is charging, all three indicator
lights will be illuminated. When charging is
complete, the red indicator light will shut off.

6
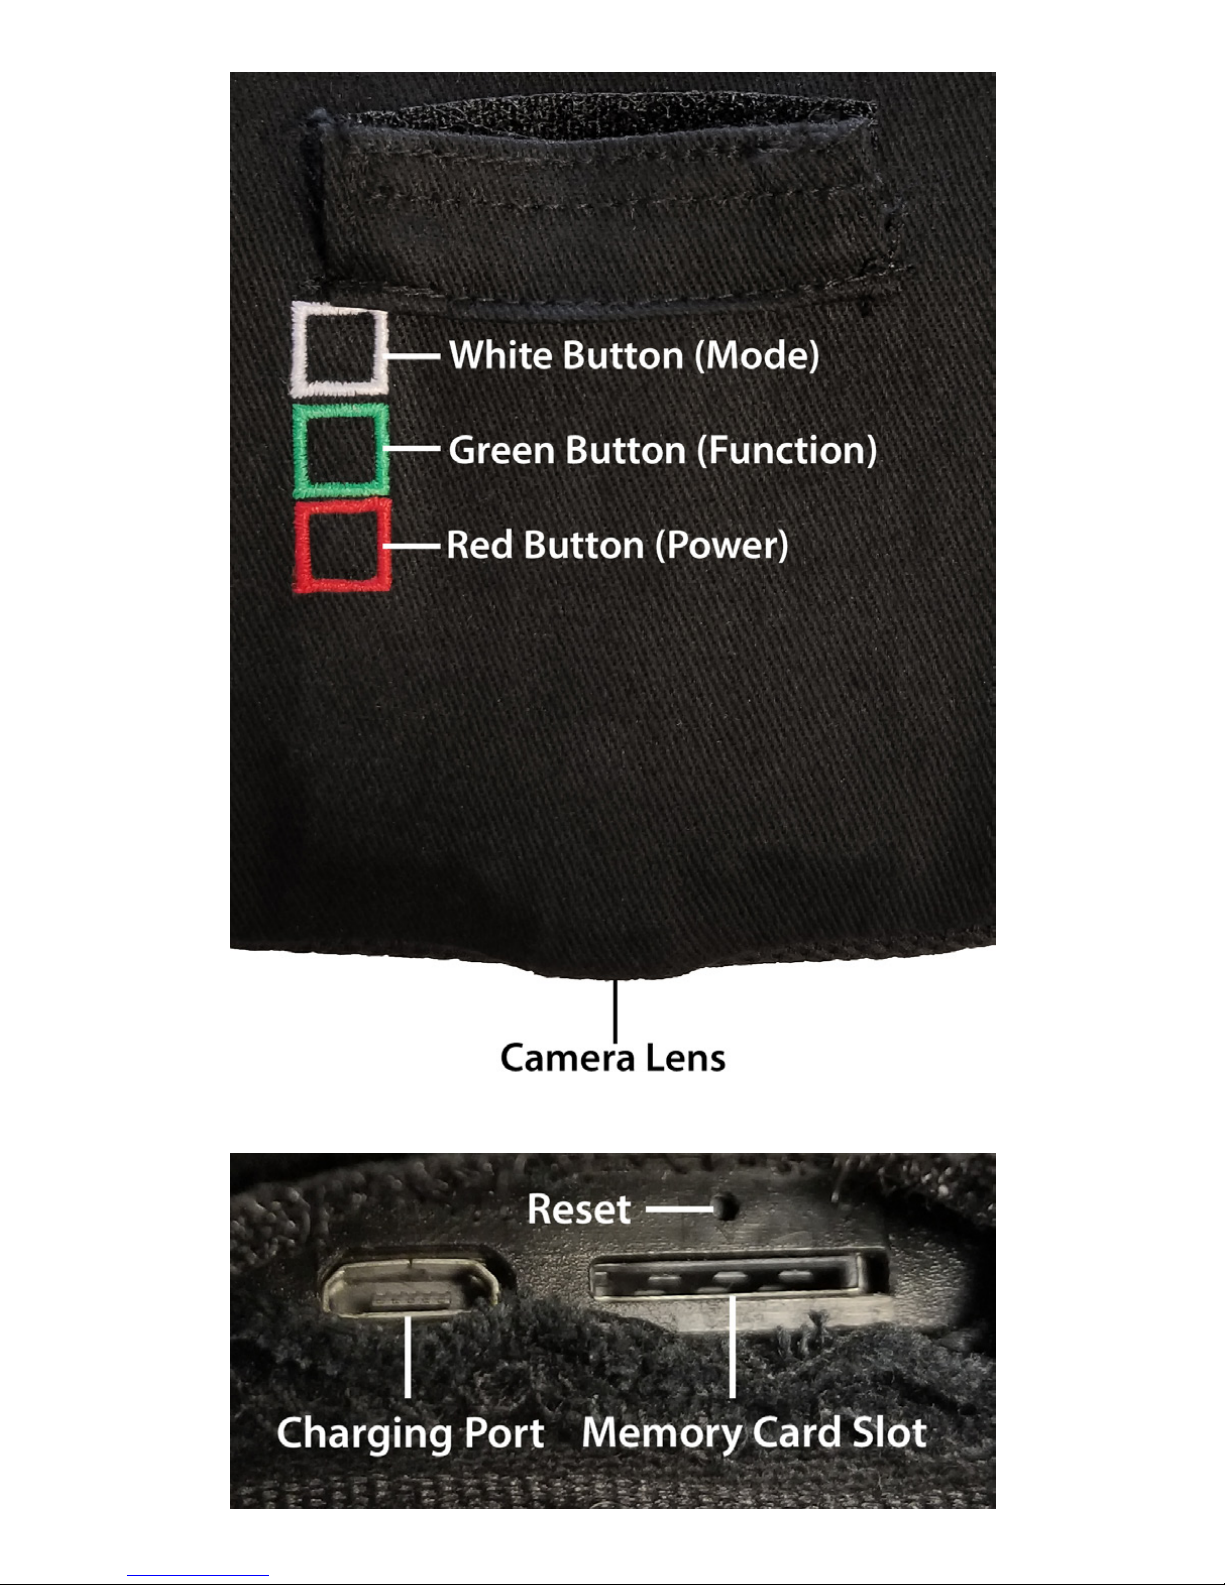
2 Insert / Eject Micro
SD Card
The HC100 supports up to a 32GB micro SD
card. Make sure the HC100 is powered off before
inserting or removing the memory card.
A. Insert a micro SD card into the memory card
slot. We recommend using a brand new class 10
micro SD card.
B. You will feel and hear a click when the card has
been inserted correctly.
C. To remove the micro SD card, push the card in
until you hear and feel a spring release and the
card will be ejected when you let go.
NOTE:
If the micro SD card is not inserted into the
HC100 the green indicator light will flash when
you turn the HC100 on.
If the micro SD card is difficult to remove, use the
included tweezers to assist in removing it.

7
3 Power On/Off
To Power On the HC100:
A. Make sure a micro SD card is inserted.
B. Press the red button.
C. The green light will turn on followed by the
blue light indicating the HC100 is on.
To Power Off the HC100:
A. Hold down the power button for 2 seconds:
the indicator lights will turn off indicating the
HC100 has powered off.

8
4 Continuous Video
Recording Mode
Continuous recording mode captures
uninterrupted video.
To activate continuous recording mode:
A. Make sure micro SD card is inserted.
B. Power on the HC100.
C. Press the green button to activate continuous
recording.
D. The green indicator light will begin blinking
and continue blinking while recording.

9
5 Photo Taking Mode
A. Make sure micro SD card is inserted.
B. Power on the HC100.
C. Press the white button to switch to photo
taking mode.
D. The blue light will turn off indicating that the
HC100 has entered photo taking mode.
E. Press the green button to snap a photo.
F. The green light will flash to indicate a photo
has been taken.
NOTE:
If you want to return to continuous video
recording mode press the white button once.

10
6 Playback
There are two methods to playback your files:
1. Connect the HC100 to a PC:
A. With a micro SD card inserted and the HC100
powered off, connect to the PC.
B. The HC100 will mount as a removable drive on
the PC.
C. Open the drive that appears on the desktop;
locate and open the “DCIM” folder to view your
files.
D. Video files can be transferred onto your
computer by copying and pasting or dragging
and dropping the files into selected folders on
the PC.
E. Double click to open a selected video with
your default player. (QuickTime users, make sure
the latest version is installed).
NOTE:
If you have trouble getting the video to play, we
HIGHLY recommend downloading VLC Player in
order to playback the videos on the PC
Table of contents
Other RecorderGear Digital Camera manuals


