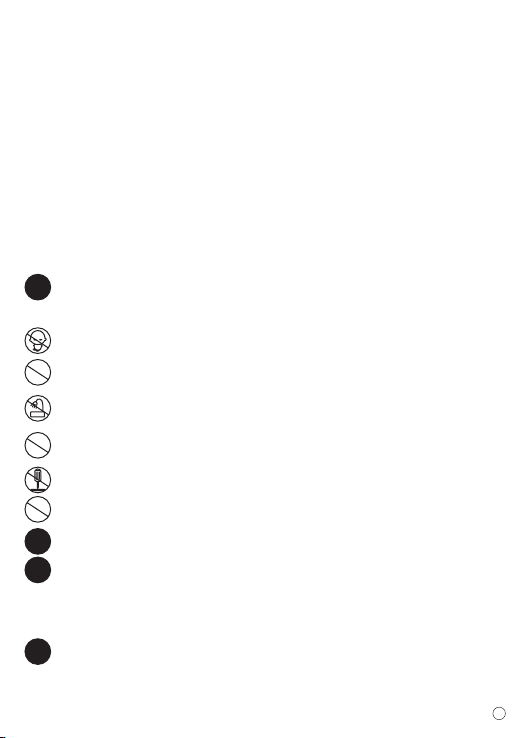
REXENER 18000 User manual

USER MANUAL
Thank you for choosing the Rexener 18000. Always
follow basic safety precautions when using
electrical appliances. Read all instructions carefully,
Please keep this instruction manual for easy reference
A. PRODUCT LAYOUT:
1
Home adaptor
A B
15V 1A input port
19V 3.5A output port
USB5V 2A output port
12V 10A output port
Car adaptor
For 12V vehicle products
Jump start socket
Jumper cable with clamps
LED Flash Light
USB5V 1A output port
Jump start socket
Indicator
19V 3.5A output port
12V 10A output port
15V 1A input port
Switch
USB5V 2A output port

1. Plug the home adaptor into the universal socket.
2. Connect 15V 1A input port of Rexener to the other end of home
adaptor .
Or
1. Plug the car adaptor into the socket of cigarette lighter.
2. Connect 15V 1A input port of Rexener to the other end of car
adaptor.
B. OPERATION GUIDANCE
Indicator
Press the switch to check the storage level of Rexener 18000.
The indicator will flash one by one during the period of charging.
Different number of solid indicators show different storage level of
Rexener. All indicators light off when the charging is paused or
completed.
Rexener Charging Instruction:
S0% 25% 50% 75% 100%
Indicator Unlit 1 solid 2 solid 3 solid 4 solid
torage level
2
Jump start 12V vehicle Instruction:
1.Connect the blue plug fully seated into the host,
and make sure the Cable Indicator is off.
2.Connect Red Clamp to the positive (+) battery
terminal, Black Clamp to the negative (-) battery
terminal.
3.Operate following the instruction of the Cable
Indicator:
BOOST
reverse correct

Only for charging/power supply to 19V Notebook
1. Plug the switch cable A to USB 19V 3.5A output port.
2. Select appropriate connector for your Notebook and connect
it to the switch cable A and your Notebook.
3. Press the switch button to charge/power supply.
Charging Cell Phone or Tablet Instruction:
1. Plug the switch cable B to USB 5V 2A output port.
2. Select appropriate connector and connect it to your mobile
phones or tablet.
3. Press the switch button to charge.
4.If doesn’t work, please try another USB Output port.
3
RED LIGHT on with
buzzing: Telling the
connection is wrong, and
buzzing to alarm to
correct the clamps as step
2 mentioned above, wait
until the GREEN LIGHT is
on to turn on the engine.
GREEN LIGHT on:
Telling the connection
is correct and the
circuit is working, you
can turn on the engine
to jump-start directly.
GREEN LIGHT blinking
with buzzing: Saying
the vehicle battery is
low, press the “BOOST”
button, wait GREEN
LIGHT becomes solid,
then turn on the engine
within 30s.
No Lights on, No
buzzing: Saying the
vehicle's battery maybe
damaged, after confirm
the clamps connection is
correct, press the
“BOOST” button, wait
GREEN LIGHT is on, and
then turn on the engine
within 30s.
Beep,Beep
Beep,Beep
4.Start the vehicle.
5.When the vehicle is started, remove the jumper cable from the
vehicle battery. Leave the vehicle's engine running.

LED flash light
Press the switch 3 seconds to start the LED flash light.
There are 4 modes of LED light appear in order (normal. strobe.
SOS. off) if you press slightly.
For power supply to 12V vehicle products or 12V electronics
1. Plug the optional switch cable to 12V 10A output port.
2. Connect the optional switch cable and 12V vehicle product
or 12V electronics.
3. Press the switch button to power supply.
C. PARTS LIST :
4
E. FAQ:
Q. How to turn off this appliance?
A. This appliance will power off automatically when no load or
charging is complete
D. TECHNICAL SPECIFICATIONS:
Size: mm
Weight: 610g
Battery Capacity: 18000mAh (66.6Wh)
Output: 5V 1A;5V 2A; 12V 10A; 19V 3.5A;
Input: 15V 1A
Full charging time: 6 hours
Starting current: 300A
Peak current: 600A
Operating temperature : -20℃ ~ 60℃
224*87*29
#
1 1
3 1
otebook 8
Parts Name Quantity
2 1
Host
Switch cable A
Switch cable B
4N connector
#
5 1
6 1
7 I 1
1
Parts Name Quantity
Home adaptor
Car adaptor
ntelligent jumper cable
8User Manual

F. TROUBLE SHOOTING:
Finding Cause Remedies
No response when
pressing the switch
button.
Rexener is a bit hot when
charging for Notebook.
Low voltage protection of Rexener is
started.
The charging current is a bit high
(3.5A)
Plug the adaptor into the
15V 1A input port to
activate.
Remove the battery of your
Notebook and use this
appliance to supply power
directly, or disconnect Rexener
with your Notebook and connect
them when it is cool.
5
G. TOXIC AND HARMFUL SUBSTANCES:
O:Indicate all homogeneous materials' hazardous substances content are below the MCV limit
specified in the Standard 2002/95/EC(RoHs).
Composition and amount of toxic and harmful substances in Rexener
Pb Hg Cd Cr(Vi)PBB PBDE
O O O O O O
Q. How long time to full charge the Rexener 18000?
A. Approx. 6 hours through the 15V1A input.
Q. How many times can this appliance charge for my cell phone?
A. Depend on the battery capacity of your cell phone. Take iPhone6 as
an example, can full charging 8 times.
Q. How long will this appliance on a full charge take to supply the
Notebook?
A. 4-6 hours
Q. How many times can this appliance jump start the vehicle if it is in
full battery?
A. Approx. 40 times.
Q. What's the lifetime of Rexener 18000?
A. Usually 3-5years in normal condition.
Q. How long does the battery last still can jump start the car after fully
charged?
A. 6-12 months, however, we suggest to recharge it every 3 months.

H. Warning:
This appliance is not intended for use by young or infirm persons
without supervision
Do not use as a toy
Do not allow the appliance to become wet
Do not immerse the appliance in water
Do not operate the appliance in explosive atmospheres, such as
in the presence of flammable liquids, gases or dust
Do not modify or disassemble Rexener. Only a repair technician may
repair this unit.
Do not expose the appliance to heat.
Do not store in locations where the temperature may exceed 70°C.
Charge only at ambient temperatures between -20°C and 60°C.
Charge only using the charger provided with the appliance.
Under extreme conditions, battery leakage may occur. Carefully
wipe the liquid off using a cloth and avoid skin contact when you
notice liquid on the batteries. In case of skin or eye contact, rinse
immediately with clean water and seek medical attention.
At the end of their useful life, discard the appliance with due care
for our environment.
6
!
!
!
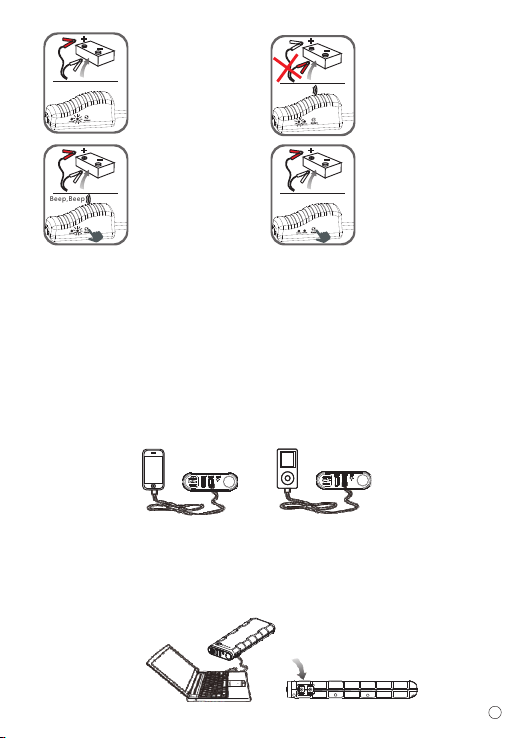
1. Always make sure the blue plug of jumper cable connect with the jump
start socket tight in Rexener before jumping start the vehicle. Otherwise, it
will affect the results, even causing the melt of the blue plug.
2. Always check if the jumper clamps are well connected, check if the
vehicle battery connector is rusted or dirty, clean it before jumping start
the vehicle. DO NOT jump start again after 3 attempts. Otherwise, it will
damage the host. And Check your vehicle if it has other trouble.
3. DO NOT connect the two clamps. Otherwise, it may be dangerous!
4. DO NOT disassemble the host. Otherwise, it may be dangerous! !
Always take care when using the appliance
!
!

I. WARRANTY INFORMATION:
1.We offer a limited warranty for this product against any defects in
material and workmanship for a period of 6 months from the date of
purchase by the end user/consumer. The conditions of the warranty are
as follows:
2.The warranty is only valid upon presentation of the original receipt
(from dealer/retailer) by the original purchaser with the product to be
repaired or replaced
3.The warranty is void if the serial number, date of purchase and label
has been removed
4.The warranty does not cover damage or product failure resulting from
normal wear and tear, physical abuse, improper installation, misuse,
modification or repairs by unauthorized third parties
5.We do not assume responsibility for any loss or damage incurred
during shipment or as a result of a force majeure
6.We are not liable for any incidental or consequential damages arising
from the use or misuse of this product
7.All warranty claims are limited to repair or replacement of the
defective product and at the sole discretion of us
8.If we repair or replace the product, the product will be covered for the
remaining time of the original warranty period. Repair or replacement
may involve the use of reconditioned units which are equivalent in
function. Replaced part or product becomes the property of us
9.Consumable components such as batteries are not covered by the
warranty.
7
Fuse Protection
Overcharge and
Overdischarge Protection Against-reverse Plug
Applied Standard:GB/T 18287-2000
Table of contents