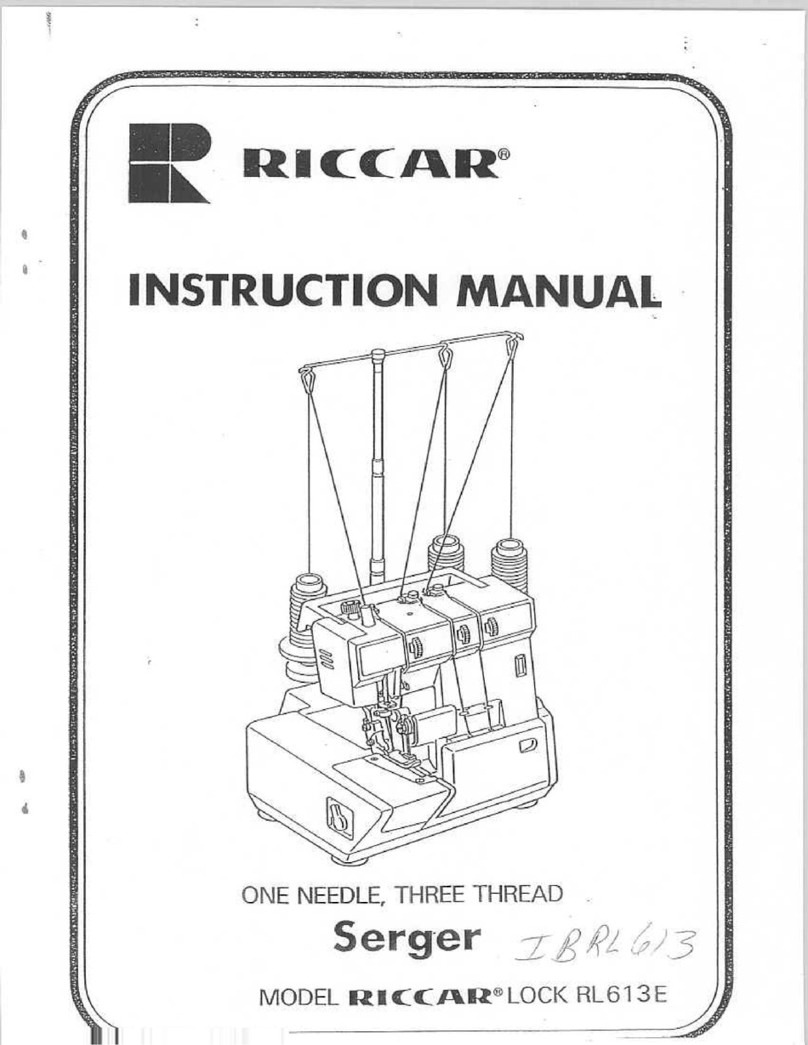
Riccar Serger User manual


OWNER'S
MANUAL
This
sewing
machine
is
intended
for
household
use
When
using
a
sewing
machine.
Basic
safety
precautions
should
always
be
followed,
including
the
following
Reed
all
Instructions
before
using.
DANGER
-
To
reduce
the
risk
of
electric
shock:
1.
Never
leave
unattended
when
plugged
in
Always
unplug
this
machine
from
the
electric
outlet
immediately
after
using
and
before
cleaning.
2.
Always
unplug
before
relamping
Replace
bulb
with
same
type
and
wattage
WARNING
-
To
reduce
the
risk
of
bums,
fire,
electric
shock,
or
Injury
to
persons:
1.
Do
not
allow
to
be
used
as
a
toy.
Close
attention
is
necessary
when
this
sewing
machine
is
used
by
or
near
children
2.
Use
this
sewing
machine
only
for
its
intended
use
as
described
in
this
manual
Use
only
attachments
recommended
by
the
manufacturer
as
contained
in
this
manual.
3.
Never
operate
this
sewing
machine
if
it
has
a
damaged
cord
or
plug,
if
it
is
not
working
properly,
if
it
has
been
dropped
or
damaged
or
dropped
into
water
Return
the
sewing
machine
to
the
nearest
authorized
dealer
or
service
center
for
examination,
repair,
electrical
or
mechanical
adjustment.
4.
Never
operate
the
sewing
machine
with
any
air
openings
blocked
Keep
ventilation
openings
of
the
sewing
machine
and
foot
controller
free
from
the
accumulation
of
Imt.
dust,
and
loose
doth
5
Never
drop
or
insert
any
object
into
any
opening
6
Do
not
use
outdoors
7
Do
not
operate
where
aerosol
(spray)
products
are
being
used
or
where
oxygen
is
being
administered
8.
Do
not
unplug
by
pulling
on
cord
To
unplug,
grasp
the
plug,
not
the
cord
9.
Keep
fingers
away
from
all
moving
parts
Special
care
«
required
around
the
sewing
ma¬
chine
needle
and
knives
10.
A
lways
use
the
proper
needle
plate
The
wrong
plate
can
cause
the
needle
to
break
11
Do
not
use
bent
needles
12.
Do
not
pull
or
push
fabric
while
stitching
it
may
deflect
the
needle
causing
rt
to
break
13.
Always
unplug
sewing
machine
from
the
electrical
outlet
when
making
any
adjustments
in
the
needle
area,
such
as
threading
needle
or
loopers
changing
neeale.
knife,
or
needle
plate
14.
Always
unplug
sewing
machine
from
the
electrical
outlet
when
removing
covers,
lubricating,
or
when
making
any
other
user
servicing
adjustments
mentioned
m
this
manual

TABLE
OF
CONTENTS
SPECIFICATIONS.1
GETTING
TO
KNOW
YOUR
SEWING
MACHINE
....2
ACCESS
TO
THREAD
GUIDES
AND
FREE
ARM
...3
ACCESSORIES.4
ELECTRICAL
CONNECTION.4
NEEDLE.
THREAD
AND
FABRIC
CHART.5
INSERTING
THE
NEEDLE.5
THREADING
THE
MACHINE.6
BEFORE
STARTING
TO
SEW.10
OVERLOOK
SEWING.11
REGULATING
THE
THREAD
TENSION.11
SETTING
STITCH
LENGTH.12
SETTING
SEAM
WIDTH.12
ADJUSTING
THE
PRESSURE
ON
FABRIC.12
NARROW
AND
ROLLED
HEMMING.13
ROLLED
OVEREDGE.15
TURNING
CORNERS.16
FREE
ARM
SEWING.17
DECORATIVE
OVERLOCK.17
CLEANING
AND
MAINTENANCE.18
BEFORE
YOU
CALL
FOR
SERVICE.20
SPECIFICATIONS
Stitch
length
1-5
mm
Seam
width
3.5-5
mm
Needle
bar
stroke
27
mm
Presser
toot
Hinged
Presser
toot
lift
5
mm
Needle
BL-1.size#11.
#14
Number
ot
threads
3
Dimensions
Width:
290
mm
X
Depth:
230
mm
X
Height:
320
mm
Net
weight
6.7
kg

REARVIEW
1.
Thread
Guide
Hanger
2.
Extension
Bar
3.
Lower
Looper
Thread
Tension
Dial
4.
Upper
Looper
Thread
Tension
Dial
5.
Thread
Guide
and
Tension
Disc
6.
Needle
Thread
Tension
Dial
7
Pressure
Regulator
8.
Thread
Take-up
Lever
9.
Extension
Table
10.
Free
Arm
11.
Extension
Table
Lock/
Release
Lever
12.
Front
Cover
13.
Looper
Thread
Guide
14.
Stitch
Length
Regulator
GETTING
TO
KNOW
YOUR
SEWING
MACHINE
FRONT
VIEW
15.
S
titch
Length
Regulator
Dial
16
HandWheel
17.
Terminal
Box
18.
Spool
Stand
19.
Spool
Pin
20.
Spool
Supporter
21.
Presser
Foot
Litter
22.
Handle

INSIDE
OF
FRONT
COVER
AND
FREE
ARM
COVER
23.
Needle
Bar
Thread
Guide
24.
Upper
Knile
Holder
25.
Upper
Knife
26.
Presser
Fool
27.
Throal
Plate
28.
Feed
Dog
29.
Seam
Width
Knob
30.
Upper
Looper
31.
Lower
Looper
32.
Lower
Knife
ACCESS
TO
THREAD
GUIDES
AND
FREE
ARM
1.
Place
thumb
in
hollow
of
front
cover
and
slide
it
to
the
right
as
far
as
possible;
pull
cover
down
toward
you.
2.
To
close,
lift
cover
up
and
it
will
snap
into
place.
3.
Be
sure
that
the
cover
is
properly
closed
before
starting
to
sew
Opening
the
Extension
Table
1.
Turn
lever
located
on
left
side
of
Extension
Table
toward
front
of
machine.
2.
Pull
Extension
Table
out
to
open
3.
To
close
shut
and
trim
lever
in
opposite
direction.
This
locks
the
Extension
Table
to
Free
Arm
Cover
Removing
the
Free
Arm
Cover
Swing
Extension
Table
out
with
lever
in
locked
position
and
Free
Arm
Cover
will
stay
attached
to
the
Extension
Table.
3

ACCESSORIES
ELECTRICAL
CONNECTION
Connect
the
electncal
cord
to
the
machine
by
inserting
the
three-hole
plug
into
the
terminal
bo*
located
on
the
right
side
of
the
machine
Connect
the
cord
plug
into
an
electrical
outlet.
Place
Foot
Control
on
floor
where
it
is
easy
to
reach
with
your
foot
To
make
machine
go
faster,
press
down
on
Foot
Control:
to
slow
down
let
up
slightly
CAUTION
1.
Disconnect
the
electncal
cord
from
the
wall
outlet
when
machine
is
not
in
use
or
when
it
is
being
cleaned.
2.
Disconnect
the
electncal
cord
from
the
wall
outlet
before
changing
needles
or
throat
plates
This
will
help
prevent
accidents.
4

NEEDLE,
THREAD
AND
FABRIC
CHART
The
chart
shows
size
and
type
of
thread,
and
needle
size
for
vanous
weights
and
types
of
fabrics.
Size
means
the
fineness
of
both
needle
and
thread
Use
BL-1
type
needle
for
this
machine
The
needle
size
is
located
on
the
shank
of
the
needle.
FABRICS
THREADS
NEEDLE
SIZES
LIGHTWEIGHT:
organdy,
voile,
taffeta,
lawn,
crepe
Cotton
#100
Silk
#100
Spun
#80-100
Tetron
#90
#11
MEDIUM
WEIGHT:
gingham,
satin,
seersucker,
linen,
velveteen,
gabardine,
broadcloth
Cotton
#60-80
Silk
#50
Spun
#60-90
Tetron
#60-80
#11.#14
HEAVYWEIGHT:
denim,
tweed,
corduroy,
pile
fabrics
Cotton
#40-60
Silk
#40-50
Spun
#60-90
Tetron
#50-60
#14
KNIT
tricot
Spun
#60-80
Tetron
#60-80
#11
jersey
Spun
#60-80
Tetron
#60
#11.#14
wool
Spun
#60-80
Tetron
#50-60
Woolly
nylon
Woolly
tetron
#14
INSERTING
THE
NEEDLE
Select
the
proper
type
and
size
needle
for
fabnc
used
(See
-NEEDLE,
THREAD
AND
FABRIC
CHART-)
r
\
v
ck
jrJ
^o=$L,
0
1.
Disconnect
the
electncal
cord
from
the
wall
outlet.
2.
Turn
hand
wheel
toward
you
until
the
needle
comes
to
its
highest
point.
CAUTION:
Use
*BL-1’
needles
for
this
machine.
Household
type
needles
cannot
be
used,
the
needle
may
break
from
the
high
speed
of
sewing.
3.
Use
the
screw
driver
provided
in
the
accessory
box
to
loosen
the
needle
damp
screw,
and
remove
the
needle
4.
Insert
tbe
needle
as
far
as
it
will
go
with
the
long
groove
facing
front.
5.
Retighten
the
screw
5

THREADING
THE
MACHINE
When
threading,
be
sure
to
follow
the
directions
given
below.
The
machine
will
not
sew
properly
if
threaded
incorrectly.
An
illustration
for
correct
threading
is
given
inside
the
front
cover
of
the
machine.
The
thread
guides
are
identified
with
color
markings
corresponding
to
the
thread
to
which
they
belong.
Thread
the
machine
in
the
following
sequence:
Upper
Looper
(threading
points
marked
in
green).
Lower
Looper
(threading
points
marked
in
blue),
needle
(threading
points
marked
in
yellow).
extension
bar
1.
Pull
the
Extension
Bar
up
as
far
as
it
will
go.
2.
Rotate
the
Thread
Guide
Hanger
so
that
the
Thread
Guides
are
right
above
the
spool
pins.
3.
Place
the
spools
or
thread
cones
on
spool
pins
Thread
spool
nets
are
useful
for
synthetic
threads
which
tend
to
come
loose
and
slip
out.
Cover
the
thread
cones
with
the
thread
nets
provided
in
the
accessory
box.
Bring
thread
end
to
the
top
of
the
cone.
Thread
caps
are
also
provided
with
the
accessories.
They
are
used
when
sewing
with
regular
spools.
Insert
the
stem
of
cap
into
the
spool
hole.
6

threading
the
upper
looper
Open
ihe
front
cover
and
thread
upper
looper
thread
as
illustrated
below
1
to
10.
Follow
thread
guides
with
green
color
markings
on
machine.
Threading
Chart
3
Bring
thread
straight
down
through
the
slot
so
that
it
passes
between
the
tension
discs.
4.
Hook
thread
into
guide
from
the
right
side.
5.
Hook
thread
from
the
left
side.
6.
Hook
thread
from
the
right
side.
7.
Hook
thread
from
the
bottom
side
and
pull
thread
up.
8.
Hook
thread
from
the
top
side.
9
Hook
thread
from
the
bottom
side
and
pull
thread
up.
10.
Use
tweezers
to
pass
thread
through
the
upper
looper
hole
front
to
back.
Pull
at
least
7
cm
(3
inches)
of
thread
through
the
upper
looper.
7

threading
the
lower
looper
Remove
the
free
arm
cover
and
thread
lower
looper
thread
as
illustrated
below
A
to
I
(Thread
guides
with
blue
color
marking
on
machine).
A
Pass
thread
through
guide
from
back
to
front.
B
Bnng
thread
down
and
pass
through
thread
guide
and
under
tension
disc.
C.
Bring
thread
straight
down
along
the
slot
so
that
the
thread
passes
between
the
tension
discs.
D.
Hook
thread
into
guide
from
the
left
side.
E.
Hook
thread
from
the
right
side
and
pull
thread
toward
left.
F.
Hook
thread
from
the
bottom
side.
G.
Hook
thread
from
the
bottom
side
and
pull
thread
toward
left.
H.
Turn
hand
wheel
toward
you
until
the
lower
looper
is
in
extreme
left
position.
Pass
thread
through
hole
using
the
tweezers.
I.
Turn
hand
wheel
until
the
lower
looper
is
in
ex¬
treme
right
position.
Use
the
tweezers
to
pass
thread
through
hole
front
to
back.
Pull
at
least
7
cm
(3
inches)
of
thread
through
lower
looper.

threading
the
needle
Thread
needle
thread
as
illustrated
below
a
to
h
(Thread
guides
with
yellow
color
marking
on
machine).
d.
Hook
thread
into
guide
from
right
to
left
and
pull
thread
up.
e.
Place
into
guide
by
sliding
thread
across
top
and
down
into
cutout.
I.
H
ook
thread
into
guide
trom
the
opening
on
right
side
of
guide.
g.
Pass
thread
through
guide.
h.
Use
the
tweezers
to
pass
thread
through
the
needle
eye
front
to
back.
a.
Pass
thread
through
guide
from
back
to
front.
b
Bring
thread
down
and
pass
through
thread
guide
and
under
Tension
Disc.
c.
Bring
thread
straight
down
along
the
slot
so
that
the
thread
passes
between
the
Tension
Discs.
easy
thread
changing
Instructions
for
changing
threads
are
given
below.
1.
Cut
the
thread
near
the
spools.
2.
Exchange
the
spool
with
a
new
one
and
tie
end
to
remaining
thread
making
knot
as
small
as
possible.
3.
Note
the
numbers
on
each
Thread
Tension
Dial.
4.
Turn
Thread
Tension
Dials
to
the
smallest
number.
5.
Press
Foot
Control
and
run
machine
until
upper
and
lower
thread
knot
comes
through
looper
hole.
6.
Stop
needle
thread
knot
before
passing
through
eye
of
needle.
Pull
needle
thread
near
the
needle
eye
and
cut
thread
knot.
7.
Pass
thread
through
needle
eye
manually.
8.
Return
tension
dials
to
noted
number.

BEFORE
STARTING
TO
SEW
When
the
machine
is
plugged
in
properly
and
threaded
correctly
it
is
ready
tor
sewing.
To
insure
good
stitches,
make
several
sewing
tests
using
the
same
fabnc
and
thread
on
which
you
will
sew
Make
the
proper
adjustments
while
test
sewing.
starting
to
sew
1.
Pull
3
threads
under
the
presser
toot
and
toward
the
back
Check
that
the
threads
near
loopers
and
needle
should
not
be
caught
by
incorrect
part.
2.
Lower
the
presser
toot.
3.
Turn
hand
wheel
toward
you
2
or
3
times
and
check
the
thread
chain,
4.
Press
Foot
Control
lightly
pulling
threads
toward
back
and
make
thread
chain
about
5
cm
(2
inches).
5.
Place
a
scrap
ot
tabric
under
the
toe
ot
the
presser
toot
at
the
position
to
be
stitched.
6.
Hold
end
ot
thread
with
your
left
hand
and
pull
gently
when
starling
to
sew
7.
When
you
have
started
sewing,
place
hand
lightly
on
tabric
Start
machine
slowly
and
gradually
increase
the
sewing
speed.
end
of
seam
1.
When
the
needle
reaches
the
end
ot
seam,
chain
oft
by
running
the
machine
until
the
thread
chain
is
6-7
cm
(2-3
inches)
long.
2.
Stop
the
machine
and
cut
the
thread
chain
remaining
3-4
cm
(1-2
inches)
to
the
machine.
Tie
small
knots
in
thread
ends
and
treat
with
dot
ot
seam
sealant.
Let
dry
and
trim
close
to
knot.
3.
For
neater
finish,
pull
thread
ends
back
through
seam
using
hook
or
yarn
needle.
when
thread
breaks
It
the
thread
breaks
while
sewing,
remove
tabric
trom
machine
and
rethread
as
indicated
below.
•
Upper
Looper
Thread;
turn
hand
wheel
toward
you
until
the
upper
looper
is
in
the
lowest
position.
Pass
thread
through
the
looper
hole.
•
Lower
Looper
Thread;
cut
the
needle
threads
near
needle
hole
and
rethread
the
lower
looper
thread
through
its
looper
hole.
•
Needle
Thread;
rethread
needle
thread
as
indicated
on
page
9.
To
begin
sewing,
place
material
3-4
cm
(1-2
inches)
behind
point
where
thread
broke.
10

Turning
thread
tension
dial
Needle
Fabric
Thread
Light
Weight
Heavy
Weight
Needle
Neeedle
Thread
Lower
Lower
Thread
Thread
Looper
Thread
Increase
Thread
Increase
Correct
thread
tension
Top
side
of
fabric
&
UpperLooper
Thread
Needle
Thread
Lower
Looper
Thread
OVERLOOK
SEWING
This
machine
will
sew
overlook
stitches
and
simultaneously
tnm
the
fabnc.
The
machine
is
delivered
from
the
factory
preset.
You
may
wish
to
make
some
adjustments
to
better
suit
individ¬
ual
fabncs
REGULATING
THE
THREAD
TENSION
Quality
stitches
depend
on
proper
balance
between
the
three
thread
tensions.
The
tension
may
need
adjusting
depending
on
the
type
of
fabnc.
heaviness
of
fabric
and
size
of
thread
used
The
table
below
is
a
guide
for
adjusting
the
thread
tension.
Note:
Be
sure
that
the
thread
is
passing
between
the
tension
discs.
TO
INCREASE,
turn
tension
dial
to
a
higher
number.
TO
DECREASE,
turn
tension
dial
to
a
lower
number
I
l—
.
This
table
is
a
guide
for
thread
tensions
when
sewing
with
«80
to
#90
polyester
spun
threads
The
charts
below
are
illustrations
of
stitches
needing
adjustment
in
the
thread
tension
Needle
thread
is
too
loose.
(Clearly
visible
on
the
bottom
side
of
fabric.)
Upper
looper
thread
bottom
side
of
fabnc
Lower
looper
thread
crossed
on
top
side
of
fabric.

SETTING
STITCH
LENGTH
The
stitch
length
can
be
adjusted
between
1
and
5
mm.
As
a
rule,
light
weight
fabrics
take
a
shorter
stitch.
Heavy
weight
fabrics
need
longer
stitches.
Most
normal
sewing
is
done
with
stitch
length
dial
set
at
3.
This
produces
a
medium
length
stitch
which
makes
a
strong
seam
and
is
suitable
for
most
fabrics.
For
shortest
stitch,
turn
dial
to
1.
For
longest
stitch,
turn
dial
to
5.
SETTING
SEAM
WIDTH
This
overedge
seam
width
can
be
adjusted
to
sew
a
3.5
mm
(about
1/8")
to
5
mm
(about
1/6")
stitch.
The
machine
is
set
at
3.5
mm
which
is
the
width
used
most
often
for
overlock
sewing.
For
heavy
weight
fabrics,
set
control
knob
to
wider
stitch.
1.
Disconnect
the
electrical
cord
from
the
wall
outlet.
2.
Open
front
cover
and
Free
Arm
Cover.
3.
Push
the
Upper
Knife
Holder
to
the
right
and
turn
the
Seam
Width
Knob
downward
to
select
wider
stitch
width.
For
smaller
width
turn
knob
in
opposite
direction.
When
adjusting
the
width,
use
graduations
on
throat
plate
as
guide
and
line
up
with
left
edge
of
lower
knife
holder,
ADJUSTING
THE
PRESSURE
ON
FABRIC
The
pressure
on
the
toot
can
be
adjusted
for
different
weight
fabrics.
The
fabric
should
move
along
smoothly
and
evenly
without
slipping
Stitches
should
be
uniform
in
size.
The
pressure
on
this
machine
is
set
for
sewing
me¬
dium
weight
fabncs.
For
sewing
light
weight
fabrics,
decrease
the
pressure
(turn
screw
to
left).
For
heavy
weight
fabrics,
increase
the
pressure
(turn
screw
to
right).
12

NARROW
AND
ROLLED
HEMMING
The
machine
trims
fabric,
folds
back
the
edge
and
sews
a
narrow
hem
(overedge).
The
width
of
the
narrow
overedge
is
1.5
mm
(about
1/16")
and
is
used
for
overedging
light
and
medium
weight
fabrics.
Two
variations
of
the
rolled
overedge
hem
can
be
sewn
with
this
machine
by
changing
the
thread
tension.
Both
methods
are
used
with
light
and
medium
weight
fabrics.
Method
B
(page
15)
gives
a
softer
finish
by
pulling
the
interlocking
threads
to
the
wrong
side.
changing
the
throat
plate
The
machine
comes
with
a
standard
overedge
throat
plate
set
to
the
machine.
Change
the
throat
plate
when
sewing
rolled
overedges.
Standard
Overedge
Throat
Plate
Rolled
Hem
Throat
Plate
1.
Disconnect
the
electrical
cord
from
the
wall
outlet.
2.
Turn
hand
wheel
toward
you
until
needle
is
at
its
highest
point.
3.
Lift
presser
foot
bar.
6.
Lift
the
Throat
Plate
off
and
replace
with
Rolled
Hemming
Plate.
(Be
sure
that
thread
is
not
caught
under
plate.)
7.
Retighten
the
screw
and
replace
Free
Arm
Cover.
13

setting
controls
Set
Ihe
controls
as
follows.
1.
Fabric.
Thread
&
Needle
Refer
to
Page
5
'NEEDLE.
THREAD
&
FABRIC
CHART.
for
selecting
suitable
thread
and
needle
sizes
for
sewing
on
light
and
medium
weight
fabncs.
2.
Stitch
Length
Regulator
Set
stitch
length
between
1
and
2
mm.
3.
Seam
Width
Knob
The
seam
width
for
sewing
rolled
overedge
is
normally
1.5
mm
(about
1/16").
Turn
seam
width
knob
and
adjust
so
that
the
left
side
of
Lower
Knife
Holder
is
aligned
with
the
mark
of
the
Rolled
Hem
Throat
Plate
(See
page
12.)
sewing
Pull
the
excess
threads
gently
toward
the
back
and
begin
sewing.
Pull
fabric
lightly
in
the
direction
it
is
being
fed
Although
the
stitch
width
is
set
at
1.5
mm.
you
will
actually
need
3.5
mm
(about
18")
to
provide
enough
fabric
for
the
fold
back.

ROLLED
OVEREDGE
The
upper
loo
per
thread
sews
through
to
the
wrong
side
of
fabric
in
Method
B
rolled
overedge
hem
creating
a
softer
finish
1.
Change
the
Standard
Overedge
Throat
Plate
to
the
Rolled
Hem
Throat
Plate
2.
Settings
and
sewing
of
Method
B
rolled
overedge
hem
are
the
same
as
the
Method
A
rolled
overedge
except
for
thread
tension.
(See
Below)
Stitch
Length^
thread
tension
-Method
B
Regulate
the
tension
dials
using
guide
below
Fabric
Needle
Thread
Upper
Looper
Thread
Lower
Looper
Thread
Light
and
Medium
1.5-3.5
25-5
4-6
NOTE:
This
table
is
a
guide
for
thread
tensions
when
sewing
with
#80
to
#90
polyester
spun
threads
Correct
thread
tension
Upper
Looper
Thread
Needle
Thread
Lower
Looper
Thread
Wrong
side
of
fabnc
Needle
Thread
Lower
Looper
Thread
Neeedie
Thread
Upper
Looper
Thread
Needle
Thread
Upper
Looper
Thread
Lower
Looper
Thread
Thread
Thread
r
Needle
thread
is
too
loose
Upper
looper
thread
is
too
loose
Lower
looper
thread
is
too
loose
]

TURNING
CORNERS
outside
corner
l
*
1.
Cut
the
corner
about
5-6
cm
(2-
3
inches)
along
the
cutting
line
end
of
fabric
and
stop
machine.
3.
Raise
needle
and
presser
foot.
4
Pull
fabric
slightly
toward
the
back
and
pull
out
tangled
thread
from
Throat
Plate.
5
Turn
fabric
and
position
the
fabnc
by
lining
up
the
cut
line
and
knife.
Lower
the
Presser
Foot
6.
Resume
sewing
inside
angle
and
slits
i
L
.
.
v
~~
.y
1.
Sew
desired
seam
line
until
you
approach
the
corner
^_
J
2.
When
you
approach
the
comer,
slow
down
and
allow
the
knife
to
make
one
more
small
notch
into
the
comer
3.
Straighten
the
fabric
out
in
front
of
the
knife
and
stitch
complet¬
ing
the
edge
outside
curves
The
machine
can
continue
sewing
when
rounding
a
curve
There
is
no
need
to
stop
the
machine
and
pivot.
Push
excess
fabnc
toward
the
presser
foot
giving
the
machine
more
fabnc
and
continue
sewing
as
if
sewing
a
straight
seam.
16

FREE
ARM
SEWING
This
machine
will
convert
to
free
arm
sewing
by
simply
opening
the
Extension
Table
It
is
used
for
sewing
sleeves
trousers
or
similar
places
that
are
difficult
to
sew
on
a
flat
bed
machine.
DECORATIVE
OVERLOOK
When
you
change
the
Upper
Looper
Thread
to
heavier
thread
or
yarn,
you
can
produce
decorative
overlook
stitching.
Try
using
various
types
of
thread
to
create
attractive
combinations
experiment
with
different
tension
adjustments
to
produce
a
variety
of
decorative
effects.
Examples;
Upper
Looper
Thread:
Heavy
thread
or
Yarn.
Upper
Looper
Thread:
Wooly
Nylon
Rolled
hem
Method
B
Upper
Looper
Thread:
Different
colored
thread
(Shorter
stitch
length).
17

CLEANING
AND
MAINTENANCE
Brush
around
the
fabric
feed
dog
cleaning
Fabric,
thread
scraps
and
dust
may
accumulate
around
moving
parts
and
effect
the
functioning
of
machine
Unplug
cord
and
clean
machine
with
the
brush
provided
in
the
accessory
box.
Brush
inside
of
the
front
cover
18
Table of contents
Other Riccar Sewing Machine manuals

Riccar
Riccar 3300 User manual

Riccar
Riccar Serger IBRL613 User manual

Riccar
Riccar 9800 User manual

Riccar
Riccar R1500 User manual

Riccar
Riccar 315SU User manual

Riccar
Riccar R552 User manual

Riccar
Riccar R651 User manual

Riccar
Riccar RS-78 User manual

Riccar
Riccar 3500 User manual

Riccar
Riccar 650 User manual

Riccar
Riccar 551 User manual

Riccar
Riccar 8400-S User manual

Riccar
Riccar RL-333 User manual

Riccar
Riccar RZ-208B User manual

Riccar
Riccar 601 User manual

Riccar
Riccar R651 User manual

Riccar
Riccar R1926 User manual

Riccar
Riccar 739DE Serger User manual

Riccar
Riccar SUPER STRETCH 888 User manual

Riccar
Riccar R200 User manual