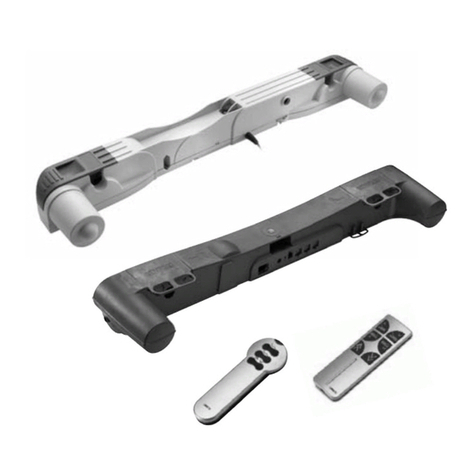
Roadmaster InvisiBrake User manual

ROADMASTER, Inc. • 6110 NE 127th Ave. • Vancouver, WA 98682
• 800-669-9690 • Fax 360-735-9300
© 2011-2019 ROADMASTER, Inc. All rights reserved. 854737-25 06.19

IMPORTANT NOTICE!
Safety Definitions
These instructions contain information that is very important to know and understand. This information is pro-
vided for safety and to prevent equipment problems. To help recognize this information, observe the following
symbols:
WARNING indicates a potentially hazardous situ-
ation which, if not avoided, could result in property
damage, serious personal injury or even death.
CAUTION indicates a potentially hazardous situ-
ation which, if not avoided, may result in property
damage, or minor or moderate personal injury.
CAUTION
CAUTION used without the safety alert symbol
indicates a potentially hazardous situation which,
if not avoided, may result in property damage.
NOTE
Refers to important information and is placed in italic
type. It is recommended that you take special notice
of these items.
InvisiBrake specifications
Controller height ..........................................2¾ inches
Controller width ...........................................8¾ inches
Controller length ..........................................8¾ inches
Voltage.......................................................12 volts DC
Fuse size ......................................................... 20 amp
Operating temperature range
............................... -2°to +150°F (-19°to +66°C)
Maximum amperage draw ...........................10.8 amps
Idle amperage draw.............................................6 mA
Battery recharging rate...........................up to 2 amps
Approximate maximum air pressure.................. 80 psi
Read all instructions before operat-
ing InvisiBrake. Failure to understand
how to operate InvisiBrake could result
in property damage, personal injury or
even death.
Welcome to the ROADMASTER family!
This manual has been prepared to acquaint you with the installation, operation, care and mainte-
nance of your InvisiBrake, and to provide you with important safety information.
Read your owner’s manual cover to cover. Understand how to install and operate your Invisi-
Brake, and carefully follow the instructions and safety precautions.
We thank you for your patronage and greatly appreciate your discerning taste.
The InvisiBrake serial number…
…is on a label on the side of the controller. You
will need this number when you fill out your product
registration card.
Write down the serial number in the space below
and retain for future reference.
Serial number:
Save this manual
Save this manual for future reference. It contains im-
portant information relative to safety and use. There-
fore, make sure this manual is always with you when
you’re towing. You can download or print a copy of the
most current manual at www.roadmasterinc.com (under
‘Support').
All illustrations and specifications contained herein are based on
the latest information available at the time of publication. ROADMAS-
TER, Inc. reserves the right to make changes, at any time, without
notice, in material, specifications and models, or to discontinue
models.
IMPORTANT
Roadmaster does not recommend installing In-
visbrake on diesel vehicles with hydroboost power
assist brakes. These vehicles do not use a tradi-
tional power brake booster and Invisibrake will not
provide enough braking force.

1
13
14
Components
7
21
22
11
12
10
23
3
1
4
6
(Components not shown to scale)
2
5
15
part number description
1945201-00 ........InvisiBrake controller, complete
2452109..............cable only
3452109-20 ........air cylinder with air fitting
4452104-10 .........pulley only
5452140 ..............cable anchor bracket
6945202-00 ........brake pedal clamp
(with mounting nuts and bolts)
7450008 .............monitor wire patch cord
8450008-15 ........car side monitor wire,
15 feet long (not shown)
9450008-50........motorhome side monitor wire,
50 feet long (not shown)
10 945203-00 ........four-wire harness with 4-pin
connector:
break away, power and ground
11 8602 .................break away cable
12 650898 .............break away switch, pin and ring
200200-20 .......break away pin and ring only
13 300065-00........motorhome monitor LED
14 451350 ..............audio signal circuit board
15 Vacuum check valves
452141 ..............3/8" vacuum check valve
452142 ..............1/2" vacuum check valve
16 450701..............1/8" air line (not shown)
17 450700 .............1/4" nylon vacuum line (not shown)
18 452111 ..............1/4" rubber vacuum hose,
one foot (not shown)
19 452137 ..............3/8" rubber vacuum hose (not shown)
20 452136 ..............1/2" rubber vacuum hose (not shown)
21 452118 ..............3/8" vacuum line tee
22 4 52116 ..............1/2" vacuum line tee
23 945204-00 ........four-wire flat harness with six-pin
connector: towed lighting

2
For vehicles with brake pedal presets —
Make certain that the cable and brake pedal clamp assembly were installed with the brake pedal as
close to the driver’s seat as possible. MAKE CERTAIN THAT THE BRAKE PEDAL IS AT THAT POSITION
WHEN TOWING.
As an option, the brake pedal may be moved to the desired position and disabled. Do not rely on a
mental note to never move the brake pedal.
Failure to follow these instructions may cause unintended braking and eventual brake failure, which
may result in property damage, personal injury or even death.
Figure 2
Figure 1
The installer should have pre-set the braking pres-
sure to a level appropriate to your vehicle. If the Invisi-
Brake brake pressure is ever adjusted, or if InvisiBrake
is transferred to another vehicle, follow all instructions
in the section titled “How to change the brake pres-
sure.”
1. Connect the monitor wire patch cord — plug the
monitor wire patch cord (Figure 1) into the front of the
towed vehicle and the rear of the motorhome.
Allow enough slack to prevent the patch cord from
being pulled loose when the motorhome turns. If the
cord is too long, wrap it around or through the umbilical
cord.
2. Connect the break away cable — Attach one of
Preparations for towing
If the InvisiBrake controller is installed under one
of the seats, carefully check to make certain that
the controller will not interfere with the movement
of the seat or affect any adjustments to the seat.
Severe non-warranty damage to the seat and/or the
controller can result if the seat comes into contact
with the controller.
If there is interference, make certain that the seat
is not moved beyond the point that would cause
damage.
Failure to follow these instructions may cause
property damage.
the snap hooks (Figure 2) to the large ring on the break
away pin (Figure 2) at the front of the towed vehicle,
then clip the other end of the break away cable to the
rear of the motorhome, close to the center.
Note: see the break away warnings beginning on
this page.
3. Turn the motorhome park lights on — this will ac-
tivate the InvisiBrake charge circuit, which will provide
a constant trickle charge to the vehicle’s battery during
towing.
4. Enjoy your travels.
When connecting the break away system, always
continued on next page
CAUTION — check seat movement and adjustments

3
Protection modes
Extended braking protection
To protect the towed vehicle’s brakes, InvisiBrake
will automatically release braking pressure after an ex-
tended period (approximately 15 seconds) of continu-
ous braking — for example, someone who constantly
drives with their foot on the brakes.
To regain supplemental braking in the towed vehicle,
release and depress the motorhome brake pedal.
Note: motorhomes with exhaust brakes may activate
the brake lights, causing InvisiBrake to brake the towed
vehicle. InvisiBrake automatically protects the towed
vehicle’s brakes by releasing braking pressure after
15 seconds of continuous braking.
When the exhaust brakes disengage, InvisiBrake
resumes normal operation.
Responding to an audio alert
If, for any reason, the towed vehicle’s brakes are
applied continuously (for approximately 20 seconds),
you will hear an audible alarm.
In addition to the audio alert, the monitor LED will
be illuminated continuously.
Stop immediately. The audio alert and illuminated
LED are indicating that the towed vehicle’s brake pedal
is being constantly depressed. Significant brake system
damage to the towed vehicle will occur.
Identify and correct the cause of the audio alert be-
fore using InvisiBrake.
If you are unable to determine the cause of the au-
dible alarm, disconnect the cable from the brake pedal
arm in the towed vehicle.
CAUTION
If InvisiBrake signals you with an audio alert,
stop immediately. Identify and correct the cause
of the alarm before using InvisiBrake.
Failure to respond to an audio alert, as indicated
above, may cause significant non-warranty damage
to the towed vehicle's tires and brake system, as
well as other consequential damage.
Preparations for towing
continued from previous page
check the following:
• Connect the cable at the rear of the motorhome,
close to the center. Connecting the cable toward
either side of the motorhome may cause the break
away pin to be pulled when the motorhome turns,
activating the break away system.
• Be certain there are no obstructions which would
prevent the cable from pulling freely away from the
break away switch. Do not wrap the cable around
anything — doing so could keep the cable from pull-
ing the break away pin, preventing the system from
activating in a break away.
• Make certain the cable is the correct length —
• The cable must be long enough to prevent the
break away pin from being pulled out during nor-
mal towing — make certain there is enough slack
to allow for sharp turns. If the cable is not long
enough, the break away system will activate even
though the towed vehicle has not detached.
• The break away cable must be longer than the
safety cables. This will prevent the break away
system from activating if a component of the tow-
ing system has separated, but the towed vehicle
is still held by the safety cables.
• Make certain that the cable is not too long — it
should not hang down to the extent that it may
catch on obstructions, or drag on the ground. This
much slack could allow the cable to be pulled inad-
vertently, activating the break away system.
• If you have a telescoping tow bar, allow enough
slack for the tow bar arms to be fully extended.
• Except to test the break away system or adjust
the braking pressure, leave the break away pin in
place, even when the vehicle is not being towed. As
soon as the pin is pulled, the break away system
will be activated. The towed vehicle’s brakes will
be applied and will not be released until the pin
is replaced. Severe non-warranty damage to the
vehicle will occur if driven with the break away pin
removed.
Additionally, the InvisiBrake compressor will run
constantly until the pin is replaced, which will dam-
age the compressor and drain the vehicle’s battery.
Removing the pin will also expose the interior
of the break away switch to damage from the ele-
ments. If the components of the switch are cor-
roded, the switch may only function intermittently
or not at all.

If increased/decreased braking pressure is desired,
follow the steps below. Read this section completely
before changing the brake pressure.
For vehicles with full-time
(‘active’) power braking systems…
IMPORTANT — Some late model vehicles have ‘ac-
tive’ braking systems, which will activate even when
the ignition is off.
If your towed vehicle has full-time (‘active’) power
brakes, the brake pressure setting must be lower than
the factory setting.
This step is included in the installation instructions.
If InvisiBrake was professionally installed, make cer-
tain that the installer has lowered the brake pressure
setting.
CAUTION
A full-time or “active” power brake system ap-
plies full power brakes even when the ignition is
turned off. For this reason, we recommend setting
the initial InvisiBrake pressure at 20 psi. This step
is included in the installation instructions.
NOTE TO CONSUMER: If this InvisiBrake system
is to be professionally installed, make certain that the
installer begins with an initial pressure of no more than
20 psi. An initial pressure higher than 20 psi will cause
the brakes to lock during each brake application and
will flat spot the vehicle’s tires. The following vehicles
have active power brake systems as of this writing*
• Ford C-Max
• Ford Escape hybrid
• Hummer H3
• Lexus GX 470
• Mazda Tribute hybrid
• Mercury Mariner hybrid
• Toyota Tacoma
*The above vehicles are among those that have ac-
tive power brake systems. If you are unsure about your
particular vehicle application, check with the vehicle
manufacturer.
The degree to which the brake pressure setting will
affect the motorhome will vary, depending on the size
and weight of the motorhome in comparison to the size
and weight of the towed vehicle —
• Brake pressure set too high — a sharp pull at the
motorhome may indicate that the brake pressure is set
too high — in this case, you may choose to lower the
setting until the towed vehicle brakes with less force.
See “If necessary, change the brake pressure setting.”
If necessary,
change the brake pressure setting
1. Pull the break away pin (Figure 2). The pressure
gauge on the controller (see page one) will display the
current braking pressure.
CAUTION
Reinsert the brake away pin within five minutes,
or premature compressor failure may result.
2. Pull out on the brake pressure adjustment knob
(see page one) to unlock it. Turn the knob clockwise
to increase the braking pressure or counterclockwise
to decrease the braking pressure.
3. Adjust the pressure by no more than 10 psi.
4. Push the brake pressure adjustment knob in to lock
it in place. Reinsert the break away pin.
5. Test drive the motorhome and towed vehicle for a
short distance, making six to eight stops. If necessary,
adjust again until you are satisfied with the brake pres-
sure setting.
Every time you adjust the brake pressure, you
must test drive the motorhome and towed vehicle.
After repetitive braking, check for excessive heat
near the center of the towed vehicle’s wheels — this
indicates that the brakes are overheating and that
the brake pressure is set too high.
You must lower the braking pressure and retest
until the brakes are not excessively hot.
Failure to follow these instructions may cause
brake failure, resulting in property damage, per-
sonal injury or even death.
4
How to change the brake pressure
It is possible to lower the brake pressure set-
ting to the point that it negates the benefit of the
supplemental braking system and break away. In- suf-
ficient brake pressure will lengthen stopping distance.
• Brake pressure set too low — if the combination of
vehicles takes longer to stop than the motorhome alone,
you may choose to raise the setting. See “If necessary,
change the brake pressure setting” (below).
If brake pressure is set too high, InvisiBrake will ap-
ply excessive force to the towed vehicle’s brake pedal,
which will cause tire and brake system damage, as well
as other consequential, non-warrantydamage.

Following is a comprehensive test of InvisiBrake
functions. We recommend that you perform this test
before each towing season.
Test InvisiBrake main functions
The following tests can be performed with the mo-
torhome and towed vehicle stationary.
1. Confirm braking — with the motorhome engine run-
ning, depress and hold the motorhome brake pedal
down. The towed vehicle’s brake pedal will be de-
pressed. Then, release the motorhome brake pedal.
At the towed vehicle, the brake pedal will retract.
2. Confirm that the motorhome monitor is function-
ing — the LED will illuminate after the motorhome’s
brake pedal is depressed and stop illuminating when
the brake pedal is released.
3. Confirm the proper operation of the extend-
ed braking protection mode — depress and hold
the motorhome’s brake pedal down. The towed ve-
hicle’s brake pedal will be depressed. After approxi-
Test InvisiBrake
5
mately 15 seconds, the brake pedal will retract, eve n
though the motorhome brake pedal is still depressed.
4. Confirm the proper operation of the audio alert
— in the towed vehicle, depress and hold the brake
pedal down. After approximately 20 seconds, the audio
alert will sound in the motorhome. (To cancel the audio
alert, release the towed vehicle’s brake pedal.)
If InvisiBrake fails any of the above tests, you
must refer to the “Troubleshooting” section and
repair the fault before towing.
Test the break away system
1. Pull the large ring on the break away pin (Figure
2) out of the break away switch (Figure 2). The towed
vehicle’s brake pedal will be depressed when the pin
is pulled. Insert the pin back into the switch. The brake
pedal will be released.
Troubleshooting
Symptom
Nothing happens after
proper installation, or In-
visiBrake only operates
sporadically.
InvisiBrake activates un-
expectedly.
Solution
• Make certain the 20-amp fuse was installed during the installation.
•Make certain that InvisiBrake is connected to a full-time power supply — some
vehicles have an automatic shut off feature, some require you to pull a fuse for
towing and some require the battery to be disconnected for towing.
•Make certain that the check valve was installed with the arrow pointing toward
the engine.
•Check all electrical connections, with particular attention to the ground between
the motorhome and towed vehicle.
•Pull the break away switch. Does InvisiBrake activate? If not, you likely have a
bad ground. Test the ground by connecting a temporary wire between both vehicles’
chassis, then apply the motorhome’s brakes. If InvisiBrake now activates, you have
a bad ground.
•Make certain that InvisiBrake is receiving a brake light signal from the motorhome.
(Is the motorhome engine on? Many motorhomes do not supply enough voltage to
activate InvisiBrake unless the engine is running.)
•The InvisiBrake wiring was connected downstream of the diodes. Reconnect the
wiring upstream of the diodes.
•Inspect the brake pedal clamp, pulley and cable anchor bracket. Make certain
that they are installed correctly and that the cable is routed properly.
• The operating temperature range is between -2°and +150°F (-19°to +66°C).
InvisiBrake will not operate at temperatures above or below this range.
Is the monitor wiring conducted through the power cord? (The monitor wiring
on both vehicles has been attached to open terminals on both vehicles’ electrical
sockets.) If so, a silicone sealant must be applied to both attachment points. Oth-
erwise, moisture and/or corrosion may cause unintended activation.
continued on next page

Symptom
The motorhome monitor
LED does not illuminate,
even though the brakes in
the towed vehicle are being
applied.
InvisiBrake doesn't stop
braking when the motor-
home brakes are released.
It keeps braking for about
15 seconds.
Turning the hazard lights
on causes InvisiBrake to
cycle on and off with the
lights for a few seconds.
I’m not braking the mo-
torhome, but the motor-
home monitor light stays
on.
The air compressor is
running, but the pressure
gauge is not showing any
air pressure.
Solution
• Make certain the brake light fuse was replaced in the towed vehicle.
•Make certain that the monitor wire patch cord between the two vehicles is se-
curely connected.
•Make certain that there is an electrical ground between the motorhome and the
towed vehicle.
•Check for power at the stop light switch, at the front of the vehicle and at the
LED in the motorhome.
•Check for power at the back side of the LED light when the brake pedal is held
down in the towed vehicle for approximately 20 seconds. You should hear an au-
dible alert after 20 seconds which proves there is power to the harness just before
the LED. If you hear the audible alert, verify proper power and ground connections
at the LED light. You can also provide positive 12 volts and ground to the LED to
determine if the LED has failed.
•The monitor LED is connected to the towed vehicle’s brake light circuit. If the fuse
in the circuit is blown, the LED will not operate. Check the towed vehicle’s brake
lights — if they illuminate when the brake pedal is depressed, the fuse is good.
•Was the optional Brake-Lite Relay installed? If so, make certain that the monitor
wire is connected to the towed vehicle’s brake light wire after the brake light switch,
but before the Brake-Lite Relay — connecting the wire anywhere else will prevent
the monitor LED from functioning.
•If the towed vehicle has been wired for towing (as opposed to installing a bulb
and socket kit), diodes must be attached to the wires. If diodes are not attached,
electrical feedback through the brake light wire will prevent InvisiBrake from releas-
ing until the extended braking protection mode overrides the brake light signal, after
approximately 15 seconds.
Likewise, if a ‘plug and play’ electrical harness has been used, diodes must be
installed to protect the towed lighting harness. (Most harnesses of this type only
have diodes to protect the towed vehicle’s electrical circuits.)
•This is normal — the hazard lights use the brake light circuit, which is what acti-
vates InvisiBrake. It takes InvisiBrake three or four cycles to recognize that this is
not a brake light signal. This cycle will start over each time the hazard lights are
turned on.
•Readjust the brake pedal clamp.
•The cable is bound or obstructed. Inspect the cable assembly from the brake
pedal to the cable anchor bracket.
•Incorrect cable adjustment — refer to the installation instructions for proper ad-
justment.
The air pressure is set at maximum. At this setting, the needle has rotated com-
pletely around the gauge, making you believe it is at zero.
To confirm that the compressor is operating properly, pull out on the brake pres-
sure adjustment knob and rotate it counterclockwise. The needle will move as you
lower the pressure. Adjust to desired pressure setting.
Troubleshooting
continued from preceding page
6
Table of contents
Popular Automobile Part manuals by other brands

Yamaha
Yamaha YZ450F Instruction supplement

Bosch
Bosch Servolectric EPSdp Fitting instructions

Briggs & Stratton
Briggs & Stratton Car MS5053 Illustrated parts list

Murphy
Murphy Digital Time Meters HD35-CD product manual

Toshiba
Toshiba 18 - 1250 A instruction manual

Edelbrock
Edelbrock 33503 installation instructions