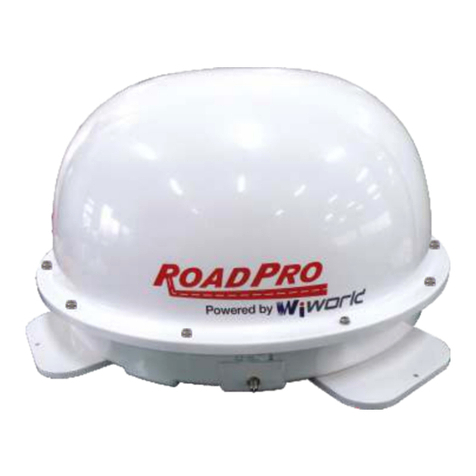
Roadpro Multimo User manual

Version Date: 170912
Multimo Satellite Dish Operating Instructions
The Multimo is a high-quality, weather-proof, portable satellite dish made by Zehnder in Germany. Its
unique design makes it very easy to use in any situation, unlike most dishes which require a tripod or have
just one or two fixing methods.
Another advantage of the Multimo is that, when set up correctly, it has the equivalent performance of a
considerably larger dish. This is due to its “cassegraine” design where the L.N.B. is placed behind, rather
than in front of, the dish.
If you follow these instructions to the letter, you will find that the Multimo is incredibly easy to set up; if you
don’t, you won’t! The instructions assume that you have a satellite finder and either a satellite receiver or a
TV with a satellite receiver built into it. A simple compass is also very useful.
Before you start: Please make sure that there is a clear line of sight to the southeast. Trees,
buildings, vehicles, people and even telegraph poles and pylons can all block the satellite signal.
1) However you mount your Multimo, whether on the ground, a table or using a tripod or a suction mount,
ensure that your Multimo is level with the ground. We advise using a spirit level if you can.
2) The angle of elevation is absolutely critical and varies as you travel around. In the north of Scotland the
angle will be much lower than in the south of France. Use the table below to find the angle of elevation
required for your current location:
3) Remember, ASTRA 2 is the name of the satellite for UK television so, for instance, in
Birmingham the angle must be set at 23°.
To set this angle on your Multimo adjust the wing nut at the side of the dish and line up the small black
pointer with the appropriate elevation angle. This can be accessed by lifting the plastic cover as shown
above.
4) Make sure all the cables are connected correctly between the television and the dish:
a. The TV is connected to the satellite receiver via SCART or HDMI (if the TV already has a
satellite receiver built in, this step can be ignored).
b. The receiver is connected to a suitable power supply.

Version Date: 170912
c. One end of the 10 metre cable supplied is firmly screwed into the “input” of the receiver (or directly into
the TV if it has satellite capability).
d. The other end of this long cable would normally be screwed into the LNB behind the dish but for now it
should be firmly screwed into the connector marked receiver on the satellite finder. (We supply two
push-on connectors which can be screwed onto the main cable at the satellite dish end and the small
cable that also goes to the LNB. This will minimize any disturbance when removing the sat-finder after
the satellite has been located.)
e. Connect the small piece of cable from the satellite finder to the Multimo’s LNB.
If you are in the U.K. make sure the cable connected to the LNB is coming down at the 5 o’clock
position as you look at the back of the dish. (See below right).
5) Turn on the TV and the satellite receiver. Select the correct “source” for the TV. This is could be AV1,
SCART or HDMI depending how the receiver is connected to the TV.
On the receiver select a UK channel from ASTRA 2, we use SKY NEWS as it is generally one of the
strongest transmissions. The satfinder should now have power going to it.
6) Turn the Multimo towards the north and adjust the “gain control knob”
on the satellite finder until it makes a noise and the needle or LEDs
move to the top of the scale. Now turn the knob down until the sound
just stops. (This can be quite a sensitive operation so take your time).
7) Now, (making sure that there are no obstacles towards the south and
south-east, with the Multimo level and the correct angle of elevation
set), sweep the dish around through east towards the south.
All of a sudden, as the dish points towards the south-east, the satfinder’s sound will increase in volume
and pitch and the needle or LEDs will move towards the top of the scale.
8) Continue turning the dish very gently until the tone and the needle (or lights) reach their maximum point.
9) If you have followed these instructions correctly you should now have a
picture. The signal can be fine tuned by making small adjustments to the
dish both in a horizontal direction and elevation angle. There is often a
useful signal strength screen available on the receiver that will help with
this. Do not adjust the “gain control knob” on the satfinder when doing this.
10) The LNB behind the dish can also be adjusted by turning it to fine tune the
signal strength. This process is called “skewing” the LNB and will be necessary when you are away
from the centre of the footprint. In most areas of G.B., keep the LNB at the position shown at (e) above.

Version Date: 170912
A common mistake is to lock onto the wrong satellite. If you have lots of signal strength but no quality
then it is very likely that you are locked onto the German satellite ASTRA 1. Recheck the elevation
angle and begin the sweep from north, through east to south again.
With a “free to air” receiver it is possible to watch programmes on ASTRA 1 and this can be useful as
there are several news channels in English and also a free version of Eurosport. So you can watch
Formula 1 for free on ASTRA 1 (albeit with a German commentary) just about anywhere in Europe. At
point 5 above, select a programme on ASTRA 1 like “Das Erste”; increase the angle of elevation
according to the chart, (normally around 4° above that needed for Astra 2) and continue to follow the
steps.
Once you have a picture, remove the satellite finder from the dish and connect the main 10 metre cable
directly to the LNB. The satellite finder is not waterproof. Be careful not to disturb the dish as this may
mean starting again from the beginning.
If, after following these instructions, you do not have a picture on your TV, start again from the
beginning. It is very unusual indeed for a Multimo or for the components that we supply to be faulty.
Almost certainly, the setting up procedure has not been followed correctly, there is an obstruction
between the satellite and the Multimo or the receiver or TV have not been set up correctly.
The base of the Multimo can be removed either for ease of storage or to use with a bracket. The base
has to be pulled off taking care not to damage the dish see picture below left.
The pictures below show how the push-on F connectors are attached to the cables.
Please note that, as long as you are within the satellite’s footprint, there are no “bad signal
areas” for satellite reception. If the line of sight from the satellite to your Multimo is blocked
then you will not receive a picture. Heavy rain may affect the picture as it will for any dish.
The map on the right shows the
reception area of the Multimo.
It should be used as a guide and
in conjunction with a website
such as Kingofsat which shows
which channels are on which
satellite.
Note that reception areas can
change at any time without
warning!
A larger version of the map can
be found on our website.

Version Date: 170912
A Multimo can be easily
attached to a motorhome’s
window using one of our
suction mounts (D1307).
Our specially made Multimo bag (D2209D) holds not only the Multimo itself but also
a receiver, cables and satfinder. There’s even room for a packet of sandwiches!
An “Easy-Mount” bracket (D2505) makes it really easy to
mount a Multimo to a pole, a jockey wheel or a tripod – even
a mast like the one on the
boat at left.
Our magnet (D2209A) fits neatly into the base of a Multimo
and keeps the dish secure when it’s on a steel surface such as
the narrow boat above. People also fix steel plates to the roofs
of their caravans and motorhomes which works well too.
If you want to run the cable from your Multimo to
the receiver through a window or door, you’ll find
one of our “through-window adaptors” (D2507)
really useful. You can still close the window or door
and the cable won’t be damaged.
You can get these items as well as satellite receivers and other accessories from your dealer or
RoadPro and you can see them on our website: www.roadpro.co.uk
RoadPro Ltd,Unit 7, Stephenson Close, Daventry, Northants, NN11 8RF.
Tel: 01327 312233 E-mail: sales@roadpro.co.uk
Table of contents
Other Roadpro Antenna manuals
