Roar Quad 15 User manual

1
User manual
Contents:
1. Safety instructions
2. Introduction
3. Mains power In & Out
4. Connections – Audio & MIDI
5. Preamp – Channel description
6. Power Attenuator
7. Control & Programming with MIDI
8. Setup Examples
9. Programmable/MIDI – controlled
pickup switching
10. Tube replacement & bias adjustment
11. Specifications & Block diagram Setup
Examples
June 2020

2
1. SAFETY INSTRUCTIONS
1. This apparatus (referred to as Quad15) must be connected to earth via the mains inlet.
2. When powering other class I apparatus via any of the three mains outlet sockets of the Quad 15, always use
IEC mains female-male chords with earth conductor.
Do not exceed “Max power from AC OUTLETS” according to Table 1:
AC voltage
(Mains)
Max power to
AC INPUT
Max power from
AC OUTLETS
Max power
consumption
Quad 15
230V (± 10%) 1500 watts 1445 watts 55 watts
115V (± 10% ) 750 watts 695 watts 55 watts
3. Always unplug the apparatus during lightning storms.
4. Operating temperature range: -20 °C to +50 °C
5. Do not cover the ventilation holes on the top and rear panel to avoid excessive temperatures.
6. Avoid using the Quad 15 in damp or wet conditions. Do not expose to water or liquids.
7. Always replace fuses with correct types shown in Table 2:
AC voltage
(Mains)
Mains fuse
(5×20mm cartridge)
Quad15 fuse
(5×20mm cartridge)
230V (± 10%) T6.3A (time-lagging) T1A (time-lagging)
115V (± 10% ) T6.3A (time-lagging) T1A (time-lagging)
8. Make sure the voltage selector is set to correct mains voltage according to your country:
America 115V. Europe 230V. Wrong setting of voltage selector will NOT harm the Quad 15, but only blow the
“Quad 15 fuse”.
9. Do not connect speaker cabinets with an impedance less than 8 ohm total.
10. Servicing and replacement of tubes and fuses shall be performed by qualified service personnel only. See
section 10. “Tube replacement & Bias adjustment”, page 22.
This apparatus complies with the following standards and directives:
EMC directive
IEC 62368-1 Audio/video, information and communication equipment. Part 1 - safety requirements
Overheating protection The apparatus is protected from overheating by a thermo-switch. If the apparatus stop
working due to overheating, turn off the power switch. Make sure to bring the temperature
down and keep the ventilation holes free, then turn on the power switch.
Short circuit protection
of power supply
The internal power supplies are all short circuit protected. In example, if a tube fails, the
HV supply (high voltage) go into current-limiting mode until the thermo-switch
disconnects the power to the apparatus.
Power consumption Idle ~ 45 W, maximum ~ 55 W
Table 2. Fuses.
Table 1. AC power.

3
2. INTRODUCTION
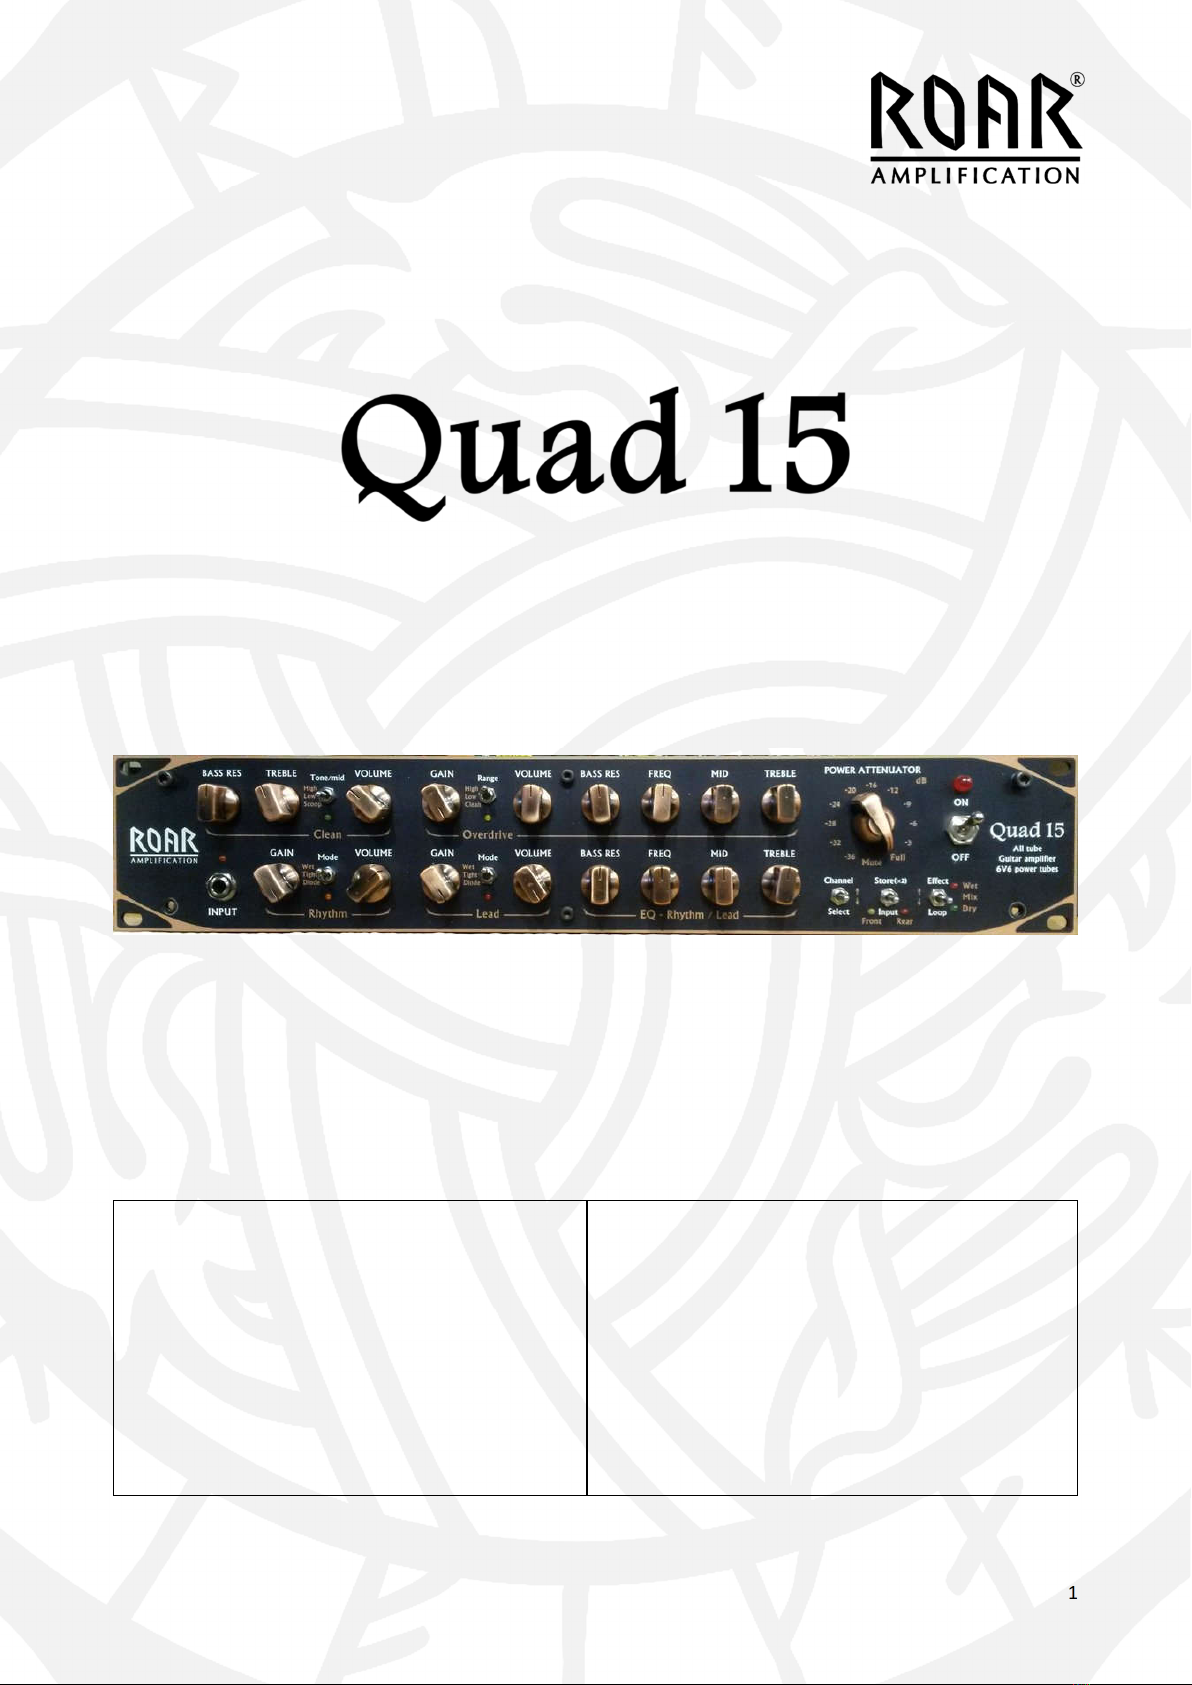
The Quad15 is a an all tube 4 channel guitar amplifier with programmable effect loops, outputting 15 watts to a speaker
cabinet (not included). The output power to the speaker can be attenuated by the built-in power attenuator to retain
the desired amount of power tube overdrive: ”The Sound of Loud at All Levels”
Channel selection, Input (Front/Rear) and Effect loop (Return/Mix/Dry) can be programmed using a MIDI-
footcontroller (not included) or other MIDI-device, see page XXXX. (Musical Instrument Digital Interface)
The knobs and switches for each channel are not programmable.
This manual describes all functions in details while you can go to www.roaramps.com to find soundclips and
instructional videos.
3. AC INPUT & AC OUTLETS (MAINS)
Power up other devices via
the triple mains outlets of the
Quad15; such as effect units
and power amplifiers. Switch
everything on and off with
the mains switch on the front
panel.
The “Mains fuse” might blow
if a device powered from the
Quad15 fails.
The “Quad15 fuse” will only
blow if the Quad15 fails.
The Quad15 is equipped with a
standard IEC mains inlet with
surge protection filter and is
fused by both the “Mains fuse”
and the “Quad15 fuse”.
For world wide use, the
Quad15 is equipped with a
voltage selector to set the
mains voltage level to 230V or
115V. Note that there's no
need to replace any fuses
dependant on the mains
voltage!
UNPACKING

4
4. CONNECTIONS – AUDIO & MIDI
This chapter describes all audio & MIDI connections to the Quad15. Use screened jack-cables of good quality for audio
connections except for the speaker output, where a dedicated speaker cable is recommended.
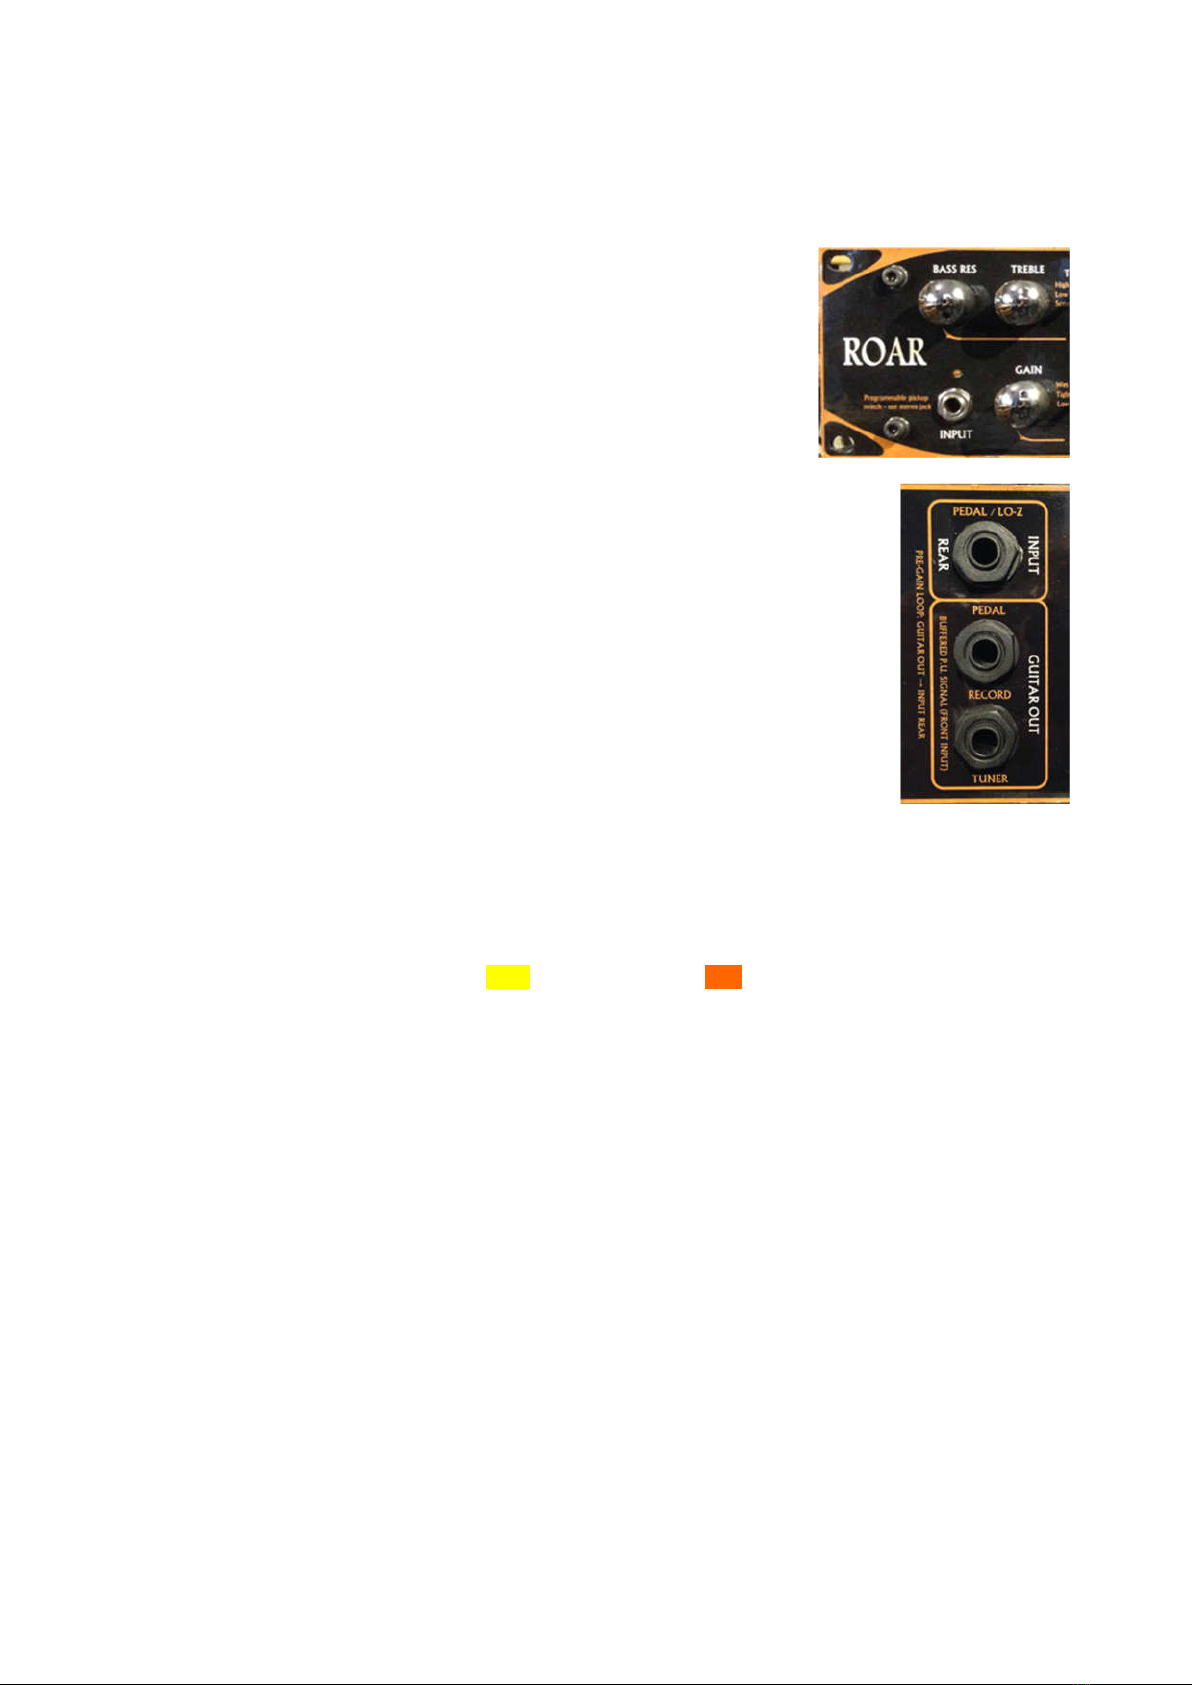
4.1 INPUT - FRONT
Plug in your guitar with a standard mono jack-cable in the front panel input. When
you turn on the power of the Quad15, the “Front” input will be selected by default
and the signal will be fed to the preamp as any other amplifier.
Input impedance ~ 1 Mohm. Programmable pickup-switch: Connecting your guitar using a stereo jack-
cable, you can switch between two pickup-signals from your guitar with the “Input – Front/Rear” selector
on the front panel. This feature requires a special pickup configuration of your guitar, which is described
in further details on page 18. Notice, that you can’t use the rear input when using a stereo cable for
pickup-switch, since it would overrule the “front input”.
4.2 INPUT – REAR
Plug in a wireless system, effect pedal, guitar with active pickups or any device with a low-
impedance output. To activate this input, simply push down the “Input” switch to select “Rear”
(Red LED) and the rear input will be routed to the preamp.
Input impedance ~ 22 kohm. It is not possible to connect both front and rear inputs to the preamp at the same time.
4.3 GUITAR OUT X 2
The signal from “Input – Front” is buffered and routed to the “GUITAR OUT x 2” jacks on the
rear panel. Connect to tuners, recording devices, effect pedals, etc.
These outputs are designed to provide low output impedance with very low noise and distortion for an uncolored pickup
sound ideal for recording and re-amping, etc. This is achieved by a high quality operational amplifier, which is the only
“non-tube” circuitry in the signal chain.
4.4 PRE-GAIN LOOP (GUITAR OUT - > INPUT REAR)
Before the input signal hits any of the four preamp channels, you can insert an effect pedal, etc. in the pre-gain loop.
“Guitar Out” -> Input (effect pedal). Output (effect pedal) –> “Input Rear”. Activate or de-activate the pre-gain loop
with the input selector on the front panel. (Front = Pre-gain loop off. Rear = Pre-gain loop on). Now, your favorite
overdrive pedal can be connected and be a part of a fully programmable setup with only the MIDI-foot controller placed
on the floor.
OD/DIST
Pedal:
Boost pedal:
Noise gate:
Combining the character of one of the many OD/DIST pedals available with the tube gain of the
Quad15 you can achieve your own unique distortion character. An OD/DIST pedal is often used as a
tone shaping device with the gain at lower settings using the tone control to control attack and
presence before the signal is distorted further in the preamp. An EQ or treble boost pedal could be
used as well.
Many guitar players prefer to use a boost pedal before the amp for lead sounds. In example, if you
prefer to use the “Overdrive” channel of the Quad15 for both rhythm and lead, you can add a boost
pedal in the Pre-gain loop and a delay pedal in the Post-gain loop. ATTENTION! Unwanted feedback
might occur if you turn up the overall gain too high, which appears as a squeezing sound. Turn down
the gain or volume on either the OD/DIST/BOOST pedal or the Quad15.
To mute unwanted noise during pauses, a noise gate can be inserted in the Pre-gain loop. In example,
you can then activate the noise gate for your hi-gain sound by selecting “Rear input” and de-activate
it for your Clean sound by selecting “Front input”.
Other effects like delay, chorus, flanger, phaser, pitch shifter etc. are typically connected after the preamp in the “Post-
gain loop”, see next page, but always feel free to experiment.

5
4.5 POST-GAIN EFFECT LOOP
The Quad 15 is equipped with a classic effect loop between the preamp and the power amp. With simple controls, you
can program whether the effect loop should be parallel, serial or de-activated:
Return on
(Red LED):
The effect signal from the “Return” input on the rear panel is fed to the power amp.
Dry on
(Green LED):
The “Dry” signal from the preamp is fed directly to the power amp for maximum sound
quality.
Mix
(Both on):
The “Return” and “Dry” signals are mixed in a tube stage and fed to the power amp.
Both off:
All signals to the power amp are muted. This can be used for a “Tuner-preset” or
complete silence during pauses.
Rack effects:
Effect pedals:
Connect a stereo jack cable from “SEND” to the input of the effect unit for a
semi-balanced output at +4dBu signal level. Connect a mono cable from the
output of the effect unit to the “RETURN +4dBu” of the Quad15. This way,
the signal level is kept at the professional +4dBu level without the need for
level switches. Many amplifiers are equipped with level switches at the rear panel that can
be hit by accident in tense live situations. Furthermore, these level switches tend to be noisy
over time and will eventually degrade the signal path, which is why they are avoided in the
Quad15. Also the built-in switch in jack connectors is not used in the Quad15 due to the same
reasons.
Connect a mono jack cable from “SEND” to the input of the effect pedal for
a standard instrument level suitable for effect pedals (- 10 dBV).
Connect a mono jack cable from the output of the effect pedal to “RETURN
-10 dBV” input.
Mix (both on):
(Parallel loop)
Most multi-effect units are equipped with a “Kill-dry” function, which only lets the processed (wet)
signal through. This is useful when you let the Quad15 mix the dry and wet signal. The preset volume
of your multi-effect unit will now set the effect level of your sound. Typical effects for this setup are:
Delay, reverb, chorus, flanger, phaser, modulation, EQ, etc.
This setup will preserve the highest possible sound quality and lowest noise level, since it’s only the “wet” part of the sound
that is processed by digital converters, etc. If the effect unit cannot mute the direct signal completely, a weird sound can
occur that cancels some frequencies in an unwanted way. Here, it's preferable to use the “Return” only mode instead. For
stereo setups, see page 16.
Return only: If you want to use the effect pedal's own mix function, or an effect with no dry signal like pitch
shifters, noise gates, EQ’s, etc., you can turn on the “Return” signal only. Also effects like phasers,
flangers and tremolos might benefit from this setting.
Monitoring and comparison of the Dry and Effect Return signals
On the Quad 15 you can easily turn the “Return” and “Dry” signal on and off, which is useful
when you setup your effects. In example, delay effects usually have a hi-cut filter for the “delays”
to dampen the attack. This thickens the tone in your sound without adding too much “noise”
from pick attacks. Listening to the dry and wet signals solo before blending them is a useful tool
to learn how your different effects work.
Warning! AVOID GROUND LOOPS to minimize hum and noise.
Use a power supply with isolated outputs when you insert an effect pedal in both “Pre-gain loop” and “Effect loop”.
Make sure the jack connectors for the “Pre-gain loop” don't touch the jack connectors for the “Effect loop”.

6
4.6 AMP OUT – TO SLAVE
This output is designed to feed additional slave amplifiers to drive more speaker cabinets.
Modern light weight power amps of up to 2 x 500 watts are available in a single rack space
unit.
Connect a standard mono jack cable from the “AMP OUT – TO SLAVE” of the Quad15 to
the input of your slave amplifier and use the volume control on the slave amplifier to set
the sound level on stage or in the rehearsal room. This setup will retain the characteristic
sound of power tube overdrive and the interaction between power amp and speaker at all
sound pressure levels, from “couch” riffing (< 5W) to the big stage (> 100W).
This output is derived from the SPEAKER OUT via a simple resistive divider to achieve a line level signal with an
output resistance of ~ 200 ohm. When sending this signal to a low distortion/high power amplifier (slave), the
dynamics, damping and frequency response of the power tubes, output transformer and speaker are replicated
by the slave amp and additional speakers to retain the authentic power tube tone at all sound levels.
If no speaker is connected to the “SPEAKER” output, the internal speaker emulator load will be activated.
4.7 SPEAKERS
Connect speaker cabinets to the speaker jacks on the rear panel of the Quad15 using dedicated speaker cables. The total
impedance must be minimum 8 ohm and the lower speaker jack must be used first.
It is completely safe to use the Quad 15 as a preamp only - with no speakers connected!
Speaker(s) connected Speaker jacks Output power
(Sinusoidal before clip)
Output power
(Heavily clipped)
16 ohm speaker Lower jack (USE FIRST) 15 W 20 W
8 ohm speaker Lower jack (USE FIRST) 15 W 20 W
2 x 16 ohm speakers Both jacks 2 x 7.5 W 2 x 10 W
4 by 12” cabinets: Typically installed with 4 ohm / 16 ohm impedance switch. Select “16 ohm”.
4.8 MIDI IN
Connect a MIDI – foot controller or other MIDI device to the “MIDI IN” jack of the Quad15. See page 12 for MIDI
control and programming of the Quad15.
4.9 PHANTOM POWER FROM MIDI IN
The MIDI-IN connector of the Quad15 is equipped with phantom power to supply your MIDI-footcontroller (Not
included) without any additional power supplies or extra mains cables on the stage.
3 or 5 pin MIDI cable
where only 3 pins are
connected
5 pin MIDI cable
where ALL 5 pins are
connected
7 pin MIDI cable Max. current
No phantom power Pin 1: GND Pin 6: GND 400 mA
MIDI only Pin 3: +12V Pin 7: +12V (Short circuit protected)
The phantom power delivers 400 mA at 12Vdc and is fully short circuit protected. Note that excessive current draw will increase the noise level from
the amplifier.
4.10 MIDI THRU
Connect a standard MIDI-cable from “MIDI THRU” of the Quad15 to the MIDI IN jack of other MIDI-controlled effect
unit, etc.
The MIDI THRU is a hardware buffered output with zero latency.

7
5 PREAMP - CHANNEL DESCRIPTION
The preamp of the Quad 15 consists of four channels with each 3 modes for a variety of clean, compression, overdrive
and distortion characteristics. This section describes the individual controls of the channels and how they sound. Visit
roaramps.com for soundclips.
5.1 CLEAN CHANNEL
A simple independent 3 knob clean channel with a variety of sound characteristics. Dynamic and clean at lower volume
settings (< 11:00), and as you turn up the volume you enter the compression/overdrive territory that will help your clean
sound stand out in the mix. The power attenuator (see page 11) lets you set the desired listening level when turning up
the volume control for compression/overdrive. At lower volume settings, this channel provides full dynamics for super
clean sounds and to receive classic distortion/overdrive pedals.
Bass Resonance: Adds body and thickness.
Most guitar amplifiers offer only the classic “tone-stack” bass control, which can
sound muddy if you turn it up to add body to your clean sound. The individual bass
resonance control for the clean channel lets you add body and thickness to the
sound while retaining clarity. Oppositely, if your guitar suffers from boomy bass, the
bass resonance can be turned down to tighten up the bass.
Tone/mid High: Mids and Highs boosted
Works well with low output humbuckers or single coils with lots of bass. A boomy neck
pickup can be tamed, while the bass resonance can be boosted for a more full and wet
clean sound that easily goes into overdrive.
Low: Mid dampened
Naturally sounding. Works well with most pickups with moderate settings of bass resonance
and treble. Adds more boomy bass to thin sounding guitars.
Scoop: Lower mids scooped (300 - 500 Hz)
Guitars with too pronounced lo-mids for clean sounds will benefit from this setting. High
output humbuckers have a tendency to sound boomy or honky tonky when played clean.
Using the “Scooped mids” setting and adding more Bass resonance will result in a more full
and balanced tone.
Treble: Balance the bass/treble levels.
While the Bass resonance, Tone/mid and Volume controls set the amount of wetness,
overdrive and mid character, the treble control is useful to balance the bass and treble
levels due to its wide range; from very dark, to lots of sparkle.
Volume: From clean to overdrive.
When turning up the volume, some asymmetrical compression/overdrive is added by
the following preamp tube before the power tubes go into overdrive. Both live and in
the studio, turning up the volume just before the power tubes start to distort, gives a thick
and compressed sound that cuts through, and is easier to work with for the sound engineer.
Turning up the volume into heavier power tube distortion, makes it difficult to match the levels from
the other channels.

8
5.2 OVERDRIVE CHANNEL
With a more classic overdrive character, this channel is designed to cover a wide range of overdrive/distortion sounds
from compressed cleans to classic overdriven blues to medium rock distortion and even metal sounds for rhythm work.
Three switchable gain range settings make it easy to adjust the desired amount of gain with the gain knob. Adding an
overdrive, eq or booster pedal in the pre-gain loop leads to an endless amount of OD/DIST sounds. Three tube stages
for all range settings make the transition from clean to overdrive, smooth and compressive. This channel has its own EQ
section with Bass resonance, Freq, Mid and Treble, which is further described on page XXXXX.
Gain: Wide range gain control
Classic gain control that makes it easy to find the point where the preamp starts to break up.
Range: High: Medium/hi-gain gain
Lower Gain settings (9 o'clock) provide smooth overdrive with great string definition for open
chords and single notes.
Higher gain settings enter the classic rock / heavy metal domain like the classic amps from the
80's. With moderate low-cut before the gain stages, the bass response is chunky and loaded
with harmonics.
Low: Brown overdrive
Classic tube overdrive with less low-cut before the gain stages. Low gain overdrive sounds
become more wet as the gain is turned up with a more brown tone. Works well with trebly
guitars that needs more body. At low settings, a dark and dirty clean sound is obtained, which
works great for blues and “Clean leads”.
Clean: Low gain for dirty cleans
The lowest gain range turns the preamp into a dirty clean channel with a very compressed
character and great sparkle. The tubey compression is ideal to bring a “clean” guitar to the front
of the mix with lots of sustain. Here, it’s easy to control the amount of overdrive by the pick
attack while keeping the overall level smooth.
Volume: The overdrive distortion character of the amp is also set by the volume control, which
overdrives the output tubes. Here, the bass frequencies are broken into upper harmonics,
which adds low order harmonics that sounds darker and more rumbling than preamp
distortion. Too much power amp distortion will however break the bass apart and make
the sound boxy with louder mids.

9
5.3 RHYTHM & LEAD CHANNELS
The Rhythm and Lead channels are Hi-gain channels that also master the lower gain territory. Built around the 5751
tube, they share the same EQ section, described on page XXXXXX, while both channels have their own “Mode” switch
with three different preamp characters for a variety of OD/DIST sounds. Four tube stages in the preamp result in plenty
of gain for Leads, rock and metal guitars, even for lower output pickups. The goal has not been to provide as much gain
as possible, but the “right” amount of gain to retain definition and to make lower gain settings easier. If you want insane
amount of gain or a unique distortion character, you can add a distortion pedal or boost pedal in the pre-gain loop.
RHYTHM CHANNEL
Gain: Classic gain control.
At 9 o’clock, the preamp goes into overdrive for classic rock sounds. Combine with some power
amp “crank” by turning up the Volume control for a rumbling overdrive sound.
Around 13 o’clock, high output humbuckers make for a good chunky heavy rock/metal rhythm
sound.
Mode:
Wet: Hi-gain with wet bass.
At lower gain settings, the amp sounds very classic. This setting works well with single coil
pickups and open chord work. Higher gain settings give a thick saturated distortion (Fuzz).
Single notes will be bold and up front in the mix. Also suitable to thicken up guitars that lack
bass. Roll of the Bass resonance to compensate if needed.
Tight: Hi-gain with more low-cut for tight bass response
Adds chunk and definition to rock and metal rhythm guitars. With moderate gain settings and
subtle power amp overdrive, the bass is dynamic and punchy with lots of growl, clarity and
chord definition. Higher gain settings make the bass more wet.
Extended treble response from the all tube circuitry.
Diode: Hi-gain with very tight bass response and attenuated hiss.
Adds clipping diodes to the circuit similar to OD/dist pedals for an even tighter bass response
with enhanced mids and attenuated hiss for high gain settings. Guitars tuned in B or deeper
often benefit from this setting. At lower gain settings, the amp is dark and goes into smooth
overdrive with lots of string definition suitable for rock and blues, while you can turn up the
bass resonance to restore bass and body to your sound.
Volume: Power amp overdrive
Turn up the volume into power amp overdrive to get more low/mid frequency harmonics,
which add growl and rumble to your sound. For high gain sounds, power amp overdrive
removes some of the preamp fizz making the distortion more raw and “loud”.
In a live setup, don’t turn the volume up too high to keep some power amp headroom for clean sounds.
NOTE! Power amp overdrive for metal and rock guitars is a subtle effect, which is underestimated by many. When
you find the sweetspot, it attenuates the hiss from the preamp and adds “bass overdrive” and definition to palm
muted riffs, which also helps the overall sound to sit perfect in the mix without excessive bass frequencies.
However, heavy saturated power amp overdrive will destroy all bass and treble definition, hence the reason why
many metal guitar players don’t think of power amp overdrive as a benefit to their sound.
Shared EQ:

10
LEAD CHANNEL
With slightly more gain and mid emphasis, the Lead channel is dedicated to solos and single notes with the pick attack
slightly dampened compared to the Rhythm channel.
Gain: Classic gain control
At lower gain settings, this channel still provides good control and clarity for chord work.
As you turn up the gain, single notes will be more bold with plenty of sustain.
At very high settings bridge humbuckers will sound more bass saturated similar to neck
humbuckers. ( You might back the gain off a bit to avoid feedback with some guitars.)
Mode:
Wet: Hi-gain with wet bass
A wet and saturated hi-gain character will make single notes thick and bassy. Bridge pickups
get a darker sound similar to neck pickups.
Extended treble response from the all tube circuitry.
Tight: Hi-gain with more low-cut for tight bass response
Balanced hi-gain character with great definition for both single notes and chords, even at
maximum gain. Extended treble response
Extended treble response from the all tube circuitry.
Diode: Hi-gain with very tight bass response
Adds clipping diodes to the circuit similar to OD/dist pedals. Helps retaining string definition
at very high gain settings. The treble response is less extended with attenuated hiss.
Volume: Power amp overdrive
When turning the “Rhythm” channel volume into slight power amp overdrive, you can turn
up the “Lead” channel volume a few dB higher to bring your lead sound up front. This will
also add more bass overdrive from the power amp to enhance the mids and keep the
overall bass level under control.
Shared EQ:

11
5.4 EQ – OVERDRIVE & RHYTHM/LEAD
Bass resonance: Adds body and fat dynamic bass
The preamp of the Quad15 is designed to produce strong mids and highs to
retain clarity and chord definition. The bass is then enhanced in the power amp
by the Bass resonance control. While classic bass controls in the EQ section
often lead to muddy bass if turned up too high, the Bass resonance adds big and
punchy bass while retaining clarity. At higher Bass resonance settings you can
turn up the volume, so the power tubes overdrive the bass and break it into
upper harmonics in the mid range. This brings tone to bass heavy sounds and
keeps the bass from being muddy.
Mid: Adjust the level of mid frequencies from the preamp
The mid control attenuates the mids at a certain frequency set by the “Freq”
control, which lets you change the fundamental sound of your amp.
Note that if you turn the mid control up fully, the “Freq” control will have no effect since there’s no
attenuation of the mids. However, at this setting the mids will appear to be boosted. Most tube amps
have a mid control that will only attenuate the mids at a certain center frequency between 300Hz –
800Hz, not boost the mids. It is this center frequency that gives a certain amp a “British” or “American”
sound, among other factors, of course.
Freq:
7 to 11 o’clock:
11 to 14 o’clock:
Above 13 o’clock:
Adjust the center frequency of the “Mid” control.
300 to 400 Hz. Lots of upper mids. Raw and crunchy. Less chunky/boomy bass.
400 to 600 Hz. Chunky bass and body. Works great for rock and metal guitars.
600 Hz – 800 Hz. Lots of body and lower upper mids. Turn up the treble to add
presence. In a mix, this setting gives a more “leaned back” sound to give space
to other instruments.
The Freq control is also a powerful tool to match the mid/treble character of
different speakers. A honky or edgy speaker can be tamed by “scooping” the
high-mids while adding more treble to compensate.
Treble: Wide range, classic treble control
Use it to balance the bass/treble level as the last step dialing in your tone.
By tradition most amplifiers come with presence controls, which control the highs by adjusting the
feedback from the speaker to the power amp, similar to the bass resonance control. Usually the
frequency range of the presence control is a bit higher than the treble control, but in practice there’s
often little tonal difference between treble and presence controls, which is why presence controls have
been avoided for the Quad15.

12
6 POWER ATTENUATOR
The built-in Power Attenuator of the Quad 15 lets you control the desired listening level while retaining a natural
“speaker cabinet” response. A total of 12 steps let you go all the way down to bedroom level with as much power amp
overdrive as you prefer. The selector switch can be turned 360 degrees, enabling direct switching from “Full power” to
“Mute”.
Power attenuator
Rotary switch - position
Power to speaker Internal load
Full power 15 W to speaker cabinet Disconnected
-3 -3 dB power to speaker Connected
-6 -6 dB power to speaker Connected
-9 -9 dB power to speaker Connected
-12 to -36 - 12 dB to – 36 dB power to speaker Connected
Mute Speaker disconnected Connected
The power attenuator is based on an internal speaker emulator load made with high quality components (Inductors, resistors and capacitors). The 12
step rotary switch on the front panel distributes the power between the speaker and the internal load in a way, so that the 6V6 power tubes are
operated at their optimal point at all times. In this way, a natural sounding power tube overdrive is achieved, even at very low sound levels, and with
a fully dynamic bass response. (Many power attenuators are made with resistors only, which does NOT sound like a speaker cabinet. A reactive load
with a resonance frequency around 100 Hz (typically) is essential for an authentic sounding power attenuator.
Please notice that there might be an audible difference between the Power attenuator settings at “Full power” versus the lower power settings due to
the different damping characteristics of speaker cabinets; especially in the bass frequencies. Speakers with low Q-values have a tendency to deliver
less and tighter bass and vice versa. Also, a speaker driver will “break up” or add “speaker distortion” as you turn it up, which will not be “simulated”
at lower settings. However, the power attenuator is a unique way to control speaker distortion, when you're in the studio.

13
7. CONTROL & PROGRAMMING WITH MIDI
Channel selection, Effect loop and Input selection (Pre-gain loop) are fully programmable and compatible with any
MIDI – footcontroller available. With only three programming switches, full control and stored presets are possible.
7.1 PROGRAMMING SWITCHES
Channel select: Press the “Channel select” switch up or down to select one of the four preamp channels.
Store: See “Programming the Quad15 with a MIDI-footcontroller” below.
Input: Press the “Input” - switch down to toggle between “Front input” and “Rear input”- jack.
Effect loop: Press the “Effect loop” switch up to turn the “Dry” signal from the preamp on and off.
Press the “Effect loop” switch down to turn the effect signal from the “Return” inputs on and off.
Four states Dry only Mix Return only
Mute
Return Off On On Off
Dry On On Off Off
7.2 PROGRAMMING THE QUAD15 WITH A MIDI-FOOT CONTROLLER
Connect a MIDI-foot controller (like the MIDI MOOSE shown below, not included) to the “MIDI – IN” connector on the
rear panel of the Quad 15 with a standard MIDI-cable. Your MIDI-foot controller can be phantom powered by the Quad
15, see page XXX.
1. Press the foot switch on the MIDI-foot controller for the preset you want to store. (128 presets total)
2. Use the programming switches on the Quad 15 to select “Channel”, “Input - Front/Rear” and “Effect loop
settings”
3. Press the “Store” - switch up twice to store your preset. All LEDs will flash fast 7 times to indicate that the
preset is stored. After the first press, the LEDs will flash slowly to indicate that you are about to
store/overwrite the preset. To escape this state, you can hit any other programming switch.
4. Recall a preset by pressing one of the foot switches on the MIDI-foot controller. E.g. number 4.

14
8. SETUP EXAMPLES
The Quad 15 is designed for any setup imaginable, from the most basic to the most advanced stereo setup. Plug in your
guitar, your speaker cabinet and a MIDI-board and you're ready to rock! Or get some inspiration from the following
examples.
8.1 SMALL CLUB SETUP – WITH EFFECTS AND MIDI-FOOTCONTROLLER
Let the Quad15 drive the speaker of a Rackcombo and an extension cabinet for a solid sound. With high efficient
speakers, this setup is adequate for small clubs, etc. (Disclaimer: You never know with a hard hitting drummer)
• The built-in Power Attenuator lets you keep the desired power amp tone/overdrive at all sound levels.
• Use the Pre-gain loop for your favorite Overdrive pedal, Booster, EQ, Noise gate, etc. (Programmable on/off)
• Use the Post-gain effect loop for effect pedals like delay, chorus, reverb, phaser, etc. or rack effects.
(Programmable Wet/Mix/Dry)
• The open back Rackcombo fills the room while the closed 1 by 12” cabinet delivers a more direct sound
towards the audience
For more power, you can add a power amp pedal like Electroharmonix 44 Magnum, fed by the ”AMP OUT – to slave”
output from the Quad15 to replicate the sound of the Quad15 power amp.

15
8.2 HIGH POWER SETUP – HEAD WITH 4 BY 12” CABINETS
The Quad15 delivers 15W of tube power to the top cabinet. An additional Class D power amp is replicating the sound
of the Quad15 – delivering hundreds of watts to additional speaker cabinets.
• Power amp tone and overdrive is kept at all sound levels. (The sound of “Loud” at all levels.)
• The Class D power amp delivers firm bass response even at very high sound levels
• The top cabinet is only driven by 15W and won’t pierce your ears when you’re standing close to your amp. Nor
bleed too much into vocal mics.
• Your signature tone of your guitar and tube amp is captured by the mic and sent to the PA system of the venue
or recording device.
• Use the Power amp’s volume control to set the stage or rehearsal room level - keeping the mic signal constant,
which makes life easier for the sound guy.
Mount the Quad15 and a 1U power amp (Class D typical) in a 3U rack head for a compact solution.

16
8.3 HIGH POWER SETUP – RACKCOMBO WITH 3 BY 12” CABINET
A rackcombo holding the Quad15, additional power amp, rack effects and effect pedals can be placed on top of a
3 by 12” cabinet for maximum flexibility and convenience.
8.4 THE QUAD15 AS A PREAMP ONLY
Using the Quad15 as a preamp only, will still maintain its 6V6 driven power amp character thanks to the internal
speaker emulator load. With no speakers connected to the Quad15, set the power attenuator to ”FULL” for maximum
signal from the ”AMP OUT – to slave” output.

17
8.5 STEREO SETUP – WITH EFFECTS AND MIDI-FOOTCONTROLLER
The ultimate setup for the demanding lead guitarist. Three speakers retain clarity for stereo sounds and provide the
sound engineer with the dry signal for better control behind the mixing desk.
• The center speaker (Rackcombo in this example) delivers the dry mono signal.
• The two extension cabinets deliver the wet signal processed by the stereo rack effect unit.
• Use the Pre-gain loop for your favorite overdrive pedal, booster, EQ, noise gate, etc. (Programmable on/off)
• Use the Post-gain effect loop for your favorite EQ, Noise gate, delay, tremolo, etc. (Programmable)
• Connect a mono jack cable from the Quad15’s “AMP OUT” jack to the stereo effect processor for stereo
effects like delay, reverb, chorus, phaser, pitch shifter, panner, etc.
• Connect the stereo output from the effect processor to a 2 channel power amp.
• Use the Power Attenuator of the Quad15 as a master volume for the entire setup.
• Connect a tuner or recording system to one of the two “Guitar out” outputs on the rearpanel of the Quad15.
Warning! AVOID GROUND LOOPS to minimize hum and noise.
Use a power supply with isolated outputs when you insert an effect pedal in both “Pre-gain loop” and “Effect loop”.
Make sure the jack connectors for the “Pre-gain loop” don't touch the jack connectors for the “Effect loop”.

18
8.6 STUDIO SETUP – RE-AMPING
• Record the raw guitar pickup signal using the “Guitar out” output of the Quad15.
• Connect an output from your recording device to “Input rear” of the Quad15 for Re-amping. Many sound
engineers prefer the option of re-amping guitar tracks in the mixing process to fine tune the amp settings.
• Record the speaker cabinet with a microphone and the guitar pickup signal simultanously. It is important for
all guitarists to have the right sound when recording!
• Connect Wah pedals, Overdrive pedals, Treble boosters, etc. before the Front input of the Quad15.
Be aware of ground loops when re-amping:
1. Use paired jack cables to connect the Quad-15 to your soundcard’s in and out.
2. Twist two jack cables to connect the Quad-15 to your soundcard’s in and out.
3. Use isolation transformers or a dedicated re-amp box.

19
9. PROGRAMMABLE/MIDI-CONTROLLED PICKUP SELECTION
This feature is advanced and can be disregarded if you prefer to use a standard wired guitar with
a mono cable!
Why ?
Go from a clean sound with your neck pickup to a distortion sound with your bridge pickup with
one step on your MIDI-footcontroller only.
How it works ?
The input jack on the front panel of the Quad15 is a stereo jack connector ready to accept two
signals, where one pickup signal at a time can be routed to the preamp via a built-in relay. Press
down the “Input” selector on the front panel to switch between the “Rear” and “Front” signal
from the front panel input jack.
The simplest way to modify your guitar for programmable pickup switching with the Quad 15 is shown above. A stereo
jack cable is required along with two volume pots or one double pot. To be able to use your guitar with standard mono
input cables for other amplifiers, there are several options to incorporate a pickup switch in your guitar as shown in
the following examples.
IMPORTANT: To use this feature, make sure that NO cable is connected to “Input Rear” on the rear panel. (Pre-gain
loop is not possible). NOTE that MIDI-controlled pickup selection requires custom-wiring of your guitar, which might
require a skilled person to do the modification.
NOTICE: When selecting “Input Rear” on the front panel to connect the ring from the “Front input” to the preamp, it
will still be the tip of the “Front input” that is connected to the “Guitar out” jacks on the rear panel.
See blockdiagram on page 25.

20
9.1 TWO VOLUME – NO TONE – STANDARD PICKUP SWITCH
The most straight forward way to customize your guitar for programmable pickup switching is to use two volume
controls; one for each pickup. This example illustrates how a guitar with two humbuckers and room for only two
potmeters can be wired (Tone control omitted). This wiring is adequate for most rock & metal guitar players that
usually have their Tone control at max anyway.
Parts list:
1 x Potmeter, 500k log w/switch
1 x Jack connector, stereo
1 x Potmeter, 500k log (keep original)
1 x Pickup switch (keep original)
Mono cable:
• This setup allows you to use your guitar with a standard jack cable with any amp; the way you're used to!
• Keep the “Push-pull switch” in “Pushed” position.
• Separate volume controls for Bridge and Neck pickups.
Stereo cable:
• Connect your guitar to the Quad 15 with a stereo jack cable.
• Pull the “Neck volume control”.
• Select between “Front” and “Rear” pickup with the Input selector on the Quad 15. (Pickup switch on your
guitar is now de-activated)
• Separate volume controls for Bridge and Neck pickups.
Other manuals for Quad 15
1
Table of contents