Rodstation HD Camera Kit User manual

Rodstation
RodstationRodstation
Rodstation
HD
HD HD
HD Camera
Camera Camera
Camera Kit
KitKit
Kit
Thank you for purchasing the Rodstation High Definition Camera Kit. This handbook will help you
to operate the DVR and 15 Metre Wired Camera.
Our company is only responsible for maintaining and repairing the problems arising from correct
use of the product. We are not responsible for any personal data deleted and lost caused by wrong
operation, product repair or other case. We are also not responsible for any other indirect loss caused
by incorrect use, damage or failure to follow instructions.
Any modify of software, hardware, introduction of this product will not be notified separately.

Contents
Notes…….………………………………………………………………………………1
Basic Information………………………………………………………………………..2
Buttons & Interface……………………………………………………….……………..3
Installation of the Camera…………………………………………………………..…...4
Attaching & Removing the Sunshield Cover………………………………......……….. 5
Charging the DVR…
…………………………………………………………………………………......
6
Basic Operation .……………………………………………………………………….. .7
Recording & Photo…………………………………………………………………..…8,9
Play Video & Pictures..…………………………………………………………....…10,11
System Settings
……………………………………………………………………………………....
13,19
Trouble Shooting…………………………………………………….……………….….20
Specifications………………………………………………………….………….….21,22
Package Content…………………………………………………………………...….…23

- 1 -
Notes
Dear customer, thank you for choosing our products.
Please read the following instructions carefully before using:
Must not be used in high temperature or a high humidity environment,
0~40
℃
is the best working temperature for the DVR.
Avoid putting the DVR in direct sunlight.
Please insert or take out the SD card only after the DVR power is turned off.
Please do not dismantle the DVR without authorization. If any query, please contact us
Please do not change or poke the battery or place the battery close to fires due to risk
of explosion.
We suggest our customers copy any data in case of any loss caused by unstable power
supply.
When inserting the SD card, please make sure the inserting direction is correct.
Otherwise it will damage the card slot.
Do not use this product to violate others’ privacy. Monitoring others’ activities
without consent is illegal and this product is not designed and manufactured for such
purpose;
Do not use this product for any illegal activities. We shall not be responsible for any
consequences of illegal acts committed by the user.

- 2 -
Basic Information
Basic Information:
Camera: 2 sets full HD 1080P cameras
Night vision: 6 pcs Led
Camera resolution: 5.0 MP 3200*1800 pixel
Metal monitor bracket: adjustable
Monitor: 7-inch HD screen with sun visor
HD Video Output Interference
:
FPD-Link
Ⅲ
Video Storage Pixels: HDMI
:
1920* 1080
Video Compression Format: H.264
Photo Format
:
JPG 5.0Mega 3200
(
H
)
×1800
(
V
)
.
Battery
:
Built-in 5000mAh high capacity Li-battery.
Working Time: 8 hours
Working Voltage: 5-24V
Storage: Supports up to 64GB TF card.
Language: Supports multi-language.
Supports Power-saving Mode: automatic shutdown, automatic off-screen.
Automatic upgrade: Supports system automatic upgrade.
Video Output: HDMI, AV-OUT

- 3 -
Buttons & Interface
Tips for symbols

- 4 -
Installation of Camera
Connect the five core aviation plug of camera to the DVR unit ensuring the red dot on the plug is
pointing towards the back of the DVR. Press “ ” to turn on L D light, Press “ ” again to turn
off the L D light.
Connect the camera ball to a 1/2" Whitworth rod fitting
- 5 -
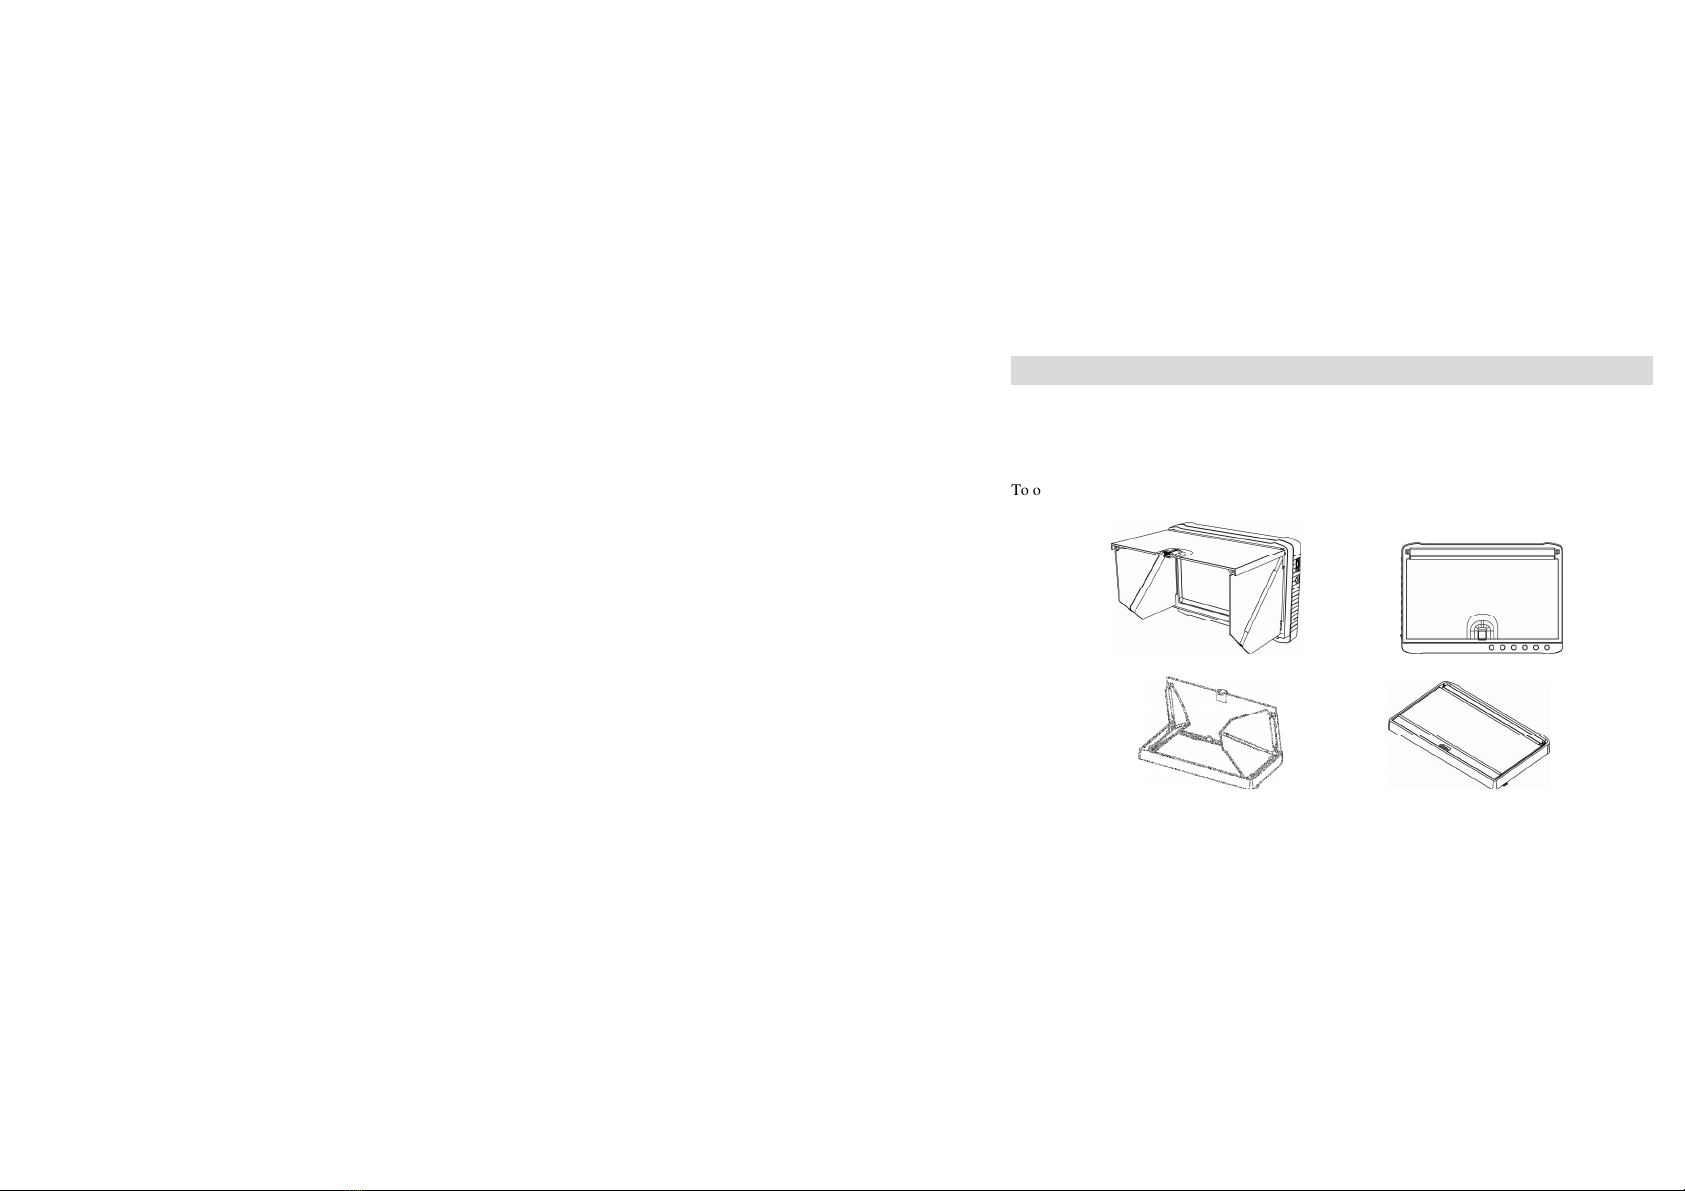
Attaching & removing the
Sunshade Cover
The bottom of sunshade cover has 4 buckle pins. Please aim them at the button holes on
monitor and push gently to load the cover into position. If you require removing the cover
just gently push it to the opposite direction.
To open the sunshade cover push up the button in the middle of the front cover.

- 6 -
Charging the DVR
1. Notice the battery capacity symbols before charging:
Tips: The possible reason for being unable to power on monitor is battery running out. Please
operate it after charging by the AC adapter or PC.
2. How to charge
Charge 4~6 hours for fully charged. Unplug the charger until the battery status is full.
Note:
A. This charger is for this machine use only. Do not leave the charger in humid environment.
Unplug the charger and keep it safe after charging. Do not repair or modify the charger.
B. For better performance, please charge the brand new machine for more than 6 hours but less
than 10 hours for the first time. New battery will reach best performance after a few times
full charge and discharge.
C. If you may not require the camera for a long period of time, it is recommended to charge the
monitor every 2~3 months and then keep it switched off.

- 7 -
Basic Operation
1. Power On/Off:
Press “ ” to power on, check the moniter is operating and the Rodsation® Logo will apear
on the monitor; to power off press “ ” again for a longer period.
2. LED light turn on mode selection:
Turn on the monitor, LED is off. Press “ ” to turn on LED light, Press “ ” again to
turn off the LED light.
3. Working mode switch (switcher located in the left corner):
When it switches to “ ”, monitor is in state of receiving/record
;
When it switches to “ ”, monitor is in the state of take photo
;
When it switches to “ ”, monitor is in the state of playback.
4. External Storage card
Only after the Mini SD card is plugged in will the record and photo facilities be available.
Screen will show symbol of card & its remaining capacity.
5. Working as a U-disk
Connect monitor to computer and power it on, it will work as a U-disk.
Open the removable
disk in the computer, you’ll find the videos and photos in “ RECORD” and “ PHOTO” files
under “DCIM” directory.

- 8 -
Record & Photo
Power monitor on, and select working mode to “ ”, it is in recording/photo mode.
1. Record: Under “ ” mode, press “ ”, monitor starts to record, and screen shows red “ ”.
Press “ ”again to pause and store, press “ ”one more time, it continue to record. Press “ ”
to end, it will save automatically and exit. If not press “ ”, the system will automatically save
video in segments until storage card is full.
2. Photo: Under “ ” mode, press “ ” once, screen flashes once, and get one picture.
Table of contents


