ROOM WATCHMAN User manual

ROOMWATCHMAN KIT
User manual 2.32
roomwatchman.com
8/26/2015

WWW.ROOMWATCHMAN.COM Page 2
Step 1:
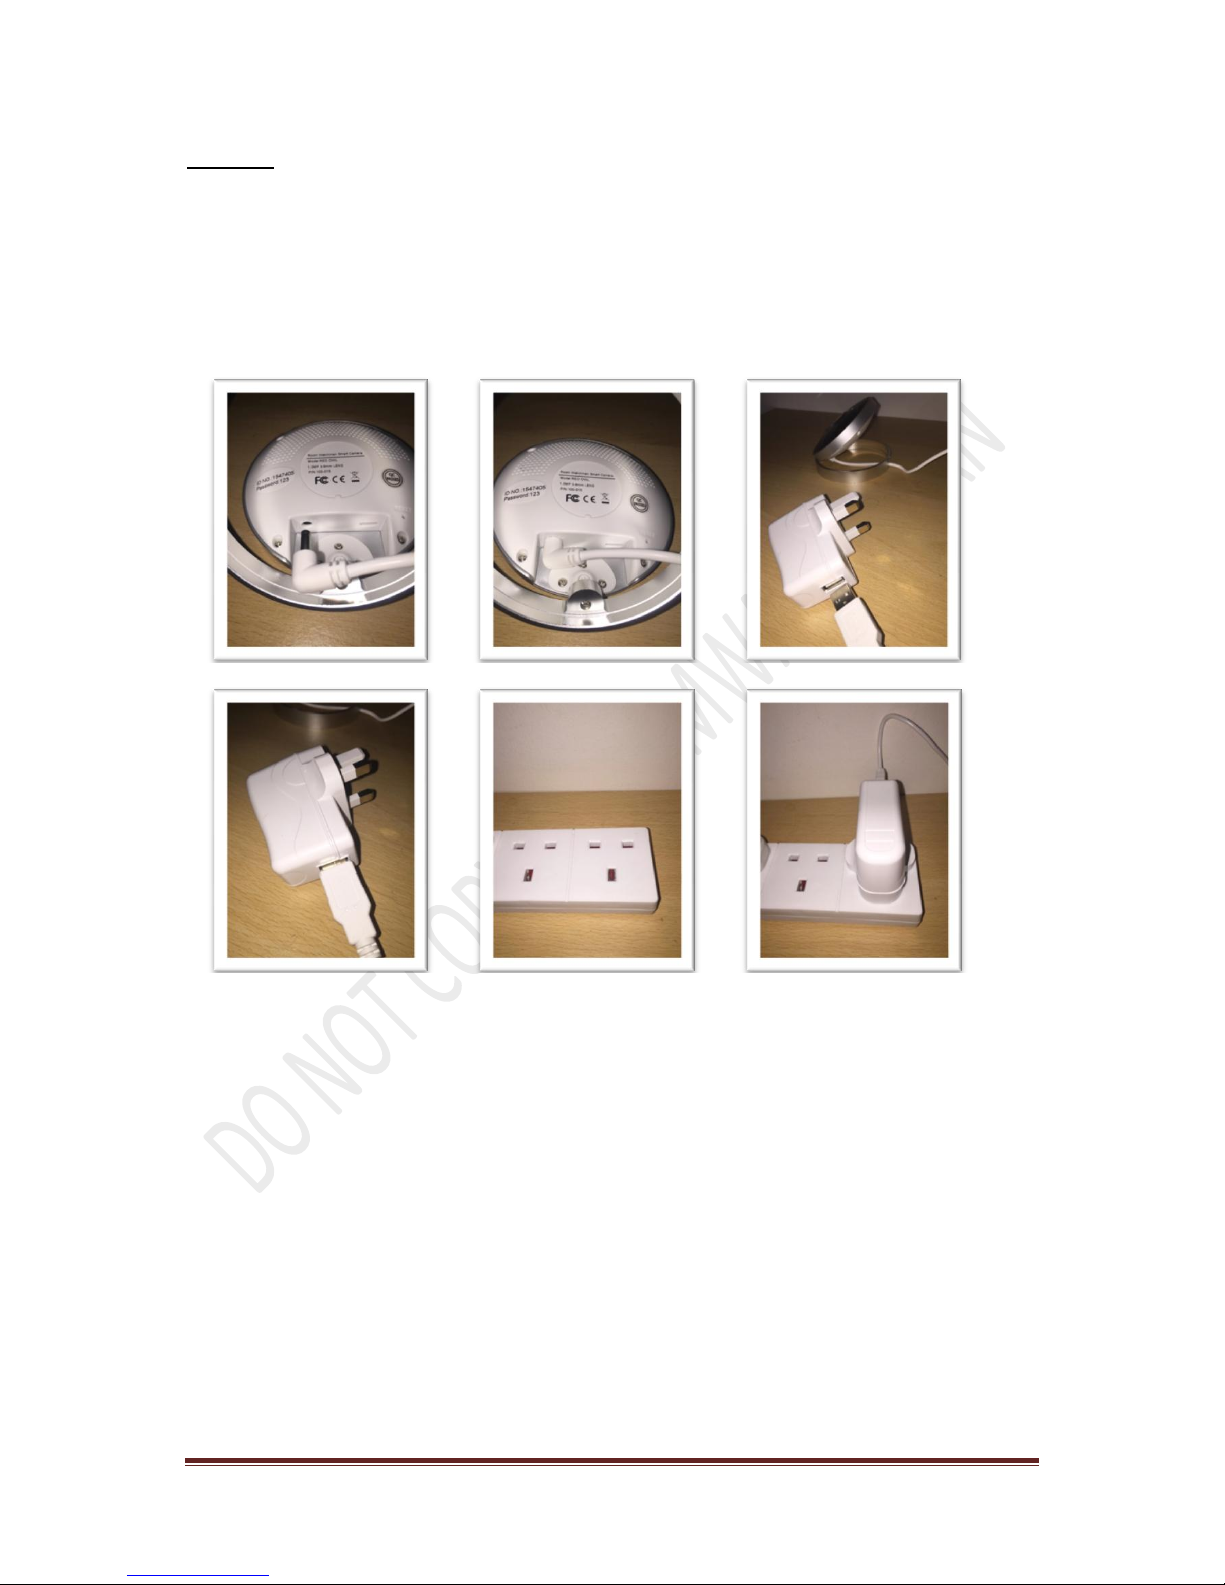
Open ROOMWATCHMAN Camera Kit
What’s in the box?
a. RED OWL Camera
b. Camera Back Cover
c. USB Power Plug
d. USB Power Cable
e. USB Extended Cable
f. Screw to fix in wall or ceiling
g. 3M Strong double sided sticker to stick camera onto wall
h. Double sided sticker to stick USB cable onto wall
i. 8GB Micro SD Memory card
j. PIR Motion Sensor
k. Screw to fix it onto the wall
l. 2 x AA Batteries
m. Strong doubled side sticker
n. Door Magnetic contact
o. Strong doubled side sticker
p. Battery
q. Temperature Sensor
Note: Please check it is original

WWW.ROOMWATCHMAN.COM Page 3
Step 2:
You can setup this camera with your iOS phone or Android Phone
1. Set your phone to Wi-Fi
iOS Android
2. Download App & Register with your email address or Phone number
iOS / Android
You can register your login details with your email address or phone number. Once
registered, you need to logon to the app. If you logged in successfully, the device adding
screen will appear on your phone.

WWW.ROOMWATCHMAN.COM Page 4
Step 3:
In this section, you will understand how to setup camera with Wi-Fi connection to connect it
via the internet.
1. Connect camera with USB 5V power, USB Adapter and USB power cable which
are provided in this kit.
After the camera is connected with 5V power this will give you an alerting sound within few seconds.

WWW.ROOMWATCHMAN.COM Page 5
2. Connect camera via the internet (Without LAN Cable)
First Reset camera, to do that press a sharp needle to reset hole for few seconds until an alerting
sound is heard.
Once it has been reset, wait a few seconds while the alerting sound is heard.
a. Login app & add camera
Press ‘+’ sign press ‘Wi-Fi Connect’ Setup your Wi-Fi Password in app & Press ‘Next’ wait a
few seconds a ‘success’ message appears on app Enter Camera password (123) then press
‘OK’

WWW.ROOMWATCHMAN.COM Page 6
OR
3. Connect camera via the internet (With LAN Cable)
Connect camera with your internet router using LAN cable & LAN Cable adapter that is provided in
this Kit.
After connecting the camera with the router, a green light will appear on the front side of the
camera
a. Login app & add camera manually
Press ‘+’ sign press ‘Manual Add’ Enter Camera ID & password (123) then press ‘SAVE’

WWW.ROOMWATCHMAN.COM Page 7
Step 4:
In this section, you will know how to setup basic camera function on the iOS & Android app.
Press Setup button on the app then you will see the setup screen
In this screen you can view all the basic function of this camera.
Setup Button

WWW.ROOMWATCHMAN.COM Page 8
1. Check camera software updates are available or not?
Press ‘Device Update’ if you have updates then it will notify you
2. Change date & Time
Press ‘Date & Time’ change date and time manually
3. Change media setting
Press ‘Media setting’’ here you can change camera reverse view, video format and speaker
volume

WWW.ROOMWATCHMAN.COM Page 9
4. Security Setting
Press Security setting here you can change your camera admin and guest login password.
5. Network Setting
If you add camera internet manually with LAN cable then you should set Wi-Fi so to do that Press
Network Setting then select your Wi-Fi Enter Wi-Fi Password Press ‘OK’
6. Alarm setting
If you want to set alarm for motion detects & high temperature, you can set it to receive email and
push notification ID.

WWW.ROOMWATCHMAN.COM Page 10
7. Record setting
Here you can setup recording methods that is manual recording, alarm recording or schedule
recording.
8. Storage info
You can see memory card information as well as format memory card.

WWW.ROOMWATCHMAN.COM Page 11
Step 5:
This explains how you can connect wireless PIR Sensors, Door magnetic sensors, remote Key
and Temperature control with your camera. Also, how to insert memory card.
1. Memory cord
Take out memory card from package and insert it the correct way into the camera as shown below
2. Temperature Sensor
Connect Temperature sensor with camera as illustrated below

WWW.ROOMWATCHMAN.COM Page 12
3. PIR Motion Sensor
Take out PIR Sensor from package remove back cover Insert 2 x AA Battery Close back
cover screw to lock back cover.
Once this is done, it is almost ready to be activated and you will need to ensure all steps below are
followed accurately
iOS Phone Setup
Go to your mobile app and click ‘setup’ click ‘Defence area setting’Click ‘Hall’ Click ‘Hall1’
Click ‘OK’ wave to your PIR Sensor to check red light is on done

WWW.ROOMWATCHMAN.COM Page 13
4. Door/Window Sensor
Take out Sensor from package remove back cover Insert 1 x AA Battery Close back cover
Once this is done, it is almost ready to be activated and you will need to ensure all steps below are
followed accurately
iOS Phone Setup
Go to your mobile app and click ‘setup’ click ‘Defence area setting’Click ‘Window’ Click
‘Window1’Click ‘OK’ Press the button on that sensor until the red light is on done

WWW.ROOMWATCHMAN.COM Page 14
5. Remote
Take out Remote from package
Once this is done, it is almost ready to be activated and you will need to ensure all steps below are
followed accurately
iOS Phone Setup
Go to your mobile app and click ‘setup’ click ‘Defence area setting’Click ‘Remote’ Click
‘Remote1’Click ‘OK’ Press the button on that Remote until the red light is on done

WWW.ROOMWATCHMAN.COM Page 15
Step 6:
This section shows how you can fix the camera, wireless PIR Sensor and Door magnetic
sensor in your house or business.
1. Fix camera on wall
You can fix the camera on the wall using a few screws or big size strong double sided sticker
depending on the condition of the wall.
2. Fix PIR Sensor on wall
You can fix the PIR Motion sensor on the wall using a few screws or small sized strong double sided
sticker depending on the condition of the wall

WWW.ROOMWATCHMAN.COM Page 16
3. Fix Door/Window Magnetic sensor
You can fix the Door/Window sensor on the door or window using a few screws or using a strong
double sided sticker depending on the condition of your door/window.
4. Fix USB Power Wire on wall
You can stick USB Power wire & extended cable on wall using double sided sticker.
Lastly, plug and connect USB Power adapter on a power socket
Table of contents