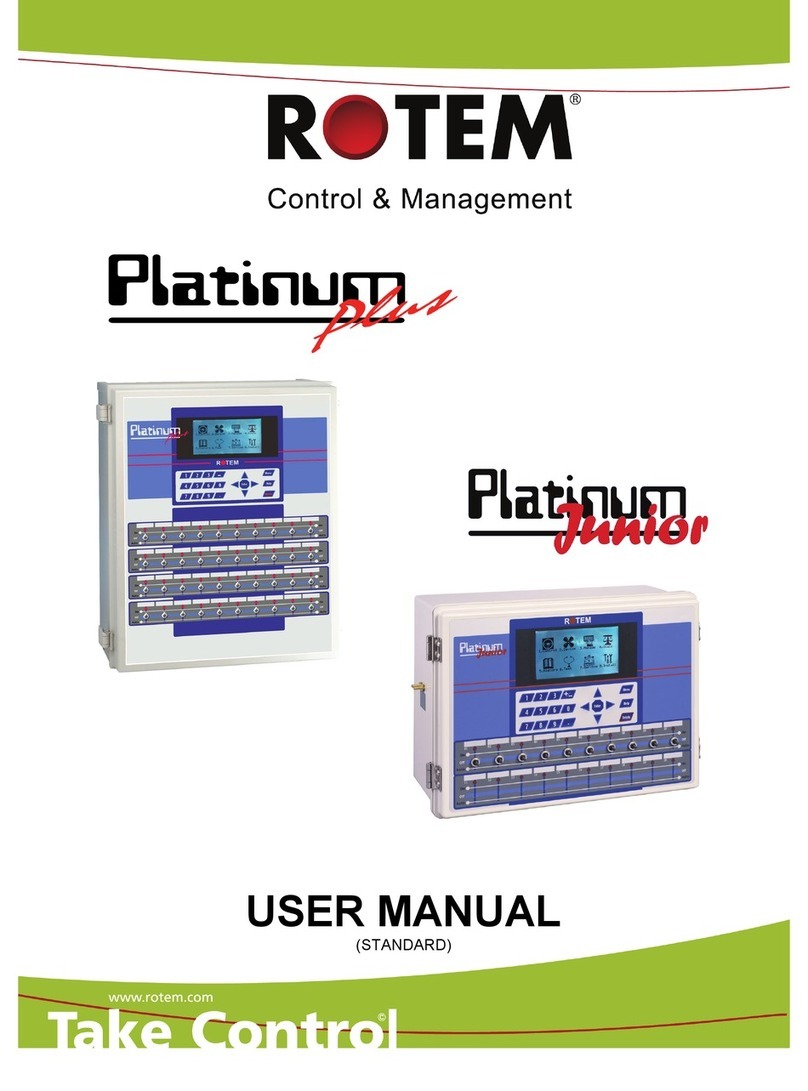
Rotem Platinum PLUS User manual

USER MANUAL
(STANDARD)

Platinum Plus
R
Re
ev
vi
is
si
io
on
n:
:
B
B
T
TA
AB
BL
LE
E
O
OF
F
C
CO
ON
NT
TE
EN
NT
TS
S
D
Do
oc
c.
.
N
Na
am
me
e:
:
P
P+
+
U
Us
se
er
r
M
Ma
an
nu
ua
al
l
-
-
S
St
ta
an
nd
da
ar
rd
d
WARRANTY & LIMITATION OF LIABILITY
1. ROTEM warrants that the product shall be free of defects in materials or workmanship and will conform to the technical
specification for a period of 1 (one) year from the date of initial installation on sight (the "warranty period").
2. Load cells are not covered by ROTEM’s warranty.
3. ROTEM warrants that during said warranty period, any item/items or part/parts of equipment found defective with
respect to materials or workmanship or which do not conform to the technical specification shall be repaired or replaced
(at ROTEM's sole discretion), free of charge.
4. During the warranty period, in the event of an alleged defect, authorized resellers in relevant regions should be notified
as soon as possible from the date of noticing the said defect, but no longer than thirty (30) days from such a discovery.
The report shall include (1) a short description of the defects noticed (2) type of card / component and its matching serial
number.
5. ROTEM's sole liability under this warranty is the repair or replacement of the defective item of product.
Conditions and Limitations
1. ROTEM will not be responsible for any labor costs or expenses associated with replacement of defective items or
other parts of the product or repair.
2. This warranty shall not cover: (i) product or part therein which has been modified (without prior written approval of
ROTEM), or (ii) product or part therein which has not handled or installed by an authorized reseller of ROTEM or (iii)
product or part therein which has either handled or installed not in strict accordance with ROTEM's instructions, (iv)
products which were used for function other than agriculture industry.
3. This warranty will not apply in the following cases: (i) if all components of the product are not originally supplied by
ROTEM (ii) the defect is the result of an act of nature, lighting strikes, electrical power surge or interruption of electricity
(iii) the defect is the result of accident, misuse, abuse, alteration, neglect, improper or unauthorized maintenance or
repair.
ROTEM warns and alerts all users that the Product is inherently complex and may not be completely free of errors.
ROTEM's products are designed and manufactured to provide reliable operation. Strict tests and quality control
procedures are applied to every product. However, the possibility that something may fail beyond our control exists.
Since these products are designed to operate climate control and other systems in confined livestock environments, where
failure may cause severe damage, the user should provide adequate backup and alarm systems. These are to operate
critical systems even in case of a ROTEM system failure. Neglecting to provide such a backup will be regarded as the
user’s willingness to accept the risk of loss, injury and financial damage.
In no event will ROTEM be liable to a user or any third party for any direct, indirect, special, consequential or incidental
damages, including but not limited to any damage or injury to business earnings, lost profits or goodwill, personal injury,
costs of delay, any failure of delivery, costs of lost or damaged data or documentation, lost or damaged products or
goods, lost sales, lost orders, lost income.
Except for the above express warranty, ROTEM makes no other warranties, express or implied, relating to the products.
ROTEM disclaims and excludes the implied warranties of merchantability and fitness for a particular purpose. No person
is authorized to make any other warranty or representation concerning the performance of the products other than as
provided by ROTEM.
Software Version:2.23
Document Version:2.1

Platinum Plus
R
Re
ev
vi
is
si
io
on
n:
:
B
B
T
TA
AB
BL
LE
E
O
OF
F
C
CO
ON
NT
TE
EN
NT
TS
S
D
Do
oc
c.
.
N
Na
am
me
e:
:
P
P+
+
U
Us
se
er
r
M
Ma
an
nu
ua
al
l
-
-
S
St
ta
an
nd
da
ar
rd
d
TABLE OF CONTENTS
0. GENERAL.................................................................................................................................................................1
0.1 Introduction........................................................................................................................................................1
0.2 Keypad...............................................................................................................................................................2
0.3 Hot Screens.......................................................................................................................................................2
0.4 Standard Display ...............................................................................................................................................3
0.5 Main Menu Icons ...............................................................................................................................................4
1. CONTROL.................................................................................................................................................................5
1.1 Temperature Curve............................................................................................................................................5
1.2 Minimum Vent Timer..........................................................................................................................................6
1.3 Humidity Treatment ...........................................................................................................................................8
1.4 Timer Settings....................................................................................................................................................8
1.5 Static Pressure ..................................................................................................................................................9
1.6 Control Mode ...................................................................................................................................................11
1.7 System Parameters.........................................................................................................................................11
2. DEVICE ...................................................................................................................................................................12
2.1 Temp & Timer Setting......................................................................................................................................12
2.2 Cool Pad..........................................................................................................................................................14
2.3 Water & Feed...................................................................................................................................................15
2.4 Light.................................................................................................................................................................15
2.5 Extra Systems..................................................................................................................................................17
2.6 Emergency Setting ..........................................................................................................................................18
3. MANAGE.................................................................................................................................................................19
3.1 Bird Inventory...................................................................................................................................................19
3.2 Feed Inventory.................................................................................................................................................20
3.3 Time & Date.....................................................................................................................................................21
3.4 Growth Day & Flock.........................................................................................................................................21
3.5 Alarm Setting ...................................................................................................................................................22
3.6 Alarm Reset.....................................................................................................................................................23
3.7 Password.........................................................................................................................................................24
4. SCALE ....................................................................................................................................................................25
4.1 Scale Layout....................................................................................................................................................25
4.2 General Settings..............................................................................................................................................26
4.3 Bird Scale Setting............................................................................................................................................27
4.4 Feed Bin Setting..............................................................................................................................................28
4.5 Bird Curve........................................................................................................................................................28
4.6 History..............................................................................................................................................................29
4.7 Feed Conversion .............................................................................................................................................30
4.8 Test..................................................................................................................................................................30
4.9 Calibration........................................................................................................................................................31
5. HISTORY.................................................................................................................................................................32
5.1 Temperature ....................................................................................................................................................32
5.2 Humidity...........................................................................................................................................................32
5.3 Water ...............................................................................................................................................................32
5.4 Feed.................................................................................................................................................................32
5.5 Mortality ...........................................................................................................................................................32
5.6 Heaters ............................................................................................................................................................32
5.7 Radiant Heaters...............................................................................................................................................32
5.8 Alarms..............................................................................................................................................................33
5.9 Table of Events................................................................................................................................................33
5.10 History View.....................................................................................................................................................34

Platinum Plus
P
Pa
ag
ge
e:
:
1
1
R
Re
ev
vi
is
si
io
on
n:
:
B
B
C
Ch
ha
ap
pt
te
er
r:
:
G
Ge
en
ne
er
ra
al
l
D
Do
oc
c.
.
N
Na
am
me
e:
:
P
P+
+
U
Us
se
er
r
M
Ma
an
nu
ua
al
l
-
-
S
St
ta
an
nd
da
ar
rd
d
0. GENERAL
0.1 Introduction
Standard Mode
Computerized Electronic Controllers such as the Platinum Plus advance the Producer’s ability to
grow high quality poultry by accurately controlling the environment. Instead of struggling with
individual thermostats for heat zones and ventilation, the Platinum Plus brings it all together into
one convenient place … with great accuracy.
Simplicity and Ease of Use are important benefits of Standard Mode. Every grower will
understand the operation where each fan and heater has its own on and off temperature. The
light and feed clocks are easy to understand and apply. In standard mode, the Platinum Plus
provides simple alternate methods to help producers who find the more advanced Cool Pad
methods too difficult.
The Platinum Plus provides a variety of Management and History utilities. You can choose from
simple overviews, or if you wish, fully detailed by the minute records of minimum, maximum and
average temperatures for each individual sensor. The unique Table of Events is one of the most
liked Histories in the Platinum Plus. It records the moment of every significant action taken by the
Platinum Plus and, optionally, its operator.
Communication software is available to customers who wish to access their Platinum Plus
controllers from their home or personal computers at ROTEM’s website, www.rotem.com.
ROTEM provides technical support on the website, as well as through the large dealer and agent
network.
This volume describes the Standard Mode operation of the Platinum Plus. For greater
performance, you can opt to use the more advanced Precision Mode, which you will find in the
next volume.

Platinum Plus
P
Pa
ag
ge
e:
:
2
2
R
Re
ev
vi
is
si
io
on
n:
:
B
B
C
Ch
ha
ap
pt
te
er
r:
:
G
Ge
en
ne
er
ra
al
l
D
Do
oc
c.
.
N
Na
am
me
e:
:
P
P+
+
U
Us
se
er
r
M
Ma
an
nu
ua
al
l
-
-
S
St
ta
an
nd
da
ar
rd
d
0.2 Keypad
Numeric Pad - To enter values, select options. Act as
shortcuts to selections.
+/- Key- Toggles between positive and negative values
and marks check boxes option selection. In a History
screen, use to toggle between quantities and time
format.
Arrows- Scroll up, down, left, and right to select menus.
MENU- To main menu, also acts as "ESC" and "Back"
keys.
ENTER- Enter menu, submenu, value, open window,
confirm a value or change.
HELP- Access help screens and graphs.
DELETE- Erases typing mistake.
0.3 Hot Screens
‘.’- Scans through all Hot Screens (five seconds each screen)
9- Lock password protected controller
7- Analog Output Status (Light Dimmers, Variable Speed Fans)
6- Light Status
5- Bird Scale and Feed Bin Status
4- Curtain Position
3- Curve Status
2- Temperature and Humidity Status
1- Return to standard main screen
Help- Software Version
Hot Screens/Keys:
Press MENU from Main Menu to see Read-Only overview.
Press MENU again to return to Main Menu.
Enter
- Increase Offset
- Decrease Offset
Enter

Platinum Plus
P
Pa
ag
ge
e:
:
3
3
R
Re
ev
vi
is
si
io
on
n:
:
B
B
C
Ch
ha
ap
pt
te
er
r:
:
G
Ge
en
ne
er
ra
al
l
D
Do
oc
c.
.
N
Na
am
me
e:
:
P
P+
+
U
Us
se
er
r
M
Ma
an
nu
ua
al
l
-
-
S
St
ta
an
nd
da
ar
rd
d
0.4 Standard Display
The main screen consists of seven main parts
connected. Otherwise, it won't appear.
1.
. Every message that appears in this screen is
Shows individual sensor readings. Those marked with dark squares form the current
average temperature.
Full square – indicates the variable participates in the average calculation.
Empty square - indicates the variable does not participate in the average calculation.
Available SENSOR readings:
•Temp – Displayed with the specific sensor number
•Out T. – Outside temperature
•Press. - Pressure
•Hum. In – Inside humidity
•Hum. Out – Outside humidity
•Weight – Average weight
1 2 3
4
5
•Weights – Number of weights
•E. Tmp1 – Temperature related to emergency card 1
•E. Tmp2 – Temperature related to emergency card 2
•Breaker – Circuit breaker
o2. Rep rts the current average temperature.
3. Shows the output list. The filled black boxes indicate active outputs. Controller also informs
the position of inlets and curtains, as well as the number of operating heaters or fans.
Available output list (ACTIVE):
•Alarm - Can be either active or not. Note that this always appears last.
- Mentions opening percentage em n
w number.
•Heat - Indicates operating heat number. mber.•Heat. Hi - Indicates operating heat high nu
•Tun. Fan - Indicates operating tunnel fan number.
•Exh. Fan - Indicates operating exhaust fan number.
•Stir - Indicates operating stir fan number. ber.•Cool P. - Indicates operating cool pad num
•Fogger - Indicates operating fogger number.
•Inlet el•Tunn
•Curt. 1-4
•Ext. Sys - Indicates operating external syst
The ACTIVE screen consists of either
full or empty squares. These squares
define whether it operates (full square),
or does not operate (empty square).
umber. !
•Light 1-4 - Note that these mention output percentage
•Water - Indicates operating water number.
•Feed - Indicates operating feed number. r.•Auger - Indicates operating auger numbe
•Rad. Lo - Indicates operating radiant heat lo
•Rad. Hi - Indicates operating radiant heat high number.

Platinum Plus
P
Pa
ag
ge
e:
:
4
4
R
Re
ev
vi
is
si
io
on
n:
:
B
B
C
Ch
ha
ap
pt
te
er
r:
:
G
Ge
en
ne
er
ra
al
l
D
Do
oc
c.
.
N
Na
am
me
e:
:
P
P+
+
U
Us
se
er
r
M
Ma
an
nu
ua
al
l
-
-
S
St
ta
an
nd
da
ar
rd
d
4. Gives important general information such as the time and ventilation mode.
Available STATUS readings:
•Time – specific time
•Day – growth day
•Set – target temperature
•Offset –Temperature Curve HELP | SET parameter
•House mode – Control Mode HELP| SET parameter
•Level – level number
•Tunnel, Natural, Minimum – the controller's state
•Fan Off - how long the cycle ends its' operation
•Fan On - how long the cycle begins its' operation
•Curve off – occurs when located in low curve temperature or when the Control Mode HELP | SET
'Temperature Curve' parameter is set to OFF.
•Hum. Treat - indicates when occurs
•Cool flush - indicates when occurs
•Nip. Flush – indicates when occurs
5. Shows important messages/alarms. The title bar shows the number of important
messages, and if there are several messages they each appear in turn.
0.5 Main Menu Icons
View history of all
functions pertaining
to controller
Test switches, relays,
communication, and
alarms are functioning
properly
Install sensors,
devices,
communication, etc.
Calibrate temp., humidity,
ventilation, static pressure,
feed, and water
Control temp.,
humidity,
ventilation, static
pressure and
system
parameters
Define settings of all
connected devices
Set, calibrate and
test Bird Scale
and Feed Bin
Manage inventory, livestock,
and alarm/password settings

Platinum Plus
P
Pa
ag
ge
e:
:
5
5
R
Re
ev
vi
is
si
io
on
n:
:
B
B
C
Ch
ha
ap
pt
te
er
r:
:
C
Co
on
nt
tr
ro
ol
l
D
Do
oc
c.
.
N
Na
am
me
e:
:
P
P+
+
U
Us
se
er
r
M
Ma
an
nu
ua
al
l
-
-
S
St
ta
an
nd
da
ar
rd
d
1. CONTROL
1.1 Temperature Curve
For every growth day define the desired target temperature.
1. Temperature Curve
Menu
Enter
1.1.1 TEMPERATURE CURVE HELP |SET
•Day:Set Growth Day.
•Temp.:Set the temperature to trigger heating to begin.
•Alarm LOW & HIGH:Set alarms for when the temperature is too LOW and too HIGH.
HELP | SET Definitions:
•Temperature Curve Offset:Adjustment of all curves either by warmer or cooler temperatures
than the one programmed in the curve. This enables the user to set only this parameter
instead of defining all the other parameters once again.
•Set Temp. Change Reminder (Diff):Sets the change in set temperature triggering a
reminder to set backup thermostats.
NOTE: '0' disables this parameter (If value is changed an appropriate message is displayed).
Help
Enter

Platinum Plus
P
Pa
ag
ge
e:
:
6
6
R
Re
ev
vi
is
si
io
on
n:
:
B
B
C
Ch
ha
ap
pt
te
er
r:
:
C
Co
on
nt
tr
ro
ol
l
D
Do
oc
c.
.
N
Na
am
me
e:
:
P
P+
+
U
Us
se
er
r
M
Ma
an
nu
ua
al
l
-
-
S
St
ta
an
nd
da
ar
rd
d
1.2 Minimum Vent Timer
This option allows the user to set the timer of
the Minimum Vent Timer.
1.
minimum vent. There are three different setups for
For the following Minimum Vent Timer setup go to INSTALL | SETUP:
1. Setup
Menu
Enter
Minimum Vent (Power): YES
Natural Ventilation: NO
Now you can set parameters by going to CONTROL | MINIMUM VENT TIMER:
3. Minimum Vent Timer
Menu
Enter
•Day:Set growth day.
•Fans (sec): Set the time (seconds) defining the cycle for when the fans are ON/OFF.

Platinum Plus
P
Pa
ag
ge
e:
:
7
7
R
Re
ev
vi
is
si
io
on
n:
:
B
B
C
Ch
ha
ap
pt
te
er
r:
:
C
Co
on
nt
tr
ro
ol
l
D
Do
oc
c.
.
N
Na
am
me
e:
:
P
P+
+
U
Us
se
er
r
M
Ma
an
nu
ua
al
l
-
-
S
St
ta
an
nd
da
ar
rd
d
2. For the following Minimum Vent Timer setup go to INSTALL | SETUP:
Minimum Vent (Power): YES
Natural Ventilation: YES
•Day:Set growth day.
•Fans (sec): Set the time (seconds) defining the cycle for when the fans are ON/OFF.
•Curtains (%):Set the percentage of minimum vent opening curtains. Set both minimum values
('Min' column) and maximum ones ('Max' column).
NOTICE: When the controller reaches natural ventilation (according to the temperature defined in the CONTROL |
Temperature Curve), all the curtains open in minimum percentage. Every curtain is independent and can
be either closed or opened according to its temperature, but can not open above the Maximum set value.
•Day:Set growth day.
•Open (sec):Set time (seconds) for curtains to open.
•Close (min):Set the time (minutes) for curtains to be closed.
•Position (%):Set percentage for curtain position; minimum % (Min) and maximum % (Max).
NOTICE: Cycle occurs when values are set both to 'Open' and 'Close'. Whereas the controller closes at
first and only then opens the "allowed" curtains (See HELP | SET).
Minimum Vent (Power): NO
Natural Ventilation: YES
3. For the following Minimum Vent Timer setup go to INSTALL | SETUP:

Platinum Plus
P
Pa
ag
ge
e:
:
8
8
R
Re
ev
vi
is
si
io
on
n:
:
B
B
C
Ch
ha
ap
pt
te
er
r:
:
C
Co
on
nt
tr
ro
ol
l
D
Do
oc
c.
.
N
Na
am
me
e:
:
P
P+
+
U
Us
se
er
r
M
Ma
an
nu
ua
al
l
-
-
S
St
ta
an
nd
da
ar
rd
d
1.2.1 CURTAIN MINIMUM VENT HELP |SET
HELP | SET Definitions:
•Curtain no. 1 - 4 min. vent. Cycle:Select Yes for Min Vent cycle or No to remain closed.
•Tunnel curtain Min. Vent cycle: Select Yes if the curtain defined as Tunnel no. operates with
no fans. Otherwise, select No.
NOTICE: If no fans are set, and power ventilation does not exist, minimum ventilation is done by
curtains.
Enter
Help
1.3 Humidity Treatment
This section is relevant for PRECISION mode ONLY!
1.4 Timer Settings
This section enables the user to set the timer on and off according to the user's desire.
4. Timer Settings
Enter
Menu
The screen is divided to two main parts; 'Timers' column consists up to 4 timers where each of
them has its' matching row of either 'On' or 'Off' measured in seconds.
It is possible to relate the fans according to one of the timers set in Temp & Timer table
(See DEVICE | TEMP & TIMER SETTINGS)

Platinum Plus
P
Pa
ag
ge
e:
:
9
9
R
Re
ev
vi
is
si
io
on
n:
:
B
B
C
Ch
ha
ap
pt
te
er
r:
:
C
Co
on
nt
tr
ro
ol
l
D
Do
oc
c.
.
N
Na
am
me
e:
:
P
P+
+
U
Us
se
er
r
M
Ma
an
nu
ua
al
l
-
-
S
St
ta
an
nd
da
ar
rd
d
1.5 Static Pressure
T
his section controls air pressure in both minimum ventilation and in tunnel ventilation.
5. Static Pressure
•Low Static Pressure Setting: Set desired static pressure for low temperature conditions.
•High Static Pressure Setting: Set desired static pressure for high temperature conditions.
NOTE: Controller creates a curve between the LOW and HIGH Temp. Static Pressure.
•Low Static Pressure Alarm: Set alarm for low static pressure.
•High Static Pressure Alarm:Set alarm for high static pressure.
Menu
Enter

Platinum Plus
P
Pa
ag
ge
e:
:
1
10
0
R
Re
ev
vi
is
si
io
on
n:
:
B
B
C
Ch
ha
ap
pt
te
er
r:
:
C
Co
on
nt
tr
ro
ol
l
D
Do
oc
c.
.
N
Na
am
me
e:
:
P
P+
+
U
Us
se
er
r
M
Ma
an
nu
ua
al
l
-
-
S
St
ta
an
nd
da
ar
rd
d
1.5.1 STATIC PRESSURE HELP |SET
Help
Enter
HELP | SET Definitions:
•Wind Gust Delay Time (sec):Set length of time (seconds) before starting Static Pressure
control after a sudden change in air pressure.
•Static Pressure During Tunnel:Select YES or NO for using Static Pressure control when in
Tunnel mode.
•Transitional Tunnel:Select YES or NO for using tunnel inlets when static pressure is high
and vents are already at 100%
•MinVent Using:Select Vent=0 or Curtain=1 for controlling static pressure when in minimum
ventilation.
•Emergency S. Press. Delay (sec.):Length of time the Platinum Plus waits before taking
emergency action when static pressure remains above the high pressure alarm setting. Note
that chronologically it is important to open and go to the next setting.
•Curtain Position in Emergency Static Pressure %:Set how much percent of opening all
curtains is needed in order to reach emergency pressure. Note that minimum inlets always
open 100%. Note that it is essential to open it first.
•Min Tunnel Curtain Level (%): When using static pressure in tunnel mode, tunnel inlet opens
at least this far in tunnel mode.
•Min Tunnel Curtain % to Start Fan:Set a value that serves as a minimum to begin fan
operation in tunnel mode.
•Vent Motor Slow/Fast: Define whether the engine used is slow or fast. For full movement
within 60 seconds or less, it is considered to be fast=1, and more than 60 seconds is slow=0.
•Time to produce S. Pressure (sec):How many seconds are needed for static pressure to
stabilize when fan cycle is on. Correction of the first pressure value will be done according to
this value.

Platinum Plus
P
Pa
ag
ge
e:
:
1
11
1
R
Re
ev
vi
is
si
io
on
n:
:
B
B
C
Ch
ha
ap
pt
te
er
r:
:
C
Co
on
nt
tr
ro
ol
l
D
Do
oc
c.
.
N
Na
am
me
e:
:
P
P+
+
U
Us
se
er
r
M
Ma
an
nu
ua
al
l
-
-
S
St
ta
an
nd
da
ar
rd
d
1.6 Control Mode
1.7 System Parameters
5. Control Mode
Choose house operating modes, turn temperature curves on or off and select which type of
min/max level method to use.
•House Mode:Select whether the house is in one of the brood set ups, or in full house.
•Empty House Mode: Select YES in order to disable all alarms.
•Temperature Curve: Select NO to disable curve. Temperature settings become fixed values.
Menu
Enter
•Minimum Vent Curve:Set ON/OFF for automatic minimum ventilation ramping
oOn: A curve according to days
oOff: Time changes at start day of each line in Min Vent tables
•Natural Ventilation:Select either to NOT ALLOW or ALLOW natural ventilation (Cannot edit
this parameter if in the INSTALL | SETUP menu "NO" is defined for Natural Ventilation).
•Tunnel:Select either to NOT ALLOW or ALLOW tunnel ventilation.
System Parameters consolidates all of the HELP | SET menus into one scroll screen.
6. System Parameters
Menu
Enter
PAGESECTIONSYSTEM PARAMETER 51.1.1Temperature Curve HELP | SET 101.5.1Static Pressure HELP | SET 11.2.1Curtain Minimum Vent HELP | SET
Temp & Timer Settings HELP | SET 2.1.1 13
2.2.1 14Cool Pad HELP | SET 162.4.1Light HELP | SET 203.2.1Feed Inventory HELP | SET 182.6.1Emergency Setting HELP | SET 3.5.1Alarm Setting HELP | SET 23

Platinum Plus
P
Pa
ag
ge
e:
:
1
12
2
R
Re
ev
vi
is
si
io
on
n:
:
B
B
C
Ch
ha
ap
pt
te
er
r:
:
D
De
ev
vi
ic
ce
e
D
Do
oc
c.
.
N
Na
am
me
e:
:
P
P+
+
U
Us
se
er
r
M
Ma
an
nu
ua
al
l
-
-
S
St
ta
an
nd
da
ar
rd
d
2. DEVICE
2.1 Temp & Timer Setting
This section enables the user to set both the temperature and the timer choosing the required
device.
1. Temp &
Timer Settings
Menu
Enter
Available Devices:
−Cool 1
−Tunnel Fans 1-20
−Tunnel Setting
−Natural Setting
−Fogger 1
−Exhaust Fans 1-3
−Stir Fans 1-2
−Set Temperature
−Heats 1-2
−Radiant
•Device:Select form the list (see above).
•On/Off:Set when the device starts/stops operating. Note: 'OFF' value can remain empty.
•Timer:Can be one of the following options – None, Timer 1-4, or Min. Vent.

Platinum Plus
P
Pa
ag
ge
e:
:
1
13
3
R
Re
ev
vi
is
si
io
on
n:
:
B
B
C
Ch
ha
ap
pt
te
er
r:
:
D
De
ev
vi
ic
ce
e
D
Do
oc
c.
.
N
Na
am
me
e:
:
P
P+
+
U
Us
se
er
r
M
Ma
an
nu
ua
al
l
-
-
S
St
ta
an
nd
da
ar
rd
d
2.1.1 TEMP &TIMER SETTINGS HELP |SET
Help
HELP | SET Definitions: Enter
•Minimum tunnel fans on: The minimum number of fans in tunnel entry. If not enough fans
exist for operating according to temperature, the fans with the lower temperatures will be
added in order to reach that number. If not enough fans that can operate in tunnel exist, an
alarm will be activated.
•Tunnel exit delay (minutes):The time Platinum Plus waits after satisfying tunnel exit
conditions.
•Non brood area diff. from heat:Set point for non-brood heaters. Can be either positive or
negative where positive = warmer and negative = cooler. (-99) = heaters not operating.
STIR FAN
•Min. vent cycle offset (+/- sec):Set the required cycle offset measured in seconds regarding
minimum ventilation. If the fan is Min Vent, and its end reference point is defined as Time 'ON'
in Stir Fan, then only the ones set as Min Vent will operate according to the cycle set in the
CONTROL | TIMER SETTINGS menu.
•Operate duration (sec):Set the time measured in seconds for duration of operation.
•Set function (stop-0/cont-1):Choose what happens when the operation temperature is
reached. From this point on, choose if to continue operating constantly or to stop completely
without a cycle. 0=STOP 1=CONTINUE
RADIANT HEATERS
•Radiant Heater High Diff: In order to activate radiant heating, this is the difference above
radiant heat temperature.
•Radiant Ignition Time (sec):Set time to begin ignition of radiant heater.

Platinum Plus
P
Pa
ag
ge
e:
:
1
14
4
R
Re
ev
vi
is
si
io
on
n:
:
B
B
C
Ch
ha
ap
pt
te
er
r:
:
D
De
ev
vi
ic
ce
e
D
Do
oc
c.
.
N
Na
am
me
e:
:
P
P+
+
U
Us
se
er
r
M
Ma
an
nu
ua
al
l
-
-
S
St
ta
an
nd
da
ar
rd
d
2.2 Cool Pad
Set operating conditions for Cool Pad. (Only operates in Tunnel mode)
6. Cool Pad
Menu
Enter
•Day:Set Growth Day
•Start Time & End Time:Set time of day you want the cool pad to start and stop
oIt is possible to set multiple start and stop times for a single day.
oIn the screen above, growth day jumps from day 1 to day 10, the cool pad will
continue to work according to day 1 settings until growth day 10.
•Tunnel Differential:Set difference from tunnel temperature to trigger cool pad.
•To Humidity:Set maximum humidity allowed before stopping cool pad.
•On Sec & Off Sec:Set the cycle in seconds for cool pad operation.
NOTE: In order to disable humidity, set to 100 or 0. If humidity does not exist, controller
ignores this column.
2.2.1 COOL PAD HELP |SET
Help
Enter
HELP | SET Definitions:
•Temperature Band:Define the scope for on/off of cool pad relative to target temperature.
•Humidity Band (%):Define the scope for on/off of cool pad relative to humidity inside.
•Flush Cool Pad At:Set time of day (hh :mm) to start a continuous application of water to the
cool cells in order clean them of debris.
•Cool Pad Flush Duration (minutes):Set the length of time in minutes for flushing.

Platinum Plus
P
Pa
ag
ge
e:
:
1
15
5
R
Re
ev
vi
is
si
io
on
n:
:
B
B
C
Ch
ha
ap
pt
te
er
r:
:
D
De
ev
vi
ic
ce
e
D
Do
oc
c.
.
N
Na
am
me
e:
:
P
P+
+
U
Us
se
er
r
M
Ma
an
nu
ua
al
l
-
-
S
St
ta
an
nd
da
ar
rd
d
2.3 Water & Feed
Set operating conditions for Water & Feed
9. Water & Feed
Menu
Enter
•Day:Set Growth Day
•Time:Set start time for water, feeder, or auger. The following line cancels out the previous
line and sets new parameters.
•Water & Feeder & Auger:Check mark desired service.
2.4 Light
Set operating conditions for Lights.
8. Light
Menu
Enter
•Day:Set Growth Day
•Time:Set start time for light(s). The following line cancels out the previous line and sets
new parameters.
•Light:Check mark the desired light(s) you would like to turn on.
•Intensity (%):Set intensity in percentage for light dimmer(s).

Platinum Plus
P
Pa
ag
ge
e:
:
1
16
6
R
Re
ev
vi
is
si
io
on
n:
:
B
B
C
Ch
ha
ap
pt
te
er
r:
:
D
De
ev
vi
ic
ce
e
D
Do
oc
c.
.
N
Na
am
me
e:
:
P
P+
+
U
Us
se
er
r
M
Ma
an
nu
ua
al
l
-
-
S
St
ta
an
nd
da
ar
rd
d
2.4.1 LIGHT HELP |SET
HELP | SET Definitions:
•Sunrise Time (minutes):Set the length of time in minutes the sunrise effect takes to move
from the present setting to the target setting.
•Sunset Time (minutes):Set the length of time in minutes the sunset effect takes to move
from the present setting to the previous setting, or to off.
•Allow Spiking from Day:Set the growth day desired for spiking to start occurring.
•Spike Cycle (minutes):Enable a spike cycle every set minutes. For example, if the spike
cycle is set to 5 minutes; the first minute will be the sunrise, the next 3 minutes the controller
operates and the last minute will be the sunset.
•Spike Duration (minutes):Set the length of time in minutes for the spiking to last.
•Spike Increase Amount (%):Set the increase in intensity for the spike in relation to the
current light intensity.
Enter
Help
LIGHT
INTENSITY
SUNRISE SUNSET
LIGHTING WITHOUT
SPIKING
LIGHTING WITH
SPIKING
TIME
TIME
LIGHT
INTENSITY
SUNRISE SUNSET
1 min. 1 min.
SPIKE CYCLE
SPIKE SPIKE
SPIKE
DURATION

Platinum Plus
P
Pa
ag
ge
e:
:
1
17
7
R
Re
ev
vi
is
si
io
on
n:
:
B
B
C
Ch
ha
ap
pt
te
er
r:
:
D
De
ev
vi
ic
ce
e
D
Do
oc
c.
.
N
Na
am
me
e:
:
P
P+
+
U
Us
se
er
r
M
Ma
an
nu
ua
al
l
-
-
S
St
ta
an
nd
da
ar
rd
d
2.5 Extra Systems
If there are other systems that are not listed in the controller, here is the place where you can
set the parameters for those systems.
10. Extra Systems
Menu
Enter
•Start Time / End Time:Set the time for the extra system to start and stop.
•From Temp. / To Temp.:Set the temperature range for the extra systems to operate.
•From Humidity / To Humidity:Set the humidity range for the extra systems to operate.
•On (sec) / Off (sec):Set cycles for the extra systems.
Other manuals for Platinum PLUS
4
Table of contents
Other Rotem Control Unit manuals
Popular Control Unit manuals by other brands

AVTECH ELECTROSYSTEMS LTD.
AVTECH ELECTROSYSTEMS LTD. AVX-S3B-P3-NUFB instructions

Keyautomation
Keyautomation CT202 Instructions and warnings for installation and use

Delta
Delta DVP04TC-S instruction sheet

infra world
infra world SAUNA-CONTROL X0 Assembly instructions

RTK
RTK MV 5271 Installation and operation instruction

Ublox
Ublox LISA-U100 Integration manual