manuals.online logo
Brands
  1. Home
  2. •
  3. Brands
  4. •
  5. Rover
  6. •
  7. Lawn Mower
  8. •
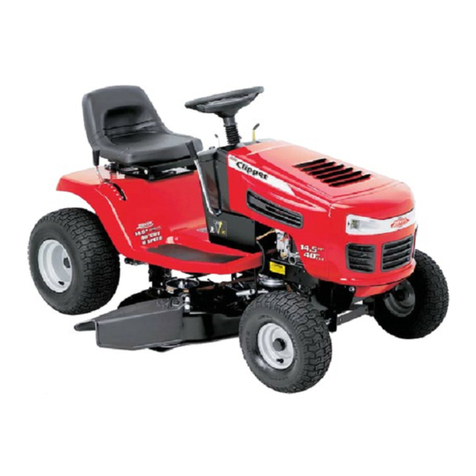
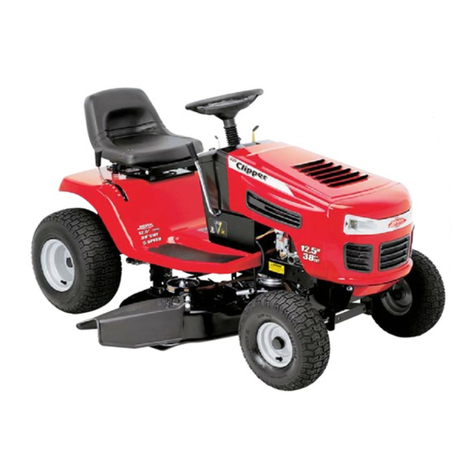
  9. Rover Clipper 425621x108A User manual

Rover Clipper 425621x108A User manual

̸»±©²»®³«-¬¾»½»®¬¿·²¬¸¿¬ ¿´´
¬¸»°®±¼«½¬ ·²º±®³¿¬·±² ·-·²½´«¼»¼©·¬¸¬¸»«²·¬ò
̸·-·²º±®³¿¬·±² ·²½´«¼»-
¬¸»×ÒÍÌÎËÝÌ×ÑÒÞÑÑÕÍô
¬¸»ÎÛÐÔßÝÛÓÛÒÌÐßÎÌÍ¿²¼ ¬¸»ÉßÎÎßÒÌ×ÛÍò
̸·-·²º±®³¿¬·±² ³«-¬ ¾»·²½´«¼»¼¬±³¿µ» -«®»-¬¿¬»´¿©- ¿²¼ ±¬¸»®´¿©-
¿®»º±´´±©»¼ò
ÐÎÑÜËÝÌ×ÒÚÑÎÓßÌ×ÑÒ
̸·-ײ-¬®«½¬·±² Þ±±µ½±²¬¿·²-·²º±®³¿¬·±²º±®-»ª»®¿´³±¼»´-ò
λ¿¼¿²¼µ»»°¬¸·-¾±±µº±®º«¬«®» ®»º»®»²½»ò
̸·-¾±±µ½±²¬¿·²-·³°±®¬¿²¬·²º±®³¿¬·±²±²
ÍßÚÛÌÇôßÍÍÛÓÞÔÇôÑÐÛÎßÌ×ÑÒôßÒÜÓß×ÒÌÛÒßÒÝÛò
ÎÛÝÑÎÜ ÌØÛÚÑÔÔÑÉ×ÒÙ×ÒÚÑÎÓßÌ×ÑÒßÞÑËÌÇÑËÎ ËÒ×ÌòÌØ×Í×ÒÚÑÎÓßÌ×ÑÒ×Í
ÒÛÝÛÍÍßÎÇÉØÛÒÑÎÜÛÎ×ÒÙÐßÎÌÍÑÎ×ÒÝßÍÛÑÚÔÑÍÍÑÎÌØÛÚÌò
F050761L
Owner sManual model 425621x108A
ÉØÛÎÛÐËÎÝØßÍÛÜæ ò
ÜßÌÛÐËÎÝØßÍÛÜæ Ü¿§ Ó±²¬¸ Ç»¿® ò
ÓÑÜÛÔÒÑæ ÜßÌÛÑÚÓßÒËÚßÝÌËÎÛÎæ ò
2F 050761L
TABLEOFCONTENTS
WARRANTY 2. ... ... ... .. .... .. .... .. .... .. .... .. ...
RESPONSIBILITY OF THE OWNER 3. ... ... .... ... ... .
SAFETY RULES 3. ... ... ... .. .... .. .... .. .... .. .... .
INTERNATIONALPICTORIALS 9. ... ... ... ... .... .. ...
ASSEMBLY 10. .. .... .. ... .. .... .. ... .. .... .. ... .. ...
PARTS BAG CONTENTS 10.. . . . . . . .. . . . . . .. . . . . . . . . . . . . .
HOWTOINSTALL THEFRONTWHEELS 11.. . . . . . . . . . . . . . . .
HOWTOINSTALL THESEAT 12.. . . . . . . .. . . . . . .. . . . . . . . . . . .
HOWTOASSEMBLETHESTEERINGWHEEL 12.. . . . . . . . .. .
HOWTOASSEMBLE THEGAUGEWHEELS 13.. . . . . . . . .. . . .
MAINTENANCEFREEBATTERY 13.. . . . . . . .. . . . . . . . . . . . . . ..
HOWTOINSTALL THEBATTERYCABLES 13.. . . . . . . . . . . . . .
IMPORTANT!BEFOREYOUSTARTMOWING 14.. . . . . . . . .. .
HOWTOPREPARETHEENGINE 14.. . . . . . . .. . . . . . . . . . . . . . .
CHECK THETIRES 14.. . . . . . . . . . . . . . .. . . . . . .. . . . . . . . . . . . . .
CHECK THELEVEL OFTHEMOWER HOUSING 14.. . . . . . . . .
OPERATION 15. ... ... ... .. .... .. .... .. .... .. .... .. ...
LOCATIONOFCONTROLS 15.. . . . . . . .. . . . . . .. . . . . . . . . . . . . .
ATTACHMENTS 16. . . .. . . . . . .. . . . . . . . . . . . . . . . . . . .. . . . . . .. .
HOWTOUSE THETHROTTLE CONTROL 16.. . . . . . . . . . . . . . .
HOWTOUSE THEBLADEROTATION CONTROL 16.. . . . . . . .
HOWTOUSE THESPEED CONTROLPEDAL 17.. . . . . . . . .. . .
HOWTODISCONNECTTHETRANSMISSION 17.. . . . . . . . .. . .
HOWTOSET THEPARKINGBRAKE 18.. . . . . . . .. . . . . . . .. . . .
HOWTOCHANGETHECUTTING HEIGHT 18.. . . . . . . . . . . . . . .
HOWTOSTOPTHEUNIT 18.. . . . . . . .. . . . . . .. . . . . . . . . . . . . . .
HOWTOTRANSPORTTHEUNIT 18.. . . . . . . .. . . . . . . . . . . . . . .
HOWTOOPERATE WITHTHEMOWERHOUSING 19.. . . . . . .
HOWTOOPERATE THEUNITON HILLS 19.. . . . . . . . . . . . . . . .
BEFORESTARTINGTHEENGINE 20.. . . . . . . .. . . . . . . . . . . . . .
HOWTOSTARTTHEENGINE 20.. . . . . . . .. . . . . . .. . . . . . . . . . .
OPERATING TIPS 21.. . . . . . . . . . . . . . .. . . . . . .. . . . . . . . . . . . . . .
MOWINGAND BAGGINGTIPS 21.. . . . . . . .. . . . . . .. . . . . . . . . . .
MAINTENANCE 22. ... ... ... .. .... .. .... .. .... .. .... ..
MAINTENANCECHART 22.. . . . . . . . . . . . . . .. . . . . . .. . . . . . . . . .
HOWTOCHECK THEMUFFLER 22.. . . . . . . .. . . . . . . . . . . . . . ..
HOWTOREMOVE ANDINSTALL THEBLADE 23.. . . . . . . . .. .
HOWTOSHARPENTHEBLADE 23.. . . . . . . .. . . . . . . . . . . . . . ..
HOWTOADJUSTTHEBLADEROTATION CONTROL 24.. . . .
HOWTOCHECK AND ADJUST THEMOTIONDRIVE BELT 25.
HOWTOCHECK AND ADJUST THEDRIVE BRAKE 26.. . . . . .
MAINTENANCEFREEBATTERY 26.. . . . . . . .. . . . . . . . . . . . . . ..
HOWTOCHARGETHEBATTERY 26.. . . . . . . .. . . . . . . . . . . . . .
WHERETOLUBRICATE 27.. . . . . . . . . . . . . . .. . . . . . .. . . . . . . . .
HOWTOCHECK THEFUEL FILTER 27.. . . . . . . .. . . . . . . . . . . . .
CHECK THETIRES 27.. . . . . . . . . . . . . . .. . . . . . .. . . . . . . . . . . . . .
HOWTOREMOVE THEMOWERHOUSING 28.. . . . . . . . . . . . . .
HOWTOINSTALL THEMOWERHOUSING 28.. . . . . . . . . . . . . .
HOWTOADJUSTTHEGAUGEWHEELS 29.. . . . . . . . . . . . . . . .
HOWTOLEVEL THEMOWERHOUSING 30.. . . . . . . . . . . . . . . .
HOWTOREPLACETHEMOTIONDRIVE BELT 31.. . . . . . . . .. .
HOWTOREPLACETHEMOWER DRIVE BELT 32.. . . . . . . . .. .
HOWTOINSTALL THEWHEELS 33.. . . . . . . .. . . . . . . . . . . . . . ..
HOWTOREPLACETHEFUSE 34.. . . . . . . .. . . . . . .. . . . . . . . . .
HOWTOREPLACETHELIGHTBULB 34.. . . . . . . .. . . . . . . .. . .
HOWTOCLEANTHEMOWERHOUSING 34.. . . . . . . . . . . . . . . .
STORAGE (OVER 30 DAYS) 34.. . . . . . . .. . . . . . .. . . . . . . . . . . . .
TROUBLE SHOOTINGCHART 35. ... ... .... .. .... .. ...
PARTS LIST 38. ... ... ... .. .... .. .... .. .... .. .... .. ...
SLOPE GUIDE 50. ... ... ... .. .... .. .... .. .... .. .... .. .
INDEX 51. .. .... .. ... .. .... .. ... .. .... .. ... .. .... .. ..
WARRANTY
General
Rover Mowers Limited warrant thismachine or accessory is free of defects in material and workmanship. Claims are limited to
making good or replacing any part found defective by the manufacturer or his agent. The warranty period shall apply from the
date of purchase for a period of 12 months for domestic use or 90 daysforcommercial use. Warranty applies to Australia and
New Zealand only. Contact any Rover Mowers Limited authorised service dealer or RoverAgent.
Extended warranty: For domestic use only, a 24 months extended warranty applies. It requiresthe customer tocomplete the
2Year warranty registration card ,and forward along with acopy of the cash register receiptto !Warranty,RoverMowers
Limited". Normal warranty exclusions as listed still apply.
Exclusions: Following is a list of conditions excluded from warranty; all engines, parts that are considered suffering from wear
and tear, parts that are damaged due to abuseor misuse, parts that can be subjectedto use beyond their normal intended
workingcapacityEg; blades, blade bolts, v-belts and spark plugs. If repairs or alterations have been made withoutthe
manufacturer swritten authority.Any transport costs involved in the repair or replacement of and defective parts. If it is found
that parts other thangenuine have been used on the machine.
NOTE: This warranty does not exclude any conditions or warranty implied by the TradePractices Act 1974 or any other relevant
legislation. Engine warranty is covered bythe engine manufacturer and could differ from the warranty of the rest of the machine.
Refer to the enginemanual (if included) or consult the nearest engine service dealer.
Proofofdate of purchase should be retained asit needs to be presentedifwarranty is to be claimed. Fill out the details on
previous page asa record for warranty purposes.
Rover Mowers Limited reserves the right to make changes and add improvements to its products at any time without
notice or obligation. Rover Mowers Limited reserves the right to discontinue manufacture of anyproductany anytime
at its discretion.
ABN 11 000 257 303
RoverMowers Limited
PO Box 1235
Eagle Fram
Queensland 4009
AUSTRALIA
RoverMowers Limited
East Tamaki
Auckland
NEW ZEALAND
OWNER SINFORMATION
3
F050761L
This instruction book is for several different models. The instructions
are written for a person with some mechanical ability. Like most ser-
vice books, notallthesteps aredescribed. Stepson how to loosen or
tighten fasteners are steps anyone can follow with some mechanical
ability. Readand follow these instructions beforeyou use the unit.
Know your product: Ifyouunderstandtheunit and how the unit oper-
ates, you willgetthebestperformance. Asyoureadthismanual, com-
pare the illustrations to the unit. Learn the location and the function of
the controls. Tohelpprevent anaccident, followthe operating instruc-
tions and the safetyrules. Keepthis manual for future reference.
IMPORTANT: Many units are not assembled andare sold in car-
tons. It is the responsibility of the owner to make surethe assembly
instructions in thismanualare exactly followed. Otherunits are pur-
chased in an assembled condition. On assembled units, it isthe re-
sponsibility of the ownerto make sure the unit is correctly
assembled. The owner must carefully check the unit according to
the instructions in this manualbefore it is first used.
EngineExhaust, someofits constituents, and
certainvehiclecomponentscontainoremit
chemicals knowntocause cancerand birthde-
fectsorotherreproductiveharm.
Batteryposts, terminalsandrelatedaccesso-
riescontainleadand leadcompounds, chemi-
cals knowntocause cancerand birthdefects or
other reproductiveharm. WASHHANDSAFTER
HANDLING.
RESPONSIBILITYOFTHEOWNER
̸» ®»-°±²-·¾·´·¬§±º¬¸» ±©²»®·-¬±º±´´±©¬¸» ·²-¬®«½¬·±²- ¾»´±©ò
1. Carefully read and follow therules for safe operation.
2. Follow all the assembly instructions.
3. Inspect the unit.
4. Make sure that the operator of the unit knows how to correctly
use all standard and accessory equipment.
5. Operate the unit only withguards, shields, andother safety
items in place and working correctly.
6. Correctly adjust the unit.
7. Service the unit only with authorized or approved replacement
parts.
8. Complete all maintenance on the unit.
EnvironmentalAwareness
Do notfill the engines fuel tank completely full.
Drain fuel for off season storage.
Use only unleadedgasoline.
Service the air cleaner regularly.
Change oil regularly. Use 10W 30 oil in summer.
Tune up the engine regularly.
Keep equipment in efficient operating condition.
Dispose of used engine oil properly.
SAFETYRULES
Safe Operation Practices for Ride on Mowers
WARNING: This cutting machine is capable of amputating hands and feet and throwing objects. Failure to observe the
following safetyinstructions could result in serious injuryor death.
I. General operation
1. Read, understand and follow all instructions in the Instruction Book, on the machine, the engine and with anyattachments before
starting.
2. Only allow responsible adults, who are familiar withthe instructions, to operate the machine.
3. Clear the areaof objects such as rocks, toys, wire, etc., which could be picked upand thrown by the blade.
4. Be sure the area is clear of other peoplebefore mowing. Stop themachine if anyone enters the area.
5. Never carry passengers.
6. Turn off power to the blades or any attachments before backing up. Do not mow in reverse unless absolutely necessary. Always look
down and behind before and while backing.
7. Be aware of the mower discharge direction and donotpoint it at anyone. Do not operate the mowerwithout either the entire grass bagger
or the mower guardin place.
8. Slow down before turning.
9. Never leave a machineunattended with the engine running. Always turn off the blade(s), setthe parking brake, stop the engine and
remove the key before dismounting.
10. Turn off power to attachment(s) when transporting or not in use. Turn off theblade(s) when not mowing.
11. Stop the enginebefore removing the grass bagger orunclogging the chute.
12. Mowonly in daylight or goodartificial light.
13. Do not operate the machinewhile underthe influence of alcohol or drugs or when very tired.
14. Watch for traffic when operating near or crossingroadways.
15. Useextra caution when loading or unloading the machine into a trailer or truck.
16. Turn off all attachment clutches before attempting to start the engine.
17. Always wear goggles, safety glasses, or an eye shield when you operate the unit to protect youreyes from foreign objects that can be
thrownfrom the unit. Always wear eye protection whenyou make an adjustment or repair to the machine.
18. Usecare when pulling loadsor using heavy equipment.
a. Use only approved drawbar hitch points.
OWNER SINFORMATION
4
F050761L
b. Limit loads to those you can safely control.
c. Donot turn sharply. Use carewhen backing.
d. Use counterweights or wheel weightswhen suggested in the Instruction Book.
19. Do not operatethis machine if you are taking drugs or othermedicationwhich cancause drowsiness or affect your ability to operate
this machine.
20. Do not use thismachine if you are mentally or physically unable to operatethis machine safely.
21. Data indicates that operators, age 60 years and above, are involved in a large percentage ofriding mower related injuries. These opera-
tors should evaluate their ability to operatea riding mower safely enough to protect themselves and others from serious injury.
II. Slopeoperation
Slopes and rough terrain are major factors related to loss of control and tip over accidents, whichcan result in severe injury
or death. ALL slopes require extra caution. If you cannot back up theslope or if you feeluneasy on the slope, do not mow it. See
the !Slope Guide"in the back of thisbook to check for safe operation.
DO
1. Mow up and down slopes, not across.
2. Remove obstacles suchas rocks, limbs, etc...
3. Watch for holes, ruts or bumps. Uneven terrain could overturn the machine. Tall grass canhide obstacles.
4. Useslow speed on slopes. Do not make sudden speed changes.
5.Follow the manufacturer s recommendations for wheel weights or counterweights to improve stability.
6. Useextra carewith grass baggers or other attachments, they can change the stability of the machine.
7. Keep all movement on the slopes slow and gradual. Do not make sudden changes in speed or direction.
8. Avoid starting or stopping on a slope. If tireslose traction, turn off the blades and proceed slowly straight down the slope.
DONOT
1. Do not turn on slopes unless absolutely necessary, then only turn slowly and gradually downhill, if possible.
2. Do not mow drop offs, ditches or embankments. A wheel over the edge or an edge caving in could cause a sudden overturn and an
injury or death.
3. Do not mow on wet grass. Reducedtraction could cause sliding.
4. Do not try to stabilize the machine by putting your foot on the ground.
5. Do not use a grass bagger or other rear mounted accessories on steepslopes (greater than 10 degrees).
III. Children
Tragic accidentscan occur if the operator is not alert to the presence of children. Children are often attracted to the machine and
the mowing activity. NEVER assume that children will remainwhere youlast saw them.
1. Keep children out of the mowing area and in the watchful care of another responsible adult.
2. Be alert and turnthe engine off if children enterthe area.
3. Before and when backing, look behind and down for small children.
4. Never carry children or any passengers, even with the blades off. They may fall off and beseriously injured or interfere with the safe
operation of the machine.
5. Never allow children to operate the machine. Instructchildren in the potential dangers of the machine.
6. Useextra carewhen approaching blind corners, shrubs, trees or other objects that may obscure vision.
IV. Service
1. Useextra care when handling gasolineand other fuels. Fuels are flammable and the vapors are explosive.
a. Useonly an approved container.
b. Never remove the gascap or add fuel withthe engine running. Allow the engineto cool for several minutes before refueling. Do
notsmoke.
c. Never refuel themachine indoors.
d. Never store the machine with fuel in the tank or fuel container inside where there is an open flame, such as a water heater.
2. Never start or run the engine inside a closed area.
3. Keep all nuts and bolts, especially the blade attachment nuts tight. Frequently check the blade(s) for wear or damage such as cracks
and nicks. A blade that is bent or damaged must be immediately replaced with an original equipment blade from an authorized service
dealer. For safety, replace the blade every two years. Keep the equipment in good condition.
4. Never tamper with the safety devices. Check their proper operation regularly.
5. To reduce fire hazards, keep the machine free of grass, leaves or other debris build up. Clean upoil or fuel spills. Allow the machine
to cool before storing.
6. Stop and inspect the equipment if you strike an object. Repair, if necessary, before restarting.
7. Never make adjustments or repairs with the engine running. The carburetor can be adjusted with the engine running. Do not change
the engine governorsettings or over speed the engine.
8. Grass bagger components are subject to wear, damage anddeterioration, which could exposemoving parts or allow objects to be
thrown. For storage, always make sure the grass bag is empty. Frequently check components and replace with manufacturer s recom-
mended parts when necessary.
9. Mower blade(s) are sharpand cancut. Wrap the blade(s) or wear gloves and use extracautionwhen servicing themor the blade housing
area.
10. Check the brake operation frequently. Adjust and service as required.
11. Wait for all movement tostop beforeservicing any part of the unit.
Look for this symbol to indicate important safety
precautions. Thissymbol indicates: !Attention!
Become Alert! Your Safety IsAt Risk."
SAFE MOWING GUIDE
5
F050761L
Each person thatoperates power
equipment must learn to use correct and
safe mowing procedures. To help you
learn, carefully read the following
pages. Most of the time the operator was
not correctly shown or did not read the
instructions on theunit or in the Instruction
Book before usingthe unit. Also, some
operators do not have enoughexperience.
The result is unsafeuse, endangering the
operator, bystanders and the equipment.
Another result canbe a poor appearance
of the area mowed.
Read this book. Readthe instructions on
the unit. Operate the mower according to
the Safe Mowing Guide. Followall safety
rules, cautions orwarnings inthis book
and onthe unit. Make sure anyone that
uses the unit reads the instructions andis
told how to safely operate the mower.
The mower will give you goodservice and
durability, if operated in normal conditions.
If the mower is not correctly serviced or is
used where the terrain is roughor
unsuitable, productperformance and
safetywill be decreased.
Correct clothing isan important part of safe
mowing. Safety glasses will protect the
eyes from objects discharged by the
mower. Safety shoes with steel plates can
protect a foot frominjury by theblade. For
protection from objects discharged from
the mower, wear clothing that will cover the
arms and legs.
Before you start cutting thegrass, practice
using the mower in a large openand level
area. Learn the location of the controls on
the mower. Know the purpose of the
controls and howthey work. In an
emergency, how fastyou can stop the
blade is important. Learn how tocontrol
the mower at all times.
Many engines arestarted by hand. When
you use a pull start or rope start, place
your feet apart andaway fromthe blade(s).
Hold the rope handle tight. Never wrap the
rope around your arm or fingers for a
!bettergrip". To startthe engine, follow the
instructions on themower, in this book and
in the engine operating instructions.
For electric start engines, sit in the seat to
start the engine. The battery can be
dangerous. Followthe instructions on the
battery, theacid container, and in this book
when working with the battery. Even small
batteries have enough voltageto cause an
injury. Always be careful.
The mower is designed to be operated by
one person. Never let anotherperson ride
with you on the unit or on any accessories.
A passenger will make the unit harder to
control, block thevisibility or distract the
operator and is dangerous to the operator,
the passenger and the equipment. Without
a passenger seat, the passenger can fall
from the mower orcontact dangerous
parts. A mower isnot a toy for showing off
or for giving rides.
Nevercut a wet lawn. Wet grass can
causean accident, affect mower
performance andcan cause problems with
future lawn growthand appearance. Wet
grassis slippery and can cause the mower
to slip. Someone can get injuredby
touching the blade(s). Wet grass tends to
clog the mower, causing poordischarge.
Cut wet grass willcollect on the lawn,
retarding the growth of the grass. Also,
gettingthe mowerwet will cause parts to
rust and decrease the life of theunit.
Whenyou look over the lawn, remember
obstacles that cannot be removed, like
pipes, stumps orrocks. Keep away from
these obstacles that can cause damageto
the mower or injuryto the operator or a
personnear the mower. Clear the area of
rocks, toys, wireor other loose objects.
Theseitems can damage the mower or
can bedischargedby the mower blade.
The blade of a power mowerrotates very
fast. It can discharge rocks and other
objects over a long distance which can be
dangerous. The force of the objects can
breakwindows, cause injuries or even put
an eyeout. Most of the time theinjury is to
a person, like a child. Keep every person
completely away from the areato be
mowed. Make sure the grass is not
discharged towardanyone. Planning your
mowing pattern hasa double advantage. It
can decrease thepossibility of an injury
and make the cleanup after mowing
easier.
Checkthe terrain of the area tobe mowed.
Mow ina pattern that will keepyou away
from dangerous areas. Check the distance
you need to stop and the distance
available to turn. Slopes and rough terrain
must be mowed carefully andsome areas
must not be mowedat all. With riding
mowers, mow up and down thehill. When
you must mow rough terrain or on slopes,
drive slowly and stop in theseareas onlyin
an emergency. Beforeyou ride upor down
a slope, try to back straight up the slope.
Do not ride up or down a slopethat is too
steep to back straight up. See the !Guide"
in the back of thisInstructionBook to
checkany slopes.
Beforeyou start cutting, make sure the
mower was completely assembled
according to the Instruction Book. If the
mower was completely assembled at the
SAFE MOWING GUIDE
6
F050761L
store, you must still check the mower
according to theassembly instructions.
Makesure the mower is correctly
assembled and that all fasteners are tight.
Make sure the engine has the correct
amount of oil. Check these items often
during the life of the mower.
Your mower has a gasolineengine.
Gasoline is a dangerous fuel. Keep
gasoline only in anapproved safety
gasoline container. Do not keeplarge
amounts of gasoline. When youadd
gasoline to the fuel tank, do not smoke.
Store the gasoline container andthe
mowerin an area that has goodventilation.
Also, keep the gasoline awayfrom any
flameslike the pilot light of a furnace or
any other source of ignition. Ifthe mower is
to be stored for more than a few weeks,
remove the gasoline from the fuel tank.
When inside an enclosure, do not add
gasoline to the fueltank. Beforeyou add
gasoline, move themower outside and add
gasoline carefully. Before you start the
engine, remove any gasoline from the
outsideof the fuel tank or from the mower.
Warm gasolinewill expand. Leave some
spacein the fuel tank for the gasoline to
expand. Also, the fuel cap hasa vent hole
for fuel vapors. Always use the correctfuel
cap. Failure to follow safety rules about
gasoline will cause fires and explosions,
injury toyou and damage to the equipment
and other property.
If you add gasolineto an enginethat is
running or hot, the result can bean
explosion. Before you add gasoline, stop
the engine and let the engine coolfor
several minutes. Remove dry grass and
other debris from the mower. Keep the
mower clean to improve the performance,
help the engine and transmission run
cooler, extend the life of movingparts, and
decrease the danger of a fire.
Fires and explosions are not the only
dangers when working around a mower.
The engine, transmission, and the muffler
will gethot in several minutes when the
engineis running. Do not touch these parts
of the mower. Stop the engine. Let the
engineand transmission cool before
servicing the mower. Remember, exhaust
fumesare dangerous. Never operate the
engineinside a building.
Whenyou get a new mower, itcan be a
new experience for the family. Tell each
personhow a mower can be dangerous.
Remember, a mower is not a toy. Amower
is not to be used by children or anyone not
old enough, strong enough or that does not
have experience.
If the mower is not correctly assembled,
not operated correctly, or not regularly
serviced, the mower can be dangerous.
The most important rule to follow is always
use good judgement and common sense.
Mow safely and carefully.
Your mower will easily cut thick grass.
Fingers, feet and other parts can also be
cut bythe blade. Injuries occur when the
operator does not think and reaches into
the chute opening. Always operate the
mower as if the blade is rotating. Do not
service or make an adjustment, exceptto
the carburetor, whilethe engine is running.
Use only accessories thatare factory
approved for yourmower. Thewrong
accessory can decrease the safety of the
mowerand can even damage the unit.
Read and follow the instructions included
with the accessory and the mower.
Use only original equipment or
replacement partsthat are factory
approved for service. If youneed service,
selectan Authorized ServiceCenter for
your mower. If youdo the work on the unit,
follow the instructions in the Instruction
Book.
Whenyou mow, remember that children
are attracted to the mower. Always use
caution when mowing around obstacles
like trees or shrubs or when moving
backward. Only mow in a forward direction
if possible. Your visibility is decreased
when you mow backward. Also, the blades
are made to cut while the unit ismoving
forward. If you mow backward, the cutting
performance decreases.
Beforeyou leave the mower, stop the
engine. Remove the key. Disengage and
lower any attachment. Set theparking
brake. Never mount or dismount from the
seat while the engine is running. An
accident can occur if you touch the brake,
speedcontrol pedal, throttle, or blade
controlwhile the engine is running. Mount
and dismount fromthe seat on the side of
the unit that is marked ENTER EXIT.
Make sure you arein good condition when
you mow. When you mow for several hours
your reflexes will decrease and your mind
will not be as alert. Take a short break or
an accident can occur. If the temperatureis
hot, use caution toprevent dehydration. If
you are tired, angry or not completely alert,
do notoperate themower. If you use
alcohol, medicationor drugs, do not use
the mower or anytype of power
equipment.
Engine speed is akey to safemowing and
to a good looking lawn. The maximum
speedof the engine was set at the factory.
Do notchange the setting of theengine
governor.
Select the maximumengine andground
speedthat is right for the terrainand the
heightof the grass. The bladecuts best
when the engine isoperating at maximum
speed. The engineand transmission will
also run cooler at maximum engine speed.
SAFE MOWING GUIDE
7
F050761L
Also, the grass bagger will function better
when the engine is operating at maximum
speed. On slopes, decrease the ground
speedand use care making sure the
mower feels safe to operate.
If the weather conditions are bad, do not
mow. If weather conditions become bad,
stop cutting and finish later. It isdangerous
to cutgrass in the rain. Always find
protection in an electrical storm. If the
weather conditions are extradry, protect
your eyes with safety glasses from the dust
and from the objects discharged by the
mower. Also, a dust or a pollen mask can
help.
Your mower is equipped with a number of
safetydevices which are important to the
safetyof the operator and bystanders and
must never be changed or removed from
the mower. If a safety deviceis lost,
damaged or no longer functions, repair or
replacethe devicebefore you operate the
mower.
It is best to mow during the day. Ifyou
must mow at night, make sure there is
enough light for safeoperation.
Your mower will require regular
maintenance andservice. The
maintenance schedule depends on the
hours of use. Also, mowing conditions can
change the schedule. Checkthe
Instruction Book for more information.
Correct maintenance will help the mower
function safely.
Do not service the
mower (except for the
carburetor adjustment)
while the engine is
running. Before you
service the unit, even
with theengine stopped,
always disconnect the
wire from the spark plug
to prevent the engine
from starting.
If you hit a large object during operation,
stop the engine. Remove the wire from the
spark plug. Carefully inspect the mower for
damage. Before you start the engine
again, make the necessary repairs. If you
feel new or excessive vibration,
immediately stop the engine and check for
the problem. Vibration can be a warning of
a problem. Keep all nuts, bolts and screws
tight.
The blade is the most dangerous part of
the mower. Frequently check the blade and
the blade mountingfasteners. Keep the
fasteners tight. If the blade hits a solid
object, stop the engine. Remove the wire
from the spark plug. Check for a blade that
is bent, cracked or for other damages.
Beforeyou start the engine, replace a
damaged blade(s). For safety, replace the
bladeevery two years.
A sharp blade decreases theworkload on
the engine and more evenly cuts grass.
Frequently sharpenthe blade for a better
lookingcut. Use the left side of the mower
housing to trim near an object.
A grass bagger is a good accessory for
your mower. For best performance and
safety, make sure the grass bagger is
approved for use with your mower. Follow
the assembly andoperation instructions
included with the grass bagger.
Somegrass baggers require a special
blade for best performance. Before you
attach, check, orempty the grass bagger,
alwaysstop the engine. Before each useof
the grass bagger, check for cracks, wear or
deterioration. Before you use the grass
bagger, replace a damaged part with a
replacement part approved by the factory.
For you to have a good green lawn, follow
the mowing procedures below. Do not cut
the grass too short. If you cut the grasstoo
short you can cause the grass to become
yellowor make the lawn lookbrown. Usea
lower height of cut in cool months when
the grass is thicker. Raise the height of cut
in hot dry periods. If you cut the grass with
a blade that is notsharp or at a slow
enginespeed youcan damage the grass.
Move the throttle control to theFAST
position when mowing and using the grass
bagger. Also, use aslower ground speed
when using the grass bagger.
If you change thedirection or pattern of cut
slightlyevery timeyou mow will make the
grassgrow stronger and thicker. Do not
add oilor gasoline to the mower while on
the lawn. Spilled oilor gasoline can kill the
grass. In high or thick grass, do not tryto
cut all the grass the first time. Raise the
heightof cut on thefirst cutting and lower
the height for the next cutting. Another way
is to cut only part of the width of the mower
and decrease your ground speed (not the
engine) to move more slowly so that the
mower can discharge the grass as it
moves forward.
Understand the controls and how they
work. Learn the ground speed(s) of your
mower. Check thestopping distance
required at different travel speeds. Check
the turning radius of the mower. The
controls on your riding mowerare different
from anautomobile. The throttle is
operated by hand and holds the engine
speedconstant until it is changed. The
location of the travel speed control is
different fromthat of an automobile. Also,
the brake and clutch systems are different.
Remember the procedures to follow in an
emergency. Remember, turning off the
engineignition switch will stop the blade
and the drive mechanism. If the traction of
the wheels is lost or does notfeel safe,
disengage all systems and stop the
engine. Dismount from the mower. Push
the unit to a safe place before you begin
mowingagain.
Your unit has an electrical system that
includes an operator presence switch in
the seat. The operator presence switch
detects if the operator is sittingon the seat.
The engine will stop if the operator leaves
the seat when the blade engagement
control is engaged. This operator presence
switchis a safetydevice only. It must not
regularly be used tostop the engine or the
blade. There are other control systems on
the mower for this purpose. Always keep
the operator presence switchand other
safetydevices and controls in place and
operating for your protection.
Remember, your mower is a tool that can
be dangerous if itis not correctly used.
Followthe instructions in thisInstruction
Book. Safe and careful use of the mower
will give you manysafe hours of problem
free use.
STEPS TOFOLLOW
8
F 050761L
BEFOREMOWING
Be sure to dresscorrectly. Wear hard shoes, not sandals or tennisshoes.
Examine the blade. A blade that is bent, cracked, or damaged must be replacedwith a factory replacement blade.
Fill the fuel tank outside. Clean off spilled fuel.
Read and follow the Owner sManual, the instructions with theengine,and theinstructions with any attachments.Owner sManual
instructions are for your safety and the safety of others.
Exhaust fumes aredangerous. Start the engine outside.
Makesure all safety devices are in place and working correctly.
Operation of the mower is only for a person that has experience.
Wet grasscan be dangerous. Let the grass dry.
Instruct children and others to keep away from the work area.
Nevercut the grass without good light.
Pick up loose objects. Remove them fromthe mowingarea.
WHILEMOWING
Watch for fixed objects and avoid them. They candamage the mower orcause injury.
A hot engine, muffler, and transmission will cause a burn. Do not touch.
Inclines and slopes must be carefully mowed. See the !Guide"in the back of this bookto check a slope.
Lack of daylight or good artificial light is cause to stopmowing.
Examine the mower, the blade, and other parts for damage after hitting a foreign object or if the unit vibrates excessively.
Do not make adjustments or repairs without stoppingthe engine. Disconnectthe spark plug wire.
On ornear roads, watch outfor traffic. Direct dischargeaway fromroads.
Whenmowing, avoid areas where tractionis unsure. Look back before changing direction of travel.
In heavy grass, raise the cutting height. Cut slower. Stop the engine to remove clogged grass from the mower.
Neverremove any safety related parts.
Do notpour gasoline into a engine that is hot or running.
AFTERMOWING
Always let the mower cool before storing in an enclosed area.
Foreign material on the moweris dangerous. Clean off grass, leaves, grease and oil before storing.
Tighten all loose nuts, bolts and screws before you use the unit.
Empty and clean any grass catcher or other accessory.
Remove the key or disconnect the sparkplug wire to prevent unauthorized use.
Make sure the mower is not kept near a source of ignition. Gas fumes can cause an explosion.
Only original parts or factoryapproved substitutes can be used to servicethe mower.
When storing the mower for an extended period, removethe fuel fromthe fuel tank.
Instruct children toleave the mower alone. It is not a toy.
Neverkeep gasoline near a source of ignition. Always use an approved container. Keepgasoline away from children.
Lubricate according to the Instruction Book. See !Lubrication".
IMPORTANT Readthe Instruction Book. Keep thisbookforfutureuseandreference.
WARNING: Look forthissymboltopointoutimportant
safetyprecautions.Itmeans: !Attention!BecomeAlert!
YourSafetyIsInvolved."
INTERNATIONAL PICTORIALS
9F 050761L
INTERNATIONAL PICTORIALS
IMPORTANT: Some of the following pic-
torialsare located on yourunit or on
literature supplied with the product. Be-
fore you operatethe unit, learn and un-
derstand the purpose for each pictorial.
SafetyWarning Pictorials
1Warning
2Shield Eyes. Explosive Gases Can
Cause Blindness Or Injury.
3No Sparks, Flames or Smoking.
4Sulphuric Acid Can Cause Blindness
Or Severe Burns
5Flush Eyes Immediately WithWater.
Get Medical HelpFast.
6IMPORTANT: Read Owner s Manual
BeforeOperating This Machine.
7WARNING: Thrown Objects. Keep
Bystanders Away. Read User
Instructions Before Operating This
Machine.
8WARNING: Do Not UseThis Machine
On Slopes Greater Than 15 Degrees.
9DANGER: KeepPeople, Especially
Children, Away From Unit.
10 DANGER: No Step.
11 DANGER: KeepFeet And Hands
Away FromRotating Blade.
12 DANGER: KeepHands AwayFrom
Rotating Blade.
13 DANGER: Disconnect Spark Plug
Wire Before Servicing Unit.
14 WARNING: Hot Surface.
15 WARNING: Use Caution When
Connecting Or Disconnecting
Accessories.
16 WARNING: Crushed Fingers.
ÓßÈçðÒ
õÓßÈïëðÒ
õ
12 í546
7
8
9
10
12
11
13 14 15 16
1
Control AndOperatingPictorials
1Engine Start
2Lights
3EngineOff
4EngineOn
6Brake
7Parking Brake
8Clutch
9Slow
10 Fast
11 Choke
12 Oil
13 Blade Rotation Control
14 Raise
15 Fuel
123467
8
9
101112 13 14 15
2
ASSEMBLY
10F 050761L
ASSEMBLY
Read and follow the assembly and adjustment instructions for your
mower. All fasteners are in the parts bag. Do not discard any parts
or material until the unit is assembled.
NOTE: In thisinstruction book, left and right describe the loca-
tion of a part with the operator on theseat.
WARNING: Before doing anyassemblyormainte-
nance to the mower, remove the wire from the spark
plug.
PARTSBAG CONTENTS
The fasteners and other loose parts areshown below. The fasteners are shown full size. The quantity is shown in brackets ( ).
2x82
(2)CarriageBolt
14x79
(2) Wing Nut
17x47
(2) Washer
1001054
(2) Knob
20729
(1) Keys & Ring
17x195
(2) Washer
17x192
(2) Washer
30x49
(2) CotterPin
94618
(2) Hub Cap
690604
(1) TerminalCover
25x3
(1) Bolt
17x146
(1) Washer
31x11
(2) HairPin
17x91
(2) Washer
ASSEMBLY
11F050761L
HOW TO INSTALL THEFRONT WHEELS
Use a knife and cutthe four sides of the container. Install the front
wheels in the container.
NOTE: Use apiece of wood about 4 feet (1.25 meters) long to
raise the frontof thetractor. If a piece of woodcannot be found,
get another person to help lift the tractor. Be careful, do not let
the tractor fall.
1. Raise the front ofthe tractor. Set asupport (block of wood)
under the tractor.
2. Make surethe valve stem is to the outsideof the tractor. Slide
the front wheel on the spindle.
3. Fasten each front wheel with washer, washer and cotter pin.
Bend the endsofthe cotter pin appart to keep the front wheel
on the spindle.
4. After the front wheels are installed, lift the tractor fromthe
support. Roll the tractor off of the container.
5. If your tractor has hub caps, install the hub caps. Makesure
the washers hold the hub caps in place.
CotterPin
Black Cable
A
Figure 1
Valve Stem FrontWheel
Spindle
Hub Cap
Washer (17x192)
Washer (17x195)
ASSEMBLY
12F 050761L
HOW TO INSTALL THESEAT
1. Carefully remove the plasticbag from the seat.
Use thefasteners shown below to install the seat. The fasteners are
shownat full size.
(A)
1001054
(B)
17x47
NOTE: Fasteners may be attached to seat for shipping
purposes, if so remove fasteners before proceeding.
2. Alignthe holes in the seat hinge to the holes in the seat
(Figure 2). Fasten the seat tothe seat hinge with thefasteners
as shown.
3. Check theoperating position of the seat. If the seat needs to
be adjusted, loosen the two wing bolts. Slide the seat forward
or backwardalongthe seat adjustingholes asshown. Tighten
the wing bolts (A).
Figure 2
Seat
Seat
Adjusting Hole
SeatHinge
A
B
HOW TOASSEMBLETHESTEERING WHEEL
Tools Required: 3/8"Socket Wrench
Attachthe steering wheel as follows:
(A)
25x3
(C)
17x146
1. Make sure the front wheelspoint forward.
2. Slide the bellows over the steering post (Figure 3).
NOTE: Before attachment of the steering wheel, make sure
that the front wheels point forward and are straight. For
proper alignment of the steering wheel, see Figure 3.
3. Slide the steering wheel onto the steering post.
4. Usethe fasteners shown above to secure the steering wheel.
The fasteners are shownat full size. Tightenthe screw until
snug and then add 1/4 turn. DO NOT over tighten.
5. Attach the cover to the steering wheel.
6. Some models have an optional decal in the parts bag. Attach
the decal to thecenter of the steering wheel as shown. Figure 3
Straight
Steering Wheel
Cover
A
C
Steering Post
Bellows
Decal
(Optional)
ASSEMBLY
13F 050761L
HOW TOASSEMBLETHEGAUGEWHEELS
Use thefasteners shown below to install the gauge wheels. The
fasteners are shown at full size.
(A)
31x11 (B)
17x91
1. Attach the gauge wheels to the axle bolts with the fasteners.
NOTE: The axle boltis mountedin the LOW position. To change
the position to ahigher cutting position, see !How To Adjust
The Gauge Wheels"in the Maintenance section.
GaugeWheel
Figure 4
AxleBolt
A
B
MAINTENANCEFREE BATTERY
IMPORTANT: Before you attachthebattery cables to the
battery, checkthebattery date. The battery date tells if the
battery must be charged.
1. Check the topand the side of the battery for the location of the
battery date (Figure 5).
2. If the battery is put into service before the battery date, the
battery cables can be attached without chargingthe battery.
See !How To Install The Battery Cables".
3. If the battery isput into service after the battery date, the
battery must be charged. See !How ToCharge The
Maintenance Free Battery".
HOW TO CHARGE
THEMAINTENANCEFREE BATTERY
WARNING: When you chargethe battery, do not
smoke. Keep the battery away from any sparks. The
fumes from the battery acid can cause an explosion.
1. Remove the battery and battery tray.
2. Remove the protective capfrom the battery terminal.
3. Usea 12 volt battery charger to charge the battery. Charge at
a rate of 6 amperes for one hour. If you do not have abattery
charger, have an authorized service center charge the battery.
4. Install the battery and battery tray. Make sure the positive (+)
terminal is on the left side.
HOW TO INSTALL THEBATTERYCABLES
WARNING: To prevent sparks, fasten the red cable to
the positive (+) terminal before you connect the black
cable.
Use the fasteners shown below toinstall the battery cables. The
fasteners are shown at full size.
(B)
14x79
(A)
2x82
1. Remove the protective capfrom the battery terminal.
2. Fasten the red cable and terminal cover (if equipped) to the
positive (+) terminal with the fasteners as shown (Figure 5).
3. Fasten the black cable to the negative ( ) terminal with the
fasteners as shown.
B
A
Positive
(+)
Terminal
Black Cable
Red
Cable
BatteryTray
A
Battery
Figure 5
TerminalCover
ASSEMBLY
14F 050761L
IMPORTANT!BEFOREYOUSTART MOWING
Checktheengineoil.
Fillthe fuel tank withgasoline.
Checktheairpressureofthetires.
Checkthelevelof themowerhousing.
Makesurethebatterycablesareattached.
Makesurethewireisattached tothesparkplug.
WARNING: Before doing anyassemblyormainte-
nance to the mower, remove the wire from the spark
plug.
NOTE: In this instructionbook, left and right describe the
location of a part with the operator on the seat.
HOW TOPREPARETHEENGINE
NOTE: The engine was shipped fromthe factory filled with oil.
Checkthe level of the oil. Add oil as needed.
NOTE: The operation of a new engine will sometimes result in
a slight amountof smoke. This smoke is caused by paint or oil
on oraroundthe muffler. Thisis normal and only expected
during initial operation.
Aseparate engine manual is also includedwith the unit. Seethis
enginemanual for the manufacturer sinstructions for the type of
gasoline andoil touse. Beforeyouusetheunit, readtheinformation
on safety, operation, maintenance, and storage.
WARNING: Follow the engine manufacturer s
instructions forthe typeof gasoline andoil to use.
Always use asafety gasoline container. Do not
smokewhen addinggasoline to the engine. When
inside an enclosure, do not fill with gasoline. Before
you add gasoline, stop theengine. Let the engine
cool for several minutes.
IMPORTANT: This unitis equipped with an internal combustion
engineand must not be used on or nearany unimproved
forest covered, brush covered or grass covered land unless
the engine s exhaust system is equipped with a spark arrester
meeting applicable local or statelaws (if any). If aspark
arrester is used, it must be maintained in effectiveworking
orderby the operator.
In the State of California the above is required by law (Section
4442 of the California PublicResources Code). Other states
may havesimilar laws. Federal laws apply on federal lands.
See an Authorized Service Center for a spark arrester for the
muffler.
In some areas, local law requires theuse ofaresistor spark
plug to control the ignition signals. Seean Authorized Service
Center for a resistor sparkplug for the engine.
NOTE: Actual sustained horsepower will likely be lower due to
operating limitations and environmental factors.
CHECKTHETIRES
NOTE: Thetires were overinflated for shipment. Thecorrectair
pressure is shown on the side of thetire.
Check the air pressure in the tires. Tires with too much air pressure
will cause the unit toride rough. Also, the wrong air pressure will
keep the mower housing from cutting level. The correct air pressure
is shown on the side of the tire.
CHECK THELEVEL OFTHEMOWERHOUSING
Make sure the level of cutis still correct. After you mow ashort
distance, look at the area that was cut. Ifthe mowerhousing does
not cut level, see the instructions on !How ToLevel The Mower
Housing"in the Maintenance section of this instructionbook.
OPERATION
15F 050761L
Figure 6
ThrottleControl
Lever
Blade Rotation
Control
BrakePedal
Lift
Lever
Speed Control
Pedal
LOCATIONOF CONTROLS
BLADEROTATIONCONTROL: Use the blade rotation
control to start and stop the rotation of the blade.
BRAKEPEDAL: Use the brake pedal to quickly stop.
HEADLIGHT SWITCH: The headlight switchis the firstpart
of the ignition switch. To use the lights with the engine running, turn
the key to the position for the lights.
IGNITION SWITCH: Use the ignition switch tostart and stop
the engine.
AUTOMATICDRIVEDISCONNECT: Use the auto-
matic drive disconnect, located underthe seat, to disengage the
transmission.
LIFTLEVER: Use the lift lever tochange theheight of cut.
PARKING BRAKELEVER: Use the parking brake lever
to engage the brake when youleave the unit.
SPEED CONTROL PEDAL: Use the speed control lever
to change the speed and the direction of theunit.
THROTTLE CONTROLLEVER: Use the throttle control
lever to increase or decrease the speed of the engine.
OPERATION
16F 050761L
ATTACHMENTS
This unit can use many different attachments. Seethe attachment
page in this book. This unit can pull attachments like alawn
sweeper, a lawn aerator, a hopper spreader or a small trailer. This
unit can not use attachments that engage the ground like a plow, a
disk harrow, or a cultivator.
For all pull behindattachments or trailers, the maximum gross
weight is 250 pounds. Gross weight is the weight ofthe attachment
or trailer and any load that might be on or in it.
Do not operate on aslope that is greaterthan 10 degreeswhen
using a pull behindattachmentor trailer. We have included a slope
guide in this book to help you determine the slope on which you will
be operating your unit. Never allow someone to stand or ride on or
in an attachment ortrailer.
HOW TO USE THETHROTTLECONTROL
Use the throttle control to increase or decrease the speedof the
engine.
CAUTION: Always operate the engine withthe throttle control
in the FAST position. If theengine runs forseveral minutes at
slowerthan the FAST position, the engine and transmission
will overheat andcan be damaged.
1. The FAST position is marked with a detent. For normal opera-
tion and when using a grass bagger, move the throttle control
totheFAST position. For maximum charging of the battery and
for a cooler running engine and transmission, operate the en-
gine inthe FAST position.
2. Fortransport and to towpull behind attachments, control the
ground speed with the speed control pedal.
3. Theengine governoris set at thefactory for maximum perform-
ance. Do not adjust the governor toincrease thespeed of the
engine.
ØÑÉÌÑËÍÛ ÌØÛÞÔßÜÛÎÑÌßÌ×ÑÒÝÑÒÌÎÑÔ
The blade rotation control is next to the steering wheel (Figure 7).
Use the blade rotation control to engagethe blade(s) or to operate
a snowthrower attachment.
1. Before you starttheengine, make surethe bladerotation con-
trol is in the DISENGAGE position.
2. Move the blade rotation control tothe ENGAGE position to
rotate the blade(s).
Note: If the engine stops when you engage the blade(s),
the seatswitch is not activated. Make sure yousitin the
middle of the seat. Also, make sure the wire is connected
to theseat switch.
3. Move the blade rotation control to the DISENGAGE position
to stop the blade(s). Before you leave the operator s position,
make sure the blade(s) has stopped rotating.
4. Before you ride the unitacross a sidewalk or a road, move the
bladerotation control to the DISENGAGE position.
WARNING: Always keep your hands and feet away
from the blade, deflector opening, and themower
housing when the engine runs.
Blade Rotation Control
Engage Position
Disengage
Position
Figure 7
OPERATION
17F 050761L
HOW TOUSE THESPEEDCONTROL PEDAL
The drive system uses a Hydrostatic Automatic Drive transmission.
The Hydrostatic transmission is very easy to operate. This type of
drive system doesnot requirea shift lever or a clutchpedal.
The speed and direction of travel is controlled by asingle speed
control pedal operated with your right foot. Donotuse theleft brake
pedal in normal operation. Only usethe left brake pedal to quickly
stop inan emergency.
HOWTODRIVEFORWARD
1. The automatic drivedisconnect mustbe in theDRIVE
position (Figure 9).
2. Slowly release your left footfrom the brake pedal.
3. Move the throttle control to the FAST position.
4. Slowly push the speedcontrol pedal forwardtothe desired
speed (Figure 8).
5. Toincrease forward speed, slowly move the speed control
pedal forward. To reduce forward speed, slowly release the
speed control pedal until the unit slows to the desired speed.
SpeedControl
Pedal
Figure 8
HOWTODRIVEINREVERSE
1. Look to the rear.
2. Slowly push the speedcontrol pedal to the REVERSE
position.
HOWTOCHANGEDIRECTIONS
CAUTION: Tochange directions, do not usetheleftbrake
pedal. Use only the speed control pedal.
1. Slowly removeyour foot fromthe speed control pedal. The
speed control pedal will automatically returnto the NEUTRAL
position.
2. When the unit stops, slowly move the speed control pedal to
the desired direction.
SPEEDCONTROLPEDALPOSITIONS
The forward speed iscontrolledbythe position of the speed control
pedal. The following chartprovides functions along with the pedal
positions. Always operate the engine with the throttle control in
the FAST position.
FUNCTION ÐÛÜßÔ
ÐÑÍ×Ì×ÑÒ
THROTTLE
Trimming
SnowThrower
1/3
Bagging Grass 1/3 to 1/2
FAST
CHOKE
Normal Mowing 1/2 to 2/3
CHOKE
FAST
Easy Mowing
Snow Blade
1/2 to 3/4 SLOW
THROTTLE
Transport FULL
Pull Behind
Attachments
1/3 to 1/2
HOW TO DISCONNECT THETRANSMISSION
Topush the unit, use the automatic drive disconnect to release
the transmission. The automatic drive disconnect is under the
seat.
1. Theengine must be off.
2. Raise the seat. The automatic drive disconnect is under the
seat.
3. Move andlatch the automatic drive disconnect inthePUSH
position (Figure 9). The transmission isnow released and the
unit can be pushed.
NOTE: In cold weather, theheavy viscosityoilinthe
transmission will make theunit difficult to push.
4. To engage the transmission, unlatch the automatic drive dis-
connect. The transmission is now connected andreadyto op-
erate. Figure 9
AutomaticDrive Disconnect
Seat
DRIVEPOSITION
AutomaticDrive Disconnect
PUSHPOSITION
OPERATION
18F 050761L
HOW TOSETTHEPARKING BRAKE
1. Completely pushthe brake pedal forward.
2. Lift the parking brake lever (Figure 10).
3. Remove your foot from the brakepedal andthenrelease the
parking brake lever. Make sure theparking brake will hold the
unit.
4. To release the parking brake, completely push the brake pedal
forward. The parking brake will automatically release.
WARNING: Before you leave the operator s position,
move theshift lever tothe neutral (N) position. Setthe
parking brake. Move the bladerotation control to the
DISENGAGEposition. Stopthe engine and remove
the ignition key.
Figure 10
Parking
Brake
HOW TO CHANGETHECUTTING HEIGHT
To change the cutting height, raise or lower the lift lever as follows.
1. Move the lift lever forward to lower the mower housingand
back to raise the mower housing (Figure 11).
2. When you ride ona sidewalk or road, move the lift lever tothe
highest position and move the blade rotation control to the
DISENGAGE position.
Lift Lever
Figure 11
HOW TO STOPTHEUNIT
1. Slowly remove your footfrom the speed control pedal. The
speed control pedal will automatically return to the NEUTRAL
position and the unit will stop.
2. Move the bladerotation control to the DISENGAGE position.
3. Setthe parkingbrake.
WARNING: Make sure the parking brake will hold the
unit.
4. Move the throttle control tothe SLOW position.
5. Tostop the engine, turn the ignition key to the OFF position.
Remove the key.
HOW TO TRANSPORTTHEUNIT
To transport the unit, follow thesteps below.
1. Move the bladerotation control to the DISENGAGEposition
2. Raise the lift lever to the highest position.
3. Move the throttle control to the FAST position.
4. Slowly pushthe speed control pedal forward to the desired
speed.
OPERATION
19F 050761L
ØÑÉÌÑÑÐÛÎßÌÛ É×ÌØÌØÛÓÑÉÛÎØÑËÍ×ÒÙ
WARNING: Thedeflector is a safety device. Donotre-
movethe deflector. The deflector forces the dis-
charged material toward the ground. Always keep the
deflector in the down position. Ifthe deflector isdam-
aged, replace the deflectorwithan original equipment
part from an authorized service center.
1. Start the engine.
2. Release the parking brake.
3. Move the lift lever to aheight of cut position. In high or thick
grass, cut the grass in the highest position first and then lower
the mower housingto a lower position.
CAUTION: Do not operate with the mower housing in the
LEVELADJUSTMENTposition. If you operate in the
LEVELADJUSTMENTposition, themowerhousing and
bladescan be damaged.
4. Move the throttle control to the SLOW position.
5. Move the bladerotation control to the ENGAGE position.
6. Move the throttle control to the FAST position.
7. Slowly push thespeed control pedal to the desired speed.
NOTE: Whenyou mow in heavy grass ormow with a grass
bagger, use a slow forwardspeed.
8. Make sure the levelof cut set at the factory is still correct. After
you mowa short distance, look at the area that was cut. If the
mower housing does not cut level,seethe instructions on !How
To Level The Mower Housing"in the Maintenance section.
WARNING: For better control ofthe unit, always
select asafe speed.
HOW TO OPERATETHEUNIT ONHILLS
WARNING: Do notride upor downslopes that are too
steepto back straight up. Never ride the unit across
aslope. See the !Slope Guide"in the back of this
book for information on how to checkslopes.
HOWTOOPERATEONAHILL
1. Control the speed only with the speed control pedal. Do not use
the brake pedal on a hill.
2. Tohelpprevent an accident, slowly move the speed control
pedal. Avoidsudden turns or changes in speed.
3. To reduce forwardspeed when going down ahill, slowly release
the speed control pedal until the unit slows tothe desired
speed.
HOWTOSTOPONAHILL
1. Avoid stopping on a hill. If you must quicklystop inan emergen-
cy, remove your right foot from the speed control pedal and
quicklydepress the left brakepedal.
2. Setthe parkingbrake.
3. Before you dismount from the seat, move thethrottle controlto
SLOW position, move the blade rotation control to the DISEN-
GAGED position, turn off theengineand setthe parking brake.
HOWTOSTARTOPERATIONONAHILL
1. Start the engine
2. Move the bladerotation control to the ENGAGED position.
3. Move the throttle control tothe FAST position.
4. Depress thebrake pedal and release the parking brake. As you
release the parking brake, push the speed controlpedal to the
desired speed.
WARNING: Slowly push the speedcontrol pedal as
you release the parking brake. The parking brake
mustbe disengaged before thespeed control pedal
is ableto engagethe transmission.
OPERATION
20F 050761L
BEFORESTARTINGTHEENGINE
CHECKTHEOIL
NOTE: The engine was shipped fromthe factory filled with oil.
Checkthe level of the oil. Add oilas needed. See the engine
manufacturer s instructions for the type of gasoline and oil to
use.
1. Make sure the unit is level.
NOTE: Do not check the level of theoil whilethe engine
runs.
2. Checkthe oil. Follow the procedure in the enginemanufactur-
er s instructions.
3. If necessary, add oil until the oil reaches the FULL mark on the
dipstick. The quantity of oil neededfrom ADD to FULL is shown
on thedipstick. Donot add toomuch oil.
ADDGASOLINE
WARNING: Always use a safety gasoline container.
Do not smoke when adding gasolineto the fuel tank.
Do notadd gasoline when you are inside an enclo-
sure. Before you add gasoline, stoptheengine and
let theengine cool for several minutes.
Fill the fuel tank withregular
unleaded gasoline. Do not use
premium unleadedgasoline.
Makesure thegasolineis fresh
and clean. Leadedgasoline will
increase deposits and shorten
the lifeof the valves.
CAUTION: A mixture of alcohol (ethanolormethanol) and
gasoline (called gasohol), will attract moisture and cause acid
deposits during storage. While the unit is in storage, the acids
in the fuel can damage the fuel system.
Toprevent engine problems with the fuelsystem, empty the fuel
systembefore storage of 30 days or longer as follows.
1. Drain the fuel tank.
2. Start the engine. Let the engine run until the fuel lines and the
carburetor are empty.
3. After storage, make sure you use fresh fuel. Seethe storage
instructions for additional information.
4. Never use engine cleaner or carburetor cleaner in the fuel tank
or permanent damage can occur.
CARBURETOR
The factory settings for the carburetor are for most conditions. If the
engineis operated under thefollowing conditions, you can adjust
the carburetor mixture. Toadjust the carburetor, see the engine
manufacturer sinstructions.
1. Theengine hasa loss of power or doesnot run smooth.
2. A change from summer to winter operation.
3. A 40 degree change in the operation temperature. The carbure-
tor was adjusted at 80 degrees at the factory.
4. Theengine is operated above 4,000 feet.
HOW TO STARTTHEENGINE
WARNING: The electrical system has anoperator
presence systemthat includesa sensor switch for the
seat. These components tell the electrical systemif
the operator is sitting on theseat. This system will
stop the engine when the operator leaves theseat.
For yourprotection, always makesure this system
operates correctly.
NOTE: The engine willnot start unless you depress the brake
pedal or engage the parking brakeand movethe blade rotation
control to the DISENGAGE position.
1. Push the brake pedal completely forward. Keep your foot on
the pedal.
2. Make surethe blade rotation control is in the DISENGAGE
position.
3. Movethe throttle control completely forward to the CHOKE or
FASTposition. Some models have aseparatechoke knob. Pull
the choke knob tothe full CHOKE position.
4. Turn the ignitionkey tothe START position. Releasethe key
when the engine starts.
NOTE: If the engine does not start after four or fivetries,
see the TROUBLE SHOOTING CHART.
5. Slowly move the throttle control to the SLOW position.
6. Let a cold engine run for severalminutes. Begin work whenthe
engineis warm. To start ahot engine, move the throttle control
to a position between FAST and SLOW.
FuelTank
Full

Other Rover Lawn Mower manuals

Rover 460 User manual

Rover

Rover 460 User manual

Rover Rancher 28269 User manual

Rover

Rover Rancher 28269 User manual

Rover Self Propelled 80M44 Owner's manual

Rover

Rover Self Propelled 80M44 Owner's manual

Rover Rancher 1766 User manual

Rover

Rover Rancher 1766 User manual

Rover 5377 - 12HP User manual

Rover

Rover 5377 - 12HP User manual

Rover ProCut 50 Owner's manual

Rover

Rover ProCut 50 Owner's manual

Rover 460 User manual

Rover

Rover 460 User manual

Rover Colt 7344 User manual

Rover

Rover Colt 7344 User manual

Rover Rancher 2042 User manual

Rover

Rover Rancher 2042 User manual

Rover Clipper 405012x108A User manual

Rover

Rover Clipper 405012x108A User manual

Rover 75 User manual

Rover

Rover 75 User manual

Rover Powermaster 11029S User manual

Rover

Rover Powermaster 11029S User manual

Rover 7091 Owner's manual

Rover

Rover 7091 Owner's manual

Rover Clipper 405606x108A User manual

Rover

Rover Clipper 405606x108A User manual

Rover Powerstart 3593 User manual

Rover

Rover Powerstart 3593 User manual

Rover 108 - 109 User manual

Rover

Rover 108 - 109 User manual

Rover Regal 35692 User manual

Rover

Rover Regal 35692 User manual

Rover Clipper 425621X108 User manual

Rover

Rover Clipper 425621X108 User manual

Rover EasyGo 75M93 User manual

Rover

Rover EasyGo 75M93 User manual

Rover 10124 User manual

Rover

Rover 10124 User manual

Rover Mulch ’N Catch 30 User manual

Rover

Rover Mulch ’N Catch 30 User manual

Rover R516 EC User manual

Rover

Rover R516 EC User manual

Rover ProCut 50 User manual

Rover

Rover ProCut 50 User manual

Rover 300361 User manual

Rover

Rover 300361 User manual

Popular Lawn Mower manuals by other brands

MTD Pro 400 series Operator's manual

MTD Pro

MTD Pro 400 series Operator's manual

Stiga MP2 504 Series operating manual

Stiga

Stiga MP2 504 Series operating manual

Ribimex PRBAT20/TON33 User and maintenance manual

Ribimex

Ribimex PRBAT20/TON33 User and maintenance manual

Dolmar PM-5600 S3 instruction manual

Dolmar

Dolmar PM-5600 S3 instruction manual

Ventrac LM600 Operator manual & illustrated parts list

Ventrac

Ventrac LM600 Operator manual & illustrated parts list

MTD 11A-504E000 Operator's manual

MTD

MTD 11A-504E000 Operator's manual

MTD 127-364-000 owner's guide

MTD

MTD 127-364-000 owner's guide

Briggs & Stratton BRUTE BTXPV22700E Quick setup guide

Briggs & Stratton

Briggs & Stratton BRUTE BTXPV22700E Quick setup guide

Ferris 5900761 Operator's manual

Ferris

Ferris 5900761 Operator's manual

Toro Recycler 20652 Operator's manual

Toro

Toro Recycler 20652 Operator's manual

Toro 74301 Operator's manual

Toro

Toro 74301 Operator's manual

Coopers 10679 Instructions for use

Coopers

Coopers 10679 Instructions for use

Iseki SRA800 Operation manual

Iseki

Iseki SRA800 Operation manual

Craftsman 917.376523 owner's manual

Craftsman

Craftsman 917.376523 owner's manual

KLIPPO Brilliant S instruction manual

KLIPPO

KLIPPO Brilliant S instruction manual

Makita DOLMAR EM411 instruction manual

Makita

Makita DOLMAR EM411 instruction manual

Cub Cadet 20HP Enforcer 44, 22HP Enforcer 48, 23HP Enforcer... Operator's and service manual

Cub Cadet

Cub Cadet 20HP Enforcer 44, 22HP Enforcer 48, 23HP Enforcer... Operator's and service manual

Krone AM 203 S Original operating instructions

Krone

Krone AM 203 S Original operating instructions

manuals.online logo
manuals.online logoBrands
  • About & Mission
  • Contact us
  • Privacy Policy
  • Terms and Conditions

Copyright 2025 Manuals.Online. All Rights Reserved.