Rowan Astronomy AZ100 User manual

www.rowanastronomy.com
01/12/2019 ©2019 Copyright Rowan Engineering Ltd. Page 1
AZ100 Alt-Azimuth Mount.
Rowan Astronomy
Rowan Engineering Ltd.
Unit 8 Overfield
Banbury
Oxon
OX16 4XR
+44 (0)1295 251188
www.rowanastronomy.com
sales@rowanastronomy.com

www.rowanastronomy.com
01/12/2019 ©2019 Copyright Rowan Engineering Ltd. Page 2
AZ100 Alt-Azimuth Mount.
Please read all instructions before attempting to set up your AZ100 mount.
The AZ100 is very rugged; however, like any precision instrument, it can be damaged by improper handling.
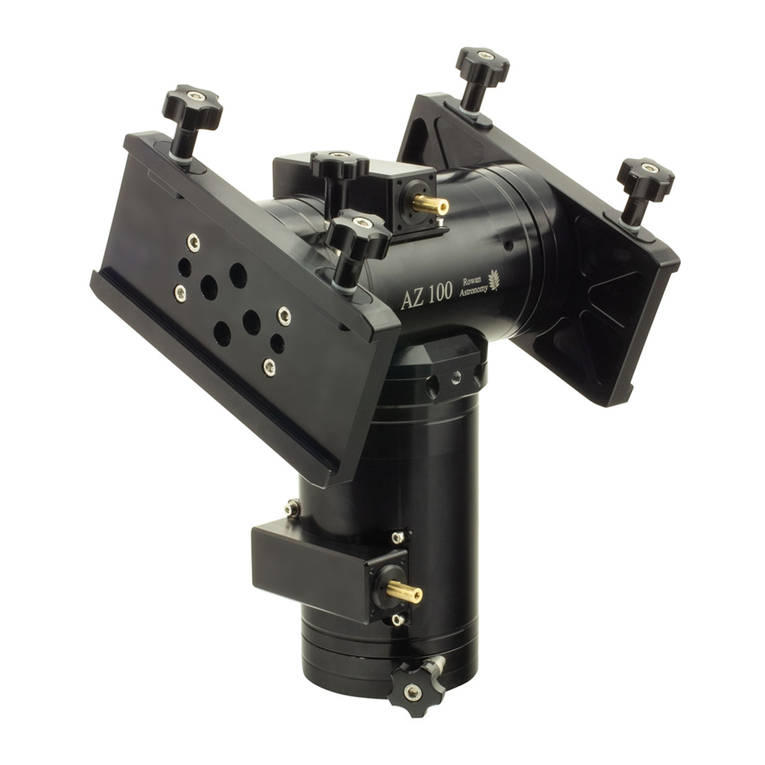
Please refer to the diagram below for an illustration of the mount.
Altitude Worm Block
Altitude lock
Altitude Axis Clutch
Altitude Slow-Motion Cable
Optional Saddle.
Altitude Damping Adjuster
DSC mounting holes
Azimuth Damping adjuster
Azimuth Worm Block Azimuth Axis Clutch
Azimuth Slow-Motion Cable
Mounting capacity.
The AZ100 has a capacity of 15-20kg per side depending on the lengths of the telescopes in use.
Generally it is recommended to mount the heavier of the 2 scopes on the left side of the mount in the saddle
shown. And if using one telescope attach this also on the left side of the mount as the left side is designed to
have a slightly higher capacity than the right.
If using a counterweight shaft attach this on the right side of the mount in the central M16 hole of the saddle or
using the counterweight mounting flange.
Azimuth and Altitude Clutches.
The clutches are fully adjustable and can be set over a wide range to give the required amount of friction to the
axis.
Altitude Lock
Gently tighten to hold the telescope in position while there is an imbalance when changing eyepieces.
Azimuth and Altitude Damping Adjusters.
Each axis has a pair of damping adjusters. These allow additional friction to the slow-motion controls only to aid
a smoother movement with large or long telescopes. Set them with approximately the same tension.

www.rowanastronomy.com
01/12/2019 ©2019 Copyright Rowan Engineering Ltd. Page 3
Slow Motion Flexible Shafts.
Fit the longer flexible shaft to the Altitude axis and the shorter to the Azimuth axis. This will position the 2 hand
control knobs adjacent to each other.
Gently tighten the thumb screw so it makes contact on the flat area of the worm shaft.
The flexible shafts are formed with a torsional stiffening process and they can not be cut or shortened.
Please contact us if you require customised slow motion shafts.
Nexus DSC
When purchasing a Nexus DSC with the AZ100 mount, the Nexus will be pre-configured to use Telescope 1
with the AZ100 encoders.
If you are using an existing Nexus DSC, go to the Settings >Telescope > Adjust screen and enter the settings
as shown below.
Encoder Specification.
152,000 ticksper rev. on each axis.
+5v, GND, Channel A & Channel B
If performing maintenance to the mount at any time, do not allow
any magnetic or magnetised objects to come in proximity to the
internal magnetic encoder rings.

www.rowanastronomy.com
01/12/2019 ©2019 Copyright Rowan Engineering Ltd. Page 4
Worm Adjustments.
Worm mesh adjustment may be necessary from time to time. The adjustment is straightforward and the user
should not be hesitant to attempt this and in doing so will achieve the best performance from the AZ100 mount.
Worm mesh screws (A)
Opposing grub screws (B)
Worm block screws (C)
Before adjusting the worm mesh check the balance of the telescope is as close to balanced as possible with the
eyepiece and finders fitted.
The worm mesh can be set by adjusting the worm mesh screws (A) and opposing grub screws (B) at the
opposite end to the slow-motion control shaft.
The worm block screws (C) should remain tightened. (Approx. 2Nm torque setting)
Start with the worm mesh screws (A) and opposing grub screws (B) loosened off. The slow motion shaft should
turn freely with virtually no resistance. You may also feel a small amount of free backlash in the axis.
Make very small inward adjustments equally to both worm mesh screws (A) and at the same slowly rotate the
slow-motion control to feel when the resistance changes.
Once a very small amount of additional resistance can be felt on the slow motion control, this is the point where
the worm is just coming in to contact with the wheel gear and the mesh is now initially set. Gently tighten the
opposing grub screws (B) in to contact to lock the worm block in position.
Further small adjustments to the mesh can be made depending on the user’s preference and telescope
configuration.
Cleaning
When required wipe over with a clean cloth preferably microfiber. Don’t use strong chemical cleaning solutions.
Maintenance.
It is advisable to re-grease the worm wheel gearing every 12-24 months depending on use and environmental
conditions.
We recommend Aeroshell 33 or compatible grease.
Remove any telescopes from the mount. Warning -If the worm block is removed whilst a telescope is mounted
the axis will be free to turn uncontrollably !
Remove the 4 x M4 cap screws holding the worm block and lift away from the axis body.
Clean the old grease from both the worm and wheel gear. A tooth brush is ideal for this.
Once clean,re-grease the wheel with Aeroshell33 or similar with sufficient grease to fill the gap in each of teeth
on the wheel gear. Apply a thin coating to the central section of the worm too. Don’t over-grease.
Replace the worm block taking care to engage the worm in to the wheel teeth and then replace the 4 x M4x12
cap screws in to the worm block. Do not tighten these until you are sure the worm is properly meshed into the
wheel gear.
Re-set the worm mesh as per the procedure above.
For further information or advice about using or adjusting the AZ100 please e-mail Rowan Astronomy at
sales@rowanastronomy.com or contact us on our office number +44 (0) 1295 251188
A .pdf version of this instruction sheet with higher resolution photos is available in the support section of
www.rowanastronomy.com
Other manuals for AZ100
3
Other Rowan Astronomy Telescope manuals
