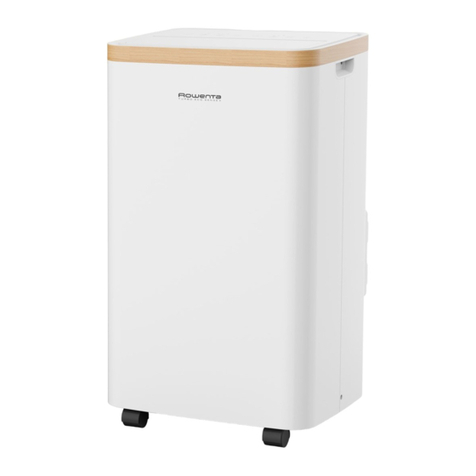
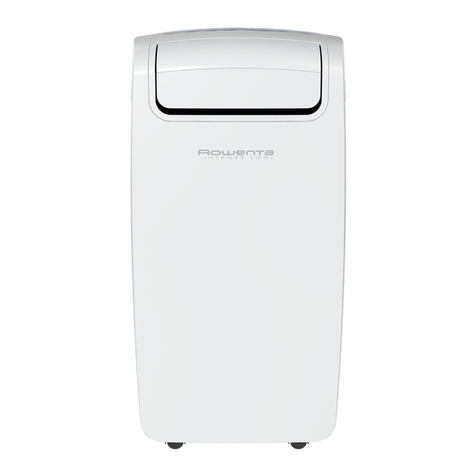
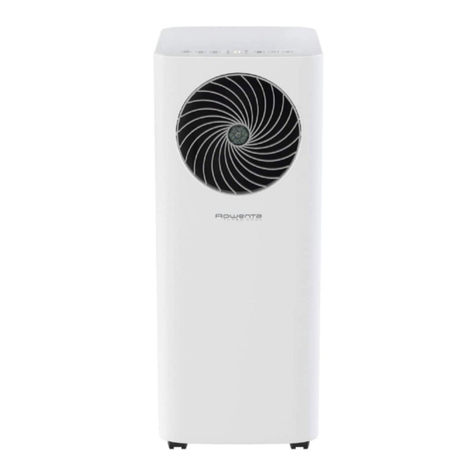
Rowenta RWAC1900C User manual

CLIMATISEUR
IDRAAGBARE AIRCONDITIONER
PT
ES
NL
FR
EN

WARNINGS
2
EN
PLEASE READ THE FOLLOWING INSTRUCTIONS
CAREFULLY BEFORE USING THE APPLIANCE AND
KEEP FOR FUTURE REFERENCE.
• This appliance is intended for domestic household use only
and should not be used for any other purpose or in any
other application, such as for non-domestic use or in a
commercial environment.
• This appliance can be usedby children aged from 8 years
and above and persons with reduced physical, sensory or
mental capabilities or lack of experience and knowledge if
they have been given supervision or instructionconcerning
use of the appliance in asafe way and understand the
hazards involved. Children shall not play with the
appliance. Cleaning and user maintenance shall not be
made by children without supervision.
• If the supply cord is damaged, it must be replaced by the
in order to avoid a hazard.
• For the details concerning the method of cleaning, please
see section “Cleaning and Maintenance” on pages 13&14.
• The battery must be removed from the appliance before it is
scrapped.
• The battery is to be disposedof safely.
• Batteries are to be inserted with the correct polarity.
• Exhausted batteries are to be removedfrom the product.
• Attention should be drawn to the environmental aspects of
battery disposal. Don’t throw used batteries in dustbin.
Please contact your retailer in order toprotectthe
environment.
• The batteries (batteries installed) shall not be exposed to

3
EN
• Refrigerant leakage contributes to climate change.
Refrigerant with lower global warming potential (GWP)
would contribute less to global warming than a refrigerant
with higher GWP, if leaked to the atmosphere.
• This product contains a refrigerant uid with a GWP equal
to 3. This means that if 1 kg of this refrigerant uid would be
leaked to the atmosphere, the impact on global warming
would be 3 times higher than 1 kg of CO2, over a period of
100 years. Never try to interfere with the refrigerant circuit
yourself or disassemble the product yourself and always ask
a professional.
• For disposal of the appliance:
To prevent possible harm to the environment or human
health from uncontrolled waste disposal, recycle the
appliance responsibly to promote the sustainable reuse of
material resources, the refrigerants and the ammable
insulation blowing gases. The disposal should only be done
through public collection points; contact the waste
treatment center nearest your home for more details on the
correct procedures for disposal.
• For installation, servicing:
The appliance should be placed on a horizontal oor and
keep the ventilation freely.
Don’t try to replace or repair any components by yourself,
ask the service agency for help if necessary.
• For handling:
Always handle the appliance to avoid any damage.
• This product contains non-uorinated greenhouse gas
(hermetically sealed) which is dangerous for the
environment and contributes to global warming if
released to the atmosphere.
• Refrigerant type: R290 Global warming potential (GWP): 3

4
IMPORTANT SAFETY INSTRUCTIONS EN
• Only use the appliance in the upright position on a at level
surface and at least 30 cm from the wall or any objects.
• Read all instructions.
• To protect against re, electric shock and personal injury, do
not immerse cord, plugs, or the unit in water or other liquid.
• Turn o and disconnect the appliance from the mains
socket when it is not in use and before cleaning.
• Transport and store the appliance in an upright position only.
• Always place the appliance on a stable, level surface.
• Do not cover or insert any objects into the air inlet and/or
outlet.
• Do not use the appliance in a wet room, such as a bathroom
or laundry room to avoid the risk of electrical shocks.
• Do not place articles on the appliance.
• Do not use the appliance with wet or
damp hands.
• Do not use the appliance in the presence
of ammable substances or vapours such
as alcohol, insecticides, petrol, etc.
• Do not use the plug to start and stop the
appliance. ALWAYS use the control panel
to start and stop the appliance.
• The lter must be used with the appliance
at all times.
• Be sure to drain water with the drain tube
connected to the middle drainage point
when the appliance is operated in heating
mode.

5
EN
• The batteries should only be replaced by adults. Do not allow
children to use the remote control unless the battery cover is
attached.
• Replace the battery only with the same type. The batteries
used in the remote control are two AAA 1.5V batteries which
are accessible and can be replaced.
Battery handling and usage
Remote control batteries (included):

4
3
1
2
5
12
11
10
9
87
6
1. Control panel
2. Louver
3. Caster
4. Carrying handle (on both sides)
5. Upper air inlet grille
6. Air outlet grille
7. Power cord outlet
8. Power cord wraps
9. Bottom drainage point
10. Power plug sockets
(use only when storing the appliance)
11. Lower air inlet grille
12. Upper drainage point
Unit Adaptor *Screw and anchor
(only for wall installation)
*Security Bracket
and Screw
*Window Slider
Adaptor
*Wall Exhaust
Adaptor A
(only for wall
installation)
*Window Slider A
*Window Slider B
Drain Hose
Wall Exhaust Adaptor B(with cap)
(only for wall installation)
Power Cord Buckle
Remote Control
and Battery
*Foam Seal A (Adhesive)
*Foam Seal C (Non-adhesive)
*Foam Seal B (Adhesive)
Exhaust Hose
*Bolt
NOTE: Items with * are optional. Slight variations in design may occur.
EN
6

CONTROL PANEL
Buttons:
+/-
Swing Setting timer Setting mode Adjusting
temperature or
time
Setting fan
speed
Sleep mode ON/OFF
Indicator lights:
Timer on Timer o
Dehumidification mode AUTO Fan mode
Cooling mode
Temperature in Celsius
High fan speed Medium fan speed
Temperature in Fahrenheit
Small fan speed
Sleep mode Power ON
REMOTE CONTROL
Buttons:
Adjusting
temperature
Setting mode Power ON Setting fan speed
Swing
Setting timer ON
Sleep mode
Swinging display blacklight on/o
Short cut
Setting timer OFF
Battery installation: Remove the cover on the back of the remote control and insert two batteries with“+”and “-”marks
correctly aligned.
Caution: Remove the batteries if the remote control is not in use for long periods of time.
The functions work the same as the control panel of the appliance.
7
EN

8
INSTALLATION
This appliance is a portable air conditioner, which can be moved from room to room.
EN
Windows Installation Kit
1. Install the unit adaptor and window slider adaptor on both sides of the exhaust hose.
2. Connect the exhaust hose assembly to the back of the appliance. Slide in the hose until it is locked in place.
3. Adjust the window sliders as per width or height of your window and insert the supplied bolt to fix at the desired position.
There is a hole where the exhaust hose will be inserted. Make sure this hole is not blocked.
4. Cut the foam seals A and B to the proper lengths and attach them to the window frame.
INSTALLATION
Exhaust hose
Unit adaptor
Hook
Unit adaptor
Hole
Window slider A Window slider B
Bolt
Lower groove Make sure the unit adaptor is
inserted into the lower groove
of the air outlet.
Hook groove
Window slider adaptor
Exhaust hose assembly
Foam seal B
(shorter)
Foam seal A Foam seal A
OR
Foam seal B
(shorter)
Note: The window kit is only designed to be installed with sliding windows.
The window kit is not designed or to be used with casement style windows.

9
EN
5. Connect the window slider assembly to the window.
6. Cut the non-adhesive foam seal C to match the width (or height) of the window. Insert the seal between the glass and
the window frame to prevent air and insects from getting into the room.
7. If desired, install the security bracket with 2 screws supplied.
8. Insert the window slider adaptor into the hole of the window slider.
OR
OR
OR
OR
Window slider A Window slider B

EN
Wall Installation Kit
1. Install the unit adaptor and wall exhaust adaptor A on both sides of the exhaust hose.
Exhaust hose
Unit adaptor
2. Connect the exhaust hose assembly to the back of the appliance.
3. Cut a 125mm hole into the wall for the wall exhaust adaptor B.
4. Secure the wall exhaust adaptor B to the wall using the supplied anchors and screws.
5. Connect the exhaust hose assembly to the wall exhaust adaptor B.
Wall exhaust adaptor A
Exhaust hose assembly
Expansion anchor position
Wall exhaust adaptor B
Adaptor cap
NOTE: Do not bend the exhaust hose.
NOTE: Cover the hole in the
wall using the adaptor cap
when not in use.
10

OPERATION
Plug the appliance into the mains socket.
Turning ON/OFF
Repeatedly press to select the desired working mode: automatic,
The indicator of your selected mode will illuminate.
Mode selection
When the fan ( ) and dehumidi cation ( ) modes are selected, the
display will show the ambient room temperature.
Repeatedly press +/- on the control panel or / on the remote to set the temperature.
The display will show the temperature you set in auto ( ), and cooling ( ) modes.
Adjustable temperature range:
30°C (86°F) max.
17°C (62°F) min.
The temperature can be displayed in degrees Fahrenheit or degrees Celsius.To change the display from one
to the other, press and hold + and - on the control panel at the same time for about 3 seconds.
Setting the temperature
Repeatedly press to select the fan speed.
The speed indicator light will illuminate to indicate which speed setting is in use.
If the appliance is in auto ( ) and dehumidification ( ) modes, you can not select the fan
speed.
Setting the fan speed
You can set the timer for both delay start and delay stop.
Programming the timer for ON – when the appliance is OFF.
Press on the control panel or on the remote control.The timer on indicator light will illumiante on the
control panel.
Repeatedly press or hold down +/- on the control panel or on the remote control to change the time in half an hour
increments up to 10 hours, and then in 1 hour increments up to 24 hours.
The set time will be con rmed after about 5 seconds and then the delay start timer will start.
When the set time has been reached, the appliance will turn on automatically.
Setting the timer
Programming the timer for OFF – when the appliance is operating.
illuminate on the control panel.
On the control panel On the remote control
EN
11

SWING
AUTOMATICALLY
To cancel the timer setting
Press or hold down +/- on the control panel or on the remote control until either remote display or the display of the
control panel shows“0.0”.
Swing opeartion
On the control panel On the remote control
Repeatedly press or hold down +/- on the control panel or on the remote control to change the time in half an hour
increments up to 10 hours, and then in 1 hour increments up to 24 hours.
The set time will be confirmed after about 5 seconds and then the delay stop timer will start.
When the set time has been reached, the appliance will turn o automatically.
Sleep operation
The sleep function adjusts the set temperature of the appliance to the thermal needs of the body falling asleep.
Press to operate the sleep mode. The sleep indicator light will illuminate.
The set temperature will increase (cooling) or decrease (heating) 1°C/2°F after about 30 minutes.The temperature will
then increase or decrease by another 1°C/2°F after an additional 30 minutes.This new temperature will be maintained for
about 7 hours before it returns to the originally selected temperature.
NOTE:This function is unavailable in fan and dehumidification modes.
To cancel the function, press .The sleep indicator light will go out.
When you turn on the appliance, the louver will swing and stop at a certain angle.
You can press to let the louver swing automatically.
Press again when you want the louver stop at a desired angle.
Switching display backlight ON/OFF (remote control only)
If you prefer to switch the display backlight o, press .
Press again the backlight will switch on.
Reset (remote control only)
Once the pinhold button is pressed, all settings will be cancelled and
the remote control will return to default settings.
DRAINAGE
When the internal water tank is full the display will show“P1”.
To empty the water tank do the following:
1. Switch o the appliance and remove the plug from the mains socket.
2. Place a water tray (not supplied) on the oor underneath the bottom drainage point.
3. Remove the drain cap and rubber plug from the drain and let the water run out.
4. Replace the rubber plug and drain cap, plug the appliance into the mains socket, and switch the appliance on.
•“P1”will disappear on the display.
RUBBER PLUG AND
DRAIN CAP
EN
12

If you wish to operate the appliance with no need to empty the water tank, please:
• Remove the drain cap and rubber plug and retain for future use.
• Connect one end of the drain tube supplied to the bottom drainage point and locate the other end into a drain.
Continuous drainage
When you need operating this appliance in high humidity, during the dehumidification
or cooling mode, connect the drain tube to this appliance.
• Remove the drain cap from the upper drainage point.
• Connect one end of the drain tube onto the drainage point and
extend with extra water tube (not supplied) if needed.
• Place the other end of the drain tube in a normal drain. Make sure
that the tube is free from twists and bends.
NOTE:The drain must be at or below the outlet level.
CLEANING AND MAINTENANCE
Cleaning the housing
Clean the housing with a slight damp cloth.
Never use chemical or abrasive cleaning agents.
Cleaning the lters
•The air conditioner is equipped with two filter to remove dust particles:
A filter in the upper air inlet.
A filter in the lower air inlet.
• Remove the upper grille and then take out the upper filter which is behind the grille.
• Loosen a screw on the lower grille and then remove the lower filter.
•The filter should be cleaned regularly. Use a vacuum cleaner or tap the filter lightly to remove loose dust and dirt
from the filter and then rinse thoroughly under running water. Dry thoroughly before replacing.
NOTE: Never use the air conditioner without the filter.
Storage
• Drain all water in the appliance before completely
operating the appliance on fan mode for a few hours,
to thoroughly dry the inside of the appliance.
• Clean the filter.
•Wrap the power cord and then insert the power plug
into the power plug sockets at the rear of the appliance.
• Remove the batteries from the remote control.
• Place the appliance in a dry place.
UPPER FILTER
REMOVETHE SCREW, THENTAKE
THE LOWER FILTER OUT.
POWER PLUG SOCKETS
EN
13

TROUBLESHOOTING
Never try to repair or dismantle the air conditioner yourself.
The battery is to be disposed of safely.
Dierent types of batteries or new and used batteries are not to be mixed.
Batteries of the same or equivalent type as recommended are to be used.
Batteries are to be inserted with the correct polarity.
Exhausted batteries are to be removed from the product.
Attention should be drawn to the environmental aspects of battery disposal.
Don’t throw used batteries in dustbin. Please contact your retailer in order to protect
the environment.
The batteries (batteries installed) shall not be exposed to excessive heat such as
sunshine, fire or the like.
Problem Possible Cause Possible Solution
The air conditioner does
not function.
No power supply.
“P1” is shown on the display.
The room temperature is lower than
the selected temperature.
Connect to a functioning outlet
and switch on.
Empty the internal water tank.
Change temperature selection.
The air conditioner seems
to have little cooling eect.
In direct sunlight.
Windows or doors open, many
people or a heat source in the room.
Dirty filters.
The room temperature is lower than
the selected temperature.
The room temperature is lower than
the selected temperature.
The room temperature is lower than
the selected temperature.
Air inlet or air outlet blocked.
Close curtains.
Close doors and windows, remove
the heat sources, and place an
extra air conditioner.
Clean the filters.
Change temperature selection.
Remove the blockage.
The air conditioner is noisy. The appliance stands uneven. Place the appliance on an even, solid
surface (less vibrations).
The remote control does
not function.
Distance too great.
The remote control signal is not
detected by the control panel.
The batteries are drained.
Make sure the remote control is
correctly aimed at the control panel.
Replace the batteries.
EN
14

Error codes
Display Cause Solution
E1
E2
E3
E4
The room temperature sensor has failed.
The evaporator temperature sensor has
failed.
The condenser temperature sensor has
failed.
The display panel communication has failed.
Unplug the appliance and
plug it back in. If
error repeats, call for service.
TECHNICAL DATA
EN
15
Product che
Trade mark
ROWENTA
model
RWAC1900C
Energy eciency class
A
Description
Symbol
Value
Unit
Rated capacity for cooling
P
rated
for
cooling
2.7
KW
Rated power input for cooling
P
EER
0.97
KW
Rated Energy eciency ratio
EERd
2.8
-
Power consumption in
thermostat-o mode
P
TO
-
W
Power consumption in standby
mode
P
SB
0.46
W
Electricity consumption of single
duct appliances
QSD
1.0
kWh/h
Energy consumption 1.0 kWh per 60 minutes, based on standard test results. Actual energy
consumption will depend on how the appliance is used and where it is located.
Sound power level
L
WA
62
dB(A)
Global warming potential
GWP
3
kgCO
2
eq.
Refrigerant leakage contributes to climate change. Refrigerant with lower global warming
potential (GWP) would contribute less to global warming than a refrigerant with higher
GWP, if leaked to the atmosphere. This appliance contains a refrigerant uid with a GWP
equal to 3. This means that if 1 kg of this refrigerant uid would be leaked to the
atmosphere, the impact on global warming would be 3 times higher than 1 kg of CO2, over
a period of 100 years. Never try to interfere with the refrigerant circuit yourself or
disassemble the product yourself and always ask a professional.
(Refrigerant: R290)
Contact detail for obtaining more
information
Etablissements Darty & ls ©
129 Avenue Gallieni, 93140 Bondy, France
Website: www.darty.com

Fuse
Circuit Diagram
Type: 4T, Voltage: 250V, Current:3.15A
Type: 334, Voltage: 250V, Current:3.15A
EN
CN6
ION
GREEN(OR Y/G)
WHITE(OR BLUE)
BLACK(OR BROWN)
POWER
RY1
SW1
CN4
RED
OPTIONAL
CN2
OPTIONAL
MOTOR
~
M
OPTIONAL
SW2
CN5
Y/G
P3 P2
N
DISPLAY BOARD
CN3
CN1
WIFI
CN2
CN15
Y/G
REMOTE BOARD
M
~
UP FAN
Y/G
DOWN FAN
M
~
Y/G
TRANSFORMER
EL
SU
YELLOW
POWER BOARD
CN2
CN1
RED
CAP
COMPRESSOR
BLACK
BLUE
M
~
BLUE
Y/G
PUMP
~
M
M
SWING
OPTIONAL
RED
OPTIONAL
OPTIONAL
CN23
CN25
3
4(5)
CN27
P1
UP FCAP
DOWN FCAP
2
2
RY2
HEATER
16020600001194
CN26
4-VAVLE
P7
RED
BLACK(BLUE)
BLACK
OPTIONAL
OPTIONAL
OPTIONAL
OPTIONAL
BLACK(BLUE)
OPTIONAL
Notes:
This symbol indicates the element is
optional,the actual shape shall prevail
CN14
CN8
OPTIONAL
UP FCAP
2
OPTIONAL
CN1
CN10
CN9
OPTIONAL
OPTIONAL
HUM
M
SWING
OPTIONAL
CN4
CN3
CN3CN3
WIFI
CN1
OPTIONAL
OPTIONAL
OPTIONAL
DISPLAY BOARD
OPTIONAL OPTIONAL
OPTIONALOPTIONAL
16

DISPOSAL
As a responsible retailer we care about the environment.
As such we urge you to follow the correct disposal procedure for the appliance, packaging materials and if applicable,
batteries.
This will help conserve natural resources and ensure that it is recycled in a manner that protects health and the environment.
You must dispose of this appliance and its packaging according to local laws and regulations.
Because this appliance contains electronic components and may contain batteries, the appliance and its accessories must be
disposed of separately from household waste when the appliance reaches its end of life.
Contact your local authority to learn about disposal and recycling.
The appliance and if applicable, batteries should be taken to your local collection point for recycling. Some collection points
accept appliance free of charge.
We apologise for any inconvenience caused by minor inconsistencies in these instructions, which may occur as a result of
product improvement and development.
Etablissements Darty & fils ©,
129 Avenue Gallieni, 93140 Bondy, France 01/11/2019
17

AVERTISSEMENTS
FR
VEUILLEZ LIRE ATTENTIVEMENT LES INSTRUCTIONS
SUIVANTES AVANT D’UTILISER L’APPAREIL ET
CONSERVEZ-LES POUR TOUTE FUTURE RÉFÉRENCE.
• Cet appareil est exclusivement destiné à une utilisation
domestique et ne doit pas être utilisé d’une autre manière
ou pour d’autres applications, notamment dans un
environnement non-domestique ou commercial.
• Cet appareil peut être utilisé par des enfants âgés d'au
moins 8 ans et par des personnes ayant des capacités
physiques, sensorielles ou mentales réduites ou dénuées
d’expérience ou de connaissance, s'ils (si elles) sont
correctement surveillé(e)s ou si des instructions relatives à
l'utilisation de l'appareil en toute sécurité leur ont été
données et si les risques encourus ont été appréhendés.
Les enfants ne doivent pas jouer avec l’appareil.
Le nettoyage et l'entretien par l'usager ne doivent pas être
• Si le câble d’alimentation est endommagé, il doit être
remplacé par le fabricant, son service après-vente ou des
• En ce qui concerne la méthode du nettoyage, référez-vous
à la section “Nettoyage et entretien” en pages 29&30.
• Les piles doivent être retirées de l’appareil avant de mettre
celui-ci au rebut.
• Les piles doivent être mises au rebut d’une manière
appropriée.
• Les piles doivent être insérées en respectant le sens des
polarités.
• Les piles usées doivent être enlevées du produit.
18

• Pour la mise au rebut de l’appareil :
Pour éviter toute nuisance envers l’environnement ou la
santé humaine causée par la mise au rebut non contrôlée
des déchets électriques et desagents moussants
pour promouvoir la réutilisation des ressources matérielles.
La mise au rebut doit être faite de façon sûre dans des
centre de traitement des déchets le plus près de chez vous
pour plus de détails sur les procédures correctes de mise au
rebut.
FR
• Veillez au respect de l’environnement lorsque vous mettez
au rebut des piles usagées. Ne jetez pas les piles usagées à
la poubelle. Renseignez-vous auprès de votre revendeur
•Les piles (ou batterie intégrée) ne doivent pas être exposées
•
hermétiquement) dangereux pour l’environnement etqui
Ce produit contient du gaz à eet de serre non-uoré (scelle
l’atmosphère. Type de réfrigérant : R290 Potentiel de
• La fuite de réfrigérant contribue au changement
climatique. Un réfrigérant au PRG moins élevé contribue
plus élevé, s’il est relâché dans l’atmosphère.
• Ce produit contient un liquide réfrigérant dont le PRG est
était relâché dansl’atmosphère, alors son impact sur le
CO2l’était, sur une période de 100 ans. Ne jamais tenter de
démonter le produit. Demandez toujours l’aide d’un
professionnel.
à une chaleur excessive, parexemple la lumière du soleil,
un feu, etc.
19

FR
• Pour l’installation, l’entretien :
L’appareil doit être installé sur un sol horizontal en assurant
que les ouvertures d’aération sont correctement dégagées.
N’essayez pas de remplacer ou de réparer vous-même une
partie ou un composant de l’appareil ; demandez de l’aide
à un personnel professionnel et qualié, si besoin.
• Pour la manipulation :
Manipulez toujours l’appareil avec précaution an d’éviter
d’endommager celui-ci.
20
Table of contents
Languages:
Other Rowenta Air Conditioner manuals