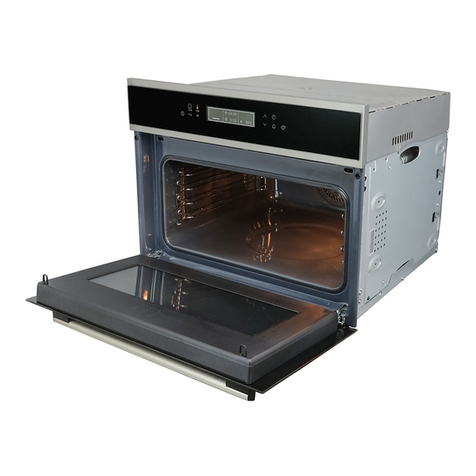
Royal Sovereign International RCMW25-1000SS User manual

Royal Sovereign International, Inc.
RCMW25-1000SS
COMMERCIAL
MICROWAVE OVEN
Owner's Manual
Please read and retain these instructions..ASUmoc.ngierevoslayor.wwwotogesaelp,tcudorpruoyretsigeroT Click the Customer Support Tab then Registration Tab.
www.royalsovereign.ca
Page en Françaisl 17

COMMERCIAL MICROWAVE OVEN
INTRODUCTION
Thank you for choosing Royal Sovereign commercial microwave oven, RCMW25-1000SS. This commercial microwave
oven can be set-up in just minutes and easily operated to satisfy your food preparation needs. This manual will
provide you information for operation, use, and maintenance. Please take a few moments to read the instructions
thoroughly and always follow the precautions.
PRECAUTIONS TO AVOID POSSIBLE EXPOSURE
TO EXCESSIVE MICROWAVE ENERGY
1. Do not attempt to operate this oven with the door-open since open-door operation can result in harmful
exposure to microwave energy. It is importantnot to defeator tamper with the safety interlocks.
2. Do not place anyobjectbetween the oven front face and the door or allow soil or cleaner residue to accumulate
on sealing surfaces.
3. Do not operate the oven if it is damaged. It is particularly important that the oven door close properly and that
there isno damage tothe:
a. Door (bent),
b. Hinges and latches (broken or loosened),
c. Door seals and sealing surfaces.
4. The oven should not be adjusted or repaired by anyone except properly qualified service personnel.

RCMW25-1000SS
3
IMPORTANT SAFETY INSTRUCTIONS
When using electrical appliances, basic safety precautions should be followed, including the following:
WARNING: To reduce the risk of burns, electric shock, fire, and injury to personsor exposure to excessive microwave energy:
1. Read all instructionsbefore using the appliance.
2. Read and follow the specific "PRECAUTIONS TO AVOID POSSIBLE EXPOSURE TO EXCESSIVE MICROWAVE ENERGY" on page 2.
3. This appliance must be grounded. Connect only to properly grounded outlet. See "GROUNDING INSTRUCTIONS” on page 5.
4. Install or locate this appliance only in accordance with the provided installation instructions.
5. Some products such as whole eggsand sealed containers-for example, closed glass jars- are able to explode and should
notbe heated in this oven.
6. Use thisappliance only for its intended use as described in thismanual. Do notuse corrosive chemicalsor vapors in this appliance.
This type of oven is specifically designed to heat, cook, or dryfood. It is notdesigned for industrial or laboratory use.
7. As with anyappliance, close supervision is necessary when used by children.
8. To reduce the risk of fire in the oven cavity:
a. Do notovercookfood. Carefully attend appliance when paper, plastic, or other combustible materials are placed inside the
oven to facilitate cooking.
b. Remove wire twist-ties from paper or plastic bagsbefore placing bag in oven.
c. If materialsinside the oven should ignite, keep oven door closed, turn oven off, and disconnect the power cord or shut off power
at the fuse or circuitbreaker panel.
d. Do not use the cavity for storage purposes. Do notleave paper products, cooking utensils or food in the cavity when not in use.
9. Liquids, such as water, coffee, or tea can be overheated beyond the boiling point without appearing to be boiling due tosurface tension
of the liquid. Visible bubbling or boiling when the container isremoved from themicrowave oven is not always present.
THIS COULD RESULT IN VERY HOT LIQUIDS SUDDENLY BOILING OVER WHENA SPOONOR OTHER UTENSIL ISINSERTED INTO THE LIQUID.
To reduce the risk of injury to person:
1) Do notoverheat the liquid.
2) Stir the liquid both before and halfway through heating it.
3) Do notuse straight-sided containers with narrow necks.
4) After heating, allow the container to stand in the microwave oven for a short time before removing the container.
5) Use extreme care when inserting a spoon or other utensil into the container.
10. Do not heatoil or fat for deep-frying. It is difficult to control the temperature of oil in microwave oven.

4
11. Pierce foods with heavy skins such as potatoes, whole squash, applesand chestnuts before cooking.
12. The contents of feeding bottlesand baby jars should be stirred or shaken and the temperature should be checked before serving
in order to avoid burns.
13. Cooking utensils may become hotbecause of heat transferred from the heated food. Potholders may be needed to handle the utensil.
14. Do not cover or blockany openings on the appliance.
15. Do not store or use this appliance outdoors. Do not use thisproduct near water, for example, near a kitchen sink, in a wet basement,
near a swimming pool, or similar locations.
16. Do not operate thisappliance if ithasa damaged cord or a plug, if it is not working properlyor if it has been damaged or dropped.
17. Do notimmerse cord or plug in water.
Keep cord away from heated surface. Do notlet cord hang over edge of table or counter.
18. Use only thermometers, which are specifically designed for use in microwave ovens.
19. Do notoperate any heating or cooking appliance beneath thisappliance.
20. Be certain the glass tray and roller ringsare in place when you operate the oven.
21. This appliance should be serviced onlybyqualified service personnel, contactnearest authorized service facility for examination,
repair, or adjustment.
22. When cleaning surfacesof door and oven that comes together on closing the door, use only mild, nonabrasive soaps, or detergents
applied with a sponge or softcloth.
23. This equipment generates, uses and can radiate radio frequency energyand, if not installed and used in accordance with the instructions,
may cause harmful interference to radio communications. However, there isno guarantee that interference will not occur in a particular
installation. If thisequipmentdoes cause harmful interference to radio or television reception, which can be determined by turning the
equipment off and on, the user is encouraged to try to correct the interference by one or more of the following measures:
• Reorient or relocate the receiving antenna.
• Increase the separation between the equipment and receiver.
• Connect the equipment into an outlet on a circuit different from that towhich the receiver is connected.
• Consult the dealer or an experienced radio/TV technician for help.

RCMW25-1000SS
5
CONTENTS
PRECAUTIONS TO AVOID POSSIBLE EXPOSURE
TO EXCESSIVE MICROWAVE ENERGY 2
IMPORTANT SAFETY INSTRUCTIONS 3
SAVE THESE INSTRUCTIONS
INSTALLATION GUIDE ∙∙∙∙∙∙∙∙∙∙∙∙∙∙∙∙∙∙∙∙∙∙∙∙∙∙∙∙∙∙∙∙∙∙∙∙∙∙∙∙∙∙∙∙∙∙∙∙∙∙∙∙∙∙∙∙ 6
GROUNDING INSTRUCTIONS∙∙∙∙∙∙∙∙∙∙∙∙∙∙∙∙∙∙∙∙∙∙∙∙∙∙∙∙∙∙∙∙∙∙∙∙∙∙∙∙∙∙∙∙∙∙ 6
UTENSILS GUIDE∙∙∙∙∙∙∙∙∙∙∙∙∙∙∙∙∙∙∙∙∙∙∙∙∙∙∙∙∙∙∙∙∙∙∙∙∙∙∙∙∙∙∙∙∙∙∙∙∙∙∙∙∙∙∙∙∙∙∙∙∙∙ 7
COOKING TECHNIQUES∙∙∙∙∙∙∙∙∙∙∙∙∙∙∙∙∙∙∙∙∙∙∙∙∙∙∙∙∙∙∙∙∙∙∙∙∙∙∙∙∙∙∙∙∙∙∙∙∙∙∙∙∙ 9
PARTS 10
CONTROL 10
DIGITAL DISPLAY ACTION INDICATORS 10
HOW TO SET THE OVEN CONTROLS 11
CLEANING AND CARE 14
SPECIFICATIONS 15
WARRANTY 16
CONTACT INFORMATION 16
PAGE EN FRANÇAIS 17
∙∙∙∙∙∙∙∙∙∙∙∙∙∙∙∙∙∙∙∙∙∙∙∙∙∙∙∙∙∙∙∙∙∙∙∙∙∙∙∙∙∙∙∙∙∙∙
∙∙∙∙∙∙∙∙∙∙∙∙∙∙∙∙∙∙∙∙∙∙∙∙∙∙∙∙∙∙∙∙∙∙∙∙∙∙∙∙∙∙∙∙∙
∙∙∙∙∙∙∙∙∙∙∙∙∙∙∙∙∙
∙∙∙∙∙∙∙∙∙∙∙∙∙∙∙∙∙∙∙∙
∙∙∙∙∙∙∙∙∙∙∙∙∙∙∙∙∙∙∙∙∙∙∙∙∙∙∙∙∙∙∙∙∙
∙∙∙∙∙∙∙∙∙∙∙∙∙∙∙∙∙∙∙∙∙∙∙∙∙∙∙∙∙∙∙∙∙∙∙∙∙∙
∙∙∙∙∙∙∙∙∙∙∙∙∙∙∙∙∙∙∙∙∙∙∙∙∙∙∙∙∙∙∙∙∙∙∙∙∙∙∙∙∙∙∙
∙∙∙∙∙∙∙∙∙∙∙∙∙∙∙∙∙∙∙∙∙∙∙∙∙∙∙∙∙∙
∙∙∙∙∙∙∙∙∙∙∙∙∙∙∙∙∙∙∙∙∙∙∙∙∙∙∙∙∙∙∙∙∙∙∙
∙∙∙∙∙∙∙∙∙∙∙∙∙∙∙∙∙∙∙∙
∙∙∙∙∙∙∙∙∙∙∙∙∙∙∙∙∙∙∙∙

6
SAVE THESE INSTRUCTIONS
INSTALLATION GUIDE
1. Make sure that all the packing materials are removed from the inside of the door.
2. Check the oven for anydamage, such asmisaligned or bentdoor, damaged door seals and sealing surface, broken or loose door
hinges and latchesand dents inside the cavity or on the door. Ifthere is any damage, do notoperate the oven but contact qualified
service personnel.
3. Thismicrowave oven must be placed on a flat, stable surface to hold its weight and the heaviest food likely to be cooked in the oven.
4. Do not place the oven where heat, moisture, or high humidity are generated, or near combustible materials.
5. For correctoperation, the oven must have sufficientairflow. Allow20cm of space above the oven, 10cm at back and 5cm at both sides.
Do not cover or blockanyopenings on the appliance. Do not remove feeton which oven stands.
6. Make sure that the power supplycord is undamaged and doesnotrun under the oven or over any hot or sharp surface.
7. The socket must be readily accessible so thatitcan be easilyunplugged in an emergency.
GROUNDING INSTRUCTIONS
This appliance must be grounded. In the event of an electrical short circuit, grounding reduces risk of electric shock by providing an escape
wire for the electriccurrent.
WARNING: Improper use of the grounding plug can result in a risk of electric shock.
Consulta qualified electrician or serviceman if the grounding instructionsare not completely understood, or if doubtexists as towhether
the appliance isproperlygrounded, and either:
1) If it is necessary to use an extension cord, use only a 3-wire extension cord that hasa 3-blade grounding plug and a 3-slot receptacle
that will accept the plug on the appliance. The marked rating of the extension cord shall be equal to or greater than the electrical rating of
the appliance.
This appliance must be connected to a grounded, metallic, permanent wiring system, or an equipment grounding conductor should be run
with the circuitconductorsand connected to the equipment grounding terminal or lead on the appliance.

RCMW25-1000SS
7
Electrical Requirements
The electrical requirements are a 120 volt 60 Hz, AC only, 20 amp. It isrecommended that aseparate circuit serving only the oven be
provided. The oven isequipped with a 3-prong grounding plug. It must be plugged into a wall receptacle that is properlyinstalled and
grounded.
Power Supply Cord
1. A shortpower supply cord is provided to reduce the risks resulting from becoming entangled in or tripping over a longer cord.
2. Longer cord sets or extension cordsare available and may be used if care is exercised in their use.
3. If long cord or extension cord isused:
a) The marked electrical rating of the cord set or extension cord should be at least as great as the electrical rating of the appliance.
b) The extension cord must be a grounding-type 3-wire cord, and The longer cord should be arranged sothat it will not drape over the
counter top or table top where it can be pulled on by children or tripped over unintentionally.
Notes: If you have any questionsabout the grounding or electrical instructions, consult a qualified electrician or service person.
Neither the manufacturer nor the dealer can acceptanyliability for damage tothe oven or personal injury resulting fromfailure to
observe the electrical connection procedures.
Radio or TV Interference
Should there be any interference caused by the microwave oven to your radio or TV, check that the microwave oven is on a different circuit,
relocate the radio or TVasfar away from the oven asfeasible or check position and signal of receiving antenna.
UTENSILS GUIDE
This section lists which utensilscan be used in the microwave, which oneshave limited use for short periods, and which ones should not be
used in the microwave.
Recommended
Microwave browning dish: Useto brown the exterior of smallitems such as steaks,chops, or pancakes.
Follow the directionsprovided with your browning dish.
Microwaveable plastic wrap: Useto retain steam. Leave a small opening for some steam to escape and avoid placing it directly on
the food.
Paper towels and napkins: Use for short-termheating and covering; these absorb excess moisture and prevent spattering.
Do not use recycled paper towels, which may contain metal and could ignite.

8
Glass and glass-ceramic bowls and dishes: Use for heating or cooking.
Paper plates and cups: Use for short-term heating at low temperatures.
Do not use recycled paper, which may contain metal and could ignite.
Wax paper: Use as a cover to prevent spattering.
Thermometers: Use only those labeled "Microwave Safe" and followall directions. Check the food in several places.
Conventional thermometers may be used on microwave food once the food has been removed from the oven.
Limited Use
Aluminum foil: Use narrow stripsof foil to preventovercooking of exposed areas. Using too much foil can damage your oven,
so be careful. You should keep distance of 1 inch (2.54cm) between aluminum foil and cavity.
Ceramic, porcelain, and stoneware: Usethese if theyare labeled "Microwave Safe". If they are notlabeled, test them to make sure
theycan be used safely.
Plastic: Use onlyif labeled "Microwave Safe". Other plastics can melt.
Not Recommended
Glass jars and bottles: Regular glass is too thin to be used in a microwave. It can shatter and cause damage and injury.
Paper bags: These are a fire hazard, exceptfor popcorn bags thatare designed for microwave use.
Styrofoam plates and cups: These can meltand leave an unhealthy residue on food.
Plastic storage and food containers: Containers such as margarine tubs can melt in the microwave.
Metal utensils: These can damage your oven. Remove all metal before cooking.
Note: Should you wish to check if a dish is safe for microwaving, place the empty dish in the oven and microwave on HIGH for 30 seconds.
A dish which becomesvery hot should notbe used.

RCMW25-1000SS
9
COOKING TECHNIQUES
Your microwave makes cooking easier than conventional cooking, provided you keep these considerations in mind:
Stirring
Stir foods such ascasserolesand vegetables while cooking to distribute heatevenly. Food at the outside of the dish absorbs more energy
and heats more quickly, so stir from the outside to the center. The oven will turn off when you open the door tostir your food.
Arrangement
Arrange unevenly shaped foods, such as chicken pieces or chops, with the thicker, meatier parts toward the outside of the turntable where
theyreceive more microwave energy. To preventovercooking, place delicate areas, such as asparagus tips, toward the center of the
turntable.
Shielding
Shield food with narrow strips of aluminum foil to preventovercooking. Areas thatneed shielding include poultry wing tips, the ends of
poultry legs, and cornersof square baking dishes. Use o nly small amounts of aluminum foil. Larger amounts can damage your oven.
Turning
Turn foodsover midway through cooking to expose all parts to microwave energy. This is especially important with large foods such as
roasts.
Standing
Foods cooked in the microwave build up internal heatand continue to cookfor a few minutes after heating stops. Letfoods stand to
complete cooking, especially foods such ascakes and whole vegetables. Roasts need this time to complete cooking in the center without
overcooking the outer areas. All liquids, such as soup or hot chocolate, should be shaken or stirred when cooking is complete. Let liquids
stand a momentbefore serving. When heating babyfood, stir well atremoval and test the temperature before serving.
Adding moisture
Microwave energy is attracted to water molecules. Food thatis uneven in moisture content should be covered or allowed tostand sothat
the heatdisperses evenly. Add a small amount of water to dryfood to help it cook.

10
PARTS
1. Door Safety Lock System
2. Oven Window
3. Control Panel
CONTROL
1. Digital display window
2. Power level pad
3. X2 pad
4. Programpad
5. Stop/Reset pad
6. Start pad
7. Number/Memory pads
DIGITAL DISPLAY ACTION INDICATORS
1. X2 indicating cooking in X2 feature
2. PROGindicating programming a cooking
3. Numbersindicating the cooking stage
4. Indicating power level used in cooking
1 2 3
4
1
2
7
3
4
5
6
X2 PROG 1 2 3
HI MED DEF
POWER
LEVEL
START
PROG
STO P/
RESET
X2
1
3
5
7
9
2
4
6
8
0
Commercial
1
23
X2 PROG 1 2 3
HI MED DEF
POWER
LEVEL
START
PROG
STOP/
RESET
X2
1
3
5
7
9
2
4
6
8
0
Commercial

RCMW25-1000SS
11
HOW TO SET THE OVEN CONTROLS
TIME AND POWER LEVEL COOKING
To set a cooking program
Selecta cooking power level and then use the number pads to set cooking time before touching the START pad. The longest cooking time is
99 minutes 99 seconds.
Touch POWER LEVEL Power Description
Once HI
Two timesMED
Three times DEF
For a single stage cooking, here isan example toset cooking power at full (HI) and cook for 3 minutes:
1. Touch POWER LEVEL pad once.
2. Touch number pads3, 0, 0.
3. Touch START pad.
MULTIPLE STAGES COOKING
Food may require different periods/stages cooking with different power levels and cooking times. You can set up to 3 stages cooking
manually.
For Stage 1 cooking
Set the first stage cooking according tothe steps above specified.
For Stage 2 cooking
Set the second stage cooking programming differentpower level and time, for example, power set at medium; cooking time 5 minutes.
To set the second stage cooking of medium power and 5 minutes time, after the above steps 1,2, do not touch the START pad, but do the
following.
1. Touch POWER LEVEL pad twice
2. Touch number pads5,0,0.
3. Touch START pad.

12
SAVE A COOKING TO A NUMBER KEY
For frequently used cooking program, you can save it to a number key and conveniently activate it by touching the number key and then
START pad.
Each of the number keysispre-set with a cooking program. In waiting mode, touch anyof the ten number pads, you are selecting a cooking
program, then press START pad to start the preset program.
The following are default settingsfor each of the number keys.
Number/Memory Pads1234567890
Preset Cooking Time :10:20:30:451:001:302:002:303:003:30
The user isfree to reset the cooking program stored under each of the ten number keys anytime. In order toset acooking program, which
may contain up to 3 stagesconsecutive cooking periods with different power levels, and to designate a number key tothis program, see the
example bellow:
To set medium power cooking for 8 min. and save it to number pad 5:
1. Touch PROGRAM once.
2. Press number pad 5.
3. Press POWER LEVEL twice to select MED.
4. Touch number pads8, 0, 0.
5. Press PROGRAM to save.
You can set atwo or three stages cooking program by repeating the steps 3-4 once or twice. After finished, press STOP/RESET to return to
waiting mode.
NOTE: If you want the oven to startimmediately after you touching anyof the number keys instead of after you touching the START pad,
press and hold down STOP/RESET for 5 sec until “P L” appears on display; now you don’t need to press START pad after selecting a
cooking program by touching anyof the number keys.
HOW TO USE THE X2 PAD
More cooking programs can be stored under the number keysby using the X2 function.
In waiting mode, press X2, any of the number keys, and the START pad, you can recall a preset cooking program as follows:
Number/Memory Pads1234567890
Preset Cooking Time :20:401:001:302:003:004:005:006:007:00

RCMW25-1000SS
13
X2 function can only program one stage cooking. After setting is finished, press STOP/RESET to return towaiting mode. The oven will start
after you touching X2, any of the number keysand then the START pad.
For example, to use the X2 function, and save a program of full power and 3 minutes cooking to number pad 8.
1. Touch PROGRAM once.
2. Touch X2 pad once.
3. Press number pad 8.
4. Press POWER LEVEL once.
5. Touch number pads 3, 0, 0.
6. Press PROGRAM tosave.
7. Press STOP/RESET button
To Test the programming just completed
i. Touch X2 Pad Once ii. Touch Number pad 8 iii. Press START
Note:If you want the oven to start immediatelyafter you touching any of the number keys instead of after you touching the START pad,
press and hold down STOP/RESET for 5 sec until “P L” appears on display; now you don’t need to press START pad after selecting
a cooking program by touching anyof the number keys.
COUNT OF OPERATIONS
You can read the countof how many times the oven hasbeen used. To do this,
1. Inwaiting mode, press and hold down STOP/RESET.
2. Touch POWER LEVEL pad. The number on display shows how many times the oven has been used.
This function is for the user to analyzethe usage of the oven and the traffic flowat a particular location where the oven is being used
commercially.
CHILD LOCK
In waiting mode, press and hold PROGRAM for 5 seconds. The oven is locked.
To release child lock.
Press and hold PROGRAM for 5 seconds, the oven goes to normal.

14
COOLING FEATURE
This microwave ovenhasa builtin automatic cooling function which activates automatically when the cooking time is set above 2 minutes.
After the cooking time is complete (above 2 minutes), the microwave oven fan will be on for about 3minutes to help cool the unit.
This automatic feature helps prolong the life of the microwave
CLEANING AND CARE
1. Turn off the oven and remove the power plug from the wall socket before cleaning.
2. Keep the inside of the oven clean. When food splatters or spilled liquids adhere to oven walls, wipe with a damp cloth. Mild detergent may be
used if the oven gets very dirty. Avoid the use of sprayand other harsh cleanersas they may stain, streak or dull the door surface.
3. The outside surfaces should be cleaned with a damp cloth. To prevent damage to the operating parts inside the oven, water should not be
allowed toseep into the ventilation openings.
4. Wipe the windowon both sides with a damp cloth to remove any spillsor spatters.
5. Do not allow the control panel to become wet. Clean with a soft, damp cloth. When cleaning the control panel, leave oven door open to
prevent oven from accidentally turning on.
6. If steamaccumulates inside or around the outside of the oven door, wipe with a soft cloth. This may occur when the microwave oven is
operated under high humidity conditions. In such case, it is normal.
7. It is occasionally necessary to remove the glass tray for cleaning. Wash the tray in warm sudsy water or in a dishwasher.
8. The roller ring and oven floor should be cleaned regularly to avoid excessive noise. Simply wipe the bottom surface of the oven with mild
detergent. The roller ring may be washed in mild sudsy water or dishwasher. When removing the roller ring from cavity floor for cleaning, be
sure to replace in the proper position.
9. Remove odorsfrom your oven by combining a cup of water with the juice and skin of one lemon in a deep microwaveable bowl, microwave
for 5 minutes. Wipe thoroughly and dry with a softcloth.
10. When itbecomes necessary to replace the oven light, please consulta dealer to have it replaced.
11. The oven should be cleaned regularlyand anyfood deposits removed. Failure tomaintain the oven in a clean condition could lead to
deterioration of the surface that could adversely affect the life of the appliance and possiblyresult in a hazardous situation.
12. Please do not dispose thisappliance into the domestic rubbish bin, it should be disposed tothe particular disposal center provided by the
municipalities.

RCMW25-1000SS
15
SPECIFICATIONS
Model Name RCMW25-1000SS
Power Consumption: 120V~60Hz, 1450W (microwave)
Output:
1000W
Operation Frequency:
2450MHz
Outside Dimensions(H×W×D):
12.3×20.5×17.1 (in)
Oven Cavity Dimensions(H×W×D):
8.4×13.2×14.3 (in)
Oven Capacity: 0.9cu.ft
Net Weight:
Approx. 39lb.

191 Superior Blvd.,Mississauga,ON L5T 2L6,CANADA
16
ONE YEAR LIMITED WARRANTY
Royal Sovereign International, Inc. warranties this product to be free from defects in material and workmanship to the original purchaser only
as outlined below.
Parts : Replacement of defective parts for 1 year from the date of customer purchase.
Compressor : 3-year warranty from the date of customer
purchase. Royal Sovereign will supply a replacement compressor (parts only), free of charge.
Labour : 1 year from the date of end user purchase.
This warranty only covers products that are properly installed, properly maintained, and properly operated in accordance with the instructions
provided. This limited warranty does not cover any failures or operating difficulties due to normal wear and tear, accident, abuse, misuse, alteration,
misapplication, improper installation, or improper maintenance and service by you or any third party.
Returned product will not be accepted without a Return Authorization number. To request a Return Authorization number, please visit us at
www.royalsovereign.com. All transportation costs for the return of damaged product or parts will be the responsibility of the purchaser. Return
defective product, inoriginal packaging, to the address below.
Royal Sovereign International, Inc. (and its affiliated companies) requires reasonable proof of your date of purchase from an authorized retailer
or distributor. Therefore, you should keep your receipt, invoice, or canceled check from the original purchase. The limited warranty shall be limited
to the repair or replacement of parts which prove defective under normal use and service within the warranty period.
Royal Sovereign International, Inc. (and its affiliated companies) SHALL HAVE NO LIABILITY WHATSOEVER TO PURCHASER OR ANY THIRD PARTY
FOR ANY SPECIAL, INDIRECT, PUNITIVE, INCIDENTAL,OR CONSEQUENTIAL DAMAGES. Some states do not allow the exclusion or limitation of incidental
or consequential damages so the above exclusion and limitations may not apply to you.
RS INTERNATIONAL CANADA INC.
TEL: +1) 905-461-1095 TF: +1) 866-961-6673
FAX: +1) 905-461-1096
www.royalsovereign.ca
ROYAL SOVEREIGN INTERNATIONAL, INC.
2Volvo Drive Rockleigh, NJ 07647 USA
TEL : +1) 800-397-1025
FAX : +1) 201-750-1022
www.royalsovereign.com

Royal Sovereign International, Inc.
RCMW25-1000SS
FOUR À MICRO-ONDES
COMMERCIAL
Guide de l'utilisateur
Veuillez lire et conserver ces directives.
Pour enregistrer votre produit, veuillez accéder au www.royalsovereign.com USA.
Cliquez sur l'onglet Customer Support (service à la clientèle), puis sur l'onglet Registration (enregistrement).
www.royalsovereign.ca
Page en Françaisl 17

FOUR À MICRO-ONDES COMMERCIAL
INTRODUCTION
Merci d'avoir choisi le four à micro-ondes commercial RCMW25-1000SS de Royal Sovereign. Cet appareil seconfigure
en Aseulement quelques minutes et fonctionne de sorte à répondre à vos besoins en matière de préparation des
aliments. Ce manuel contient desrenseignements sur le fonctionnement, l'utilisation et l'entretien. Veuillez
consacrer quelques instants à la lecture attentive des directiveset toujoursprendre les précautions indiquées.
PRÉCAUTIONS POUR ÉVITER LES RISQUES D'EXPOSITION
EXCESSIVE À L'ÉNERGIE DES MICRO-ONDES
1. Tenter de faire fonctionner le four pendantque le portillon est ouvert peut mener à une exposition dangereuse
à l'énergie des micro-ondes. Il est importantde ne pas contourner ou altérer lesdispositifs de verrouillage de
sûreté.
2. N'interposez aucun objetentre la face avantdu four et le portillon et ne laissez pas s'accumuler la saleté ou les
résidusde nettoyant sur les surfaces d'étanchéité.
3. Ne faites pas fonctionner le four s'il est endommagé. Il est particulièrement important que le portillon du four
soit correctement fermé et que ne soient pas endommagés :
a. le portillon (tordu);
b. lespentureset loquets (brisés ou lâches);
c. les joints d'étanchéité et surfaces d'étanchéité du portillon.
4. Seul un technicien de service adéquatementformé à cette fin doitrégler ou réparer le four.

RCMW25-1000SS
19
CONSIGNES DE SÉCURITÉ IMPORTANTES
Lorsde l'utilisation d'appareils électriques, desprécautionsde sécurité élémentaires doiventêtre prises, dont les suivantes :
AVERTISSEMENT: Pour diminuer lesrisquesde brûlure, de choc électrique, d'incendie et de blessures corporelles ainsi que l'exposition excessive à l'énergie
des micro-ondes :
1. Lisez toutes les directives avant d'utiliser l'appareil.
2. Lisez et suivez lesdirectives« PRÉCAUTIONS POUR ÉVITER L'EXPOSITION EXCESSIVE POSSIBLE À L'ÉNERGIE DES MICRO-ONDES »
à la page 18.
3. Cet appareil doit être mis à la terre. Ne le branchez que sur une prise de courant correctement mise à la terre. Reportez-vous à«DIRECTIVES DE MISE À LA
TERRE » à la page 22.
4. N'installez ou ne situez cet appareil que conformémentaux directivesd'installation fournies.
5. Certainsproduits comme les œufs entiersetles contenants scellés - par exemple, les pots en verre fermés - risquent d'exploser et ne doiventpas être
chauffésdans ce four.
6. N'utilisez cet appareil qu'aux fins prévuesindiquées dansce manuel. N'utilisez aucune substance chimique ou vapeur corrosive dans cet appareil.
Ce type de four est spécialement conçu pour le réchauffement, la cuisson ou l’assèchement des aliments.Il n'est pas conçu pour l'usage industriel ou
l'utilisation en laboratoire.
7. Comme pour toutappareil, une surveillance attentive s'impose lorsde l'utilisation par les enfants.
8. Pour diminuer lesrisques d'incendie à l'intérieur du four:
a. Ne surcuisez pas les aliments. Surveillez attentivementl'appareil lorsque le four contientdu papier, du plastique ou d'autres matières combustibles visant
à favoriser la cuisson.
b. Retirez les liens torsadés à fil métallique ou les sacs en plastique avantde placer des sacs dans le four.
c. Si le contenu du four s'enflamme, gardez le portillon fermé, mettez l'appareil horsfonction et débranchez le cordon d'alimentation ou coupez l'alimentation
au panneau de fusibles ou de disjoncteurs.
d. N'utilisez pas l'intérieur du four aux fins de rangement. Ne laissez aucun article en papier, ustensile de cuisson ou aliment à l'intérieur du four lorsqu'il
n'est pas utilisé.
9. Les liquides, tels que l'eau, le café ou le thé, peuvent être portés au-delà du pointd'ébullition sans en donner l'apparence en raison de la tension superficielle
du liquide. Le bouillonnement ou l'ébullition n'est pas toujoursvisible lorsdu retraitd'un contenant du four.
CELA PEUT PROVOQUER UN DÉVERSEMENT PAR ÉBULLITION SOUDAINE DES LIQUIDES TRÈS CHAUDSLORSQU'UNE CUILLER OU UN AUTRE USTENSILE SONT
PLONGÉS DANS LE LIQUIDE.
Pour diminuer lesrisques de blessures corporelles:
1) Ne surchauffezpas les liquides.
2) Remuez les liquides avant le processus de réchauffementetà mi-chemin dansle processus.
3) N'utilisez aucun contenant à paroisdroites comportantun goulot étroit.
4) Aprèsle réchauffement, laissez le contenant refroidir quelquesinstants dansle four à micro-ondes avant de l'en retirer.
5) Faites preuve de très grande prudence lorsde l'introduction d'une cuiller ou d'un autre ustensile dans le contenant.

20
10. Ne réchauffez pasde l'huile ou de la graisse destinée à la friture. Il est difficile de contrôler la température de l'huile dans les foursà micro-ondes.
11. Perforezles aliments dont l'enveloppe est épaisse, tels que pommesde terre, courges entières, pommes et marrons, avant la cuisson.
12. Le contenu desbiberons et des pots pour bébés doitêtre remué ou agité et sa température vérifiée avant de servir pour éviter les brûlures.
13. Les ustensilesde cuisson peuventdevenir chauds en raison de la chaleur transférée depuisl'aliment chauffé. La manipulation de l'ustensile peut devoir
s'effectuer à l'aide de poignéesisolantes.
14. Ne recouvrez et ne bloquez pas lesouvertures de l'appareil.
15. Ne rangez et n'utilisez pas cetappareil à l'extérieur. N'utilisez pascetarticle à proximité de l'eau, par exemple, près d'un évier de cuisine, dans un sous-sol
trempé, près d'une piscine ou desendroits semblables.
16. N'utilisez pas cet appareil si le cordon ou la fiche sont endommagés, s'il ne fonctionne pas correctement ou s'il a été endommagé ou a chuté.
17. N'immergez pasle cordon ni la fiche dansl'eau.
Gardez le cordon à l'écart des surfaceschauffantes. Ne laissez pas suspendre le cordon du bord d'une table ou d'un comptoir.
18. N'utilisez que des thermomètres conçus spécialementpour utilisation dans un four à micro-ondes.
19. Ne faites pasfonctionner un appareil de cuisson ou de chauffage qui est situé sous ce four à micro-ondes.
20. Assurez-vous que le plateau de verre etl'anneau à rouleaux sont en place avantde faire fonctionner le four.
21. Cet appareil ne doit être réparé que par du personnel technique compétent; contactez le centre de réparation autorisé le plusprès pour l'examen, la
réparation ou le réglage.
22. Pour le nettoyage des surfacesdu four qui entrent en contact entre elles lorsde la fermeture du portillon, n'utilisez que des nettoyants ou détergents doux
et non abrasifs, appliqués à l'aide d'une éponge ou d'un linge doux.
23. Cet appareil génère, utilise et peut émettre une énergie radioélectrique et, s’il n’est pas installé correctement et utilisé conformément aux directives, peut
causer une interférence nuisible aux communications radio. Il n’est toutefois pas garanti qu'aucune interférence ne se produira dans une installation
particulière. Si cet appareil cause une interférence nuisible à la réception radio ou télé, ce qui peut être déterminé en mettant l’appareil en marche puis en
l’arrêtant, l’utilisateur est encouragé à essayer de corriger l’interférence en prenant une ou plusieurs des mesures suivantes :
• Réorienter ou déplacer l’antenne de réception.
• Augmenter la distance entre l’appareil et le récepteur.
• Brancher l’appareil sur une prise ou un circuit autre que celle ou celui sur lesquels le récepteur est branché.
• Consulter le détaillant ou un technicien de radio/télé d'expérience pour obtenir de l’aide.
Table of contents
Languages: