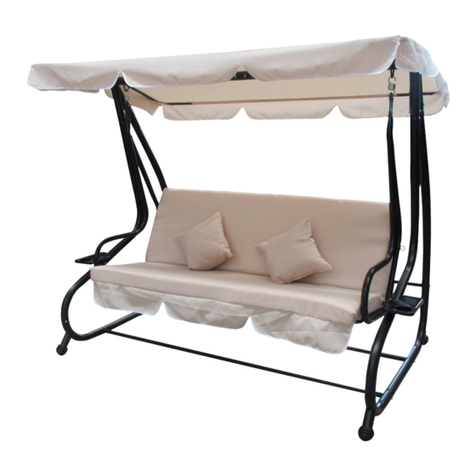
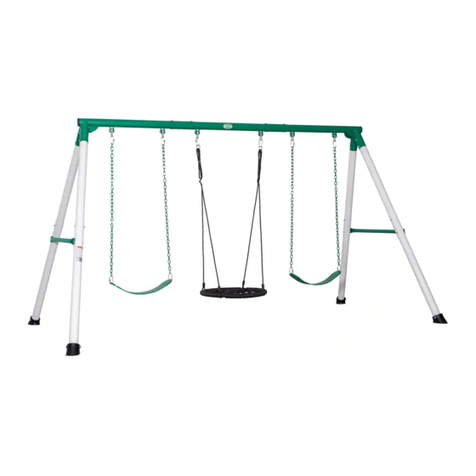
Royalcraft Verona Padded 3 Seat Swing User manual

3 Seat Swing Hammock
Assembly Instructions
ProducedinChinaforA.Mir&Co.,Ltd.
© A. Mir & Co., Ltd. 1 / 8
www.ro
y
alcraft.co.uk
Product size:
L208*W122*H178 cm
This product is for Domestic use only!
IMPORTANT, RETAIN FOR FUTURE REFERENCE
READ CAREFULLY

3 Seat Swing Hammock
Assembly Instructions
ProducedinChinaforA.Mir&Co.,Ltd.
© A. Mir & Co., Ltd. 2 / 8
www.ro
y
alcraft.co.uk
Before you start
Warnings
IMPORTANT, RETAIN FOR FUTURE REFERENCE
READ CAREFULLY
The product contains small parts which could pose a risk to
young children. Keep small parts out of reach of children.
See enclosed instructions for assembly, safety and care
information.
Failure to follow the warnings could result in serious injury.
Handle heavy parts with care.
Ensure that this product is fully assembled as illustrated before
use.
This product should only be used on firm, level ground.
Do not stand or climb onto this product.
This product is intended for domestic use only.
Ensure the product is always placed on level ground.
Furniture can be dangerous if incorrectly used. No liability will be
accepted for damage or injury caused by incorrect use of this
product.
Dos
When you are ready to start, make sure that you have the right
tools, plenty of space and a clean, dry area for assembly.
Unwrap all packaging materials and place the components on
suitable surface to prevent scratching your product.
Check the pack and make sure you have all of the parts listed.
Before use, check if all screws and bolts are tightened and inspect
regularly.
We recommend the use of furniture covers to protect your product
when not in use.
During bad weather or in winter months, the product should be
stored in a cool, dry place. Before storage, ensure that the product
is clean and dry.
This product is suggested to be assembled at the place of use.
To clean, wipe down with a sponge and warm soapy water and wipe
with a clean, dry cloth.
Don’ts
Do not stand or climb onto the product.
Do not use power tools to construct this product.
Do not sit or lean onto the rims of this product.
Do not use this product if parts are missing, damaged or worn.
Never use scourers, abrasives or chemical cleaner.
Do not use this product as a ladder as this could lead to the
product becoming unbalanced and overturning.
Never drag furniture when moving it, always lift it.
Don’t tilt/sway the swing backwards and
forwards violently!
Number of people required for assembly
Two people
Time to assemble
50 minutes
Tools required
3 Seat Swing Hammock
Assembly Instructions
ProducedinChinaforA.Mir&Co.,Ltd.
© A. Mir & Co., Ltd. 3 / 8
www.ro
y
alcraft.co.uk
Components, fixtures & fittings (not actual size)
Parts List
Part
No. Diagram Qty
(pcs)
Part
No. Diagram Qty
(pcs)
Part
No. Diagram Qty
(pcs)
1
Front Leg
2
PCS 2
Rear Leg
2
PCS 3
Top Cross Bar
1
PC
4
Rear Cross Bar
1
PC 5
Side Leg Brace
2
PCS 6
Middle Cross Bar
1
PC
7
Seating Panel
1
PC 8
Backrest
1
PC 9
Left Armrest
1
PC
10
Right Armrest
1
PC 11
Rear Hanging Pole
2
PCS 12
Front Hanging Pole
2
PCS
13
Canopy Cross Bar
2
PCS 14
Side Canopy Brace
2
PCS 15
M8*120mm
4
PCS

3 Seat Swing Hammock
Assembly Instructions
ProducedinChinaforA.Mir&Co.,Ltd.
© A. Mir & Co., Ltd. 4 / 8
www.ro
y
alcraft.co.uk
Parts List
Part
No. Diagram Qty
(pcs)
Part
No. Diagram Qty
(pcs)
Part
No. Diagram Qty
(pcs)
16
M8*45mm
4
PCS 17
M6*80mm
4
PCS 18
M6*65mm
4
PCS
19
M6*60mm
2
PCS 20
M6*45mm
4
PCS 21
M6*35mm
2
PCS
22
M8 Nut
4
PCS 23
M6 Nut
6
PCS 24
M8 Washer
12
PCS
25
M6 Washer
22
PCS 26
M8 Bolt End Cap
8
PCS 27
M6 Bolt End Cap
16
PCS
28
M8 Nut Cap
4
PCS 29
M6 Nut Cap
6
PCS 30
Locking Knob
2
PCS
31
Spring Hook
2
PCS 32
Spanner
2
PCS 33
Canopy
1
PC

3 Seat Swing Hammock
Assembly Instructions
ProducedinChinaforA.Mir&Co.,Ltd.
© A. Mir & Co., Ltd. 5 / 8
www.ro
y
alcraft.co.uk
Step by step assembly instructions
Note: Don't tighten nuts before every bolt is in place.
Don't tighten the nuts before all parts are aligned properly.
WARNING: At least two people should work together for easy assembly.
Step One
Attach the Front Legs (1) and Rear Legs (2)
to each end of the Top Cross Bar (3).
Secure them with Washers (24),
Bolts (15) & Bolts End Caps (26),
Nuts (22) & Nut Caps (28).
Tighten only enough to hold the parts
in place. Do not tighten completely at this time.
Some latter adjustments may be necessary
to ensure the parts are aligned properly.
The Bolts End Caps and Nut Caps can only
be attached when all Bolts and Nuts are tightened.
Step Two
Assemble the two Side Leg Braces
(5) & Rear Cross Bar (4) to
the Rear Legs (2);
Secure them with Washers (25),
Bolts (17) & Bolt End Caps (27),
Nuts (23) & Nut Caps (29).
Please note the Rear Legs are placed
between the Leg Braces (5) and Rear Cross Bar (4).
Assemble the front Part of the Side Leg Braces (5)
to the Front Legs (1) using Washers (25),
Bolts (19) & Bolt End Caps (27),
Nuts (23) & Nut Caps (29).

3 Seat Swing Hammock
Assembly Instructions
ProducedinChinaforA.Mir&Co.,Ltd.
© A. Mir & Co., Ltd. 6 / 8
www.ro
y
alcraft.co.uk
Step Three
Attach the Middle Cross Bar (6) to the
two side Leg Braces (5) using Washers (25),
Bolts (21) & Bolt End Caps (27).
Step Four
Assemble the Backrest (8) to the
Left Armrest (9) and Right Armrest (10)
using Washers (25),
Bolts (18) & Bolt End Caps (27).
Assemble the Seating Panel (7)
to the Left Armrest (9) and
Right Armrest (10) using Washers (24),
Bolts (16) & Bolt End Caps (26).
Step Five
Attach the Front Hanging Poles (12) &
Rear Hanging Poles to the
Armrests (9 & 10) using Washers (25),
Bolts (20) & Bolt End Caps (27).
Attach Spring Hook (31) to the
Hanging Poles (11 & 12).

3 Seat Swing Hammock
Assembly Instructions
ProducedinChinaforA.Mir&Co.,Ltd.
© A. Mir & Co., Ltd. 7 / 8
www.ro
y
alcraft.co.uk
Step Six
With two people holding the assembled seat,
hang them to the pre-fitted Hanging Hook
on the Top Cross Bar (3).
Step Seven
Attach the Canopy Brace (14) to each end of
the Assembled Swing Frame
using Knocking Knob(30).
Assemble the Canopy Cross Bar (13) to
the Canopy Brace (14).

3 Seat Swing Hammock
Assembly Instructions
ProducedinChinaforA.Mir&Co.,Ltd.
© A. Mir & Co., Ltd. 8 / 8
www.ro
y
alcraft.co.uk
Step Eight
Attach the Canopy to the Swing Frame.
Your swing hammock is now ready for use.
Warning:
Children and Kids should not use this product
without adult supervision and presence.
PLEASE KEEP THESE INSTRUCTIONS FOR FUTURE REFERENCE
Other manuals for Verona Padded 3 Seat Swing
1
Table of contents
Other Royalcraft Swing Set manuals
Popular Swing Set manuals by other brands

sweeek.
sweeek. MELTEMI manual

Hedstrom
Hedstrom NEPTUNE GYM manual

Lemeks
Lemeks Palmako BRENDA MV80-5120 Assembly, installation and maintenance instructions

Creative Play
Creative Play BASKET SWING installation instructions

Backyard Discovery
Backyard Discovery HILLCREST manual

PlaySafe
PlaySafe 22-PS311 Owner's manual and assembly instructions